Stick Vacuum Cleaner

7 Benefits of Stick Vacuums

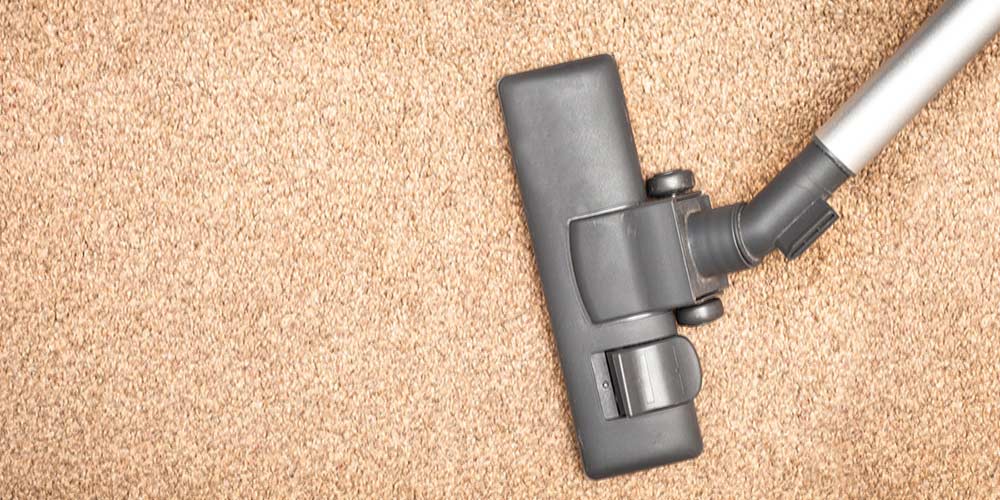
Vacuum cleaners are a convenience of modern times and as all technologies, these cleaning devices have improved quite a bit over time. Today, vacuums come with more attachments then you’ll probably ever need.

A stick vacuum cleaner may not be the most powerful type of vacuum cleaner, but they do offer some pretty compelling features, such as swivel steering, a multitude of attachments, cordless and rechargeable, a motorized brush, ability to easily transition between a floor and light handheld, and even HEPA filtration.

This portfolio of features has taken stick vacuums well beyond the old carpet sweepers, and transformed them into a serious consideration in the cleaning arsenal for homeowners. Below are some of the reasons why homeowners should consider buying a stick vacuum cleaner.

What is a Stick Vacuum?

A stick vacuum is a lightweight version of an upright vacuum cleaner. It’s likely not as powerful as its larger counterpart, or come with as many attachments or accessories. They are simple to use and easy to store, which are two of the main reasons why people love their stick vacuums.


What to Expect From a Stick Vacuum Cleaner

While this type of vacuum cleaner is a popular choice for homeowners, that doesn’t mean it’s the best cleaning device for you and your home. To help you figure out whether this is the right choice for you, let’s take a closer look at seven common benefits that come with a stick vacuum.

1. Smaller Size & Weight

By definition, stick vacuums are smaller, lighter, and easier to move around. Who wants to haul around a heavy vacuum cleaner, especially if you only need to spot-clean a single spill. This is where a stick or handheld vacuum cleaner really excels. When it comes to the size and weight, other types of vacuums can’t even begin to compete.

Most stick vacuums come in under ten pounds, with some models weighing about half that. This is a huge benefit for any homeowner that may have difficulty carrying or pushing around heavier machines, including the disabled or elderly consumers. Their lightweight designs not only increases its maneuverability and ease of use, but it also makes it easier to store when its not in use.

2. Lower Cost

Stick vacuums typically cost far less than their bigger counterparts. There are many reasons for this, but it really comes down to three things:

  1. They use less powerful motors.
  2. They have a compact build that makes them easy to store.
  3. They usually don’t come with a bunch of attachments or accessories.

If any of these seem like cons to you, then perhaps a stick vacuum isn’t the right device for you. Otherwise, you will soon discover that finding one within your budget is extremely easy to do.

3. Great for Quick Cleanups

Had a surprise call from a friend wanting to get together and you feel like maybe you should clean the high traffic areas before they arrive? Did your dog knock over a house plant again? Another great benefit of a stick vacuum is that they are perfect for those quick cleanings between your regular full-on household cleaning days.


4. Easy to Store

One of the most noticeable benefits of a stick vacuum is how easy they are to store. This is especially important to those who live in small apartments or tiny houses.

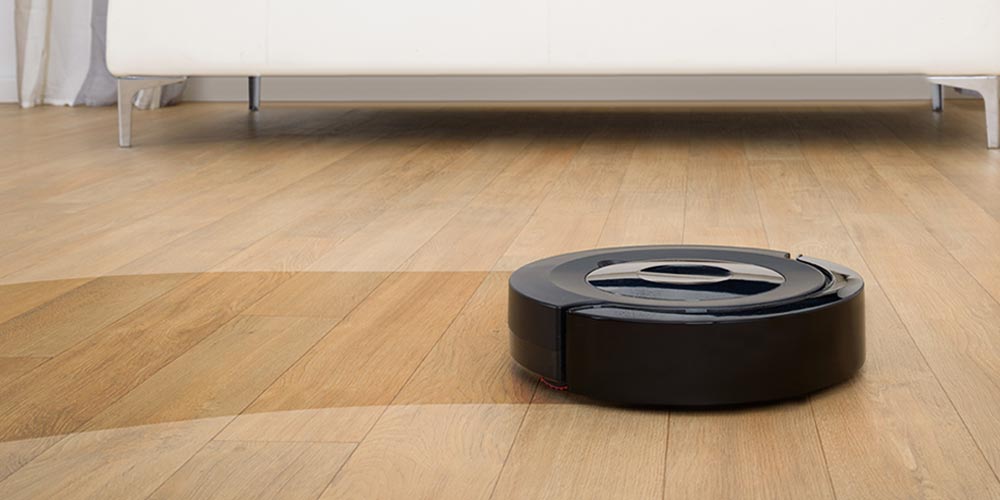
Much like a robot vacuum cleaner, these take far less room then the more popular canister vacuums, with some models even coming with a wall mount to help you preserve floor space. Because of their compact size and weight they can even be stored high on a closet shelf or inside your pantry where they are less noticeable and out of the way, yet still within quick reach when you need them.

5. Very Easy to Use

For many homeowners out there, this is one of the most important benefits of not only vacuum cleaners in general, but all appliances. And for the record, stick vacuums are incredibly easy to use. This ease is mainly due to the upright and lightweight design, as well as the added technologies that makes cleaning less of a chore and more of a quickly done afterthought. That’s what a stick vacuum can do for you.

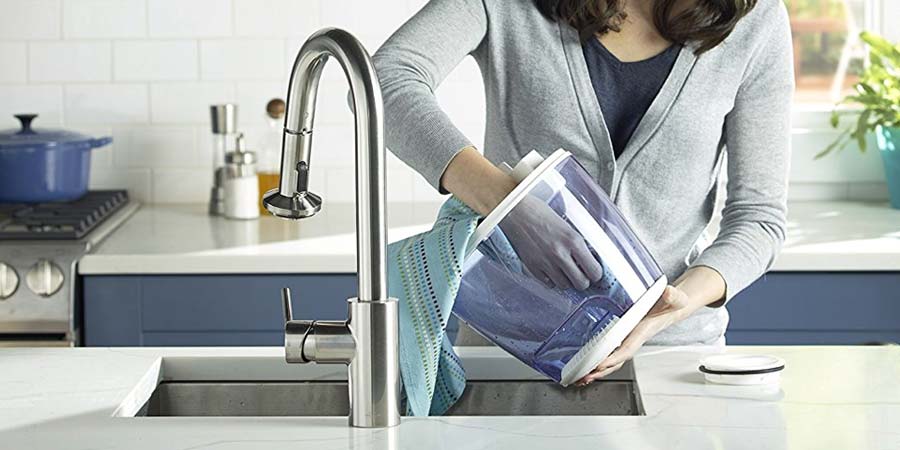
Many of these devices have motorized brushes which increase its overall cleaning potential and maneuverability. Some models offer attached containers that make emptying the dust and debris a breeze. Just be sure to empty these containers outside to avoid contaminating your indoor air quality, which is an issue that hits right into the heart of the “bag vs bagless vacuum cleaner debate.”

While the attachments may be limited, most stick vacuums do come with wands that give you easier access to clean places in your home that are hard to reach. Another huge benefit of stick vacuums is their upright build. Often they feature a height adjustable design, which increases proper body positioning during cleaning, as well as protecting your back against unnecessary fatigue and strain.

6. Make Less Noise

Depending on the type of vacuum cleaner you buy, you’ll have to deal with the noise that comes with it. There’s just no way around it… they all make noise. Too much noise, despite the brand or model or type.

Unfortunately, some of those big vacuums not only have the power of a cyclone but they also sound like one too. And nobody wants that in their home.

Whether you have a pet that perceives the vacuum cleaner as their mortal enemy, or maybe you’re just timid of vacuuming at certain times because of disturbing the neighbors or sleeping family members; one of the main benefits of a stick vacuum is that it allows you to get those messes cleaned up and forgotten about with less chance of disturbing anyone in your home.

Most stick vacuum cleaners have a pretty low decibel level. Whether or not the product page that you buy it from states the Db level, for the most part, they are much quieter than than their larger counterparts.


7. Versatility

Another great feature of stick vacuums is their versatility. Most can easily be converted to very light handhelds and some models, such as the popular Dyson V11 Vacuum Cleaner, are completely cordless, running instead on a rechargeable battery.

This not only makes cleaning easier, but gives you the option of cleaning away from an outlet without stringing two or three extension cords. Some models even use HEPA filtration to help keep your air clean and free of the tiny particles that may get kicked up while vacuuming.


Stick Vacuum Cleaners: The Best Choice For You?

Though these vacuums may not be as deep cleaning or as powerful as many other types of vacuum cleaners, there are many benefits to owning one. They are a great addition for quick cleanups and if you live in a tiny house, smaller apartment, or don’t have carpeted floors it is very likely that they could completely take the place of their bigger brothers, making the costly, noisy, and cumbersome vacuum obsolete.


Portable Air Conditioner

How to Clean & Maintain Your Portable Air Conditioner

During those hot summer months, your portable air conditioner can be the reprieve you need to stay cool. There’s nothing quite like the feel of cool freon on your skin, especially as the mercury starts to soar.

It not only helps cool your living areas, but a portable air conditioner can help save you money on your monthly energy bills. But, like most appliances in your home, a portable AC unit can only do this if you take proper care of the device. If you fall behind on performing basic maintenance, fail to install it properly, or simply get lazy about cleaning the device, your portable air conditioner will struggle to run at its full capacity.

Below, we’ll take a closer look at some of the basic maintenance tips you can follow to keep your portable air conditioner in its best shape (and helping you stay cool for years to come).


Know Where to Install (And Not to Install)

One of the biggest advantages of using a portable air conditioner in your home is that it’s easy to move from room to room. However, where you install it within the room will play a significant factor in how well the air conditioner operates and cools the space.


Tips to Installing Your Portable Air Conditioner:

Whether you’re moving it from room to room, or just installing the AC unit for the first time. Here’s a few things you should consider as you install your portable air conditioner in your home.

1. Avoid Installing in Dusty Areas:

You should never install your portable AC unit in an area that is dirty or dusty. Small particles may start to clog either of the two motors in the appliance, which will eventually lead to further electrical or mechanical problems.

2. Avoid Placing Near Pet Bed:

Much like the dirt and dust, the fur your pet sheds may start to accumulate in the device. Furthermore, if you don’t have a good filter in your portable air conditioner, pet dander may get sucked into the device and possibly compromise your indoor air quality.

3. Do Not Install Directly Against the Wall:

This is very important to keep in mind. In order for your portable air conditioner to work both efficiently and properly, it needs to be at least 12-16 inches away from the wall. This distance may vary from unit to unit, so make sure you read the owner’s manual that comes with the device.

4. Make Sure It Can Drain Properly:

If you’re using your portable air conditioner in a humid room, then the device will pull more condensation from the air, and need to be drained regularly. Most AC units will come with a drain tube that can help remove any liquid, but it would be wise to make sure this is working properly to avoid any mishaps.

5. Use the Right Power Source:

If your power source is not operating on a circuit that can accommodate your portable air conditioner, you run the risk of a shortage or busted fuse. Make sure the circuit can supply 120 VAC. This gives your A/C unit enough power to start up the compressor and fan motors.

You may also consider spending a very small amount of money on an electrical surge protector. This will help you in the long run should you experience a sudden and unexpected power surge.


Keep the Exhaust Hose Short & Straight

A small tip involving the exhaust can go a long way. When you install the hose, make sure it is as short and straight as it can be. This will help prevent excess moisture from collecting inside the hose, as well as mitigate the possibility of moisture rolling back into the air conditioning unit. Water inside your AC unit can cause damage.


Change & Clean the Filters Frequently

As with any room air conditioner or HVAC system, your portable air conditioning unit has at least one filter that should be either regularly cleaned or replaced.

Portable Air Conditioner
(Source)

Portable Air Conditioner Unit

Depending on what type of AC unit you have, you may find a pre-filter located on the back of the unit. You should clean this at least once a month with a soft cloth. Do not use soap or any detergents, as those can leave a film and actually increase the risk of a clog.

The reason you need to keep the filters fresh is because as dirt or dust accumulates, it can mix with the moisture inside the unit to form a layer on the coils. This layer will keep the coil from transferring heat from the room to the great outdoors. In essence, it means your unit will overheat and eventually start to malfunction.

There may also be a second filter on your portable air conditioner known as a carbon filter, which serves to neutralize odors. This filter should be changed at least twice a year — if not more frequently — depending on the manufacturer’s recommendation.


How to Store Your Portable Air Conditioner

Unless you plan on running your AC unit year-round, you will need to properly put it to bed during the months you will not be using it. Before you store it away until next season, it is recommended that for homeowners to do the following:

  • Drain the AC unit of any moisture that has collected inside.
  • Put the unit in “fan only” mode on high speed for a few hours to ensure everything inside is completely dry.
  • Use plastic sheeting to cover the unit, which will protect it from dust and other debris.
  • Store your portable air conditioner in a cool, dry place.

Where you choose to store your portable air conditioner is important. If possible, choose an area in your home that is temperature controlled. The last thing you want is for the device to be sitting in extreme temperatures for an extended period of time. If exposed to the elements for too long, you may find that your portable AC unit won’t work properly when you pull it out of storage.


Final Thoughts

By following just a few maintenance tips, you can ensure your portable air conditioner will serve you well for years to come. It’s simple, really. Just make sure you keep it in a place free of dust and debris that could clog up working parts. Clean or change the filters regularly. And, if you’re done using it for the season, be sure to store it correctly so it will be ready to go when the mercury rises again.


Bagless Vacuum Cleaner

5 Benefits of Bagless Vacuum Cleaners

How a Bagless Vacuum Cleaner Will Benefit You

The idea of centrifugal separation vacuuming has been around since at least the 20’s, but the most recent trend toward this technology, and the bagless vacuum, was the making of James Dyson who introduced his first unit in 1979. They gained in popularity especially in the 1990’s and soon other big name vacuum manufacturers, such as Hoover and Shark, adopted examples of the technology.

What makes a bagless vacuum a good decision?

Most bagless vacuums have much the same options their bagged counterparts including; motorized brushes, all the extensions and add-ons and running lights, but they have some standout characteristics. Below, we have taken a closer look at five benefits that bagless vacuum cleaners have over their bagged counterparts.

1. Less Loss of Suction

You know those times your vacuuming along, really putting a dent in the house cleaning, and you feel that slow dread rising as you realize dirt particles aren’t staying in the vacuum. A kernel of popcorn is sucked away as you pass over it only to be spat back out a moment later. You pull the hose, placing your hand against the end and sure enough, the satisfying slurp and high whine of good suction is not to be found.

Vacuum Cleaner Bag

Does the bag need to be changed? You expose the vacuums guts and tentatively poke at its stomach. It seems only half full. But something has stolen suction, so you pull the bag off the fitting, see nothing, replace it on the post, close it up and start the vacuum again. And suction is back, but still not quite what it is with a brand new bag.

Okay, it doesn’t always happen like this, but I’m sure this has happened to you at least once. Overall bagged vacuum cleaners preform admirably, but we all know that they have a tendency to slowly lose suction as the bag fills.

Bagless vacuums lose far less suction as the dust collection cup fills and often even continue to have good suction when the cup is almost completely full. But there is also less chance of the dust cup becoming completely full; it’s transparent and you know exactly when it needs emptying.


2. Bagless Vacuums Are Environmentally-Friendly

Bagless vacuums are better for the environment. Every bag takes resources to make, takes resources to transport to the store where you will purchase it. Every bag you use and throw away goes into a landfill. It may seem a small thing but when you’re trying to live greener the small things add up.

With a bagless vacuum you are not taking part in the using of those resources and the only thing you are throwing away is the dust and other debris sucked up off the floor. You are not adding to it by throwing away the container too.

3. Satisfaction of Seeing Your Work

There is something very satisfying about being able to look through the transparent plastic canister and see all the dirt and grime you’ve gotten off the floor. Like a salesman working hard to sell the vacuum, you may find yourself running to someone else in the house just to show how much you’ve picked up, how messy the house really was, and pointing out, yes it actually really did need to be cleaned.

Bagless vacuums also make it tons easier to find that jack of Jimmy’s or little Mary’s doll barrette, sucked away in a moment of poor floor scrutiny. There’s no having to cut into a bag to get at lost items, just dump the canister carefully in a trashcan lid and easily fish out the once missing treasures.

4. Easy To Empty

Bagless canisters are also very easy to empty. Usually only requiring a release from the vacuum body and a snap of the bottom or top canister lid. You want to do this over an outside trashcan and as close to the bottom as possible, because all the dust can easily turn into a big cloud if some care is not taken.

This also brings up the point of allergies. Bad allergies may be a good reason to stick with bagged vacuums. But many bagless vacuums now have HEPA filtration built right in and if done carefully and with a little thought these canisters can be emptied with minimal allergic reactions; and, going back to the green point, a single reusable allergy face mask worn when emptying the canister is greener then throwing bag after bag away.

After emptying the canister, you also have a unique opportunity to clean the inside of the bin and perhaps wash/replace the filters. Taking the extra couple of minutes to clean your machine will go along way in keeping it in top working condition.


5. No Fussing with Bags

I know I’ve found myself in the situation where I’m in a cleaning mood. I start vacuuming and realize the bag needs to be changed, so I start searching… where did I put those, in closets and drawers until finally I conclude that I have no more bags, so, an extra trip to the store to get bags. It’s a hassle, at least for those lacking in their organization. With a bagless vacuum cleaner this is just not a worry. When you’re ready to clean, the vacuum is ready to clean.

There is some maintenance with bagless vacuums. The filters need to be cleaned periodically to maintain best performance. Most are easily washable. They will also need to be replaced once-in-awhile, but far less often than you would be buying bags (again the greener part).

There’s also a reason most handheld, stick, and robot vacuum cleaners are bagless, this type of technology is more easily molded into these less conventional vacuum configurations. Not to mention more favorable by consumers.

Conclusion

Regardless of whether purchasing a bagged or bagless vacuum cleaner remember to do some research on the pros and cons of each type. It is important to purchase a well-designed and easy-to-use vacuum. After all, if you don’t like to use the vacuum it makes cleaning that much more of a chore. Bagless vacuums are not inherently better than vacuums that require bags, but they do offer a greener, more hassle-free cleaning experience for those that would like the option.


Steam Mops vs. Steam Vacuums: The Pros & Cons

What is a Steam Cleaner?
What Are the Benefits of Using Steam to Clean?
The Pros & Cons of Steam Mops
The Pros & Cons of Steam Vacuums
Which One is Best for You?

A decade ago, having a steam cleaning vacuum or a mop that was fancier than a stick with dreadlocks was pretty much a dream for your average homeowner. Over the last few years, however, an influx of technological advances and new features have created a wide variety of steam cleaning devices that have completely revolutionized the way we clean our homes.

We now not only have budget-friendly steam cleaners available to the average consumer, but we have choices between different types. For the purpose of this article, I’d like to focus on the differences between steam mops and steam vacuums. Weighing the pro’s and con’s of these two popular types of steam cleaners will give you the opportunity to make the best purchase for you and your family.

So, before you rush out and buy the first unit you come across, let’s take a closer look at the benefits, disadvantages and the differences between steam mops and steam vacuums. But first, let’s take a step back and review what exactly a steam cleaner is, and why every homeowner should own one.

What is a Steam Cleaner?

As the name suggests, a steam cleaner uses steam to clean your floors and carpets, mainly, but can also be used to clean your clothes, curtains, and a whole host of other areas and objects in your home.

On a personal note, as a father of an infant, my handheld steam cleaner is the easiest way to sanitize the toys my teething son loves to chew on. So, you may very well be surprised at what all you could clean with a steam cleaner.


What are the benefits of using steam to clean?

Let’s go over five of the most obvious benefits of using a steam cleaner to clean and sanitize your home.

  1. Hygienic Cleaning:

    Steam and the heat it produces can kill around 99% of the germs, bacteria and parasites that may be lurking around your home. That means that whatever surface you steam clean is completely disinfected and sanitized. More so than could ever be achieved by a vacuum or swiffer alone.

  2. Kills Almost Everything:

    Not only does steam kill germs and bacteria, but it can also kill pests and insects. This would include the microscopic pests you probably don’t even realize are there, such as dust mites. The steam is hot enough to kills ants, ticks, fleas and other common household pests. If you’re using a steam vacuum, it kills the pests with the steam, and then sucks up their remains.

  3. Chemical-Free Cleaning:

    The steam cleaners only use steam to clean and sanitize your homes. While some models may allow you to add chemical cleaners, they are not necessary to kill off the germs and bacteria that may be contributing to your dirty home. Maybe it’s just me, but the less chemicals used in my home, especially on the floors where my kids play, is nothing but a good thing. Not only does this help you clean your home, it helps establish a safer environment for your children and pets.

  4. Works Quickly / Saves You Time:

    Not only does the steam soften up the hard-to-clean stains, it also allows you to clean those trouble areas quicker and more efficiently. If you were to use a swiffer or traditional mop, you’d have to wait for it to dry, and possibly, re-clean areas that you may have used chemicals on.

  5. Air Purification:

    While this seems like a stretch, because of the filters that they use, some steam cleaners actually help clean the air as you clean the floors. While this is a benefit, it should be noted that an air purifier is still the most effective method at cleansing the air in your home. But, a steam cleaner can help supplement the air purification process, as can certain houseplants.

Bottom-Line:

The bottom-line here, is that a steam cleaner is a great way to safely and efficiently clean your home, especially the floors. But, you still have to figure out which type of steam cleaner is best for your situation. So, let’s now take a look at the differences between two of the most popular versions — steam vacuums and steam mops.

Steam Mop: The Pros & Cons

A steam mop is a common household appliance that helps you clean your carpets and floors without the use of harsh chemicals. Unlike a traditional mop that requires soap and detergents to clean the floors, steam mops utilize the heat of steam to sanitize, clean and disinfect the floors. Because the device uses steam, it is able to kill approximately 99% of the germs, bacteria and dust mites that may be on your floors, as well as clean up the dirt and grime that may be noticeable.

Let’s take a closer look at the pros and cons of steam mops to give you a better idea of what you can expect to get out of it.

The Pros:

  • No Bucket Required:

    Cleaning with a steam mop eliminates the need to have a container filled with water. The old-fashioned method of mopping would require a bucket of soapy water and a dirty mop that you would need to wring frequently. This is not the case with a steam mop. Simply fill up the canister with water and you cleaning your floors has never been easier.

  • Save Time & Energy:

    Piggybacking on the previous pro listed above, working with a steam mop will save you time, energy and, ultimately, help cut down on the fatigue you may experience while doing these necessary chores. Not only is a steam mop easier to use, it’s more sanitary and efficient than a conventional mop.

  • Environmentally Friendly & Healthier Home:

    Because a steam mop uses intense heat in the form of steam, you don’t need to use any chemicals to achieve a hygienic cleansing on your floors. Whereas, with a traditional mop or swiffer, you will need to mix detergents, bleach and other potentially dangerous chemicals to achieve the same level of cleanliness. And then follow-up with clean water, if you don’t want those chemicals lingering around.

  • Lightweight:

    A steam mop is a compact, small and lightweight appliance. While the sizes and shapes will vary from model to model, they are typically smaller than steam vacuums and/or a traditional (non-steam) vacuum cleaner.

  • Easier to Store:

    Because of its smaller size, a steam mop is very easy to store when not in use. It’s compact, lightweight dimensions allow you to store it in many areas of your home. Even those with little storage space available. The same cannot always be said about vacuum cleaners, whether they use steam or not.


The Cons:

  • Not Multi-Surface Friendly:

    Steam mops are typically designed to clean hardwood and tiled floors only. There is a myth out there that you cannot clean carpets with a steam mop, but that’s merely a myth. You may need to purchase an extra attachment or accessory, but there are many steam mops out there that can clean both carpets and hard floors. However, you cannot clean as many areas in your home as you can with a steam vacuum cleaner, including furniture, curtains and other upholstered items. At least, it’s not an easy task to accomplish.

  • Extra Prep Time:

    In order for you to get the most effective clean with your steam mop, it is strongly recommended that you sweep the floors before you start to mop. Unfortunately, this will increase the amount of work you have to do to achieve clean and sanitized floors.

  • Doesn’t Get As Hot:

    A steam mop gets the water/steam hot, however, the water does not heat-up as hot as other types of steam cleaners. Again, this will vary from model to model, but if you can’t achieve that necessary heat, you will have a slightly harder time achieving the same level of cleanliness that you could get with other types of steam cleaners.

Bottom-Line on Steam Mops:

The steam mop is a fantastic choice for anybody that is addicted to “swiffering” their floors. While they are designed for hardwood, tiled and laminate floors, there are plenty of models out there that can help you clean your carpet as well. Not only does its smaller size make it easier to store, it’s also easier to maneuver than its steam vacuum counterpart. And, on average, steam mops come with a lower price tag. It’s certainly better than a traditional mop, but depending on what all you want to clean, it may or may not be the best steam cleaner for your situation.

Steam Vacuums: The Pros & Cons

A steam vacuum, sometimes referred too as a steam vac, is basically a vacuum cleaner that has an extra feature that utilizes steam to help it clean and sanitize your floors more effectively than just vacuuming alone. Depending on the model that you get, it’s possible that you can clean more than just your floors, instead using it to clean your furniture, drapes and other upholstered furnishings in your home.

Let’s take a look at the pros and cons of steam vacuum cleaners.

The Pros:

  • Multi-Surface:

    Steam vacuums can be used on a multitude of surfaces, including carpet, wood floors, tiles, furniture, curtains and other upholstered furnishings in your home.

  • Multi-Dimensions:

    Just as it can be used to clean all sorts of surfaces, steam vacuums can also be used to clean both horizontally and vertically, which makes it useful when cleaning walls, windows and cars.

  • No Prep:

    Unlike other types of steam cleaners, it is not necessary for you to sweep the floors before you use it. The vacuum will suck up the dirt and debris, allowing the steam to clean and sanitize the floor. This not only saves you time, but also provides a deeper clean.

  • Environmentally Friendly:

    You don’t need to use any chemicals or other potentially dangerous substances on your floor. The steam will kill off 99% of germs, bacteria, insects and microscopic parasites that may be living on your floors.

  • Self-Contained:

    You don’t have to hook this appliance to your kitchen sink in order for it to drain. It has its own water tank contained on the device. The size of the tank will vary from unit to unit, and is something that should be taken into consideration when shopping.


The Cons:

  • Bulky:

    Even though steam vacuums get smaller and sleeker as the years go on, they still tend to be a bit bulky. Depending on the model you get, and the surface you are trying to clean, this bulkiness may make it a little more difficult to maneuver.

  • Expensive:

    When compared to a regular vacuum cleaner or a steam mop, a steam vacuum will likely be more expensive. This “con” is a bit anecdotal, as the prices will range based on the brand, model and features of the unit. But typically, they tend to have a higher price tag.

  • Noisy:

    Just like your average vacuum cleaner, a steam vacuum can be a bit noisy. At this point, the louder noise is expected with this type of cleaning appliance.

  • Hard to Store:

    Because of its large and bulky size, a steam vacuum may be hard to store. Again, this “con” is dependent on the size of the model you own and the amount of space available in your home. It may not be an issue for you, but is something that should be taken into consideration.

Bottom-line:

A steam vacuum is great for people with a variety of flooring, including a large amount of carpeted area, in their homes. It can thoroughly clean any flooring type, and do so without any previous prep work from you. It’s also a great device to help you clean other areas in your home, such as furniture and curtains.

Unfortunately, the bulky size may make it difficult for some to use and store. All in all, steam vacuums are extremely handy to have around, but may not be the best fit for everyone.


Steam Mop or Vacuum: What’s Right for You?

As you consider which steam cleaner is best for you and your situation, you have to think about what you plan on using it for. Do you have a lot of carpets to clean? Maybe that means a steam vacuum would be better for your household. Do you only have one room with carpets and the rest are laminates? Perhaps the mop would be better suited for such a household.

The fact of the matter is that both the steam vacuum and the steam mop come with their own set of pros, cons and uses. You have to consider your budget, what you need to clean, how often you would use it and how much time you would be able to focus on cleaning. These factors will all affect which type of steam cleaner is right for you. In the end, it is up to you, so you have to get what you think you will be happiest with.

Keep in mind, steam cleaning is a great way to really kill germs, pests and bacteria on your floors, not to mention help remove stuck on stains and other residue. If you’re consider getting a steam cleaner, make sure you weigh the pros and cons of the vacuum or the mop, and get whichever is right for you. Don’t rent another steam cleaner.


Mold In Home

How to Remove Mold From Your Home

As a homeowner, it’s critical for you to know and understand the dangers that mold presents to your home. It is a common concern for homeowners and can cause unseen damage to your home and your health.

Mold is a fungus that has the potential to grow within any location that is damp or excessively moist. If these areas are also warm, poorly ventilated, or have no light, then mold is more likely to thrive and cause issues.

At first, mold in your house will only create a musty or unpleasant odor, but as time goes on, mold can lead to some pretty serious damage. In fact, according to the CDC, exposure to mold has the potential to provoke allergies and asthma attacks for people who are prone to them.

In this article, you’ll learn more about how to get rid of mold from your house, as well as how you can spot it and prevent it from growing in the first place. Ask any homeowner, mold is not something you want in your home.

1. Control Humidity & Moisture

Mildew is a thin black or white substance that you typically find growing on grout in a bathroom. It flourishes in warm, humid areas, so the first step in removing and preventing it is to clean the places in a home where it’s mostly likely to show up, and keep them dry.

Mold

Be sure to regularly clean your bathroom and kitchen, stretch out wet shower curtains and dry damp clothing quickly.

If your basement is often damp, there may be crevices in the walls letting moisture in, so replace cracked mortar and make sure you have sufficient outside drainage.

An air conditioner can help by taking in warm air, which holds more moisture, and circulating it back out as cool, dry air. A humidstat or dehumidifier is also useful for reducing humidity.

On days when the air outside is dry, open up your windows and use electric fans to let the outside air circulate into your home and carry the moisture out.


2. Use Cleaning Solutions & Products

There are a number of cleaning solutions you can use, all of which are relatively inexpensive and easy to find.

Bleach

Bleach is very effective when used on moldy surfaces. Mix 1 cup of bleach with 1 gallon of water, then use either a spray bottle or a bucket and sponge to clean the affected area.

If you want to prevent growth, don’t wipe the area afterward. Note that bleach has some drawbacks, the foremost being that it’s useless on porous materials like wood and drywall. It also gives off harsh fumes, and mixing chlorine bleach with ammonia or certain other household cleaners is incredibly dangerous as it produces toxic gas.

Note: Never mix bleach with other chemicals!

Vinegar

Vinegar isn’t quite as effective as bleach, but it’s safe and doesn’t give off harsh fumes. Pour undiluted white vinegar or apple cider vinegar into a spray bottle, spray the affected area, let it sit for an hour, then wipe clean.

If you want to use it to prevent growth, simply don’t wipe afterward, and spray again every few days. Use it only on non-porous surfaces.

Borax

Borax is dangerous if swallowed, but it’s otherwise safe and doesn’t give off dangerous fumes. Create a mixture of 1 cup of borax for every 1 gallon of water, then clean with a scrubbing brush. Once again, only use it on non-porous surfaces, and you can use it to prevent growth by not wiping it off afterward.

Ammonia

Ammonia is similar to bleach in that it can’t be used on porous surfaces, and also that it’s a dangerous chemical. Make sure that you only use clear ammonia. Create a 50/50 mix of water and clear ammonia, and spray the affected surface. Let it sit for a few hours, then wipe and rinse.

Baking Soda

Baking soda is both mild and safe, and it also acts as a deodorizer. What’s more, unlike the other solutions, baking soda can be used on porous surfaces.

Add 2 tablespoons of baking soda to 8 ounces of water and mix thoroughly. Spray the affected area, scrub with a sponge or brush, then rinse. Follow this by spraying a second time, but don’t rinse afterward.


3. Cut Out & Remove Large Infestations

Mold can grow behind the walls and other unseen places in a house, leaving homeowners unaware until they smell it or notice stains on the wall. At that point, it has to be literally cut out of carpets and drywall.

How to Remove Moldy Drywall & Carpets

If you choose to do this on your own, you’ll want to wear old clothing and shoes along with goggles, gloves and N-95 respirator.

N-95 Respirator For Mold Removal

N-95 Respirator For Mold Removal from 3M

Prep & Set-Up

Set a box fan in the window of the room you’re working on. Next, make sure you tape plywood or cardboard around the window openings so spores expelled by the fan can’t get back in. Turn off your air conditioner and/or furnace, and then seal off the airflow within the room by covering the vents and doorways with plastic sheeting and duct tape.

Removing Moldy Carpets

Use a utility knife to cut moldy carpets into 6′ x 8′ sections, and mist the surfaces with a pump sprayer to control spores. Roll up the sections and wrap them in thick plastic trash bags.

Removing Moldy Drywall

Turn off power to the room, and probe stained or soft spots on the wall with a screwdriver to find the infestation and locate any wiring, removing baseboards and trim if necessary. Use a drywall saw or utility knife to cut out the infested drywall and any moldy insulation behind it. Mist with the pump sprayer to control spores, then double-bag the material in heavy plastic bags and tie the bags off.

Clean-Up

Vacuum up the debris with a shop-vac with an extra-long hose, so you can keep the shop vac outside to keep spores from spreading. Use a brush to scrub stained surfaces inside the walls with a water and bleach mixture, and then wipe the areas, but don’t rinse them. Dry any trim you washed in direct sunlight, and use fans and dehumidifiers to dry the room for at least three days.

When you’ve eliminated it all, seal the wood with a pigmented shellac or oil-based primer. Put in new insulation and drywall, replace the trim, and repaint using paint that contains mildewcide.


4. Hire Mold Remediation Professionals

If you have a persistent infestation, you may need to hire a mold remediation specialist.

Do your homework to find one who is reputable. The specialist will thoroughly inspect your home to determine the extent of the infestation, and afterward he or she will let you know if you can take care of the problem yourself, or if you’ll need to hire professionals to handle it.

Make sure the specialist gives you a written report. Note that, to avoid conflicts of interest, the specialist who inspects your home should work independently from the company you hire to clean out the infestation.

Robot Vacuum

Robot Vacuums: Are They Really Worth It?

Robot vacuum cleaners have really taken off in the last few years and it’s fairly easy to understand why. With their ease of use and practical, hands-free action, homeowners are discovering the many advantages of purchasing this type of vacuum cleaner. But, are they really worth the higher cost? Let’s take a look at some of the benefits you can expect from using one.

What Are Robot Vacuum Cleaners?

Robot vacuums are an autonomous device that is designed to clean carpet, tiles and hardwood floors of all dirt and debris, much like other types of vacuum cleaners. The main difference of robotic versions is their ability to minimize the amount of work hat homeowners need to do.

Upon their release in the late ’90s, robotic vacuums initially struggled with homeowners. However, after two decades of innovation and the continual rise in Smart Home devices, robot vacuums have never been more popular.

In recent years, there is no denying their spike of interest from homeowners, partly because they’ve become more affordable, but mostly because they’ve become more efficient at accomplishing their intended purpose — cleaning your floors without requiring you to put in much work.

The Benefits of Owning a Robot Vacuum

If you’re currently looking to buy a vacuum cleaner, you would be doing yourself a disservice by not considering a robotic vacuum. To help you determine if this is the right device for you, let’s take a closer look at some of the benefits you can expect to receive from a robot vacuum.

1. Easy To Use

Perhaps the number one benefit of owning a robot vacuum cleaner is that they are extremely easy to use. Once the machine is programmed for a given space and the timer is set for a predetermined start time, the product virtually runs itself. Simply place the device on the floor in an appropriate starting spot and you’re good to go.

In addition, many models have been refined over the years to be self-regulating and nearly foolproof, meaning mishaps are becoming more and more unlikely as the technology evolves. That means you don’t have to worry about your vacuum malfunctioning or becoming stuck on a surface.

2. Incredibly Efficient

Today’s robot vacuum cleaners provide multiple tasks. They not only clean, they remember the layout of your space, are able to dump the dirt they collect, and then find their way back to the charging station.

Some higher-end models have advanced sensors and are also able to transition between bare floors and carpeted areas without manually switching settings. Other allow you to control them through a smartphone app.

The methodical, back-and-forth or circular motion of the machines also ensures that every inch of a floor or space is covered, which translates to a more thorough cleaning overall.

ECOVACS Robotic Vacuum Cleaner

Photo Credit: ECOVACS Robotics

3. Saves You Time

It is a universal experience that everyone’s lives have become increasingly busier in the 21st century. Indeed, multi-tasking has become paramount to, and part of, modern-day existence. One of the most desirable benefits of robot vacuum cleaners is that you don’t have to be present when the vacuum is operating.

Simply turn it on before you leave the house and it will do all the work for you while you’re out of the house. Therefore, time not spent manually vacuuming can be spent working, relaxing, playing with your kids, or doing whatever your heart desires. Indeed, the old adage that time is money certainly applies to this product as well.

4. Works on Different Surfaces

Another benefit of the robot vacuum cleaner is that it works on multiple types of surfaces, from carpets to wood floors to linoleum to concrete.

As mentioned, higher-end models are able to transition between different types of surfaces during the same cleaning cycle. With other models, you simply change the setting, place the product at a designated starting point, and set the programmer and timer as usual.

5. Detects All Levels of Dirt

Along with working on all types of surfaces, autonomous vacuum cleaners are able to tackle all types of dirt as well. From dust that has barely settled to deeply-embedded debris in your carpet, the vast majority of these vacuums are designed with increasingly powerful suction capabilities, despite their compact size.

Using built-in sensors, the machines also can detect the amount of cleaning required in different situations and will repeatedly go over an area until it is clean. This level of detail when it comes to cleaning is unmatched in other similar products.

6. Sets Boundaries

Another advantage of robot vacuum cleaners is their inherent ability to perform in — and only in — a given space that they are programmed for.

For instance, if you have children playing in another room while the product is operating, you can set virtual walls in the programming function to prevent the machine from going across doorways and other openings. Likewise, if you have pets alone at home while the machine is operating, you can easily limit the scope of the machine so it won’t frighten them.


7. Small, Compact & Easy to Store

A robot vacuum is much smaller than an upright or canister vacuum cleaner and, as such, can easily be stored in just about any space — in a closet, under a bed, or wherever you have room. This makes the product ideal for any homeowner that has limited storage space or is trying to downsize their belongings.

These smaller vacuums can also be easily transported from one location to another because of its size. You don’t need to clear out your trunk or borrow somebodies truck to move it from one place to another. As an added benefit, the small, low-slung nature of the product means it can get under furniture and reach areas that a regular vacuum cleaner cannot.

8. Makes Housecleaning Go Faster

Because a robot vacuum cleaner is self-sufficient and self-operating, it is an ideal product to help you maximize the amount of time spent on housecleaning.

Indeed, while your robotic vacuum is doing its thing on your floors, it frees up your time to work on cleaning other areas of the house. Working in tandem, you’ll be able to significantly cut down on the time it takes to clean your house. And, the result of more efficient cleaning is that you’ll be more likely to clean your house more thoroughly more often.

9. Ideal Solution for the Handicapped & Elderly

People with mobility issues, such as the elderly and handicapped, can truly benefit from owning a robot vacuum cleaner.

With its ease of use and hands-free operation, a robot vacuum cleaner can be a liberating product for this demographic, who would otherwise be forced to hire house-cleaners at a much greater expense. In addition, the money saved that would otherwise be spent on doing so makes this a product worth investing in.

Another alternative to consider that offers similar benefits would be a stick vacuum cleaner.

10. Economical and Cost-Efficient

Because robotic vacuum cleaners have been on the market for a number of years, both the price and features have improved significantly, and continue to improve as the years roll by.

The good news is that you don’t have to spend a fortune to get a decent product that does the job right for your particular needs. Starting at approximately $150, with high-end models running upwards of $1,000 to $1,500, there is something for everyone’s budget when it comes to this type of product.

Takeaways

When considering the reasons why you should buy a robot vacuum cleaner, the previous ten benefits should be at the top of your list. If you can see your life improving with 8, 5, or even 1 of the benefits outlined, then purchasing a robot vacuum cleaner is worth it and then some. For efficient and effective cleaning power, a robot vacuum cleaner is becoming the hands-down choice among many homeowners, businesses, and commercial establishments alike.


Downsizing

9 Reasons Why Downsizing Your Home Makes Sense

When we consider the benefits of downsizing, we need to go far beyond the idea that the term “downsizing” simply refers to just moving into smaller living quarters. That’s not a fair definition for homeowners to go by.

What Is Downsizing?

Downsizing can be defined as an intentional reduction in size. This could be as simple as the amount of belongings you own or the size house you live in.

However, we would suggest that it is larger than that. Downsizing is a complete overhaul in your lifestyle. It’s more than just a smaller home, it’s a move towards the simple life.

For the purposes of this article, we will be examining all the reasons why your average homeowner should consider this change in mindset, the benefits of downsizing and how the simple life can bring happiness to your front door.

The Benefits You Should Expect by Downsizing

Once we focus on the totality of downsizing, the benefits increase exponentially. From the testimonials of many who have discovered the wonders of downsizing, here are nine benefits that they smile about.

1. Less Stress, More Happiness

This is a huge benefit that cannot be overestimated. From losing a large mortgage on an oversized house to not running around an urban area trying to have the family involved in so many different activities, downsizing brings less stress, which means more serenity and a much greater chance of actually enjoying life.

You may also will find yourself arriving early for appointments, not always being late. In short, you will be more on top of your weekly schedule, not sweating bullets as you pull up to the dentist 20 minutes late. Another related perk is the ability to find lost items more quickly. With less stuff to clutter your living room, you can locate your keys and purse much faster. Who can put a price tag on that stress-buster?

2. Saving Money on Monthly Expenses

When possessions are jettisoned, one has to spend far less on maintaining them. When the McMansion is left behind, so is the monster mortgage payment.

Downsizing Saves Money

It is almost impossible to downsize and not be in a better position financially. Many people who have downsized have experienced an immediate windfall as they have money left over from the sale of their previous home.

Others see a better balance each month even if they don’t move, as one car needs regular maintenance, not three, as the gasoline bill dips precipitously when the family’s schedule is de-cluttered.

Whether you see this improved picture clearly during Day One of downsizing or after six months, it will be clear at one time or another. Enjoy the view.

3. Better for the Environment

Smaller house equals fewer trees felled. Less driving equals less CO2 that you put into the air. Fewer or smaller appliances equal less electricity consumed. The list can go on and on. You will be the “green” person you’ve always aspired to be without even trying!

4. More Energy to Focus on What Matters

Someone once wrote that the opposite of happiness is boredom. That statement can be debated, but the weariness that comes with routine is well known by many. Downsizing your life could very well push you out of your comfort zone. That change very well may energize you as you re-create your life and become a happier, less stressful person.

As you see the benefits on this list take shape, you will become even more excited about the possibilities of your new minimalistic lifestyle, and rather than sleeping away your precious spare time, you will want to be spending your new free time in constructive ways.


5. More Time to Do What You Want

Do you have any idea how much time you will gain every Saturday when you don’t have to clean so many rooms? You can easily add another hour or two instantly to the weekend!

You will have more time to pursue the passions you’ve always wanted to develop, from painting to reading, from traveling to tennis. Less time cleaning, less time driving, less time shopping — the hours add up rapidly and you will find new joy as you are able to spend more time on pursuits that bring you joy.

6. Fewer Temptations to Buy Stuff

This might not sound like a benefit, but when you really think about it, it does have many upsides.

9 Reasons Why You Should Downsize

Less space means less temptation to buy new items and clutter your living space. Downsizing your living space also means less cleaning.

In another benefit that apartment dwellers have long understood, it can also cause you to spend more time outside, which always equates to better health.

7. Opportunity to Get To Know Your Neighbors

It has been said that when people live on top of each other, they tend to keep to themselves. That necessary social distance in urban areas is true, but it is also true that the opportunities to get to know your neighbors and local shopkeepers multiply when you live in smaller spaces.

Many Americans, in particular, have traditionally sought to live on large lots, separated from other human beings. They have ended up with huge yards to mow, mortgages to pay and a gnawing sense of loneliness.

Of course, not all apartment dwellers revel in community spirit, but don’t be surprised if you see the same people again and again and begin to build a relationship with them. It’s much easier in an apartment or condo building, or in townhouses that adjoin without giant lots in between.

8. More Control On Your Everyday Life

This benefit comes up again and again as veteran downsizers talk about their new way of life.

They offer perspectives such as, “My stuff used to run me. Now, I control my stuff,” or “I was a slave to my possessions. Now, I’m free.” A more open schedule, a less cluttered living space and life, and a realignment that puts you in the driver’s seat–not your things–can surprise you with a far greater sense of control than you’ve previously experienced in life.

9. The Freedom to Live Simple

Whether that freedom comes from you dictating your schedule, not the other way around, or simply feeling liberated by getting rid of junk that has cluttered your mind and life, downsizers all revel in the new freedom that they feel.

Add to this list as you downsize. Fill in the gaps that we may have missed in the list above. Begin the great adventure of living with less and gaining far more in return than you anticipated.

Have you downsized your life? What benefits did you experience? Let’s hear them in the comments below.


Cleaning A Humidifier

How to Clean Your Humidifier

One of the most important factors in determining your indoor air quality is the amount of moisture in the air. The relative humidity inside your home becomes particularly important as winter sets in.

This is because as the temperature starts to drop and you start to crank up the heat, the warm air circulating around your home will dry out the air you breathe. When the air in your home is too dry, you may start to experience a whole bunch of issues, all of which may range from minor annoyances to significant health complications, such as the flu.

Now that the seasons are starting to change and the mercury is starting to drop, we created the below guide to help homeowners learn how to clean their humidifier, and have it ready on those long, chilly nights.

How Often Do I Need to Clean My Humidifier?

Every 24-36 hours. If water has been standing inside your humidifier for longer than that time, you should not use it inside your home. While inconvenient, it is strongly recommended that you clean your humidifier prior to every use.


Why Do I Need to Clean My Humidifier?

Cleaning the humidifier will prevent any sort of bacterial growth or mold from developing inside the device. If you have this sort of contamination inside your humidifier, and you do not clean it before you turn it on, then you may inadvertently disperse harmful particulates into the air.

Not only is this detrimental to your indoor air quality, but it can immediately impact the health of anyone inside your home. This is not only detrimental to your indoor air quality, but it also puts everyone in your home at risk for developing respiratory issues. This is especially true for young children, the elderly and anyone that breathes it in for an extended period of time.

Check the Cleaning Instructions In Manual

Before you try using any of the cleaning methods listed below, it is wise to take a look at what the user manual that came with your humidifier says and follow the care instructions from the manufacturer. These guidelines are the best way to keep your humidifier in good working order, and prevent any unexpected damage that voids the warranty or leads to you having to replace it.


3 Ways to Clean Your Humidifier

Without proper care and regular cleaning, your humidifier puts your indoor air quality at risk. Below, we have highlighted three methods that you can follow to clean your humidifier.

1. Use White Vinegar & Tea Tree Oil

Due to their natural disinfectant properties, the easiest and “all-natural” way to clean your humidifier is to use a mixture of vinegar and tea tree oil.

Vinegar & Tea Tree Oil

Supplies You Need:

  • White vinegar
  • Tea tree oil (optional)
  • Bottle brush if required for your humidifier
  • Water

Cleaning Instructions:

Begin by disassembling your humidifier. Pour any standing water from the tank and lay all pieces out as you take it apart.

Next, add a generous amount of white vinegar to the base of your humidifier, as well as a few drops of tea tree oil. Do the same for the water tank, as well as submerge all other external parts into a similar mixture. Allow it to soak for at least 20-30 minutes.

Before you pour out the vinegar, use a brush or washcloth to scrub all parts of the humidifier. Try to remove any deposit buildup that may be visible.

Once you have scrubbed it thoroughly, rinse all parts of your humidifier with warm water. You may need to do this several times to get rid of the vinegar smell before reassembling your humidifier.

2. Disinfect With Bleach or Hydrogen Peroxide

To give your humidifier a deep clean, try following the cleaning instructions listed above but substitute the tea tree oil with bleach or hydrogen peroxide. By using one of these two chemicals, you ensure that all bacteria and mold spores inside your humidifier is killed off.

Bleach & Hydrogen Peroxide

Supplies You Need:

  • Bleach or Hydrogen Peroxide
  • Clean Towels
  • Safety Goggles & Gloves
  • A Soft-Bristle Brush
  • Water
  • Optional: White Vinegar*

Cleaning Instructions:

For the most part, this process will follow the same instructions recommended for the vinegar and tea tree oil option. However, if you decide to use bleach, you should wear gloves and goggles to protect yourself from the chemicals. *And never mix bleach and vinegar together!*

When using bleach, you can choose to do so at the same time you are cleaning the tank or you can disinfect after the tank is clean. Disinfecting a humidifier with bleach will take an additional 30 minutes, so if you are short on time, it is probably beneficial to do both at once.

Step 1: Begin by disassembling your humidifier. Don’t forget to remove the air filter, if there is one. You can clean the filter by using cool water and letting it air dry.

Step 2: Mix about 1 teaspoon of bleach — or use 3 percent hydrogen peroxide — into a gallon of water and fill the tank with it. Ensure the entire inside is coated by stirring the mixture around.

Step 3: Once you’ve completed both steps, rinse the base, tank and all of its small parts. Shake it well to dislodge any trapped moisture. Remember to do this several times to get rid of any vinegar or bleach odors. Set the pieces on clean towels to air dry.

Once everything is dry, you can reassemble your machine.

Optional Step: After the humidifier has been disassembled, fill the base with vinegar and submerge the smaller parts. Allow it to soak for at least 20-30 minutes, use a brush or washcloth to dislodge any deposits or buildup, and thoroughly rinse out the vinegar. Do not mix vinegar and bleach together.

3. Buy & Use a Humidifier Disinfectant (Bacteriostat)

Humidifier Bacteriostat Treatment

If you don’t want to fool around with any of the cleaning options listed above, you can also buy a ready-made disinfectant or cleanser online. Often labeled as a descaler or bacteriostat, there are plenty of these cleanser available online. (View your options on Amazon.)

All you would do is simply follow the instructions that comes with the product. That’s it, your humidifier is clean and ready.

Effective, but Expensive:

While it is easy and convenient, and no doubt effective at disinfecting your humidifier, this option is not recommended for homeowners as it is grossly more expensive than all the others options listed here.

Vinegar, bleach and peroxide are all very effective at cleaning your humidifier, and they are also all incredibly cheap. You can buy all of them at every grocery store or corner store, and you’ll get a larger supply at a fraction of the cost.


Humidifier Maintenance & Care Tips

Now that you know how to clean your humidifier, it’s recommended that you also learn some simple maintenance tips to prolong its life and overall effectiveness.

How to Clean Humidifier

Empty Basin / Limit Standing Water

Besides weekly deep cleaning of your humidifier, you should be sure to rinse the water basin before every use. Doing so helps to keep bacteria from growing, keeps your unit working properly, and ensures your family is breathing the best air possible.

If possible, disinfect the humidifier any time that water has been standing for more than four hours.

Use Distilled Water

When you do fill your humidifier, only use distilled water. Tap water usually has added minerals. These minerals could be released into the air and create a thin layer of white dust on the surfaces in the room. Additionally, added minerals can build up as deposits in the machine and harbor the bacteria and mold you’re trying to prevent.

Drain & Dry Before Storing

Finally, be sure to drain and clean your humidifier and allow it to dry completely before storing it for the season. Storing a damp unit in a dark place, such as a closet or garage, only creates an optimal breeding ground that encourages bacteria and mold to grow. This will lead to a very gross discovery when it comes time to pull the unit out of storage.


The Homeowner Payoff

Knowing how to clean your humidifier ensures the air you and your family breathes is as pure as possible and leaves you comfortable and healthy. Even better, proper cleaning helps your machine to work for as many seasons as possible so you will be able to save money instead of purchasing a new unit each winter.


Broken CFL Bulb

How to Clean Up a Broken CFL Bulb

Using compact fluorescent light (CFL) bulbs in your house is a great way to use less energy, save a little bit of money on your utility bills and help protect the environment.

However, breaking one of these bulbs, as simple as it may seem, can create a dangerous situation. Because of the trace amounts of mercury inside the bulb, it’s important that you take proper precautions if you ever find yourself having to clean up a broken one.

Is a Broken CFL Bulb Dangerous?

Yes, it can be a potential safety concern. The tiny shards of glass that come from the broken bulb can easily cut open your skin.

But, that’s probably not why you’re reading this. I’m willing to guess that you’re concerned about the small amounts of mercury inside of a CFL bulb, and, perhaps, what it’s going to do to your indoor air quality. This is a valid concern.


Is There Mercury In CFL Bulbs?

Yes. It’s true that CFL bulbs have mercury inside them. And yes, if one of these bulbs break open inside your home, your indoor air quality could deteriorate if you don’t take proper precautions.

However, this scenario is much like many other emergency-like situations that homeowners often face. When something goes wrong, you take action before it gets worse. It’s simple.

Let’s look at the science:
  • Study from 2008: CFL bulbs tested contained about 3-5 mg of mercury, but the energy savings of each bulb prevents about 4.5 mg of mercury from being emitted into the air by power plants. Interestingly, this study also found that CFL bulbs contain about 1% of the mercury as old thermostats (500 mg).
  • Study from 2011: CFL bulbs tested only contained 0.1 to 3.6 mg of mercury, and would take up to ten weeks to emit vapors that would be considered hazardous to human health.
  • Study from 2012: Concluded that young infants were at the highest risk, and clean-up within the first four hours after a bulb breaks is “critical.” The study also noted that the temperature and ventilation of the room play a big role in whether the air is safe to breathe.

So, yes… A broken CFL bulb can be dangerous, especially for younger kids. But the danger can be minimized if you act quickly and follow a proper cleanup process.

For more information about the dangers of mercury, please visit the EPA’s website.


How to Clean Up Broken CFL Bulb

Cleaning up a broken CFL bulb isn’t a difficult or harrowing task. It’s a rather simple process that doesn’t require a professional and can be completed within a few minutes. However, because CFL bulbs contain mercury, the process for cleaning it up is a bit more complicated than simply picking up glass.

Below, we have explained the process you should follow if you break a CFL bulb, as well as some general tips that every homeowner should know before they start.

How to Clean a Broken CFL Bulb

Gather Your Materials:

  • Cardboard, heavy-duty paper or plastic scoop.
  • Tape, damp paper towels, or cleaning wipes.
  • Plastic bag or glass jar with lid.

Procedure for Clean-Up:

  1. First, use your cardboard or stiff paper to scoop-up the large pieces of the broken CFL glass.
  2. Next, use tape or damp paper towels to help remove the smaller shards of glass.
  3. Continue previous step until you feel confident that all glass shards have been removed.
  4. Wipe area with disinfectant wipes.
  5. Put all materials into your bag or glass jar, and seal completely.
  6. Dispose immediately.

Note: A glass jar with a tight fitting metal lid is the best item to dispose of the broken shards of glass because it keeps the mercury vapor sealed inside.

If one is not available, a sealable plastic bag, such as a large ziploc bag, will suffice. However, if you go this route, try to handle it as little as possible. You may also want to wear disposable gloves or gloves you don’t mind throwing away in order to prevent the glass shards from cutting your hands.


General Tips Every Homeowner Should Know

Know that you have a better understanding of how to clean up a broken CFL bulb, let’s take a closer look at a few other factors that will help protect you from the mercury inside.

1) Shut Off Central AC

The first step is to turn off your air conditioner, heater, fans or any other appliance that circulates air throughout your home.

The goal with this first step is to prevent the air in the “zone” with the broken bulb from spreading throughout your home. If the area has been exposed to elemental mercury, than it is important that you prevent the air from dissipating to other areas of your home.

2) Air Out & Ventilate Room

Now that you’ve shut off all air conditioners in the room, open the windows and allow the room to “air out” a bit. As noted in the studies above, a well-ventilated room is an important step to limit your exposure.

It would be wise to instruct all people and pets to leave the room immediately, taking precautions to avoid the area where the bulb was broken. Once everyone has left the room, you should open windows, doors and vents to the outside, but not into the house. Use this time to gather your materials.

CFL Bulb

3) Clean Up Within Four Hours

Allowing the mercury to sit, undisturbed, in a room with no ventilation is extremely unsafe and will quickly degrade the indoor air quality of your home. If you’re using an air conditioner, no matter what kind it may be, turn it off.

As the study above concluded, the first four hours are the most important. Try to clean it up within that time frame.

You have absolutely nothing to gain by waiting.

4) Safely Collect & Seal Debris

After you’ve gathered what you need, re-enter the room where the CFL bulb was broken. Leave the windows, vents and doors to the outside open in order to continue to let the mercury vapor dissipate.

Scoop up the larger pieces of glass from the floor. Place the shards into the glass jar or ziploc bag. Use the tape to pick up the smaller pieces of glass. Make sure that all glass is removed from the hard surface or carpet.

Once the glass has been picked up and placed in the jar, use the damp paper towels to clean the affected area. Disposable disinfectant towels will also be good for this purpose. All of these wet wipes should be placed inside the jar or ziploc bag. If you wear disposable gloves while cleaning up the mess, those too should be discarded inside the container

Once this has all be completed, tightly seal the jar or ziploc bag.

5) Remove From Home Immediately

Now that the broken bulb has been picked up, remove it from the house immediately. This is especially important if you used a plastic bag. This is because the plastic may not completely contain the mercury vapor inside. If not, it may then leak out into the air inside your home.

6) Never Use a Vacuum Cleaner. Ever.

Trying to vacuum up the glass from a broken bulb will only further fan the mercury vapor into the air. This is exactly what you want to avoid. Contain, not circulate.

Of course, depending on the type of floors that the broken bulb is on, this is easier said than done. Below, we have listed out some tips for cleanup based on the type of flooring.

  • Hardwood & Tiled Floors — It would be avoid the vacuum cleaner entirely. Stick with using a steam mop, swiffer or wet wipes to clean up the tiny shards of glass.
  • Carpets & Rugs — On a carpeted area, it can be difficult to find all the smaller pieces of glass from a broken bulb. Vacuuming can help, but it should be done with windows open and entry ways into the rest of the house closed.


No matter what type of flooring you have, once you completed the cleanup process listed above and picked up as much of the broken bulb as possible, you will be able to then — and only then — use the vacuum cleaner.

Note: If you decide to use the vacuum cleaner, it would be wise to use the hose attachment, keep the area well-ventilated and dispose of the bag / empty the canister as soon as possible. You don’t want CFL debris sitting inside your vacuum cleaner for an extended period of time.

7) Always Wash Your Hands Immediately After

Even if you wear gloves when you clean up the broken bulb, there is no guarantee that mercury didn’t get onto your hands. After cleaning up the shards of glass and throwing all the debris away in the best possible way, thoroughly wash your hands with soap and hot water.

This will help remove any small pieces of glass that may be lingering on your hands. It will also give you more peace of mind about residual mercury.

8) Dispose Hazardous Waste Correctly

Check your local regulations for the best way to properly dispose of broken CFL’s. Some municipalities may require you to dispose of the hazardous waste in different manners. Some simply allow you to throw it out with your garbage.

Of course, you could always toss it out and know one would ever know. But, you don’t want to inadvertently contaminate another area of our community. So, be a good neighbor, follow the law and dispose accordingly.


Summary

Cleanup of any broken CFL bulbs should be prompt and precise. Shut off your air conditioner to prevent circulation of air. Open windows to ventilate air in the area. Never, ever use a vacuum cleaner. And, seal the broken shards in bag or jar and remove from your home as soon as possible.