Gardening

5 Sustainable Gardening Tips Every Homeowner Should Know

Sustainability is more than just a buzzword or a flavor-of-the-month cause; it’s a way of life that supports the Earth! And, sustainability begins at home – which is why creating a sustainable, natural garden is always a wonderful idea.

Many homeowners use harmful fertilizers or pesticides, or even excess water, in their gardens, but these types of conventional gardening techniques may often be more detrimental to our planet’s health than you intended. Instead, it’s important for homeowners to create a self-sustaining, organic garden that’s free of as many chemicals as possible.

Are you just getting started on your environmentally-conscious journey? If so, it’s time to read up on five our sustainable gardening tips that every homeowner should know!


1. Use Native Plants

Using native plants in your garden is one of the overall best ways to ensure that your garden is in tip-top, sustainable shape.

But first… what are native plants?

In short, native plants are types of plants that are uniquely indigenous to your region or ecosystem and are adapted to local soils and your climate. There are tons of benefits when it comes to transitioning to a native landscape! Namely, this type of garden requires much less maintenance than a typical garden or lawn – this is because minimal watering is required, and you don’t have to use harmful pesticides or fertilizers.

In addition to this, a native plant garden has the added benefit of becoming a wildlife habitat for local birds and insects. Bottom line: Native plant usage allows for your developed landscape to coexist peacefully with nature, which is always the goal for any sustainable garden.

To get started, it’s recommended that you checki in with local garden experts to get ideas for plants that thrive in your area and vegetables that mature easily during your area’s growing season.

2. Mulch Your Garden

If you’re truly committed to a sustainable garden, using mulch is the way to go. Basically, mulch comes from organic materials, which helps to make your garden more resistant to pests; it also provides tons of valuable nutrients.

Mulching is also the best sustainable method for providing soil moisture and for preventing weeds from growing in your garden. Simply add a 2-inch layer of mulch to your garden beds and around your plants, and let the sustainable magic begin!

3. Cut Down On Watering

It’s important to use the least amount of water possible, when making the shift to sustainable gardening.

There are a few different ways to do this:

  • Native Plants Require Less Water — First, as we’ve already noted, using more native plants in your garden will automatically mean using less water.
  • Use a Rain Barrel — A popular option for homeowners is to install a rain barrel on one of your home’s downspouts, for collecting water to use for your plants.
  • Collect Leftover Water — Another water-saving trick we love is to use a shower bucket – just place a bucket in your shower to collect leftover water runoff, and then use that water for your garden and any other plants. Simple yet effective!


4. Grow Your Own Food

There are so many reasons to grow your own food! First, selfishly, it just tastes better — garden-fresh fruits and veggies are far superior to the same fruits and veggies you’ll find in a supermarket. And, from a sustainability standpoint, growing your own food just makes sense.

You get to control your garden’s growing environment, which means you can elect NOT to use dangerous chemicals and pesticides.

Plus, harvesting our own veggies and other garden items can help contribute to overall waste reduction, considering that organic waste is the second highest component of landfills in the U.S.

Need other incentives? Growing food in your home garden can help save money and become a super-fun hobby!

5. Start Composting

Composting is an integral component of any sustainable garden. Seriously, one of the best ways to jump-start your sustainable garden is by composting all your food waste.

Composting does a lot of great things for our planet: it enriches the soil, provides much-needed nutrients to our gardens, and contributes to less waste being produced at the landfill.

In addition, composting will also help you to use less water in your garden – this is because the organic material from your compost pile allows your soil to become more fertile and able to retain more water.


Ready to get started?

When it comes to creating your personal compost pile, you have a few options. First, you could elect to simply rake your leaves over your garden bed in the fall and winter; and/or you could collect all yard waste and organic materials, such as (eggshells, coffee grounds, all your veggie and fruit scraps, grass clippings, and even shredded newspaper, and place everything in a bin or a pile.

Over time, these combined materials will start to decompose back into the earth – like a science project, but for the earth’s benefit!

Do you use sustainable gardening practices in your home garden? Did we miss an important sustainable gardening tip or technique? Tell us in the comments below!


Composter

Composter Buying Guide: How to Find the Best Composter For You

It’s estimated that about a third of all food produced annually is thrown away before it can be consumed. Food waste is a growing problem… But, composting is a very simple alternative that allows homeowners to put some of their food waste to good use to help your garden grow and enrich the soil around your home.

Why You Should Start Composting

Composting is one of those great things in life that really does accomplish two things at once. You’ll not only generate less waste, but you can create rich fertilizer for your plants all at the same time. You can do your part to reduce the amount of rotting food and food scraps filling landfills while developing one of the best types of fertilizer possible.

To do composting well, you do need the right supplies and a basic understanding of how composting works. To help you find the best composter for your home, we have put together the following “Composter Buyers Guide” to get you started.


Types of Composters

There are three main types of composters you have to choose from, with a couple of subcategories within them.

Compost Bin

Compost Bin

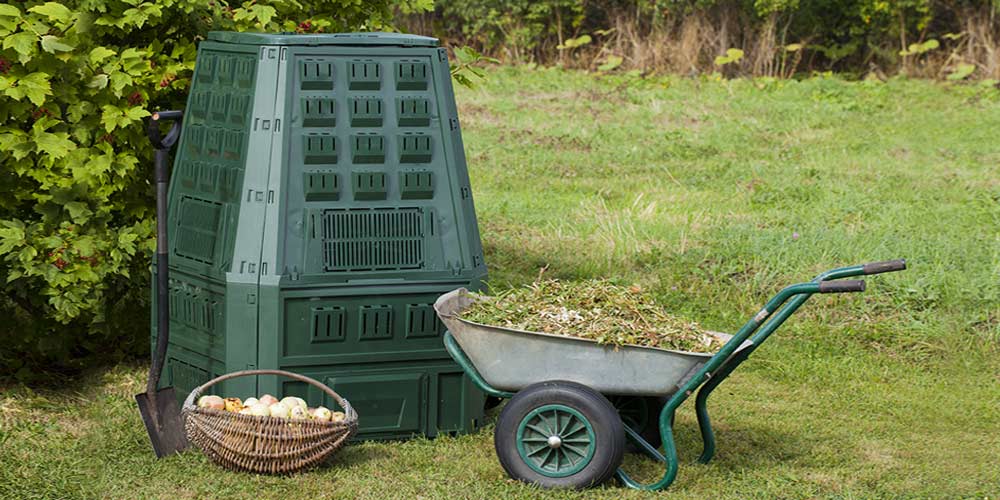
The most basic type of composters on the market are stationary compost bins. These often look somewhat like trash bins, are meant to stay in one spot, and you can add to them from an opening in the top.

This type of composter often features a large capacity and a removable lid, to protect your compost from the elements and interested animals (although these do tend to attract animals more than some of the other options).

These break down compost more slowly than other options and you have to do the work of mixing the compost manually to keep the process going. And it can be a little more difficult to remove the compost and transport it to your garden with these. But they’re the most affordable option and their simplicity appeals to a lot of gardeners.

Why You Should Buy a Compost Bin:

  • Affordable.
  • High capacity.
  • Slower than other type of composters.
  • Require more work than other options.

Compost Tumbler/Rolling Composters
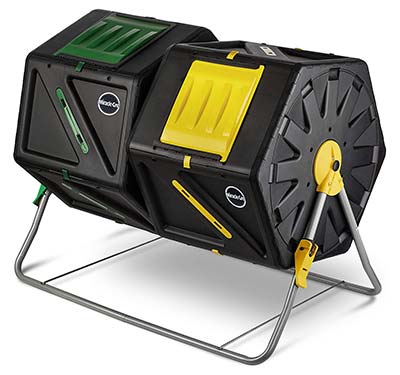
Composter Tumbler

Compost tumblers and rolling composters are designed to make it easier to turn the compost regularly as you go, mixing it more often to speed the process of breaking it down.

This type of composter generally come up off the ground, which makes them more animal-proof than any composters that sit on the ground. And it’s relatively easy to empty them into a container when the compost is ready in order to transport it to your plants.

Rolling composters are similar to compost tumblers in being easy to turn so you speed up the composting process, but they’re less stationary. If you want, you can roll the composter up the house to make adding to it easier, and roll it over to your garden or plants when it comes time to empty it.

Both types are more expensive than stationary compost bins and, while generally easier to use, can become harder to turn as they get heavier. But if you want something that makes the process easier and faster and is likely to hold up to longer use over time, a tumbler or rolling composter is worth investing in.

Why You Should Buy a Compost Tumbler:

  • More expensive than stationary bins.
  • Creates compost faster.
  • Very easy to use.
  • More animal-proof than other types of composters.
  • Can get harder to use as you add more to them.

Worm Bin / Worm Composter
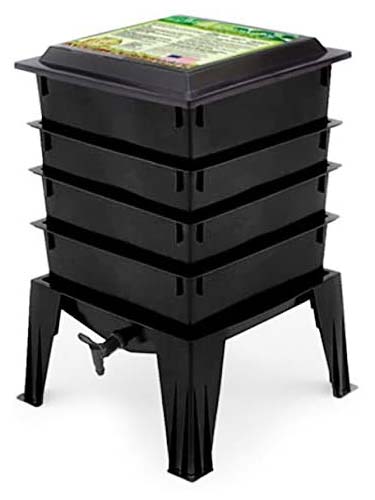
Worm Composter

While both of the other options should definitely only be used outdoors, worm bins can actually be kept inside. These composters allow you to keep worms living in the compost bin where they can eat the kitchen scraps you toss in and convert them into nutrient-rich compost.

It’s the fastest option available and the worms consume your kitchen scraps before they start to get smelly, so you remove concerns about odors entirely. They’re also extremely low maintenance. The worms do most of the work for you so you don’t have to worry about turning or stirring the compost.

Worm bins are often more expensive than your other options, but for those with limited yard space or who want a faster, easier option, they’re worth the higher cost.

Why You Should Buy a Worm Bin:

  • Often more expensive than other types of composters.
  • Low maintenance.
  • Fast.
  • Can be used indoors.
  • Takes up very little space.

Gardening with Compost

12 Factors to Finding the Best Composter

In addition to selecting the right type of composter, you have a number of different factors to consider in order to help you select the right model.

1. Size

One of the first things to think about is size. If you’ll be keeping a composter in your yard (which is necessary for any type of composter other than worm composters), you should have a spot in mind for it before you choose which composter to buy so you can make sure to buy one that will properly fit. If you’ll be going with a worm composter and plan to keep it indoors, the same thing goes: where in your house will you be keeping it and how much space can you afford to give over to it?

Generally speaking, bigger composters will cost more and be harder to move if the need ever comes to do so. But they’ll have a higher capacity so you’re able to create more compost. If you have a lot of plants or a particularly large garden, being able to create a higher quantity of compost will be important.

2. Speed

The decomposition that turns your old leaves and food scraps into fertilizer takes time. With some composters, it will take a lot more time than others.

If you want compost fast, then a worm composter is your fastest option. Tumbler composters are usually more affordable than worm composters and not as fast, but if you stay on top of turning them regularly will break down the compost much faster than stationary composters.

There are a few other factors that influence how fast the composting process is:

  • Color — A black composter will absorb heat more, which cooks the compost and speeds up the decomposition process.
  • Aeration — Compost needs exposure to a certain amount of air in order to break down. Stationary bins should therefore have some slits or openings that let air in, and you should plan on turning tumblers or stirring the compost in stationary bins to give more of the materials the chance to be exposed to air. But you have to be careful, as too much aeration can mean the compost doesn’t get hot enough to cook adequately – which is why most tumblers are fully enclosed.
  • Moisture — Compost should be a little bit moist, without being too wet. If your compost gets either too wet or too dry, the composting process won’t work as efficiently. You ideally want your compost to have a moisture level equivalent to a wrung out sponge. When it gets too dry, water it a bit. When it gets too wet, add some more dry materials to it.
  • The Carbon to Nitrogen Ratio — This is where composting can get a little complicated. If you want your compost sooner rather than later, you need to get the ratio of green materials (kitchen scraps, grass clippings, egg shells) and brown materials (sawdust, fall leaves, straw, twigs) right. Experts recommend a ratio of about 30 parts brown materials to one part green materials. If you get the ratio wrong, you should still end up with compost, it will just take longer.

The composter you buy can make a difference in how fast the composting process goes, but you can also do a little bit to speed up the process with whatever type you get, if you so desire.
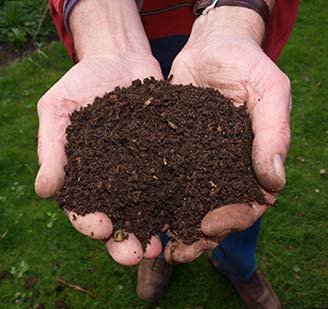
Compost Soil

3. Price

There’s a pretty wide range in the cost of composters. People that prefer to take the DIY route can throw something together pretty cheaply or even just create a pile for composting (although you risk attracting animals and having to deal with a nasty smell if you go that route). But if you opt to purchase a composter, you’re looking at anywhere from $50 for a low-end stationary compost bin to about $300 for a high-end worm composter.

Most composters of all types fall somewhere in the $80-$150 range though. If you’re able to spend somewhere within that range, you’ll have plenty of options to choose from.

When considering how much to spend, keep in mind that composting can save you money on fertilizer and reduce the amount of waste you produce each week. Your upfront cost will help you spend less over time.

4. Ease of Use

There are a few main factors that affect ease of use. One is how often you have to mix or turn it, and how much work is involved in doing so. Stationary compost bins can be hard to stir, whereas tumblers usually have a lever you can turn to mix the compost fairly easily. Of course, worm composters are the easiest of all since you never have to do anything to mix the compost.

Another factor to consider is getting the mix of nitrogen and carbon just right. This primarily matters if you’re hoping to speed up the process, but can get a little complicated to keep up with and get enough of the right materials at the right time. A big appeal of worm composters in comparison to the other types is that you simply don’t have to worry about any of this stuff at all.

And finally, you have to consider how difficult a composter will be to empty at the point where you need to access finished compost. With stationary composters, this can be difficult as you have to figure out how to get to the finished compost on the bottom while leaving the unfinished compost on the top – that is, unless you keep two stationary bins so one can cook while the other has new items added to it. Even in that case though, you have to remove all the compost from the bin and transport it to where you’ll be using it, which can be tricky.

Tumbler composters are often off the ground, so you can spin the composter to where the opening is facing the ground and dump the finished compost into a wheelbarrow or other container to transport it. And roller composters let you roll the composter right up to where you’ll be using it, but you’ll still need to deal with getting the compost out and spreading it around.

This is another category where the clear winner is the worm composter. Worm composters are designed to have several levels and the worms eat their way up the food scraps. That means the finished compost ends up in the bottom layer, which can be easily removed so you can empty the compost where needed.

5.How Durable the Composter Is

The durability of the composter you choose will generally have more to do with the material it’s made of and the quality of the construction than the type of composter it is. That said, in looking over reviews of various types of composters from different brands, tumbler and worm composters tend to fare better in this category than stationary composters.

Your best option for determining how durable a composter is likely to be before buying is to peruse the user reviews. People often take time to mention it if a composter they buy starts to show problems within the first few months or first couple of years, and some people will even come back years later to praise a brand or particular composter for lasting a long time.


6. How the Composter is Ventilated

As previously discussed, one of the key components in the composting process is making sure that the compost is exposed to just enough air (but not too much). For that reason, most stationary and rolling composters need to have some kind of slits or holes to let a little bit of air in. Tumbler composters don’t always include slits or holes, since the spinning process ensures the different parts of the compost get more access to air.

7. Pests

While most garden bugs that may access your compost are beneficial, larger animals like raccoons, opossums, and rodents are not. Compost piles and some stationary bins are at risk of attracting critters that make a mess of your compost in order to take advantage of the kitchen scraps. Compost tumblers and worm composters are generally more protected from critters and reduce your risk of having to deal with cleanup (and a slowed down process) after a raccoon scatters your compost about the yard.

8. Will the Composter Emit Unpleasant Odors & Smells

The composting process can be smelly. Worm composters manage to eliminate this issue entirely, since the worms consume the food scraps before they get the chance to rot. But for other types of composters, that rotting is simply part of the process.

A composter that’s made of a thicker material can reduce the amount of smell you have to deal with. You’ll probably notice the smell when you open your bin or tumbler to add more, but will be spared from it the rest of the time. Nonetheless, most people will want to keep their composter some distance from the house to be safe.

9. What the Composter is Made From

Most composters are made of plastic which is good for absorbing heat, which speeds up the composting process – especially if the plastic’s in a dark color. A few composters are made of wood, which means they’ll look nicer in your yard, but you have to be more concerned about rot, they won’t heat up as fast, and they don’t usually have as snug of a lid for keeping animals out. If you want a bin that looks nicer in your yard though, they pretty handily beat plastic composters in that category.

10. Is it a Multi-Bin Composter?

Many tumbler composters include multiple compartments so you can fill up one side and let it cook, while you start to fill the other side. That way the composting process isn’t slowed by the continual addition of new materials. Many people who compost will want either a composter with two compartments, or to get two composters for this reason.

With stationary bins, you can try to access the finished compost on the bottom while the new materials on top continue to cook, but that’s a tricky (and messy) process. Two compartments or bins side by side are much simpler.

Worm composters are the one exception. Their design makes it pretty easy to remove the bottom section where the compost is finished without having to worry about the food scraps above that aren’t done yet.

11. The Weight of the Composter

For stationary composters, weight doesn’t have to be much of a consideration, at least not once you have them installed and put into place. For anything you expect to have to move or turn, the heavier it gets, the harder that will be.

Consider the weight before you start filling it, and imagine what it’s going to be like once it’s full. If you’ll have a hard time turning the composter or moving it as needed, then you might need to consider a lighter alternative or plan on not filling it all the way.

12. How Easy it is to Assemble

While this is only an issue once, it can make a big difference in how satisfied with your composter you are soon after purchase. This is another factor where your best bet is to check the reviews of a composter before buying to see if it’s likely to be difficult to put together.

If you’ll be dealing with the assembly alone or know you generally aren’t great at putting things together, then you can steer clear of composters with a reputation for being difficult (or know in advance to ask a friend over to help).


Composting Accessories & Extras

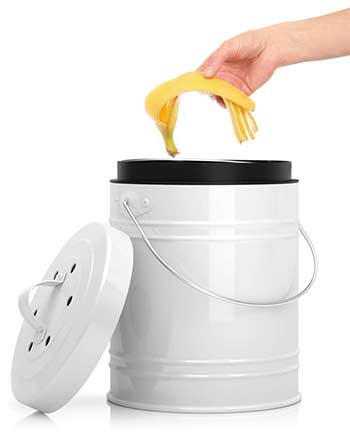
  • Compost Bucket — Most people won’t want to run outside every time they do food prep to throw items in the composter. A compost bucket can sit on your kitchen counter and be added to until it’s full and you head out to dump it.
  • Compost Starter — Compost starter can help speed up the process of getting your compost cooking so it’s done sooner.

Conclusion

Compost is a fairly easy way to reduce your waste and make your plants happier. Figure out which composter makes the most sense for your home and make a move toward becoming greener in general, and more of a green thumb as well.
Garden Slug

How to Get Rid of Garden Pests

Growing a successful and productive garden is a lot of work. It can be rather frustrating to tend to your garden, only to watch a variety of bugs, insects, and other pests destroy it before you can harvest.

Before deciding to use chemical pesticides which may be harmful to the overall ecosystem of your garden, homeowners should consider using a natural approach to getting rid of those annoying plant-eaters and garden disturbers. Any number of homemade sprays and methods can be helpful in deterring garden pests from your yard, all while keeping your plants healthy.

To start, it is helpful to identify the particular pests that have invaded your yard or to discover common pests to your area so you know what you’re up against. Then, consider using a few of these tips to keep your plants thriving and bug-free.

1. Slow Down the Slugs

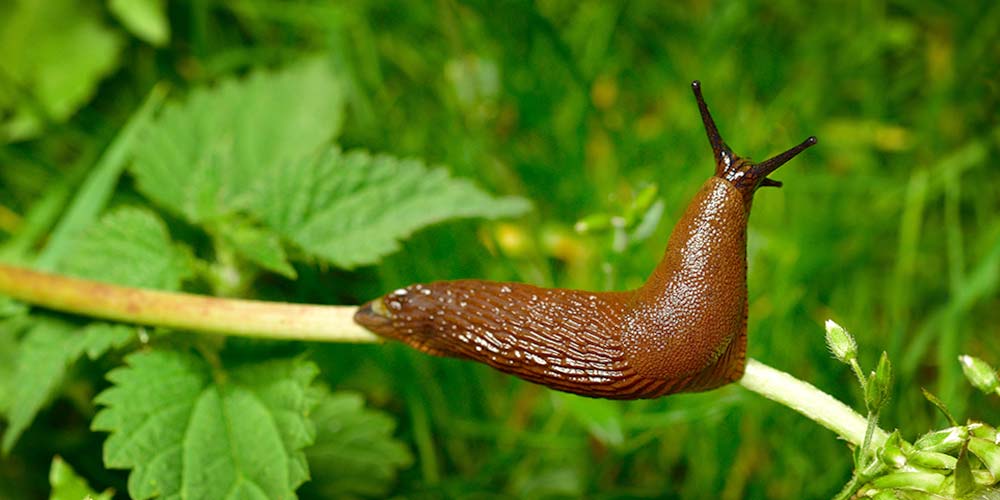
Slugs can be good at eating other bugs, but unfortunately they also tend to target your garden veggies. Fortunately there are a number of ways you can deter these slimy garden pests.

One way to keep the slugs from destroying your plants is by distracting them with copper flashing. The copper will give the slugs a slight electrical shock when they come in contact with it. This means that the copper will act as a barrier to keep the slugs out of the blocked off area or away from a particularly susceptible plant.

Because slugs have soft bodies, you can utilize certain materials as garden borders that the slugs would avoid coming in contact with. Try applying gravel or lava rock in strips around your plants or garden in order to keep the little slugs from crawling across and into your garden. Wood ashes are another good choice for this sort of slug warfare because not only are the ashes good for deterring these pests, but the potassium in the ashes is good for the soil too.


2. Avoiding Aphids

Aphids come in a variety of colors and are excellent at sucking the sap from new growth in a plant. Often, you can get rid of these garden pests simply by hosing them off, but you will need to be vigilant.

If you are looking for a method that is a little more effective and permanent, you could try creating your own aphid-repelling spray. For this method, you will be creating a blend of cooking oil, water, and dish soap. Mix approximately one cup of fresh cooking oil with a tablespoon of dish soap.

Then, dilute the mixture in a spray bottle by taking four teaspoons of the oil/soap mix and blending it with one pint of water. As you spray this on your vegetables, it can help keep aphids away, and also thrips, spider mites, and whiteflies. You should reapply this mixture to your plants once a week for the best results.

3. Utilize Citrus Peels

Citrus peels from lemons or oranges are a great way to add nitrogen to your compost pile, but they can also be used as garden defense. This method will not only deter garden pests, but it will also improve the health of your soil.

If you dry the peels first, you will be able to grind them up and sift the powder directly into the soil. This will make your entire garden more resistant to a bug invasion.

A whole orange peel is also able to help keep aphids and mosquitoes away. For this method, all you need to do is cut a slit in an orange peel and carefully slide it over an aphid-susceptible plant, or else simply rub the peels on the plants to act as a mosquito repellent. Even cats are supposedly deterred by citrus peel. Sprinkle leftover orange peels in spots where your or neighborhood cats tend to prowl.

4. Sprinkle Diatomaceous Earth

Diatomaceous earth is a powder made of fossilized bodies of tiny, aquatic organisms, also known as diatoms. The particles in diatomaceous earth are abrasive and excellent for deterring soft-skinned insects, such as slugs.

All you need to do is sprinkle the diatomaceous earth over plants and around the garden’s perimeter to control flea beetles, twig borer, thrips, cockroaches, ants, earwigs and spider mites. The sharp edges of the dirt dry out and kill these undesirable pests. It also works to destroy these pests if they ingest the diatomaceous earth.


5. Use Garlic on Your Garden Pests

Garlic, a seasoning we all have in our kitchen pantries, is surprisingly useful in the garden as well. If you are dealing with apple maggots, caterpillars, sowbugs, grasshoppers, grubs, leafminers, mealybugs or whiteflies, garlic spray is an effective and natural way to battle the bugs.

To make a natural garlic pesticide, you need to blend 12 cloves of garlic with one and a half cups of water. Strain the pulp and then dilute the strained garlic water with a gallon of water. Shake it well, and then use the mixture in a spray bottle once a week on your plants to keep the bugs away.

6. Use Your Chickens

If you keep a coop of chickens, know that you can use them for more than a food source. While you may want to keep your chickens out of your garden beds, you might consider constructing a chicken moat around your gardening area.

A chicken moat is essentially a strip of dry ground fenced in on both sides which surrounds the plants. This space allows for the chickens to go to town eating weeds and grasshoppers and any other bug or beetle attempting to enter your garden plot. This is an effective method for controlling the pest population while giving your chickens plenty to feast upon.

If you are a homeowner interested in more details on how to construct a good chicken moat, check out this blog post. The double fence has the advantage of keeping deer and rabbits away from your plants, as well.

7. Invite Friendly Birds

Hornworms and other bugs are destructive to your tomato plants and can easily gobble up leaf after leaf if left unchecked. To prevent this, try attracting birds to eat these worms by placing bird feeders or a bird bath around your vegetable garden.

Check your plants once or twice a day for hornworms, and if the birds aren’t getting them all, you can always create another homemade spray. Try mixing garlic, soap and cayenne pepper with water to spray over your plants for added protection. This green pesticide helps to keep the moths that lay hornworm eggs out of your garden.


8. The Five-Finger Trap

One of the most common, cheap, and effective ways a homeowner can get rid of squash bugs, slugs, Japanese Beetles and hornworms is handpicking. It is tedious and not for the squeamish, yes, but very effective because you can see exactly what bugs you are removing and from where.

If you happen to have chickens, you can feed the insects and critters to the chickens or hope that some local robins may come scoop up the handpicked pests. Handpicking, along with some of the other remedies in this series, is a great way to be sure you have a pest-free garden.


As you prepare your garden, find out which pests are common to your area, and then arm yourself with these natural remedies for keeping the bugs out of your vegetable beds. By following these tips, you will find that garden care isn’t so challenging after all.


Beaucarnea recurvata

How to Grow a Ponytail Palm

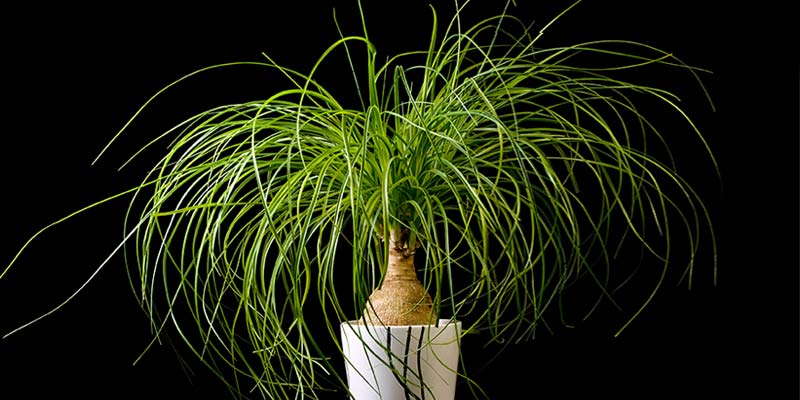
As one of the most popular houseplants found in homes all around the world, the Ponytail Palm (Beaucarnea recurvata) is one of the easiest to grow and require very little maintenance by their owners. If you’re looking to add a splash of charm into your home, but don’t want to put much time or thought into it, then this tropical houseplant may just be the perfect choice for you.

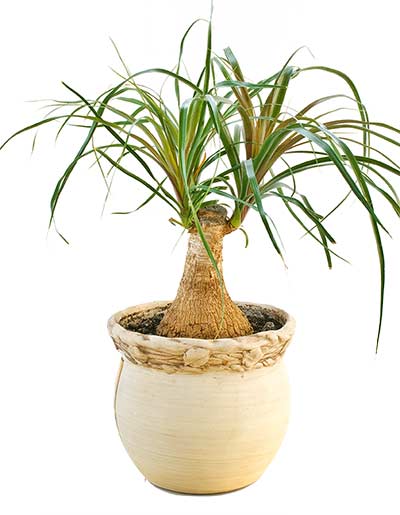
Originating from the arid landscapes of Mexico, the name Ponytail “palm” is a bit of a misnomer. While the bulbous trunk indeed had some similarities to the trunks of other palm trees, the Beaucarnea recurvata is actually a drought-resistant succulent. And that bulbous trunk is where the plant stores its water.

Ponytail Palm

How to Care for Ponytail Palm

Ponytail palms are one of the easiest houseplants to care for.

They require little water, love lots of light, you don’t have to fertilize often, and they have the ability to adapt to the comfortable temperatures often found in homes. The downside of growing a ponytail palm inside your home is the incredible slow pace in which they grow.

As long as you don’t over-water it, you probably won’t kill it. It’s pretty much that simple.

However, if you want your plant to grow tall, thrive and be healthy, there are some easy guidelines you can follow to help you provide the best care for your ponytail palm.

Botanical Info

Latin Name Beaucarnea recurvata
Plant Family Asparagaceae
Genus Beaucarnea
Common Names Ponytail Palm, Elephant Foot Palm, Bottle Palm, Nolina Palm
Origin Mexico, South America
USDA Zone 10 – 11

Growing Conditions

Water Once every ~10 days.
Light Bright & full exposure to sun.
Soil Cactus potting soil.
Fertilize Once a month. Diluted liquid fertilizer.
Temperature Warm. Keep above 55°F.  
Humidity Adaptable. Not too low.  
Maintenance Easy to care for.  
Grow Inside? Yes
Grow Outside? Yes. Best in USDA Zone 10 – 11
Safe for Pets? Yes. But, care should be taken.
Container Size Depends on how large you want it to grow.  

7 Common Questions About Ponytail Palms

To help ensure that you’re providing to proper care for your ponytail palm, we have listed out the most frequently asked questions down below. If you have a question that you don’t see listed or would like to add additional feedback for others to learn from, please leave it down in the comment section below.

1. How often do you water a ponytail palm?

Not often, but the frequency depends largely on the environment you’re growing it in. Below, we have some general guidelines to watering a ponytail palm, but the best advice is to give it a drink of water when you see the soil start to dry.

  • During Hotter Months — You’ll want to water your ponytail palm plant once every 7-10 days.
  • During Cooler Months — You’ll want to slow down the watering schedule to once every 20-30 days.

If you don’t abide to that precise schedule, don’t fret. This plant is great at surviving long periods without water. But, if you want a healthy plant that grows to its fullest, you should try to follow the watering guidelines listed above.

Remember: The easiest way to kill a ponytail palm is by over-watering. Less is more.


2. How much light does it need?

Ponytail palms love lots of light. Remember, this plant is native to arid deserts, so full exposure to the sun will be appreciated by this plant. However, while full exposure is recommended, ponytail palms are adaptable to little or moderate amounts of light.

The downside of less light exposure is that you’ll see a noticeable slow down in its growth. And for an already slow-growing houseplant, this may just completely stunt it.

So, if you want your ponytail palm to grow tall, give it lots of light.

3. How often should I fertilize a ponytail palm?

Depends on the season and environment you’re growing your ponytail plant in. A general guideline is to fertilize your plant once every 3 or 4 weeks. If you see the tips of the leaves start to turn brown, then you’re using too much fertilizer.

  • Spring & Summer — Add fertilizer once every 2 or 3 weeks.
  • Fall & Winter — Add fertilizer once every 4 to 6 weeks.

Adding fertilizer is essential to the overall health of houseplants, and Beaucarnea recurvata is no different. Liquid fertilizers are recommended for ponytail palms, but granular fertilizers will also suffice. An all-purpose fertilizer will work fine here, but you can also consider using one formulated for cactus and other succulents.

4. What kind of soil should I use?

The best type of soil for this plant is one that drains quickly. Unlike many popular tropical houseplants, the last thing the ponytail palm wants is to sit around in moist soil for an extended period of time.

When you repot or transplant, it is recommended that you use a soil designed for cactus or succulents. If you want to make your own soil mixture, keep it light on the amount of peat you use within.

Remember: Keep the soil dry, and water sparingly.

5. Is repotting possible with a ponytail palm?

Yes, repotting a ponytail palm is possible and easy to do, but precautions should be made before you undertake this effort.

  • Size Matters — First, consider how large the tree is, and where you’re going to be moving it to. Larger plants will likely require more help from others, as well as a few other tools or equipment to assist in the transplant. On the flip side, if you’re repotting a small bonsai ponytail palm, then you likely won’t need any help or special tools.
  • Do In Spring — It is recommended that repot your ponytail palm early in the growing season, as this gives it plenty of time to adjust to the larger pot and form strong roots.
  • Examine the Roots — Once you have it out of the original container, take a close look at the roots of your plant. Look for any signs of bugs, rotted areas, or anything that looks injured or contaminated. Cut these off before you repot in new container.

Keep in mind: Transplanting it to a larger pot will encourage the plant to grow larger. This may be a deal-breaker for anyone growing a bonsai palm.

6. Is this plant safe for pets?

According to the ASPCA, the ponytail palm does not pose any toxicity threats to dogs or cats.

However, every homeowner with pets should know, and possibly take precautions if deemed necessary, that the leaves of the Beaucarnea recurvata contain saponin which may cause discomfort in some animals if ingested. So, while it’s unlikely that any harm will come to your dog or cat, it may be wise to keep an eye on them and ensure that they are not eating or chewing on the leaves.

It’s also worth noting that saponins are found in many popular houseplants, not just the ponytail palm. They also pose no danger to humans. In fact, saponin is found in many dietary supplements and are suggested to have some nutritional benefits.

7. Can you grow a ponytail palm outside?

Yes, but it’s recommended that you live in USDA Plant Hardiness Zone 10 or 11 if you want your plant to thrive. The sandy soil and hotter temperatures create an ideal environment for growing the ponytail palm outside.