Portable Air Conditioner in Home

How A Portable Air Conditioner Will Benefit Homeowners

All around the United States, homeowners rely on their central air conditioner to keep their home cool during the hot summer months. While a central AC is one of the best options to keep you and your family cool, more and more homeowners are turning to a more versatile and convenient cooling appliance — the portable air conditioner.

These convenient, yet underrated, cooling appliances can do much more than simply provide cold air throughout your home. This type of “room” air conditioner is designed with many benefits in mind. Below, are five reasons why every homeowner would benefit from using a portable air conditioner in their home.

Portable Air Conditioner

1. Enhanced Temperature Control

If you are the type of person that always feels warmer than everyone else in your home or office, then you may benefit from the use of your a portable air conditioning unit.

Portable air conditioners provide you the freedom to cool a area or room without bothering your coworkers or roommates. As long as the interior space is enclosed, you could benefit from a portable air conditioner by simply cooling that one room. This will keep you in a comfortable temperature, without bothering anyone else nearby.


2. Saves You Money (And Energy Use)

For homeowners that live in warmer climates, using a room air conditioner to help cool their home may be a wise decision when it comes to lowering their utility bills.

Regardless of whether you go with a portable or window air conditioner, these smaller AC units can help homeowners bring the temperature down to a comfortable level in a small area or room that they spend the most time within. Running your central air conditioner at full power all the time tends to result in high energy bills, but a portable air conditioner can give your central AC unit a bit of a break. This not only extends the life of your central air conditioner, but a portable air conditioner can save you money.

This is also particularly useful if you happen to have non-standard windows that won’t fit a general window unit. Most portable A/C units can be installed in all sorts of odd-shaped windows, or even within a ceiling vent. Portable AC units also help save you money by only cooling the area of your home or office that you want to be cooled, which means less wasted energy in unoccupied spaces.

3. Improves Indoor Air Quality

Portable air conditioners do much more than just cool the air in a room. Some units have the ability to generate heat, making them a helpful appliance for year-round necessity use. Other AC units can utilize their built-in air filters to help improve your indoor air quality.

Popular Features & Functionality

  • Heater
  • Air purifier
  • Humidifier
  • Dehumidifier

You have lots of features available. Be sure to research all of the options provided with your preferred model in order to assure that is meets all of your unique needs.


4. Portability on the Road & Sea

For homeowners that enjoy hitting the road and traveling — whether by road or sea — a portable air conditioner is perfect for on-the-go. If you’re traveling in an RV, a portable air conditioner can help keep you cool during long road-trips. These also work great in cabins, vacation homes, and boats.

Simply remove your portable air conditioner from your home (or storage) and take it with you. Portability provides convenience when you need it most.

5. Keep Your Office & Tech Cool

The emergence of the internet and the ability to house processing power into smaller units has made it easier to run advanced businesses right from your own home. This frequently includes the ability to store servers and provide hosting services without leasing office or warehouse space.

If you have servers in your closet, garage, or anywhere else inside your home, then you may need a way to keep these servers cool.

Portable air conditioners can be used as a main cooling option or even as a supplement to your central air conditioning system to keep your equipment at a suitable temperature. These A/C units helps to prevent overheating and hot spots, which can lead to premature equipment failure as well as many other unexpected costs.


What’s the Best Air Conditioner for Your Home?

One way to get the most benefits from your portable air conditioning unit is to make sure you have a strong understanding of the amount of power your space requires to cool. To accomplish this, you just need to know the square footage of the room, as well as the BTU or ASHRAE that your AC unit produces.

For example, if you want to add a portable air conditioner into a typical, average-sized bedroom, then you won’t need a unit with industrial capabilities. However, if you plan on putting an air conditioner into a larger living room or game room, then you may need a larger unit to ensure that it’s capable of cooling the space.

How to Calculate BTU & Room Size

In order to ensure that you are utilizing the correct size, it is necessary that you calculate the BTUs required to achieve the cooling level you prefer.

To do this, you will need to calculate the size of the room you are planning to cool by multiplying the length by the width of the room. This will give you the square footage of the room. Once you have the size of the room, you should have a pretty good idea on what size unit you will need.

Cooling Capacity Chart by Room Size

The below chart is a rough estimation on how much cooling capacity you need for your room size.

  • < 225 sq/ft — 8,000 to 10,000 BTU’s
  • 225-300 sq/ft — 10,000 to 12,000 BTU’s
  • 300-425 sq/ft — 12,000 to 14,000 BTU’s
  • > 425 sq/ft — 14,000 BTU’s (or larger)

Enjoy Your Air Conditioner in a Variety of Ways

Although they have many different uses, portable air conditioners often get overlooked. Investing in a portable AC unit might just be the smartest financial move you can make as we move into these warmer months, and as heaters for your home when the weather beings to cools down.


Stick Vacuum Cleaner

7 Benefits of Stick Vacuums

Vacuum cleaners are a convenience of modern times and as all technologies, these cleaning devices have improved quite a bit over time. Today, vacuums come with more attachments then you’ll probably ever need.

A stick vacuum cleaner may not be the most powerful type of vacuum cleaner, but they do offer some pretty compelling features, such as swivel steering, a multitude of attachments, cordless and rechargeable, a motorized brush, ability to easily transition between a floor and light handheld, and even HEPA filtration.

This portfolio of features has taken stick vacuums well beyond the old carpet sweepers, and transformed them into a serious consideration in the cleaning arsenal for homeowners. Below are some of the reasons why homeowners should consider buying a stick vacuum cleaner.

What is a Stick Vacuum?

A stick vacuum is a lightweight version of an upright vacuum cleaner. It’s likely not as powerful as its larger counterpart, or come with as many attachments or accessories. They are simple to use and easy to store, which are two of the main reasons why people love their stick vacuums.


What to Expect From a Stick Vacuum Cleaner

While this type of vacuum cleaner is a popular choice for homeowners, that doesn’t mean it’s the best cleaning device for you and your home. To help you figure out whether this is the right choice for you, let’s take a closer look at seven common benefits that come with a stick vacuum.

1. Smaller Size & Weight

By definition, stick vacuums are smaller, lighter, and easier to move around. Who wants to haul around a heavy vacuum cleaner, especially if you only need to spot-clean a single spill. This is where a stick or handheld vacuum cleaner really excels. When it comes to the size and weight, other types of vacuums can’t even begin to compete.

Most stick vacuums come in under ten pounds, with some models weighing about half that. This is a huge benefit for any homeowner that may have difficulty carrying or pushing around heavier machines, including the disabled or elderly consumers. Their lightweight designs not only increases its maneuverability and ease of use, but it also makes it easier to store when its not in use.

2. Lower Cost

Stick vacuums typically cost far less than their bigger counterparts. There are many reasons for this, but it really comes down to three things:

  1. They use less powerful motors.
  2. They have a compact build that makes them easy to store.
  3. They usually don’t come with a bunch of attachments or accessories.

If any of these seem like cons to you, then perhaps a stick vacuum isn’t the right device for you. Otherwise, you will soon discover that finding one within your budget is extremely easy to do.

3. Great for Quick Cleanups

Had a surprise call from a friend wanting to get together and you feel like maybe you should clean the high traffic areas before they arrive? Did your dog knock over a house plant again? Another great benefit of a stick vacuum is that they are perfect for those quick cleanings between your regular full-on household cleaning days.


4. Easy to Store

One of the most noticeable benefits of a stick vacuum is how easy they are to store. This is especially important to those who live in small apartments or tiny houses.

Much like a robot vacuum cleaner, these take far less room then the more popular canister vacuums, with some models even coming with a wall mount to help you preserve floor space. Because of their compact size and weight they can even be stored high on a closet shelf or inside your pantry where they are less noticeable and out of the way, yet still within quick reach when you need them.

5. Very Easy to Use

For many homeowners out there, this is one of the most important benefits of not only vacuum cleaners in general, but all appliances. And for the record, stick vacuums are incredibly easy to use. This ease is mainly due to the upright and lightweight design, as well as the added technologies that makes cleaning less of a chore and more of a quickly done afterthought. That’s what a stick vacuum can do for you.

Many of these devices have motorized brushes which increase its overall cleaning potential and maneuverability. Some models offer attached containers that make emptying the dust and debris a breeze. Just be sure to empty these containers outside to avoid contaminating your indoor air quality, which is an issue that hits right into the heart of the “bag vs bagless vacuum cleaner debate.”

While the attachments may be limited, most stick vacuums do come with wands that give you easier access to clean places in your home that are hard to reach. Another huge benefit of stick vacuums is their upright build. Often they feature a height adjustable design, which increases proper body positioning during cleaning, as well as protecting your back against unnecessary fatigue and strain.

6. Make Less Noise

Depending on the type of vacuum cleaner you buy, you’ll have to deal with the noise that comes with it. There’s just no way around it… they all make noise. Too much noise, despite the brand or model or type.

Unfortunately, some of those big vacuums not only have the power of a cyclone but they also sound like one too. And nobody wants that in their home.

Whether you have a pet that perceives the vacuum cleaner as their mortal enemy, or maybe you’re just timid of vacuuming at certain times because of disturbing the neighbors or sleeping family members; one of the main benefits of a stick vacuum is that it allows you to get those messes cleaned up and forgotten about with less chance of disturbing anyone in your home.

Most stick vacuum cleaners have a pretty low decibel level. Whether or not the product page that you buy it from states the Db level, for the most part, they are much quieter than than their larger counterparts.


7. Versatility

Another great feature of stick vacuums is their versatility. Most can easily be converted to very light handhelds and some models, such as the popular Dyson V11 Vacuum Cleaner, are completely cordless, running instead on a rechargeable battery.

This not only makes cleaning easier, but gives you the option of cleaning away from an outlet without stringing two or three extension cords. Some models even use HEPA filtration to help keep your air clean and free of the tiny particles that may get kicked up while vacuuming.


Stick Vacuum Cleaners: The Best Choice For You?

Though these vacuums may not be as deep cleaning or as powerful as many other types of vacuum cleaners, there are many benefits to owning one. They are a great addition for quick cleanups and if you live in a tiny house, smaller apartment, or don’t have carpeted floors it is very likely that they could completely take the place of their bigger brothers, making the costly, noisy, and cumbersome vacuum obsolete.


Bed Bugs

6 Signs of a Bed Bug Infestation

One of a homeowner’s worst nightmares, bed bugs are a serious concern that requires prompt action in order to prevent from spreading. The sooner you are able to recognize the signs of an infestation and get a professional exterminator out to your house to diagnose and treat, the easier it will be for you to kill and remove bed bugs from your home.

Unfortunately, far too many homeowners allow the situation to escalate before seeking help because they simply do not recognize the signs of a bed bug infestation.

That’s what we’re here to talk about today.

How to Tell if You Have Bed Bugs

To help you get back to a having a restful night’s sleep, let’s take a look at some of the most common symptoms, signs, and indicators that every homeowner should be familiar with. Here are six of the most common indicators to be on the lookout for.


1. Bites, Bumps & Redness On Skin

This is easily the most common sign that homeowners will recognize right away. If you start noticing red or pink bumps on your skin, then you may be looking at a bed bug bite. In fact, you may not even notice you have these bumps until the itching or burning sensation starts to set in.

If it’s feasible, take a photo of the bites with your phone. This will help your doctor diagnose whether the bites are from bed bugs. At this time, it may be wise for you to contact your doctor to ensure you are getting the appropriate medical care.

What Do Bed Bug Bites Look Like?

Pay particularly close attention to the pattern and number of red bumps, as it is common for bed bugs to bite several times in a straight line or in one area. Are there numerous bites all appearing within the same localized area? This is a sign of bed bugs.

Bed Bug Infestation

2. Actually Seeing Bed Bugs

If you have a heavy infestation, it’s entirely possible that homeowners will actually be able to see bugs crawling around your bed sheets. If you are able to see them for yourself, then an exterminator needs to be contacted right away.

Spotting bed bugs for yourself is not always as easy as it seems. This is because bed bugs tend to be nocturnal, which means you may not be able to see them during the day. If you suspect you have an infestation of bed bugs in your home, try to inspect your sheets at night. Check every area of your bed, including all of the crevices and edges. Inspect and remove all of your bedding. You should also take a look at your box spring.

Bed bugs are very tiny, so you may need to look closely. They are almond-shaped with a reddish-brown color. It is also possible that you will see eggs in your bed, which means you have several generations of bugs that are infested within your sheets. In addition to the bed bugs themselves, look out for any excrement or skin that may have been left behind as well.


3. Presence of Exoskeletons

You may not see bed bugs for yourself after the infestation has grown, but it should be easier to spot the presence of exoskeletons. These are the hard shells that are used to provide structure to the bed bugs’ organs and muscles.

As bed bugs grow, they molt this skin and leave it behind. Seeing an exoskeleton on its own might be easy to dismiss, but remember, it is incredibly unlikely that an infestation has moved away or resolved itself on its own. If you find exoskeletons in your bed, then it’s very likely that you have bed bugs.


4. Blood Spots on Your Mattress

Another sign that you may have bed bugs in your home is if you notice tiny spots of blood on your bed sheets. This is because bed bugs feed by biting your skin and drinking your blood.

They will be more noticeable if your sheets are white or lighter in color. If you have dark sheets, then you may not notice them right away. You should also pay attention if there are any small, unexplained blood spots on your clothing or furniture. It is not unheard of for bed bugs to attach to clothing and become mobile. Unfortunately, this is a very common way for bed bug infestations to spread to other parts of your home.


5. Fecal Matter on Your Mattress

This one may be a little disgusting to think about, but another common sign of bed bugs is discovering small black or brownish spots on your bed sheets or mattress. These small spots could be feces produced by bed bugs.

To confirm whether these spots are actually excrement from a bed bug, you can take a mildly damp cloth and gently rub it over the spots.

Because bed bug excrement is generally just dried blood, a damp cloth will make these brownish spots red again. This is a strong indication that you may have an infestation in your home.


6. Strange Odor

It is also very common for bed bugs to create a very unpleasant odor. The description of the scent can vary, but many people describe it as either smelling like coriander or spoiled raspberries.

This smell is generally the result of the bed bugs releasing pheromones, but it can also be created by crushing the bugs. These odors are most often created when the infestation of bed bugs has increased drastically, so if you start smelling something in your mattress, then it is highly likely that your bed bug problem has escalated quite a bit.

Spot the Signs & Act Quickly!

Out of all signs and indications listed above, the most important one that homeowners should watch out for is actually seeing the bugs in your bed. If possible, try to capture one or more of the bugs to show an exterminator. This will prove beyond a doubt that the culprits are bed bugs and you can then proceed with the proper treatment to eliminate the infestation.

Obviously, no homeowner ever wants to deal with a bed bug infestation. But the sooner you can spot the signs of an infestation, the easier and more cost-effective it will be to kill and get rid of these unwanted pests. At the first sign of trouble, contact a pest extermination company near you in order to get a professional out to your home or business so that you can go back to getting a good night of sleep.


Portable Air Conditioner

How to Clean & Maintain Your Portable Air Conditioner

During those hot summer months, your portable air conditioner can be the reprieve you need to stay cool. There’s nothing quite like the feel of cool freon on your skin, especially as the mercury starts to soar.

It not only helps cool your living areas, but a portable air conditioner can help save you money on your monthly energy bills. But, like most appliances in your home, a portable AC unit can only do this if you take proper care of the device. If you fall behind on performing basic maintenance, fail to install it properly, or simply get lazy about cleaning the device, your portable air conditioner will struggle to run at its full capacity.

Below, we’ll take a closer look at some of the basic maintenance tips you can follow to keep your portable air conditioner in its best shape (and helping you stay cool for years to come).


Know Where to Install (And Not to Install)

One of the biggest advantages of using a portable air conditioner in your home is that it’s easy to move from room to room. However, where you install it within the room will play a significant factor in how well the air conditioner operates and cools the space.


Tips to Installing Your Portable Air Conditioner:

Whether you’re moving it from room to room, or just installing the AC unit for the first time. Here’s a few things you should consider as you install your portable air conditioner in your home.

1. Avoid Installing in Dusty Areas:

You should never install your portable AC unit in an area that is dirty or dusty. Small particles may start to clog either of the two motors in the appliance, which will eventually lead to further electrical or mechanical problems.

2. Avoid Placing Near Pet Bed:

Much like the dirt and dust, the fur your pet sheds may start to accumulate in the device. Furthermore, if you don’t have a good filter in your portable air conditioner, pet dander may get sucked into the device and possibly compromise your indoor air quality.

3. Do Not Install Directly Against the Wall:

This is very important to keep in mind. In order for your portable air conditioner to work both efficiently and properly, it needs to be at least 12-16 inches away from the wall. This distance may vary from unit to unit, so make sure you read the owner’s manual that comes with the device.

4. Make Sure It Can Drain Properly:

If you’re using your portable air conditioner in a humid room, then the device will pull more condensation from the air, and need to be drained regularly. Most AC units will come with a drain tube that can help remove any liquid, but it would be wise to make sure this is working properly to avoid any mishaps.

5. Use the Right Power Source:

If your power source is not operating on a circuit that can accommodate your portable air conditioner, you run the risk of a shortage or busted fuse. Make sure the circuit can supply 120 VAC. This gives your A/C unit enough power to start up the compressor and fan motors.

You may also consider spending a very small amount of money on an electrical surge protector. This will help you in the long run should you experience a sudden and unexpected power surge.


Keep the Exhaust Hose Short & Straight

A small tip involving the exhaust can go a long way. When you install the hose, make sure it is as short and straight as it can be. This will help prevent excess moisture from collecting inside the hose, as well as mitigate the possibility of moisture rolling back into the air conditioning unit. Water inside your AC unit can cause damage.


Change & Clean the Filters Frequently

As with any room air conditioner or HVAC system, your portable air conditioning unit has at least one filter that should be either regularly cleaned or replaced.

Portable Air Conditioner
(Source)

Portable Air Conditioner Unit

Depending on what type of AC unit you have, you may find a pre-filter located on the back of the unit. You should clean this at least once a month with a soft cloth. Do not use soap or any detergents, as those can leave a film and actually increase the risk of a clog.

The reason you need to keep the filters fresh is because as dirt or dust accumulates, it can mix with the moisture inside the unit to form a layer on the coils. This layer will keep the coil from transferring heat from the room to the great outdoors. In essence, it means your unit will overheat and eventually start to malfunction.

There may also be a second filter on your portable air conditioner known as a carbon filter, which serves to neutralize odors. This filter should be changed at least twice a year — if not more frequently — depending on the manufacturer’s recommendation.


How to Store Your Portable Air Conditioner

Unless you plan on running your AC unit year-round, you will need to properly put it to bed during the months you will not be using it. Before you store it away until next season, it is recommended that for homeowners to do the following:

  • Drain the AC unit of any moisture that has collected inside.
  • Put the unit in “fan only” mode on high speed for a few hours to ensure everything inside is completely dry.
  • Use plastic sheeting to cover the unit, which will protect it from dust and other debris.
  • Store your portable air conditioner in a cool, dry place.

Where you choose to store your portable air conditioner is important. If possible, choose an area in your home that is temperature controlled. The last thing you want is for the device to be sitting in extreme temperatures for an extended period of time. If exposed to the elements for too long, you may find that your portable AC unit won’t work properly when you pull it out of storage.


Final Thoughts

By following just a few maintenance tips, you can ensure your portable air conditioner will serve you well for years to come. It’s simple, really. Just make sure you keep it in a place free of dust and debris that could clog up working parts. Clean or change the filters regularly. And, if you’re done using it for the season, be sure to store it correctly so it will be ready to go when the mercury rises again.


Gardening

5 Sustainable Gardening Tips Every Homeowner Should Know

Sustainability is more than just a buzzword or a flavor-of-the-month cause; it’s a way of life that supports the Earth! And, sustainability begins at home – which is why creating a sustainable, natural garden is always a wonderful idea.

Many homeowners use harmful fertilizers or pesticides, or even excess water, in their gardens, but these types of conventional gardening techniques may often be more detrimental to our planet’s health than you intended. Instead, it’s important for homeowners to create a self-sustaining, organic garden that’s free of as many chemicals as possible.

Are you just getting started on your environmentally-conscious journey? If so, it’s time to read up on five our sustainable gardening tips that every homeowner should know!


1. Use Native Plants

Using native plants in your garden is one of the overall best ways to ensure that your garden is in tip-top, sustainable shape.

But first… what are native plants?

In short, native plants are types of plants that are uniquely indigenous to your region or ecosystem and are adapted to local soils and your climate. There are tons of benefits when it comes to transitioning to a native landscape! Namely, this type of garden requires much less maintenance than a typical garden or lawn – this is because minimal watering is required, and you don’t have to use harmful pesticides or fertilizers.

In addition to this, a native plant garden has the added benefit of becoming a wildlife habitat for local birds and insects. Bottom line: Native plant usage allows for your developed landscape to coexist peacefully with nature, which is always the goal for any sustainable garden.

To get started, it’s recommended that you checki in with local garden experts to get ideas for plants that thrive in your area and vegetables that mature easily during your area’s growing season.

2. Mulch Your Garden

If you’re truly committed to a sustainable garden, using mulch is the way to go. Basically, mulch comes from organic materials, which helps to make your garden more resistant to pests; it also provides tons of valuable nutrients.

Mulching is also the best sustainable method for providing soil moisture and for preventing weeds from growing in your garden. Simply add a 2-inch layer of mulch to your garden beds and around your plants, and let the sustainable magic begin!

3. Cut Down On Watering

It’s important to use the least amount of water possible, when making the shift to sustainable gardening.

There are a few different ways to do this:

  • Native Plants Require Less Water — First, as we’ve already noted, using more native plants in your garden will automatically mean using less water.
  • Use a Rain Barrel — A popular option for homeowners is to install a rain barrel on one of your home’s downspouts, for collecting water to use for your plants.
  • Collect Leftover Water — Another water-saving trick we love is to use a shower bucket – just place a bucket in your shower to collect leftover water runoff, and then use that water for your garden and any other plants. Simple yet effective!


4. Grow Your Own Food

There are so many reasons to grow your own food! First, selfishly, it just tastes better — garden-fresh fruits and veggies are far superior to the same fruits and veggies you’ll find in a supermarket. And, from a sustainability standpoint, growing your own food just makes sense.

You get to control your garden’s growing environment, which means you can elect NOT to use dangerous chemicals and pesticides.

Plus, harvesting our own veggies and other garden items can help contribute to overall waste reduction, considering that organic waste is the second highest component of landfills in the U.S.

Need other incentives? Growing food in your home garden can help save money and become a super-fun hobby!

5. Start Composting

Composting is an integral component of any sustainable garden. Seriously, one of the best ways to jump-start your sustainable garden is by composting all your food waste.

Composting does a lot of great things for our planet: it enriches the soil, provides much-needed nutrients to our gardens, and contributes to less waste being produced at the landfill.

In addition, composting will also help you to use less water in your garden – this is because the organic material from your compost pile allows your soil to become more fertile and able to retain more water.


Ready to get started?

When it comes to creating your personal compost pile, you have a few options. First, you could elect to simply rake your leaves over your garden bed in the fall and winter; and/or you could collect all yard waste and organic materials, such as (eggshells, coffee grounds, all your veggie and fruit scraps, grass clippings, and even shredded newspaper, and place everything in a bin or a pile.

Over time, these combined materials will start to decompose back into the earth – like a science project, but for the earth’s benefit!

Do you use sustainable gardening practices in your home garden? Did we miss an important sustainable gardening tip or technique? Tell us in the comments below!


Composter

Composter Buying Guide: How to Find the Best Composter For You

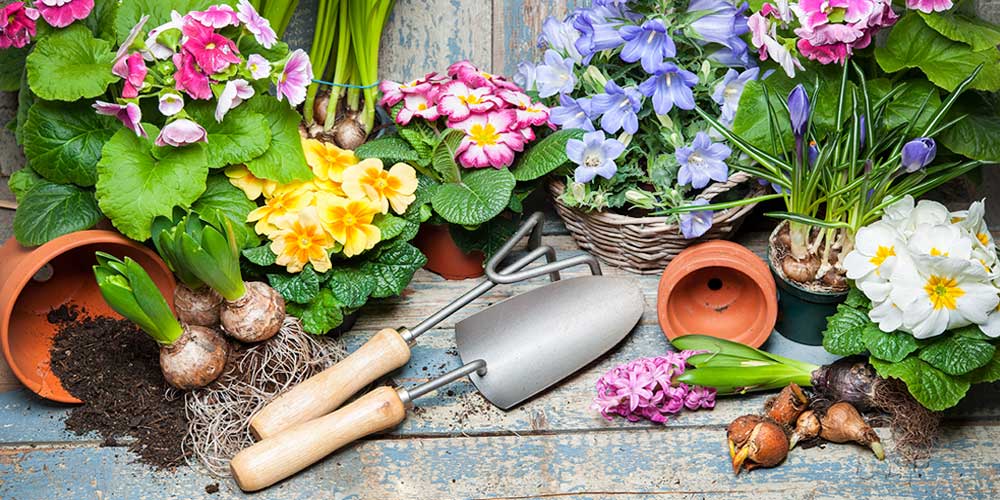
It’s estimated that about a third of all food produced annually is thrown away before it can be consumed. Food waste is a growing problem… But, composting is a very simple alternative that allows homeowners to put some of their food waste to good use to help your garden grow and enrich the soil around your home.

Why You Should Start Composting

Composting is one of those great things in life that really does accomplish two things at once. You’ll not only generate less waste, but you can create rich fertilizer for your plants all at the same time. You can do your part to reduce the amount of rotting food and food scraps filling landfills while developing one of the best types of fertilizer possible.

To do composting well, you do need the right supplies and a basic understanding of how composting works. To help you find the best composter for your home, we have put together the following “Composter Buyers Guide” to get you started.


Types of Composters

There are three main types of composters you have to choose from, with a couple of subcategories within them.
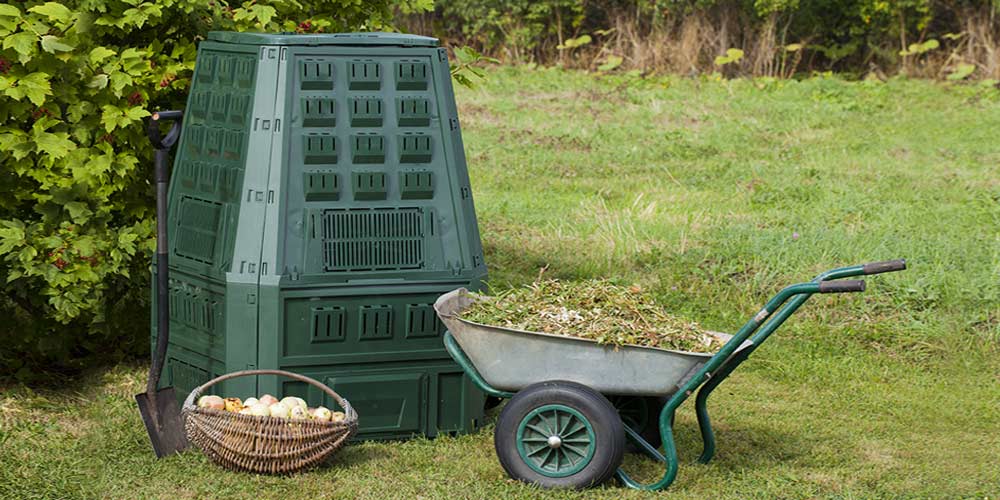
Compost Bin

Compost Bin

The most basic type of composters on the market are stationary compost bins. These often look somewhat like trash bins, are meant to stay in one spot, and you can add to them from an opening in the top.

This type of composter often features a large capacity and a removable lid, to protect your compost from the elements and interested animals (although these do tend to attract animals more than some of the other options).

These break down compost more slowly than other options and you have to do the work of mixing the compost manually to keep the process going. And it can be a little more difficult to remove the compost and transport it to your garden with these. But they’re the most affordable option and their simplicity appeals to a lot of gardeners.

Why You Should Buy a Compost Bin:

  • Affordable.
  • High capacity.
  • Slower than other type of composters.
  • Require more work than other options.

Compost Tumbler/Rolling Composters

Composter Tumbler

Compost tumblers and rolling composters are designed to make it easier to turn the compost regularly as you go, mixing it more often to speed the process of breaking it down.

This type of composter generally come up off the ground, which makes them more animal-proof than any composters that sit on the ground. And it’s relatively easy to empty them into a container when the compost is ready in order to transport it to your plants.

Rolling composters are similar to compost tumblers in being easy to turn so you speed up the composting process, but they’re less stationary. If you want, you can roll the composter up the house to make adding to it easier, and roll it over to your garden or plants when it comes time to empty it.

Both types are more expensive than stationary compost bins and, while generally easier to use, can become harder to turn as they get heavier. But if you want something that makes the process easier and faster and is likely to hold up to longer use over time, a tumbler or rolling composter is worth investing in.

Why You Should Buy a Compost Tumbler:

  • More expensive than stationary bins.
  • Creates compost faster.
  • Very easy to use.
  • More animal-proof than other types of composters.
  • Can get harder to use as you add more to them.

Worm Bin / Worm Composter

Worm Composter

While both of the other options should definitely only be used outdoors, worm bins can actually be kept inside. These composters allow you to keep worms living in the compost bin where they can eat the kitchen scraps you toss in and convert them into nutrient-rich compost.

It’s the fastest option available and the worms consume your kitchen scraps before they start to get smelly, so you remove concerns about odors entirely. They’re also extremely low maintenance. The worms do most of the work for you so you don’t have to worry about turning or stirring the compost.

Worm bins are often more expensive than your other options, but for those with limited yard space or who want a faster, easier option, they’re worth the higher cost.

Why You Should Buy a Worm Bin:

  • Often more expensive than other types of composters.
  • Low maintenance.
  • Fast.
  • Can be used indoors.
  • Takes up very little space.

Gardening with Compost

12 Factors to Finding the Best Composter

In addition to selecting the right type of composter, you have a number of different factors to consider in order to help you select the right model.

1. Size

One of the first things to think about is size. If you’ll be keeping a composter in your yard (which is necessary for any type of composter other than worm composters), you should have a spot in mind for it before you choose which composter to buy so you can make sure to buy one that will properly fit. If you’ll be going with a worm composter and plan to keep it indoors, the same thing goes: where in your house will you be keeping it and how much space can you afford to give over to it?

Generally speaking, bigger composters will cost more and be harder to move if the need ever comes to do so. But they’ll have a higher capacity so you’re able to create more compost. If you have a lot of plants or a particularly large garden, being able to create a higher quantity of compost will be important.

2. Speed

The decomposition that turns your old leaves and food scraps into fertilizer takes time. With some composters, it will take a lot more time than others.

If you want compost fast, then a worm composter is your fastest option. Tumbler composters are usually more affordable than worm composters and not as fast, but if you stay on top of turning them regularly will break down the compost much faster than stationary composters.

There are a few other factors that influence how fast the composting process is:

  • Color — A black composter will absorb heat more, which cooks the compost and speeds up the decomposition process.
  • Aeration — Compost needs exposure to a certain amount of air in order to break down. Stationary bins should therefore have some slits or openings that let air in, and you should plan on turning tumblers or stirring the compost in stationary bins to give more of the materials the chance to be exposed to air. But you have to be careful, as too much aeration can mean the compost doesn’t get hot enough to cook adequately – which is why most tumblers are fully enclosed.
  • Moisture — Compost should be a little bit moist, without being too wet. If your compost gets either too wet or too dry, the composting process won’t work as efficiently. You ideally want your compost to have a moisture level equivalent to a wrung out sponge. When it gets too dry, water it a bit. When it gets too wet, add some more dry materials to it.
  • The Carbon to Nitrogen Ratio — This is where composting can get a little complicated. If you want your compost sooner rather than later, you need to get the ratio of green materials (kitchen scraps, grass clippings, egg shells) and brown materials (sawdust, fall leaves, straw, twigs) right. Experts recommend a ratio of about 30 parts brown materials to one part green materials. If you get the ratio wrong, you should still end up with compost, it will just take longer.

The composter you buy can make a difference in how fast the composting process goes, but you can also do a little bit to speed up the process with whatever type you get, if you so desire.

Compost Soil

3. Price

There’s a pretty wide range in the cost of composters. People that prefer to take the DIY route can throw something together pretty cheaply or even just create a pile for composting (although you risk attracting animals and having to deal with a nasty smell if you go that route). But if you opt to purchase a composter, you’re looking at anywhere from $50 for a low-end stationary compost bin to about $300 for a high-end worm composter.

Most composters of all types fall somewhere in the $80-$150 range though. If you’re able to spend somewhere within that range, you’ll have plenty of options to choose from.

When considering how much to spend, keep in mind that composting can save you money on fertilizer and reduce the amount of waste you produce each week. Your upfront cost will help you spend less over time.

4. Ease of Use

There are a few main factors that affect ease of use. One is how often you have to mix or turn it, and how much work is involved in doing so. Stationary compost bins can be hard to stir, whereas tumblers usually have a lever you can turn to mix the compost fairly easily. Of course, worm composters are the easiest of all since you never have to do anything to mix the compost.

Another factor to consider is getting the mix of nitrogen and carbon just right. This primarily matters if you’re hoping to speed up the process, but can get a little complicated to keep up with and get enough of the right materials at the right time. A big appeal of worm composters in comparison to the other types is that you simply don’t have to worry about any of this stuff at all.

And finally, you have to consider how difficult a composter will be to empty at the point where you need to access finished compost. With stationary composters, this can be difficult as you have to figure out how to get to the finished compost on the bottom while leaving the unfinished compost on the top – that is, unless you keep two stationary bins so one can cook while the other has new items added to it. Even in that case though, you have to remove all the compost from the bin and transport it to where you’ll be using it, which can be tricky.

Tumbler composters are often off the ground, so you can spin the composter to where the opening is facing the ground and dump the finished compost into a wheelbarrow or other container to transport it. And roller composters let you roll the composter right up to where you’ll be using it, but you’ll still need to deal with getting the compost out and spreading it around.

This is another category where the clear winner is the worm composter. Worm composters are designed to have several levels and the worms eat their way up the food scraps. That means the finished compost ends up in the bottom layer, which can be easily removed so you can empty the compost where needed.

5.How Durable the Composter Is

The durability of the composter you choose will generally have more to do with the material it’s made of and the quality of the construction than the type of composter it is. That said, in looking over reviews of various types of composters from different brands, tumbler and worm composters tend to fare better in this category than stationary composters.

Your best option for determining how durable a composter is likely to be before buying is to peruse the user reviews. People often take time to mention it if a composter they buy starts to show problems within the first few months or first couple of years, and some people will even come back years later to praise a brand or particular composter for lasting a long time.


6. How the Composter is Ventilated

As previously discussed, one of the key components in the composting process is making sure that the compost is exposed to just enough air (but not too much). For that reason, most stationary and rolling composters need to have some kind of slits or holes to let a little bit of air in. Tumbler composters don’t always include slits or holes, since the spinning process ensures the different parts of the compost get more access to air.
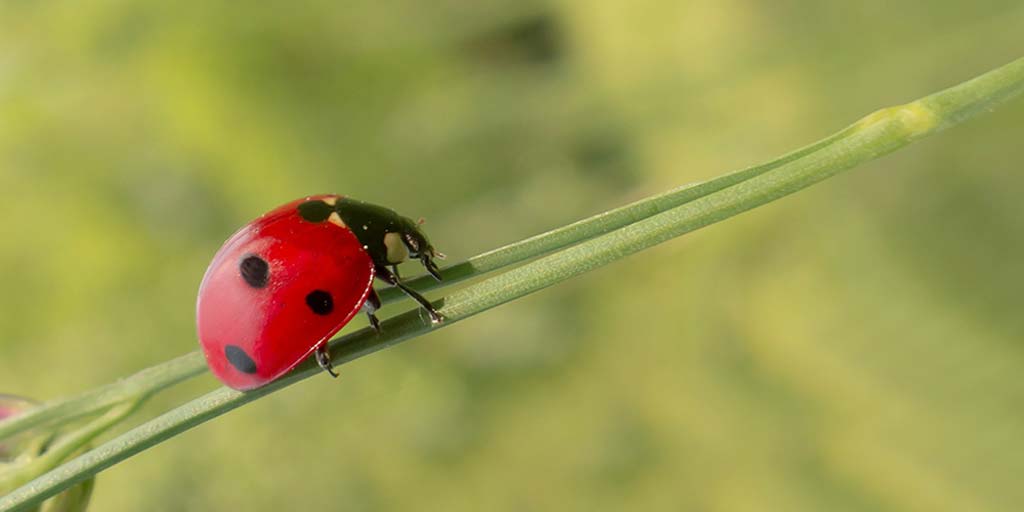
7. Pests

While most garden bugs that may access your compost are beneficial, larger animals like raccoons, opossums, and rodents are not. Compost piles and some stationary bins are at risk of attracting critters that make a mess of your compost in order to take advantage of the kitchen scraps. Compost tumblers and worm composters are generally more protected from critters and reduce your risk of having to deal with cleanup (and a slowed down process) after a raccoon scatters your compost about the yard.

8. Will the Composter Emit Unpleasant Odors & Smells

The composting process can be smelly. Worm composters manage to eliminate this issue entirely, since the worms consume the food scraps before they get the chance to rot. But for other types of composters, that rotting is simply part of the process.

A composter that’s made of a thicker material can reduce the amount of smell you have to deal with. You’ll probably notice the smell when you open your bin or tumbler to add more, but will be spared from it the rest of the time. Nonetheless, most people will want to keep their composter some distance from the house to be safe.

9. What the Composter is Made From

Most composters are made of plastic which is good for absorbing heat, which speeds up the composting process – especially if the plastic’s in a dark color. A few composters are made of wood, which means they’ll look nicer in your yard, but you have to be more concerned about rot, they won’t heat up as fast, and they don’t usually have as snug of a lid for keeping animals out. If you want a bin that looks nicer in your yard though, they pretty handily beat plastic composters in that category.

10. Is it a Multi-Bin Composter?

Many tumbler composters include multiple compartments so you can fill up one side and let it cook, while you start to fill the other side. That way the composting process isn’t slowed by the continual addition of new materials. Many people who compost will want either a composter with two compartments, or to get two composters for this reason.

With stationary bins, you can try to access the finished compost on the bottom while the new materials on top continue to cook, but that’s a tricky (and messy) process. Two compartments or bins side by side are much simpler.

Worm composters are the one exception. Their design makes it pretty easy to remove the bottom section where the compost is finished without having to worry about the food scraps above that aren’t done yet.

11. The Weight of the Composter

For stationary composters, weight doesn’t have to be much of a consideration, at least not once you have them installed and put into place. For anything you expect to have to move or turn, the heavier it gets, the harder that will be.

Consider the weight before you start filling it, and imagine what it’s going to be like once it’s full. If you’ll have a hard time turning the composter or moving it as needed, then you might need to consider a lighter alternative or plan on not filling it all the way.

12. How Easy it is to Assemble

While this is only an issue once, it can make a big difference in how satisfied with your composter you are soon after purchase. This is another factor where your best bet is to check the reviews of a composter before buying to see if it’s likely to be difficult to put together.

If you’ll be dealing with the assembly alone or know you generally aren’t great at putting things together, then you can steer clear of composters with a reputation for being difficult (or know in advance to ask a friend over to help).


Composting Accessories & Extras

  • Compost Bucket — Most people won’t want to run outside every time they do food prep to throw items in the composter. A compost bucket can sit on your kitchen counter and be added to until it’s full and you head out to dump it.
  • Compost Starter — Compost starter can help speed up the process of getting your compost cooking so it’s done sooner.

Conclusion

Compost is a fairly easy way to reduce your waste and make your plants happier. Figure out which composter makes the most sense for your home and make a move toward becoming greener in general, and more of a green thumb as well.


Natural Pest Control

Natural Pest Control: How to Control Bugs in Your Home

Commercial bug sprays get the job done fast, but our homes and environment pay a hefty price for overuse of insecticides, which can poison beneficial insects and wildlife. When you use sprays and foggers indoors, you also run the risk of making pets and children sick.

Fortunately there are lots of easy to use natural alternatives that actually work to repel and kill insects. Next time you get bugged and bitten by mosquitoes or when the ants on your counters are driving you crazy, you might check out some of the following “natural pest control” options.

How to Repel Insects With Essential Oils

Quite a few plants have insect-repellent qualities. There are a number of essential oils that will do the job, and a few living and dried herbs also can keep bugs away.

Try mixing a few drops of any of the following essential oils in a spray bottle filled with water, or add to a damp cloth, and wipe-down your counters and sinks. You can also place cotton balls with a couple drops of essential oils inside your pantries and cupboards, or even add a couple of drops to a bandana and tie loosely on your dog. However, never apply essential oils a pets’ skin or fur without consulting your veterinarian. Not only will bugs head the opposite direction, the oils will make your home smell fragrant and clean.

  • Clove
  • Lavender
  • Any citrus oil, including lemon, lime, and sweet orange
  • Mint, including peppermint and spearmint
  • Rosemary
  • Thyme

You might also look for products containing cedar oil or shavings. These sprays, shampoos, and pet bedding are great to both repel and kill fleas and other biting insects. They are safe to use on both cats and dogs, and they smell great too!

For mosquitoes and flies, you can’t go wrong with lemon eucalyptus, rosemary, tea tree, and neem essential oils. You can add a few drops to hand lotion to make your own insect repellent, but do not use eucalyptus or tea tree oil on pets — tea tree oil is particularly toxic to cats.

Some plants will also repel mosquitoes even as they grow in your garden. Consider planting lemongrass, catnip, rosemary, lemon balm, citronella, scented geraniums, mints, and marigolds around your patio or deck. These grow well in containers and hanging baskets. These plants will add color — and possibly culinary bonuses — to your yard, as well as keep the bugs at bay.

Tuck sprigs of rosemary and bay laurel leaves in your cabinets or under your kitchen and bathroom sinks to repel a variety of insects from food, paper products, and clothing.


How to do Pest Control at Home By Yourself

Below, we have highlighted some of the most common pest control problems for homeowners. If you have further questions of concerns, please start a conversation in the comments down below.

1. Fleas

For anyone who has pets, you know summertime is flea season.

If you know fleas are going to be an issue, a natural pest control method is to spray your yard and outdoor runs or kennels with beneficial nematodes in the early spring. These tiny parasites are safe for the environment and will control the outdoor flea population, significantly reducing the need for pesticides or flea medications on your pets. Throughout the spring and summer, also be sure to keep your lawns mowed and trim back all weeds, as this will help keep flea numbers down (and also help control mosquitoes and other biting insects).

How to Kill Fleas on Your Pets

For treating fleas on your pets, there are a few easy things you can try. Giving dogs a bath with non-toxic flea shampoos can substantially reduce the flea population in your home.

Many people swear by Dawn dishwashing detergent as the best flea shampoo out there. When you give your dogs a bath, suds them up and leave the shampoo on for at least 3-5 minutes. Rather than subject your cat to a bath, try using a flea comb to safely remove the majority of fleas. You can drop them into a cup of soapy water or diatomaceous earth to kill the fleas after you pull them from your pet’s fur.

How to Treat Flea Infestations Inside Your Home

If you have a flea infestation inside your home, you should vacuum regularly, wash all bedding, and use a steam cleaner to sanitize all the areas where your pet spends the majority of their time. These cleaning methods will significantly reduce the number of active fleas inside your home, as well as kill their eggs.

You can also sprinkle pet bedding with diatomaceous earth. Diatomaceous earth is a fine white powder that is made from fossilized aquatic creatures, and contains significant quantities of silica. While entirely nontoxic to pets and humans, it kills fleas and other insects by getting into the areas of their exoskeleton and dehydrates them. Once you apply the powder, leave it for a few hours to kill fleas and then vacuum it up again.


2. Mosquitoes

Mosquitoes aren’t just an itchy nuisance. Health officials warn of Zika and West Nile viruses spreading in the US. When it comes to cats and dogs, there’s also the added concern of heart-worm, which is transmitted by mosquitoes. With these illnesses becoming more common in the US, it’s imperative that you protect yourself and your family from mosquitoes and their nasty bites.

How to Reduce Mosquitos Outside Your Home

There are some easy things you can do outdoors to reduce mosquito populations. Be sure to regularly drain any standing water on your property. Water often collects in potted plants, wheelbarrows, tires, children’s toys, playscapes, and pet bowls. If you a pond, fountain, or birdbath in your yard, you should consider using mosquito dunks or granules that contain a non-toxic bacteria that prevents mosquitoes from breeding.

Keeping your lawn mowed will help with mosquito issues. Even better, consider inviting mosquito-eating bats to your property with low-profile bat houses that can be easily installed on your house or fencing.

Natural Methods to Repel Mosquitos

A safe alternative to bug sprays when spending time outdoors is citronella oil lamps and candles. Mosquitoes don’t like the smell of citronella, and just adding a few of these can help make your entire patio safe for your next cookout or pool party. And when you absolutely need an all-natural repellent, look for products that utilize lemon eucalyptus oil. Even the CDC has recommended lemon eucalyptus oil as an effective alternative to DEET for repelling mosquitoes.


3. Bees and Wasps

While mosquitoes get most of the attention, there are a number of other flying insects that you don’t want interrupting your next picnic. Stinging insects like bees and wasps may be nuisances, but they are actually beneficial insects for the environment.

Because of the benefit these bugs provide, it’s important to leave them alone whenever possible. Many people want to kill wasps who build nests in their doorways, under eaves, or swarm on the porch. Instead of reaching for bug spray, consider making your house less appealing to them so they find another place to call home.

You can make a simple homemade repellent spray that will discourage rather than kill these helpful insects. Fill a spray bottle with water, a couple squirts of Dawn dish soap, a few drops of peppermint oil, and a pinch of powdered cinnamon and cayenne. Spray this mixture around your entryways and anywhere else these insects like to buzz around.

If you have an active and unwanted bee hive or wasp nest on your property, rather than destroy it, call out a professional beekeeper or natural pest control company that can attempt to relocate the nests rather than kill the insects.


4. Ants, Grain Moths, and Weevils

Several species of ants find their way into our homes in search of food or water. While it can be difficult to get rid of them even when using commercial products like ant bait, the good news is that there are much cheaper and easier options.

How to Make a DIY Cleanser for Ants

Because ants use their sense of smell to find food, you can disrupt their plans by cleaning your countertops and walls with a 1:8 mixture of vinegar and water. For even better control, consider adding several drops of peppermint or orange oil to your cleanser. This all-natural cleanser is a great everyday cleaner and will make your ant problems a thing of the past.

If you get ants or other bugs in your pantry, especially in your dry goods, try sprinkling some cinnamon, cayenne pepper, or diatomaceous earth — or a combination of the three — in the corners and along your floorboards. You can also put bay leaves in bins with flour, pasta, grains, and cereals. All of these all-natural methods will help control and prevent pests.

It’s also a great idea to invest in tightly-sealing plastic containers for items you keep in your pantry, such as flour, granola, and cereal. Not only will this help your food stay fresh for longer, but it will also prevent tiny insects from getting inside your food.

If you still have issues with weevils in your flour, we would strongly recommend storing it in your refrigerator or freezer.


5. Moths

Rather than using mothballs, — which are toxic — try making your own repellents by adding dried lemon peels or cedar chips into a stocking, and then tie it to a rack inside your closet. You can even make small individual sachets out of cheesecloth to hang around the neck of clothes hangers.

This is one of the best natural pest control methods for preventing moths from destroying your clothes.


6. Other Creepy Crawlers

To discourage centipedes, rolly-polly bugs, and silverfish, homeowners should try placing cotton balls with peppermint or eucalyptus oil around baseboards, behind bookshelves, and in damp locations. You can also add bay leaves or sachets with cedar shavings to boxes of papers or books.

When it comes to spiders, scorpions, and other crawling pests, on of the easiest non-toxic pest control techniques is to simply seal off access to your home. Caulk around window sills and doorways, and fill in holes around utility lines or plumbing.

If you’ve tried all of this and still can’t determine how/where insects are gaining access, then you should contact a local pest control company to provide a thorough inspection of your property and recommend improvements.


Final Thoughts on Natural Pest Control

Not only are these natural pest control options safer for the environment and your family, most are also less expensive and easier to apply than commercial alternatives. For example, although a bottle of essential oil may seem a little pricey at first, when you discover that one bottle will last many years, you’ll realize what a smart investment it can be.

Next time bugs get on your nerves, give one of these alternatives a try, and you might not ever want to purchase bug sprays again.


Bamboo

How to Remove Invasive Bamboo from Your Yard

Bamboo is a popular ornamental plant in many areas with warm climates, but if yours has gotten out of control, then it can be a massive headache. Removing invasive bamboo isn’t always an easy process, but with a little bit of planning, it is quite doable. Here are a few tips for removing invasive bamboo in your yard.

What is Bamboo?

Native to tropical forests, bamboo is a type of grass that has a thick, woody stem, with stalks that can vary from a few millimeters around to nearly four inches in diameter. It can also be a very hardy plant, in some cases surviving freezing temperatures. Even though the stalks are hollow, the tensile strength of mature bamboo can be as strong as steel.
com
Bamboo is world-famous for being the fastest known growing plant. Most species can grow several feet in a month, with some kinds growing as much as three feet per day! Additionally, bamboo can spread outward as well as upward — runner bamboo can spread nearly 15 horizontal feet per season.

This plant spreads by sending out new shoots, rather than by spreading seeds. The root system grows outwards from the base, occasionally sprouting new stalks. This makes it very difficult to eradicate unless the entire root system can be completely removed, and since a single growth can extend for acres, this might be a difficult task.

How to Prevent Invasive Bamboo Growth

If you’ve lost control of the invasive bamboo in your yard, have a neighbor whose bamboo patch is spreading, or even live next to a forested area, then you know how tough it can be to deal with. Bamboo is an invasive species in many areas, and even when it’s native to a location, it’s still hard to keep it out of your yard. Fortunately, there are a few steps you can take to prevent this weed from growing in your yard.

Prevention, of course, is the best treatment. If you notice bamboo encroaching in your yard or want to control a plant of your own, start by putting up a barrier. It should be made of concrete or metal for maximum effectiveness; wood often works for a few years but will eventually decompose in the soil. The barrier should extend at least two feet below the ground and six inches above it. Be vigilant and cut back any shoots that try to sneak over it.

If it’s too late and you already have a invasive bamboo infestation, then not all is lost. There are steps that you can take to eliminate it — although these steps may not be the obvious ones.


3 Tips to Eliminating Visible Bamboo Growth

So what does work? If your invasive bamboo has grown particularly tall, then your first step should be to cut it back to a manageable height. This can be done with a machete (for large shoots) or pruning shears (for smaller ones). If you have extremely small or tender bamboo, then you might be able to use your lawn mower to trim it. Cut as close to the ground as possible to make the next few steps easier.

There are three basic steps you should take to eliminate invasive bamboo from your yard. You should:

  1. Cut Shoots

    Make sure that when you’re eliminating bamboo, don’t leave the bamboo shoots, root systems, or other waste near your yard where the bamboo can spread again. If your city has a green waste program, check to see if they accept bamboo. If not, the plants can be composted (without the roots), burned, or even used for arts and crafts. Just don’t let them back into your yard.

  2. Dig Deep

    The next step is to eliminate as much of the root system as possible. Dig up the bamboo clumps, eliminating as many of the shoots and tendrils as you can find. You may have to go as deep as two or three feet to make sure that you’ve gotten it all.

  3. Apply Herbicide

    After a few days, the bamboo will probably start to crop up again, although it will most likely be thinner than before. When you first encounter these small shoots, kill them right away. Use maximum strength herbicide to poison the plant. You can either spray it directly on the leaves, or (for the best effect) cut the plant back and dab the herbicide directly onto the freshly cut stem. After about a week or so, the plant will begin to appear brown; this means that it is dead or dying. Once this happens, dig it up again.

    This process can be helped along by placing a plastic barrier over the plant and anchoring it with rocks or landscape pins. Not only will this block sunlight from getting to the plant, it will help prevent rainwater from diluting the herbicide and intensify the effects.

Organic Alternative to Herbicides

If you dislike using chemicals like herbicide in your yard, one organic solution is to pour boiling water over the plant. The extreme heat will kill the bamboo without harming your soil. However, this many not be as effective for larger infestations.


Treatments to Avoid

What doesn’t work when you’re trying to remove invasive bamboo? Simply cutting it back is rarely effective, because this doesn’t deal with the root system. The plant will just send up new shoots in a matter of days or weeks. Using some substances such as rock salt or bleach might help, but they can also damage your soil and make it difficult to grow anything after the bamboo is removed. Trying to burn the bamboo can actually make the problem worse, since it not only leaves the root system intact but enriches the soil with extra nutrients. And purchasing a panda to eat the bamboo isn’t really a feasible option.

What you should do if nothing else is working

If none of these solutions are working, then there is one more drastic option that you can take. You may need to not only eliminate the bamboo plant, but also the topsoil in your yard. This step combined with concrete barriers can eliminate bamboo once and for all. However, since it’s an expensive and difficult process, you might be better off trying the other options mentioned here first.

Conclusion: Don’t Give Up!

A hardy bamboo plant can live for decades, so eliminating bamboo is not a one-time process. Two or three years of dedicated treatment may be necessary to make your yard completely bamboo free. Don’t give up hope, though, and keep fighting that plant — eventually you’ll be able to eliminate it and enjoy a bamboo free yard.

Bagless Vacuum Cleaner

5 Benefits of Bagless Vacuum Cleaners

How a Bagless Vacuum Cleaner Will Benefit You

The idea of centrifugal separation vacuuming has been around since at least the 20’s, but the most recent trend toward this technology, and the bagless vacuum, was the making of James Dyson who introduced his first unit in 1979. They gained in popularity especially in the 1990’s and soon other big name vacuum manufacturers, such as Hoover and Shark, adopted examples of the technology.

What makes a bagless vacuum a good decision?

Most bagless vacuums have much the same options their bagged counterparts including; motorized brushes, all the extensions and add-ons and running lights, but they have some standout characteristics. Below, we have taken a closer look at five benefits that bagless vacuum cleaners have over their bagged counterparts.

1. Less Loss of Suction

You know those times your vacuuming along, really putting a dent in the house cleaning, and you feel that slow dread rising as you realize dirt particles aren’t staying in the vacuum. A kernel of popcorn is sucked away as you pass over it only to be spat back out a moment later. You pull the hose, placing your hand against the end and sure enough, the satisfying slurp and high whine of good suction is not to be found.

Vacuum Cleaner Bag

Does the bag need to be changed? You expose the vacuums guts and tentatively poke at its stomach. It seems only half full. But something has stolen suction, so you pull the bag off the fitting, see nothing, replace it on the post, close it up and start the vacuum again. And suction is back, but still not quite what it is with a brand new bag.

Okay, it doesn’t always happen like this, but I’m sure this has happened to you at least once. Overall bagged vacuum cleaners preform admirably, but we all know that they have a tendency to slowly lose suction as the bag fills.

Bagless vacuums lose far less suction as the dust collection cup fills and often even continue to have good suction when the cup is almost completely full. But there is also less chance of the dust cup becoming completely full; it’s transparent and you know exactly when it needs emptying.


2. Bagless Vacuums Are Environmentally-Friendly

Bagless vacuums are better for the environment. Every bag takes resources to make, takes resources to transport to the store where you will purchase it. Every bag you use and throw away goes into a landfill. It may seem a small thing but when you’re trying to live greener the small things add up.

With a bagless vacuum you are not taking part in the using of those resources and the only thing you are throwing away is the dust and other debris sucked up off the floor. You are not adding to it by throwing away the container too.

3. Satisfaction of Seeing Your Work

There is something very satisfying about being able to look through the transparent plastic canister and see all the dirt and grime you’ve gotten off the floor. Like a salesman working hard to sell the vacuum, you may find yourself running to someone else in the house just to show how much you’ve picked up, how messy the house really was, and pointing out, yes it actually really did need to be cleaned.

Bagless vacuums also make it tons easier to find that jack of Jimmy’s or little Mary’s doll barrette, sucked away in a moment of poor floor scrutiny. There’s no having to cut into a bag to get at lost items, just dump the canister carefully in a trashcan lid and easily fish out the once missing treasures.

4. Easy To Empty

Bagless canisters are also very easy to empty. Usually only requiring a release from the vacuum body and a snap of the bottom or top canister lid. You want to do this over an outside trashcan and as close to the bottom as possible, because all the dust can easily turn into a big cloud if some care is not taken.

This also brings up the point of allergies. Bad allergies may be a good reason to stick with bagged vacuums. But many bagless vacuums now have HEPA filtration built right in and if done carefully and with a little thought these canisters can be emptied with minimal allergic reactions; and, going back to the green point, a single reusable allergy face mask worn when emptying the canister is greener then throwing bag after bag away.

After emptying the canister, you also have a unique opportunity to clean the inside of the bin and perhaps wash/replace the filters. Taking the extra couple of minutes to clean your machine will go along way in keeping it in top working condition.


5. No Fussing with Bags

I know I’ve found myself in the situation where I’m in a cleaning mood. I start vacuuming and realize the bag needs to be changed, so I start searching… where did I put those, in closets and drawers until finally I conclude that I have no more bags, so, an extra trip to the store to get bags. It’s a hassle, at least for those lacking in their organization. With a bagless vacuum cleaner this is just not a worry. When you’re ready to clean, the vacuum is ready to clean.

There is some maintenance with bagless vacuums. The filters need to be cleaned periodically to maintain best performance. Most are easily washable. They will also need to be replaced once-in-awhile, but far less often than you would be buying bags (again the greener part).

There’s also a reason most handheld, stick, and robot vacuum cleaners are bagless, this type of technology is more easily molded into these less conventional vacuum configurations. Not to mention more favorable by consumers.

Conclusion

Regardless of whether purchasing a bagged or bagless vacuum cleaner remember to do some research on the pros and cons of each type. It is important to purchase a well-designed and easy-to-use vacuum. After all, if you don’t like to use the vacuum it makes cleaning that much more of a chore. Bagless vacuums are not inherently better than vacuums that require bags, but they do offer a greener, more hassle-free cleaning experience for those that would like the option.


How to Save Energy in Your Kitchen

5 Tips Every Homeowner Should Know

Whether it’s cooking, baking, or washing dishes, the kitchen is one of the main areas within your home where you will be consuming energy. There’s no way around this, but you can, however, reduce the amount of energy used by being a smart and frugal consumer.

Here in this article, we will discuss some easy ways that homeowners can learn how to cut their energy use in the kitchen while still preparing delicious meals and keeping a tidy — and functional — cooking space. Here’s how.

1. Buy Energy Efficient Appliances

If you’re in the market for new kitchen appliances, look for the Energy Star label before you buy. This is a designation given only to items that have been deemed highly efficient by the EPA (Environmental Protection Agency) and the Department of Energy. If you have perfectly good appliances that are not Energy Star, don’t just trade them in for new models.

2. Make Your Refrigerator More Efficient

Your fridge can cost you approximately $90 a year to operate, unless you outsmart it with a few frugal maneuvers, such as:

  • Change the Thermostat Setting:

    If you set your refrigerator’s thermostat to too cold of a setting, you are spending more money than you need to. Adjust your fridge’s temperature to a range between 37° & 40° F. Your freezer should be set between 0-5°F. Buy two appliance thermometers to monitor the temperatures if your appliance doesn’t have them already built-in. By raising your fridge temperature, you can save around $20 annually.

  • Make Your Own Ice:

    A built-in ice maker may be convenient, but it’s costing you extra cash. By relying on this feature, you could be spending 14 to 20 percent more than you need to be. Turning off this auto-feature is fairly simple, and by doing so, you can keep more money in your bank account.

  • Clean Off Your Coils:

    When your refrigerator’s coils get dusty, the cool-air flow is restricted, which makes your appliance struggle to do its job. You can remove this dust with a vacuum cleaner attachment, and save yourself nearly five dollars a year after performing the task.

  • Limit Yourself to One Fridge:

    Do you have an extra fridge in the basement, garage, or game room for beer, holiday turkeys, and party food? If so, you are shelling out hard-earned cash for something you only use seasonally. Find a way to make one refrigerator work for your household and save yourself $90 a year.

3. Spend Less on Cooking by Altering Your Oven/Stove Habits

The gas or electric oven and stovetop in your kitchen can cost you less if you change a few of your cooking habits. When you pay attention to the way you use your range, you can shave dollars off your utility bills. Follow these tips:

  • Stop preheating your oven: It’s not necessary to preheat your oven for every single recipe you prepare. There are a few items, such as fragile cakes like angel food, that may require preheating, but most dishes don’t necessarily need this step performed. If you want to be extra sure that you can skip this step with your meal preparation, it might be a good idea to do a bit of research beforehand, but for the most part it isn’t a big deal. If you skip preheating, you can save a couple dollars each month, which adds up to big dollars over time.
  • Use the right size burner: When you have a large pot or pan, use a larger burner. If you’re cooking with a small saucepan, use a smaller burner. Putting small pans on oversize burners is a waste of gas or electricity. It’s also not great for the pan. This practice will save you money on your energy bills, plus protect your pans for years to come.
  • Turn the power off early: You don’t have to leave your oven or burner on till your food is fully cooked, because plenty of heat will still be present when you turn the switch to “off”. Take advantage of the lingering heat and save cash in energy costs.
  • Clean your burners: The shinier your burner pans are, the more they will reflect and magnify the heat.

4. Save While Operating Your Dishwasher

If you have a dishwasher, you can save money while using it by doing the following things:

  • Use it: Most people think that hand washing dishes is cheaper than running the dishwasher, but this is actually not true. It is cheaper to run a full dishwasher than to hand wash every dish along the way. When you hand wash dishes, more water is lost down the drain than is used to wash and rinse the dishes.
  • Load it up: Be sure to wait until your dishwasher is full of plates, cups, bowls, and utensils before running it. It takes the same amount of water, energy, and soap to run a half-full load and a completely full load, so be sure to fill it all the way up before washing the load.
  • Skip heated-dry feature: Your dishes will dry without the extra heat, so skip this feature and save money. If your machine has an energy-efficient setting, be sure to utilize it.

5. Cut Costs During Cooking

You can cut dollars from your budget if you practice a few frugal cooking practices, such as:

  • Use your microwave as much as possible, because it’s a fairly economical machine and won’t heat up the rest of your home.
  • When using the oven, reduce the amount of heat you need to cook foods by baking your meals in glass or ceramic dishes.
  • Stop opening the oven door to check your meal, because you’re wasting heat.
  • Cover pots and pans on top of your stove for faster cooking times.
  • Boil foods in smaller amounts of water, to reduce energy needed to bring liquids to a boil.
  • Use a pressure cooker, because foods cook quickly and efficiently.
  • Double or triple recipes so you have leftovers.
  • Cut foods into smaller pieces, because they will require less energy to be cooked.
  • Use your barbecue on your patio to avoid using your oven and to keep your house cooler during the summer months.
  • Instead of using a blender, mixer, food processor, or electric coffee grinder, use your muscles to chop, blend, beat, or grind.

Your kitchen is the heart of your home. It’s where your family congregates, and where food and beverages are prepared to feed appetites and provide comfort. You can keep this important room warm and welcoming, but still trim dollars off your energy bills. When you know how to cut energy use in your kitchen and make “green” practices the norm, everyone benefits.