Portable Air Conditioner

How to Clean & Maintain Your Portable Air Conditioner

During those hot summer months, your portable air conditioner can be the reprieve you need to stay cool. There’s nothing quite like the feel of cool freon on your skin, especially as the mercury starts to soar.

It not only helps cool your living areas, but a portable air conditioner can help save you money on your monthly energy bills. But, like most appliances in your home, a portable AC unit can only do this if you take proper care of the device. If you fall behind on performing basic maintenance, fail to install it properly, or simply get lazy about cleaning the device, your portable air conditioner will struggle to run at its full capacity.

Below, we’ll take a closer look at some of the basic maintenance tips you can follow to keep your portable air conditioner in its best shape (and helping you stay cool for years to come).


Know Where to Install (And Not to Install)

One of the biggest advantages of using a portable air conditioner in your home is that it’s easy to move from room to room. However, where you install it within the room will play a significant factor in how well the air conditioner operates and cools the space.


Tips to Installing Your Portable Air Conditioner:

Whether you’re moving it from room to room, or just installing the AC unit for the first time. Here’s a few things you should consider as you install your portable air conditioner in your home.

1. Avoid Installing in Dusty Areas:

You should never install your portable AC unit in an area that is dirty or dusty. Small particles may start to clog either of the two motors in the appliance, which will eventually lead to further electrical or mechanical problems.

2. Avoid Placing Near Pet Bed:

Much like the dirt and dust, the fur your pet sheds may start to accumulate in the device. Furthermore, if you don’t have a good filter in your portable air conditioner, pet dander may get sucked into the device and possibly compromise your indoor air quality.

3. Do Not Install Directly Against the Wall:

This is very important to keep in mind. In order for your portable air conditioner to work both efficiently and properly, it needs to be at least 12-16 inches away from the wall. This distance may vary from unit to unit, so make sure you read the owner’s manual that comes with the device.

4. Make Sure It Can Drain Properly:

If you’re using your portable air conditioner in a humid room, then the device will pull more condensation from the air, and need to be drained regularly. Most AC units will come with a drain tube that can help remove any liquid, but it would be wise to make sure this is working properly to avoid any mishaps.

5. Use the Right Power Source:

If your power source is not operating on a circuit that can accommodate your portable air conditioner, you run the risk of a shortage or busted fuse. Make sure the circuit can supply 120 VAC. This gives your A/C unit enough power to start up the compressor and fan motors.

You may also consider spending a very small amount of money on an electrical surge protector. This will help you in the long run should you experience a sudden and unexpected power surge.


Keep the Exhaust Hose Short & Straight

A small tip involving the exhaust can go a long way. When you install the hose, make sure it is as short and straight as it can be. This will help prevent excess moisture from collecting inside the hose, as well as mitigate the possibility of moisture rolling back into the air conditioning unit. Water inside your AC unit can cause damage.


Change & Clean the Filters Frequently

As with any room air conditioner or HVAC system, your portable air conditioning unit has at least one filter that should be either regularly cleaned or replaced.

Portable Air Conditioner
(Source)

Portable Air Conditioner Unit

Depending on what type of AC unit you have, you may find a pre-filter located on the back of the unit. You should clean this at least once a month with a soft cloth. Do not use soap or any detergents, as those can leave a film and actually increase the risk of a clog.

The reason you need to keep the filters fresh is because as dirt or dust accumulates, it can mix with the moisture inside the unit to form a layer on the coils. This layer will keep the coil from transferring heat from the room to the great outdoors. In essence, it means your unit will overheat and eventually start to malfunction.

There may also be a second filter on your portable air conditioner known as a carbon filter, which serves to neutralize odors. This filter should be changed at least twice a year — if not more frequently — depending on the manufacturer’s recommendation.


How to Store Your Portable Air Conditioner

Unless you plan on running your AC unit year-round, you will need to properly put it to bed during the months you will not be using it. Before you store it away until next season, it is recommended that for homeowners to do the following:

  • Drain the AC unit of any moisture that has collected inside.
  • Put the unit in “fan only” mode on high speed for a few hours to ensure everything inside is completely dry.
  • Use plastic sheeting to cover the unit, which will protect it from dust and other debris.
  • Store your portable air conditioner in a cool, dry place.

Where you choose to store your portable air conditioner is important. If possible, choose an area in your home that is temperature controlled. The last thing you want is for the device to be sitting in extreme temperatures for an extended period of time. If exposed to the elements for too long, you may find that your portable AC unit won’t work properly when you pull it out of storage.


Final Thoughts

By following just a few maintenance tips, you can ensure your portable air conditioner will serve you well for years to come. It’s simple, really. Just make sure you keep it in a place free of dust and debris that could clog up working parts. Clean or change the filters regularly. And, if you’re done using it for the season, be sure to store it correctly so it will be ready to go when the mercury rises again.


Bamboo

How to Remove Invasive Bamboo from Your Yard

Bamboo is a popular ornamental plant in many areas with warm climates, but if yours has gotten out of control, then it can be a massive headache. Removing invasive bamboo isn’t always an easy process, but with a little bit of planning, it is quite doable. Here are a few tips for removing invasive bamboo in your yard.

What is Bamboo?

Native to tropical forests, bamboo is a type of grass that has a thick, woody stem, with stalks that can vary from a few millimeters around to nearly four inches in diameter. It can also be a very hardy plant, in some cases surviving freezing temperatures. Even though the stalks are hollow, the tensile strength of mature bamboo can be as strong as steel.
com
Bamboo is world-famous for being the fastest known growing plant. Most species can grow several feet in a month, with some kinds growing as much as three feet per day! Additionally, bamboo can spread outward as well as upward — runner bamboo can spread nearly 15 horizontal feet per season.

This plant spreads by sending out new shoots, rather than by spreading seeds. The root system grows outwards from the base, occasionally sprouting new stalks. This makes it very difficult to eradicate unless the entire root system can be completely removed, and since a single growth can extend for acres, this might be a difficult task.

How to Prevent Invasive Bamboo Growth

If you’ve lost control of the invasive bamboo in your yard, have a neighbor whose bamboo patch is spreading, or even live next to a forested area, then you know how tough it can be to deal with. Bamboo is an invasive species in many areas, and even when it’s native to a location, it’s still hard to keep it out of your yard. Fortunately, there are a few steps you can take to prevent this weed from growing in your yard.

Prevention, of course, is the best treatment. If you notice bamboo encroaching in your yard or want to control a plant of your own, start by putting up a barrier. It should be made of concrete or metal for maximum effectiveness; wood often works for a few years but will eventually decompose in the soil. The barrier should extend at least two feet below the ground and six inches above it. Be vigilant and cut back any shoots that try to sneak over it.

If it’s too late and you already have a invasive bamboo infestation, then not all is lost. There are steps that you can take to eliminate it — although these steps may not be the obvious ones.


3 Tips to Eliminating Visible Bamboo Growth

So what does work? If your invasive bamboo has grown particularly tall, then your first step should be to cut it back to a manageable height. This can be done with a machete (for large shoots) or pruning shears (for smaller ones). If you have extremely small or tender bamboo, then you might be able to use your lawn mower to trim it. Cut as close to the ground as possible to make the next few steps easier.

There are three basic steps you should take to eliminate invasive bamboo from your yard. You should:

  1. Cut Shoots

    Make sure that when you’re eliminating bamboo, don’t leave the bamboo shoots, root systems, or other waste near your yard where the bamboo can spread again. If your city has a green waste program, check to see if they accept bamboo. If not, the plants can be composted (without the roots), burned, or even used for arts and crafts. Just don’t let them back into your yard.

  2. Dig Deep

    The next step is to eliminate as much of the root system as possible. Dig up the bamboo clumps, eliminating as many of the shoots and tendrils as you can find. You may have to go as deep as two or three feet to make sure that you’ve gotten it all.

  3. Apply Herbicide

    After a few days, the bamboo will probably start to crop up again, although it will most likely be thinner than before. When you first encounter these small shoots, kill them right away. Use maximum strength herbicide to poison the plant. You can either spray it directly on the leaves, or (for the best effect) cut the plant back and dab the herbicide directly onto the freshly cut stem. After about a week or so, the plant will begin to appear brown; this means that it is dead or dying. Once this happens, dig it up again.

    This process can be helped along by placing a plastic barrier over the plant and anchoring it with rocks or landscape pins. Not only will this block sunlight from getting to the plant, it will help prevent rainwater from diluting the herbicide and intensify the effects.

Organic Alternative to Herbicides

If you dislike using chemicals like herbicide in your yard, one organic solution is to pour boiling water over the plant. The extreme heat will kill the bamboo without harming your soil. However, this many not be as effective for larger infestations.


Treatments to Avoid

What doesn’t work when you’re trying to remove invasive bamboo? Simply cutting it back is rarely effective, because this doesn’t deal with the root system. The plant will just send up new shoots in a matter of days or weeks. Using some substances such as rock salt or bleach might help, but they can also damage your soil and make it difficult to grow anything after the bamboo is removed. Trying to burn the bamboo can actually make the problem worse, since it not only leaves the root system intact but enriches the soil with extra nutrients. And purchasing a panda to eat the bamboo isn’t really a feasible option.

What you should do if nothing else is working

If none of these solutions are working, then there is one more drastic option that you can take. You may need to not only eliminate the bamboo plant, but also the topsoil in your yard. This step combined with concrete barriers can eliminate bamboo once and for all. However, since it’s an expensive and difficult process, you might be better off trying the other options mentioned here first.

Conclusion: Don’t Give Up!

A hardy bamboo plant can live for decades, so eliminating bamboo is not a one-time process. Two or three years of dedicated treatment may be necessary to make your yard completely bamboo free. Don’t give up hope, though, and keep fighting that plant — eventually you’ll be able to eliminate it and enjoy a bamboo free yard.

How to Hire an HVAC Technician

8 Tips Every Homeowner Should Know About Hiring an HVAC Technician

When your HVAC unit starts to show signs of needing maintenance, service, or complete replacement, it’s critical that every homeowner knows what to do and who to call (or not call).

During the peak of the summer months or in the thick of the winter months, your ability to find the right HVAC technician can make a huge difference on the timeline that is needed in order to fix whatever indoor air problems you may be experiencing in your home.

If you hire the right contractor to service your HVAC system, you will likely get things fixed or replaced without much of a hassle, and be back to feeling comfortable inside of your home in no time. On the other hand, if you hire the wrong contractor, it may make things much more difficult, causing you to have to wait a long time in the extreme heat or the freezing cold for service, pay too much for repairs, or be left without a working HVAC system.

Below, we will lay out eight tips that every homeowner should know to help you find and hire the best HVAC technician to service your unit.

1. Review Licensing Information

Any time you are considering hiring someone to do work within your home, you need to do a bit of research to ensure everything is on the up and up.

The first important thing to check is your HVAC technician’s license number. Your contractor should have no problem sharing his or her license number with you. If not, move on and find someone else.

Once you get the number, it is possible to look up the license and get an overview of past performance. If your contractor won’t provide a home improvement license to you, this is a red flag that you may need to choose someone else.


2. Ask for and Contact Customer References

What you should do next is to ask your contractor for customer references. A reputable company should be more than happy to provide a list of previous clients who can share their experiences with you.

When you start talking to your technician’s customers, make sure you ask about various things such as the contractor’s timeliness, work habits, ability to finish the job and whether or not the price was within the budget. Learning about another homeowner’s experience may help you make a decision about whether or not this contractor can help you in your situation. If your contractor dodges your questions about references, this is another red flag that they may not be the best technician for you.

3. Look at Experience Within the Industry

Ideally, the HVAC service person that you choose should have a lengthy list of experience. Whether or not you choose a team of contractors or a single proprietor, it’s important to go with someone who has a proven record of success with various types of HVAC systems and room air conditioners.

When you’re paying for time and labor, you want to have someone in your home that can quickly diagnose the problem and efficiently make adjustments or repairs. It may not be necessary to have someone who has been around for decades, but at the very least you want to choose a technician that has been in the industry for a few years.

4. Read Online Reviews

You can check the reputation of your HVAC technician by perusing popular websites dealing with businesses or home improvement. What you can do is conduct an Internet search using the company’s name as your search term.

While you should be on the look out for fallacious or untruthful reviews, most of the time online reviews can help guide you to finding and hiring the best HVAC technician. Just make sure that your read over each review in order to make a decision about choosing a contractor to service your HVAC problems.


5. Evaluate the Pricing

One of the most important things to homeowners when they schedule service to their major appliances is the price. What will come out of your pocket is always an important factor to keep in mind.

Either on the company website or through customer references, look at some of the pricing of the various services the business may offer. Companies that are on the lowest end of the region’s pricing may not be the best bet. The highest priced contractors may offer additional services, so be sure to ask.

Keep in mind, while going with the cheapest company isn’t always smart, you certainly don’t want to pay more than you have to. You get what you pay for.

6. Ask About Rebates & Energy Efficiency

When you’re having work done to your HVAC unit, or if you’re going with a brand new system, a reputable company should offer you additional tips and recommendations that can help you make sure your home is more energy efficient.

Part of any routine service for HVAC systems is a complete run through of the little improvements you can make around the house to support the proper maintenance and efficiency of your air conditioning or heating system. Contractors who take the time to show you how to make your home more energy efficient are typically ones you can trust.


7. Make Sure You Get an Estimate

Every reputable HVAC technician should provide a detailed and itemized price estimate of the work that needs to be done. If you don’t get a line-item or detailed information about how much the project or repairs may cost, then you should consider hiring a different HVAC technician.

It is strongly recommended that every homeowner get several estimates from different HVAC companies, as this will allow you to compare costs and make a data-driven decision. Ask about discounts your contractor may offer to help you keep things within your budget. Perhaps there are rebates available for you to take advantage of.

Some technicians may even offer financing opportunities that can help you purchase an entirely new system for your home. This can break down the cost into manageable monthly payments, making it much more affordable.

8. Get Everything in Writing

Once you have made a choice about which company you want to hire, it’s important to get a solid contract written out. Your contract should detail the entire scope of the project along with the detailed pricing.

Go line-by-line and read over everything that your technician presents to you. Make sure you ask any and all questions if you don’t understand something. An HVAC technician understands that most homeowners will have questions, and they expect you to ask. So, ask away before you sign anything.

Putting everything in writing can help you know exactly what to expect, and how much you’re going to pay before the job is completed. When everything has been finished, make sure you get additional information about your HVAC’s warranty and service requirements if you installed a new system.

Keep in mind that the warranty may vary between the manufacturer and the company that installed the devices. Get this in writing.

The Importance of Researching HVAC Technicians

Finding the right home improvement company or HVAC technician is something that can take some time, research, and effort.

If you skip this important step, you’re setting yourself up to getting a lower standard of service, paying much more than you need to or even becoming victim to an unscrupulous company. Being an informed and smart consumer can help you and your HVAC technician know exactly what to expect and provide a more positive working experience for all.

Steam Mops vs. Steam Vacuums: The Pros & Cons

What is a Steam Cleaner?
What Are the Benefits of Using Steam to Clean?
The Pros & Cons of Steam Mops
The Pros & Cons of Steam Vacuums
Which One is Best for You?

A decade ago, having a steam cleaning vacuum or a mop that was fancier than a stick with dreadlocks was pretty much a dream for your average homeowner. Over the last few years, however, an influx of technological advances and new features have created a wide variety of steam cleaning devices that have completely revolutionized the way we clean our homes.

We now not only have budget-friendly steam cleaners available to the average consumer, but we have choices between different types. For the purpose of this article, I’d like to focus on the differences between steam mops and steam vacuums. Weighing the pro’s and con’s of these two popular types of steam cleaners will give you the opportunity to make the best purchase for you and your family.

So, before you rush out and buy the first unit you come across, let’s take a closer look at the benefits, disadvantages and the differences between steam mops and steam vacuums. But first, let’s take a step back and review what exactly a steam cleaner is, and why every homeowner should own one.

What is a Steam Cleaner?

As the name suggests, a steam cleaner uses steam to clean your floors and carpets, mainly, but can also be used to clean your clothes, curtains, and a whole host of other areas and objects in your home.

On a personal note, as a father of an infant, my handheld steam cleaner is the easiest way to sanitize the toys my teething son loves to chew on. So, you may very well be surprised at what all you could clean with a steam cleaner.


What are the benefits of using steam to clean?

Let’s go over five of the most obvious benefits of using a steam cleaner to clean and sanitize your home.

  1. Hygienic Cleaning:

    Steam and the heat it produces can kill around 99% of the germs, bacteria and parasites that may be lurking around your home. That means that whatever surface you steam clean is completely disinfected and sanitized. More so than could ever be achieved by a vacuum or swiffer alone.

  2. Kills Almost Everything:

    Not only does steam kill germs and bacteria, but it can also kill pests and insects. This would include the microscopic pests you probably don’t even realize are there, such as dust mites. The steam is hot enough to kills ants, ticks, fleas and other common household pests. If you’re using a steam vacuum, it kills the pests with the steam, and then sucks up their remains.

  3. Chemical-Free Cleaning:

    The steam cleaners only use steam to clean and sanitize your homes. While some models may allow you to add chemical cleaners, they are not necessary to kill off the germs and bacteria that may be contributing to your dirty home. Maybe it’s just me, but the less chemicals used in my home, especially on the floors where my kids play, is nothing but a good thing. Not only does this help you clean your home, it helps establish a safer environment for your children and pets.

  4. Works Quickly / Saves You Time:

    Not only does the steam soften up the hard-to-clean stains, it also allows you to clean those trouble areas quicker and more efficiently. If you were to use a swiffer or traditional mop, you’d have to wait for it to dry, and possibly, re-clean areas that you may have used chemicals on.

  5. Air Purification:

    While this seems like a stretch, because of the filters that they use, some steam cleaners actually help clean the air as you clean the floors. While this is a benefit, it should be noted that an air purifier is still the most effective method at cleansing the air in your home. But, a steam cleaner can help supplement the air purification process, as can certain houseplants.

Bottom-Line:

The bottom-line here, is that a steam cleaner is a great way to safely and efficiently clean your home, especially the floors. But, you still have to figure out which type of steam cleaner is best for your situation. So, let’s now take a look at the differences between two of the most popular versions — steam vacuums and steam mops.

Steam Mop: The Pros & Cons

A steam mop is a common household appliance that helps you clean your carpets and floors without the use of harsh chemicals. Unlike a traditional mop that requires soap and detergents to clean the floors, steam mops utilize the heat of steam to sanitize, clean and disinfect the floors. Because the device uses steam, it is able to kill approximately 99% of the germs, bacteria and dust mites that may be on your floors, as well as clean up the dirt and grime that may be noticeable.

Let’s take a closer look at the pros and cons of steam mops to give you a better idea of what you can expect to get out of it.

The Pros:

  • No Bucket Required:

    Cleaning with a steam mop eliminates the need to have a container filled with water. The old-fashioned method of mopping would require a bucket of soapy water and a dirty mop that you would need to wring frequently. This is not the case with a steam mop. Simply fill up the canister with water and you cleaning your floors has never been easier.

  • Save Time & Energy:

    Piggybacking on the previous pro listed above, working with a steam mop will save you time, energy and, ultimately, help cut down on the fatigue you may experience while doing these necessary chores. Not only is a steam mop easier to use, it’s more sanitary and efficient than a conventional mop.

  • Environmentally Friendly & Healthier Home:

    Because a steam mop uses intense heat in the form of steam, you don’t need to use any chemicals to achieve a hygienic cleansing on your floors. Whereas, with a traditional mop or swiffer, you will need to mix detergents, bleach and other potentially dangerous chemicals to achieve the same level of cleanliness. And then follow-up with clean water, if you don’t want those chemicals lingering around.

  • Lightweight:

    A steam mop is a compact, small and lightweight appliance. While the sizes and shapes will vary from model to model, they are typically smaller than steam vacuums and/or a traditional (non-steam) vacuum cleaner.

  • Easier to Store:

    Because of its smaller size, a steam mop is very easy to store when not in use. It’s compact, lightweight dimensions allow you to store it in many areas of your home. Even those with little storage space available. The same cannot always be said about vacuum cleaners, whether they use steam or not.


The Cons:

  • Not Multi-Surface Friendly:

    Steam mops are typically designed to clean hardwood and tiled floors only. There is a myth out there that you cannot clean carpets with a steam mop, but that’s merely a myth. You may need to purchase an extra attachment or accessory, but there are many steam mops out there that can clean both carpets and hard floors. However, you cannot clean as many areas in your home as you can with a steam vacuum cleaner, including furniture, curtains and other upholstered items. At least, it’s not an easy task to accomplish.

  • Extra Prep Time:

    In order for you to get the most effective clean with your steam mop, it is strongly recommended that you sweep the floors before you start to mop. Unfortunately, this will increase the amount of work you have to do to achieve clean and sanitized floors.

  • Doesn’t Get As Hot:

    A steam mop gets the water/steam hot, however, the water does not heat-up as hot as other types of steam cleaners. Again, this will vary from model to model, but if you can’t achieve that necessary heat, you will have a slightly harder time achieving the same level of cleanliness that you could get with other types of steam cleaners.

Bottom-Line on Steam Mops:

The steam mop is a fantastic choice for anybody that is addicted to “swiffering” their floors. While they are designed for hardwood, tiled and laminate floors, there are plenty of models out there that can help you clean your carpet as well. Not only does its smaller size make it easier to store, it’s also easier to maneuver than its steam vacuum counterpart. And, on average, steam mops come with a lower price tag. It’s certainly better than a traditional mop, but depending on what all you want to clean, it may or may not be the best steam cleaner for your situation.

Steam Vacuums: The Pros & Cons

A steam vacuum, sometimes referred too as a steam vac, is basically a vacuum cleaner that has an extra feature that utilizes steam to help it clean and sanitize your floors more effectively than just vacuuming alone. Depending on the model that you get, it’s possible that you can clean more than just your floors, instead using it to clean your furniture, drapes and other upholstered furnishings in your home.

Let’s take a look at the pros and cons of steam vacuum cleaners.

The Pros:

  • Multi-Surface:

    Steam vacuums can be used on a multitude of surfaces, including carpet, wood floors, tiles, furniture, curtains and other upholstered furnishings in your home.

  • Multi-Dimensions:

    Just as it can be used to clean all sorts of surfaces, steam vacuums can also be used to clean both horizontally and vertically, which makes it useful when cleaning walls, windows and cars.

  • No Prep:

    Unlike other types of steam cleaners, it is not necessary for you to sweep the floors before you use it. The vacuum will suck up the dirt and debris, allowing the steam to clean and sanitize the floor. This not only saves you time, but also provides a deeper clean.

  • Environmentally Friendly:

    You don’t need to use any chemicals or other potentially dangerous substances on your floor. The steam will kill off 99% of germs, bacteria, insects and microscopic parasites that may be living on your floors.

  • Self-Contained:

    You don’t have to hook this appliance to your kitchen sink in order for it to drain. It has its own water tank contained on the device. The size of the tank will vary from unit to unit, and is something that should be taken into consideration when shopping.


The Cons:

  • Bulky:

    Even though steam vacuums get smaller and sleeker as the years go on, they still tend to be a bit bulky. Depending on the model you get, and the surface you are trying to clean, this bulkiness may make it a little more difficult to maneuver.

  • Expensive:

    When compared to a regular vacuum cleaner or a steam mop, a steam vacuum will likely be more expensive. This “con” is a bit anecdotal, as the prices will range based on the brand, model and features of the unit. But typically, they tend to have a higher price tag.

  • Noisy:

    Just like your average vacuum cleaner, a steam vacuum can be a bit noisy. At this point, the louder noise is expected with this type of cleaning appliance.

  • Hard to Store:

    Because of its large and bulky size, a steam vacuum may be hard to store. Again, this “con” is dependent on the size of the model you own and the amount of space available in your home. It may not be an issue for you, but is something that should be taken into consideration.

Bottom-line:

A steam vacuum is great for people with a variety of flooring, including a large amount of carpeted area, in their homes. It can thoroughly clean any flooring type, and do so without any previous prep work from you. It’s also a great device to help you clean other areas in your home, such as furniture and curtains.

Unfortunately, the bulky size may make it difficult for some to use and store. All in all, steam vacuums are extremely handy to have around, but may not be the best fit for everyone.


Steam Mop or Vacuum: What’s Right for You?

As you consider which steam cleaner is best for you and your situation, you have to think about what you plan on using it for. Do you have a lot of carpets to clean? Maybe that means a steam vacuum would be better for your household. Do you only have one room with carpets and the rest are laminates? Perhaps the mop would be better suited for such a household.

The fact of the matter is that both the steam vacuum and the steam mop come with their own set of pros, cons and uses. You have to consider your budget, what you need to clean, how often you would use it and how much time you would be able to focus on cleaning. These factors will all affect which type of steam cleaner is right for you. In the end, it is up to you, so you have to get what you think you will be happiest with.

Keep in mind, steam cleaning is a great way to really kill germs, pests and bacteria on your floors, not to mention help remove stuck on stains and other residue. If you’re consider getting a steam cleaner, make sure you weigh the pros and cons of the vacuum or the mop, and get whichever is right for you. Don’t rent another steam cleaner.


6 Ways An Extra Freezer Can Save You Time & Money

How an Extra Freezer Can Save You Money

Economic inflation is causing the price of food to skyrocket and families are looking for ways to reduce their monthly expenses in order to maintain the quality of life they have become accustomed to. One way that consumers can combat the ever-rising cost of food prices is to invest in an extra freezer.

Whether you have a chest freezer in your garage or an upright freezer down in the basement, the extra space you’ll gain to store your frozen goods will bring many benefits to you and your family.

Here are six reasons why having another freezer in your home is a practical investment that will not only save you time and money, but also promote a healthy lifestyle for you and your family.

1. Save Money on Grocery Bills

The average person goes grocery shopping one to two times a week. While there is nothing wrong with this, those frequent trips to the grocery store can quickly add up.

Having an extra freezer in the home will encourage you to take an in-depth look at your shopping habits and tweak them. By tweaking your shopping habits, you can save hundreds of dollars every month on groceries, without having to use coupons. You can also save more money on gas since you will not have to drive to the grocery store as often.

Extra Freezer Can Save You Money

2. Purchase Food in Bulk

Purchasing food in bulk quantities means that you can purchase better quality food for a cheaper price, or just save more money on the food you would’ve normally bought. Most importantly, meats and cheese have a lower price per unit when they are purchased in larger quantities.

By dividing your bulk food purchases and preparing them in advance, you will not have to go to the grocery store as often. Purchasing food in large quantities also gives you the flexibility to purchase food only when it is on sale to save additional money. Purchasing food in bulk sizes makes it easier to store and prepare meals in advance.


3. More Storage Room

The average person has a limited amount of storage space for their food. Less space means frequent trips to the grocery store. Frequent trips can actually put a significant dent in your budget, because there is always the risk of waste due to purchasing more food than you can immediately use.

With an extra freezer inside of your home, you will have enough freezer space to store your groceries. You can purchase large quantities of meats, fruits, and vegetables and freeze them for future use.

Common ways to store freezer foods include:

  • Place pre-measured portions of cut up vegetables and meats into a storage bags and containers for future oven and crock-pot meals.
  • Label all foods with the date they are placed into the freezer for storage.
  • Use small containers to prevent freezer burn and preserve quality.
  • Always cool hot foods prior to freezing them.

4. Better Time Management

One reason why so many people avoid cooking is that they simply do not have the time or energy to do so. With an additional freezer in the home, one can prepare meals in advance and freeze them. If you happen to have a free day such as Sunday, use that day to prepare your meals for the rest of the week.

Once the meals are frozen, you can pull a meal out each day and heat it up in the oven while you handle other tasks. It is not necessary for one to be in the kitchen the whole time their meal is cooking. Preparing your meals in advance will give you time to deal with other things and give you more personal freedom.

This will also help put an end to any impulse grocery shopping and restaurant trips.


5. Reduce Food Waste

How much food do you throw away each month? Have you ever noticed that some of the food you are tossing in the trash has not been touched since it came from the supermarket?

Have you noticed that wasted leftovers are a frequent occurrence in your home? Your lack of time and frequent trips to the grocery store cost you money that you don’t have to spend.

Instead of resolving to be a savvier shopper, start using an extra freezer in your home. That freezer will keep you from throwing away so much food each month, and keep you from having to repurchase items anytime soon. Leftovers can be frozen for future consumption. By freezing your meats, fruits, vegetables, and leftovers, you gain more time to use them.

Standard Times for Frozen Foods Include:

  • Ground meats can last up to three to four months in the freezer.
  • Cooked meats can be frozen up to four months.
  • Different cuts of meat can last up to a year in the freezer.
  • Fruits and vegetables can last as long as eight to twelve months in the freezer.
  • Soups and stews can be frozen anywhere from two to three months.
  • Cooked leftovers can be stored in the freezer for as long as two months.

6. Incorporate More Healthy Foods Into Meals

Prepackaged and processed foods may seem like they are convenient items to add to your grocery bill, however they cost more money and often have unhealthy ingredients. This can cause you to become dependent and addicted to certain foods, although they hold no nutritional value for you and your family.

Encourage healthy eating habits by purchasing healthier foods. Purchase fresh fruits and vegetables in bulk when they are in season, and freeze them for use throughout the rest of the year.

Save Time & Money with an Extra Freezer

It doesn’t matter what type of freezer you use, having this extra appliance can be a real life-saver for you and your family. From reducing waste to helping you prepare meals in advance to saving you time and money, there’s no doubt that having an extra freezer is guaranteed to improve the quality of your life.

How to Prepare Your House to Sell

If you are preparing to sell your house, then you probably know that taking care of a few basic maintenance concerns and making it look great are keys to selling it at a better price. What you might not have heard about, though, are the directed strategies that pay off best and how to put them into place for your sale.

Below, we highlight a few of the key home improvements that may pay off when you are trying to raise the value of your home before you put it on the market. While every house has a maximum reasonable asking price that is mostly determined by its size, location, and architecture, these strategies will get you as close to that number as you can get without overspending.

1. Make Simple Upgrades

Full remodels tend to be more expensive than they are worth for sellers, regardless of which room you do them in. They are great ways to make a home your own, but when you want to sell, you really need to be concerned with the cost-to-value ratio, and the only value that matters is the final sale price. Here are the cost-effective upgrades that you might want to try out in your home:

House for Sale
  • Add a Fresh Coat of Paint

    Prioritize rooms with walls that show a little wear or damage, and keep your color choices light, inviting, and relatively neutral. Just don’t be boring or flashy, keep things in the middle.

  • Repair damage with fills, plasters, and other bonding agents.

    Whether it is wood, porcelain, drywall, or whatever, you do not want cracks, chips, divots, and other signs of wear showing up. For woodwork, many hardware stores carry blending touch-up pens that can be a huge help.

  • Reglaze damaged countertops, tubs, and sinks.

    This one is easy to lose money on if you do not really need it, but it is better to spend a few hundred dollars reglazing a chipping or peeling formica countertop than it is to lose thousands because show features are damaged. If you have questions about whether this option is right for your home, talk to your realtor about it.

  • Consider simple fixture replacement.

    New cabinet handles, faucet features, and other basic fixtures can often be purchased and installed cheaply as DIY projects. A few simple swaps for tarnished, over-painted, or just out-of-date fixtures and your new additions make the room look up-to-date without investing in a full remodel.


2. Depersonalize Your Space

The hardest step for most homeowners is coming to terms with the need to cut back on their personal clutter.

Your house is your refuge, and even when it’s time to sell, it can be difficult to transition into treating it like a space for other people, but you really need to do that if you are going to get the most out of your sale. Think in terms of how a professional might come and stage your home before a showing. These steps will help you to make your home showroom-ready, and they can also help your move be easier in the long run.

  • Declutter Everything.

    Box up items that really do not need to be around the house, like old photo albums and keepsakes that are mostly out for display, take down most of your old family photos, and try for a minimalist approach to wall decor. You do want a few pictures or paintings for accent pieces, but it can be hard for a buyer to see the house behind your stuff if it is too full.

  • Tidy Up Your Storage Space

    Even if you normally organize your tools or books with piles that are mostly the same size and color, your buyers are looking to see what is possible in a space, so storing some items and arranging others to showcase the best uses of your cabinets and other built-in storage areas will help prospective buyers see that.

  • Trim Your Furniture to a Tasteful Minimum

    You want each room to have the pieces that are necessary to say it is completely furnished, but most of us like to over-furnish our rooms as part of our personal decorating style. Pulling that back makes it easier to see the room for itself, and it also helps you to stage it in a way that takes advantage of natural light.

  • Clean Up After Your Pets

    If possible, get them out of the house, even if it is just during the days when the house is being shown. Having strange animals around can be off-putting to some people, and you never know who is going to be allergic.

Having some of your family’s extra belongings in storage, including that extra furniture, makes moving simpler because it gets everything that is not essential out of your way until you are ready for it.


3. Clean the House from Top to Bottom

A deep and thorough home cleaning is actually a house improvement, because it rolls back some of the wear and tear that can become damage in the long-term if it is not taken care of. This can include the growth of mold or mildew, especially in the bathroom and window sills, air purity issues that come from allergen buildups in the carpet, and moisture that can lead to problems with your basement and crawl spaces. Take these steps to get a solid deep cleaning, so that buyers see your home in the best possible light.

  • Remove all the stains

    From hard water buildup to soap scum, rings around the drop sink, and rust marks in the basement, you will want to get rid of any signs of regular wear from your home’s fixtures. There are a variety of products, including natural alternatives, that will help with everything from rust stains to limescale. Inventory the sites in your house that need to be treated, and hit them systematically until you see no signs of the deposits.

  • Shampoo Carpets and Rugs

    Even if they are not permanent installations in the home, a deep cleaning on all the rugs and carpets helps purify your home air quality and takes years off the appearance of the rugs. Sometimes, it can even rescue a carpet that looks like it needs to be replaced.

If you follow through with these basic upgrades and house improvement strategies, then it should be easy to maximize your home’s resale value for today’s market. Just remember, the key is to find low-cost solutions. Anything that involves major remodeling should wait for your next house.

How to Winterize Your Sprinkler System

Your sprinkler system is an important part of your landscaping. Lawns, trees and plants are very expensive to replace, so it is important to protect and maintain your sprinkler system at all times. Before the temperatures drop with the onset of winter, it’s important that homeowners take the appropriate steps to winterize their sprinklers.

Without the proper preparation, you may be facing expensive repairs to your sprinkler system or the loss of established trees, shrubs, or flowers. And expensive repairs are the last thing that any homeowner wants, especially when a bit of preventative maintenance can avoid this altogether.

Check Your Owner’s Manual

First things first, if possible, look in the owner’s manual for how to winterize your sprinkler system and follow those directions to ensure that you don’t void a warranty or make any other mistakes.

If you’re unable to find the original owner’s manual or just want some quick tips to winterize your sprinklers, we’ve put together several important tips that every homeowner should be aware of.

1. Shut Off the Water

The first thing to do as winter’s freezing temperatures are drawing near is to turn off the water to your sprinklers. Make sure to shut it off at the main valve. Your sprinkler system’s shut-off valve should be housed in a space where it can’t freeze. If this wasn’t done during the installation, perform this task before the frigid weather arrives.

2. Turn Off the Controller

Once you’ve gotten the water turned off, you need to shut off the timer, also known as the controller. Timers sometimes have settings marked rain mode. If yours doesn’t, you will need to disconnect it from the power source.

If your controller is outdated, you may want to update to a model such as a solid-state controller, which has digital displays for time settings as well as efficient energy usage to reduce your electric bills.


3. Remove Backflow Preventer

Your system has a device to prevent backflow, which is great for lawn-watering season, but during the winter, it must be removed and stored safely until spring. After it is removed, it’s time to drain the water.

How to Remove Backflow Preventer:

  • First, you can try to siphon it out.
  • If siphoning doesn’t work, pump it out with a shop vacuum designed for wet/dry use.
  • It’s helpful to attach duct tape to the hose in order to narrow the opening.
  • Drain above ground valves and store them, as well.
  • You can use pipe-heating cables on some areas, but this can be problematic in case of power failures.

4. Drain Water From Pipes

It’s absolutely crucial that you drain all the water from your irrigation system. If any water is left in the system, it’s possible for the pipes to freeze, which will lead to the pipes cracking or bursting once the water starts to expand.

You can use a shop vacuum to do this process, which can be time consuming, or you can take an easier route. The simpler alternative method to clear your sprinkler valves is to blow them out.

How to Blow Out Irrigation System

Below are the steps to help you blow out your sprinkler system and remove all water from the lines. It’s important that you have the right safety eye protection prior to starting this process. If you have any doubts, it would be best to call a professional.

  • Get a large compressor: To drain your valves with the blowout technique, you’re going to need the right equipment: a compressor with 50 cubic feet per minute rating. It’s imperative that the regulator valve gauge on your compressor is accurate.
  • Take off the backflow prevention: If you have an anti-siphoning lock on your valve, remove the entire mechanism.
  • Turn on the air compressor: Connect this equipment to the backflow-prevention riser.
  • Switch on valves: Using the automatic controls, turn on your valves one at a time as you blow out your irrigation system. It’s best to start with the highest elevation and open the hand valves manually.
  • Turn on compressor: Take your time and gradually increase the pressure. If it’s too hot or powerful, attach a hose length to modify it.
  • Blow out the H2O: Watch the pressure gauge and temperature as you slowly blow the water out.
  • Move to the following valve: One by one, move around your yard, blowing out each valve. Repeat this process until the draining process has been completed.
  • Blow out main line: You’ll also need to blow out your irrigation system’s main line if it has one.
  • Finish up: At the end, you’ll need to replace caps, set rain mode or turn your power source off.

5. Protect Spigots & Hoses

In addition to protecting pipes and valves, you can also safeguard other parts of your landscape-watering system, including:

  • Spigots: Protect the spigots by covering them with Styrofoam protective devices that can be found at home improvement stores.
  • Hoses: Drain water from garden hoses and store them in an area away from ice and snow to prevent cracking.


Get to Know Your Irrigation System

While it’s not entirely necessary, it’s wise to have a good understanding of the ins-and-outs of your sprinkler system before you start the winterizing process. You don’t have to be an expert, but, if possible, every homeowner should learn what they can about the following:

  • Drain Valve Locations:

    Your system should have drain valves at each pipe’s low point. You also need them at high points, so air can be released; otherwise, the water won’t be able to drain properly.

  • Slope of the System:

    When a sprinkler system is installed, there should be a slight slope to allow for easy draining.

  • Auto-Drain Valves:

    If you install automatic drain valves, your annual winterization can be greatly streamlined.

Create a Map of Irrigation System

It would be helpful to have a diagram or map that tells you where all of the sprinkler heads, valves, and watering zones are located. This will not only help you stay organized, but also make it easier to upgrade, repair or winterize your sprinkler system.

Once you create your irrigation map, keep it in a waterproof and convenient location. This will ensure that it remains helpful and ready all year round.

Know Your Region’s Climate

Before performing any winterizing steps, take time to think about the climate in that your home is located in.

If it snows only once in the season and the temperature barely hits freezing, then you may not have to winterize your irrigation system at all. On the flip side, if your home is in an area that always has freezing temperatures, snow, and ice, then you will definitely need to prepare your irrigation system for the deep freeze.

This is where a professional can be a real help. They know the area well and will be able to tell you how to best prepare your sprinkler system for winter.

Takeaways

If you want a beautiful yard when spring arrives, there are many tasks that a homeowner should do to prepare their yard for winter. One of the most important is to winterize your sprinkler system.

Because it’s a moderately difficult DIY project, consider hiring a professional to do the job for you. You and your front yard and backyard will be glad you did.

Mold In Home

How to Remove Mold From Your Home

As a homeowner, it’s critical for you to know and understand the dangers that mold presents to your home. It is a common concern for homeowners and can cause unseen damage to your home and your health.

Mold is a fungus that has the potential to grow within any location that is damp or excessively moist. If these areas are also warm, poorly ventilated, or have no light, then mold is more likely to thrive and cause issues.

At first, mold in your house will only create a musty or unpleasant odor, but as time goes on, mold can lead to some pretty serious damage. In fact, according to the CDC, exposure to mold has the potential to provoke allergies and asthma attacks for people who are prone to them.

In this article, you’ll learn more about how to get rid of mold from your house, as well as how you can spot it and prevent it from growing in the first place. Ask any homeowner, mold is not something you want in your home.

1. Control Humidity & Moisture

Mildew is a thin black or white substance that you typically find growing on grout in a bathroom. It flourishes in warm, humid areas, so the first step in removing and preventing it is to clean the places in a home where it’s mostly likely to show up, and keep them dry.

Mold

Be sure to regularly clean your bathroom and kitchen, stretch out wet shower curtains and dry damp clothing quickly.

If your basement is often damp, there may be crevices in the walls letting moisture in, so replace cracked mortar and make sure you have sufficient outside drainage.

An air conditioner can help by taking in warm air, which holds more moisture, and circulating it back out as cool, dry air. A humidstat or dehumidifier is also useful for reducing humidity.

On days when the air outside is dry, open up your windows and use electric fans to let the outside air circulate into your home and carry the moisture out.


2. Use Cleaning Solutions & Products

There are a number of cleaning solutions you can use, all of which are relatively inexpensive and easy to find.

Bleach

Bleach is very effective when used on moldy surfaces. Mix 1 cup of bleach with 1 gallon of water, then use either a spray bottle or a bucket and sponge to clean the affected area.

If you want to prevent growth, don’t wipe the area afterward. Note that bleach has some drawbacks, the foremost being that it’s useless on porous materials like wood and drywall. It also gives off harsh fumes, and mixing chlorine bleach with ammonia or certain other household cleaners is incredibly dangerous as it produces toxic gas.

Note: Never mix bleach with other chemicals!

Vinegar

Vinegar isn’t quite as effective as bleach, but it’s safe and doesn’t give off harsh fumes. Pour undiluted white vinegar or apple cider vinegar into a spray bottle, spray the affected area, let it sit for an hour, then wipe clean.

If you want to use it to prevent growth, simply don’t wipe afterward, and spray again every few days. Use it only on non-porous surfaces.

Borax

Borax is dangerous if swallowed, but it’s otherwise safe and doesn’t give off dangerous fumes. Create a mixture of 1 cup of borax for every 1 gallon of water, then clean with a scrubbing brush. Once again, only use it on non-porous surfaces, and you can use it to prevent growth by not wiping it off afterward.

Ammonia

Ammonia is similar to bleach in that it can’t be used on porous surfaces, and also that it’s a dangerous chemical. Make sure that you only use clear ammonia. Create a 50/50 mix of water and clear ammonia, and spray the affected surface. Let it sit for a few hours, then wipe and rinse.

Baking Soda

Baking soda is both mild and safe, and it also acts as a deodorizer. What’s more, unlike the other solutions, baking soda can be used on porous surfaces.

Add 2 tablespoons of baking soda to 8 ounces of water and mix thoroughly. Spray the affected area, scrub with a sponge or brush, then rinse. Follow this by spraying a second time, but don’t rinse afterward.


3. Cut Out & Remove Large Infestations

Mold can grow behind the walls and other unseen places in a house, leaving homeowners unaware until they smell it or notice stains on the wall. At that point, it has to be literally cut out of carpets and drywall.

How to Remove Moldy Drywall & Carpets

If you choose to do this on your own, you’ll want to wear old clothing and shoes along with goggles, gloves and N-95 respirator.

N-95 Respirator For Mold Removal

N-95 Respirator For Mold Removal from 3M

Prep & Set-Up

Set a box fan in the window of the room you’re working on. Next, make sure you tape plywood or cardboard around the window openings so spores expelled by the fan can’t get back in. Turn off your air conditioner and/or furnace, and then seal off the airflow within the room by covering the vents and doorways with plastic sheeting and duct tape.

Removing Moldy Carpets

Use a utility knife to cut moldy carpets into 6′ x 8′ sections, and mist the surfaces with a pump sprayer to control spores. Roll up the sections and wrap them in thick plastic trash bags.

Removing Moldy Drywall

Turn off power to the room, and probe stained or soft spots on the wall with a screwdriver to find the infestation and locate any wiring, removing baseboards and trim if necessary. Use a drywall saw or utility knife to cut out the infested drywall and any moldy insulation behind it. Mist with the pump sprayer to control spores, then double-bag the material in heavy plastic bags and tie the bags off.

Clean-Up

Vacuum up the debris with a shop-vac with an extra-long hose, so you can keep the shop vac outside to keep spores from spreading. Use a brush to scrub stained surfaces inside the walls with a water and bleach mixture, and then wipe the areas, but don’t rinse them. Dry any trim you washed in direct sunlight, and use fans and dehumidifiers to dry the room for at least three days.

When you’ve eliminated it all, seal the wood with a pigmented shellac or oil-based primer. Put in new insulation and drywall, replace the trim, and repaint using paint that contains mildewcide.


4. Hire Mold Remediation Professionals

If you have a persistent infestation, you may need to hire a mold remediation specialist.

Do your homework to find one who is reputable. The specialist will thoroughly inspect your home to determine the extent of the infestation, and afterward he or she will let you know if you can take care of the problem yourself, or if you’ll need to hire professionals to handle it.

Make sure the specialist gives you a written report. Note that, to avoid conflicts of interest, the specialist who inspects your home should work independently from the company you hire to clean out the infestation.

Frozen Pipe

How to Prevent Frozen Pipes

If you live in a cold climate, you probably know all too well the dilemma of frozen pipes. If you’re new to cold climates or, perhaps, new to owning a house, it’s wise to learn all you can about what you should do in the event that your pipes freeze during a cold winter chill.

To help you prepare and protect your home, let’s take a look at why pipes freeze, as well as some simple prevention tips that every homeowner should know as the mercury starts to drop.

Why Do Pipes Freeze?

The reason behind why pipes freeze is likely self-explanatory. When the temperature outside your home drops too low, the water inside the pipes will freeze.

This typically starts with any spigots, faucets or pipes that are exposed to the elements. However, it can have an effect on areas in your home this is not heated or just poorly insulated. Upon hitting this frozen state, the water inside your pipes and spigots will expand, which may cause it to burst. This is where things can go really bad for homeowners, possibly leading to a whole host of other problems.


How to Prevent Frozen Pipes

There are many preventative measures that a homeowner can take to protect their home from a frozen pipe. There’s no single “best” way to prevent your pipes from freezing.

Instead, familiarize yourself with the tips below and use them in conjunction with each other. This will go a long way to make sure your pipes don’t freeze and, hopefully, prevent them from bursting and flooding your home.

1. Add Insulation to Exposed Pipes & Fixtures

By far, this is the easiest thing that a homeowner can do to protect their pipes. By adding a layer of insulation to all plumbing fixtures that are exposed, especially pipes and spigots, you can help prevent them from becoming too cold.

Most homeowners will initially think of the pipes and faucets on the exterior of their home. But, don’t forget about any pipes that are exposed in areas of your home that are not heated or well-insulated. This could be your garage or a basement, but also any of the forgotten crawl spaces. All of the pipes in these areas should be insulated, too.

There are lots of types of insulation that can help you here, all of which are available at home improvement stores or online.

Faucet Cover

Faucet Covers

These are a great way to protect outdoor spigots or faucets. Typically, a faucet cover is only a couple of bucks and they’re incredibly easy to install. If possible, opt for the faucet covers that have a hard plastic shell, as these are a bit more durable and will last for many seasons.

Foam Pipe Insulation

Resembling the colorful “noodles” you kids playing with in a swimming pool, these are pieces of foam that are designed to wrap completely around and insulate all exposed pipes. Extremely affordable and easy to install. The best part about this type of insulation, is that it goes far beyond preventing pipes from freezing, it will actually help cut your energy costs and prevent those same pipes from condensation when the temperature goes back up in the summer.

Pipe Wrap Tape

Very similar to the foam insulation above, but instead of a giant noodle of foam, this type of pipe insulation looks more like a roll of duct tape. You’ll apply it much like you would tape, too. Simply wrap it around any exposed areas and it will add a layer of thermal insulation to prevent it from freezing. Unfortunately, pipe wrap tape is going to be one of the more expensive options.

DIY Insulation

Sometimes, a winter storm will creep up on you and leave you with little to no time to get the necessary supplies or insulation. If you find yourself in this situation, don’t worry, there are still some easy and free insulation options that will protect your pipes.

Perhaps, the oldest method of protecting your pipes. Simply take some old rags or towels, and wrap them around any exposed pipes, spigots or other areas that you think is susceptible to freezing.

Make sure it’s wrapped up tight and won’t come loose during a storm. The best option is to wrap duct tape around the towel. Another option is to use another towel, tying it into a knot around the “insulating” layer to ensure it stays in place.

2. Use Heat Tape to Regulate Temperature

The name “heating tape” can be a bit of a misnomer. While there are different types available, some of which do have adhesive properties, most homeowners will think of this as a type of extension cord or cable.

The heating cable is then strategically wrapped around any exposed pipes. Once installed, simply plug in and turn on. The cord will emit a small amount of heat that will help regulate the temperature around the pipe, thus preventing from freezing.

When used properly, this can be a great way to make sure your pipes never freeze. Unfortunately, they are much more expensive then other types of pipe insulation. Additionally, you also need to be mindful of the type of heating cable you use, as well as the material your pipes are made of.

3. Protective Measures Inside Your Home

For pipes and spigots located on the exterior of your, insulation is about the most you can do to protect them from freezing. However, when it comes to the inside of your home, there are many things that a homeowner can do.

Frozen Water Spigot
  • Maintain Temperature:

    The number one thing you should do is regulate and maintain a steady temperature inside your home. Try to keep it above 60°F at all times, even if you’re not home at the time.

  • Heat & Insulate Exposed Areas:

    If you have a basement, garage or crawl space with an exposed water line, then you may want to consider using a small heater in that area to help prevent the temperature from dropping to a level that will cause water inside to freeze. Of course, a heater should only be used if it is deemed safe by the homeowner. Insulating pipes will be the best prevention, but a heater may also help. The very least you can do, at least for a garage, is keep the door closed and insulated.

  • Weather Sealing Doors & Windows:

    This is something that every homeowner should consider, just for the energy savings alone. No matter how extreme the temperature is outside, this is one easy DIY project that will help you regulate the temperature inside. It’ll help prevent pipes from freezing in the cold winter, as well as help your air conditioner keep the room cool in the hot summer.

  • Heat Circulation Within Cabinetry:

    Inside your home, it’s not uncommon for pipes to be exposed inside the cabinetry. They may be hard to spot, but there they are. Look inside your cabinets and if you see pipes, leave those doors open to ensure that the heat in the room can circulate to those areas.

4. Shut-Off Water Supply & Drain

Your pipes won’t burst if there’s no water inside to expand. Therefore, it would be wise to shut-off the water supply for any pipes that lead to an exterior spigot, as well as drain all the water out.

This would include:

If the weather hits extreme temperatures, then you may also want to drain the water out of any appliances that have a water supply, such as your hot water heater or fridge. This is especially true if they are located in a basement or garage.


5. Let Your Faucet Drip

The most popular way to prevent pipes from freezing, is to allow the faucets in your home to slowly drip water. Sure, it’s a gross waste of water, but it works. This is much better than dealing with a burst pipe.

The slow drip works because it helps moderate the water pressure inside your pipes. This allows the water to keep flowing and pressure lowered, all of which makes it more difficult to freeze.

6. Wash Your Dishes & Clothes (While You Sleep)

Most dishwashers and washing machines have an option that allow you to delay the wash-cycle for a few hours. If you have one of these, schedule a load to start in the middle of the night. This is when the temperatures will be at their lowest, and when your pipes have the highest risk of freezing.

This follows the same principles of a dripping faucet, but instead, you’re putting some of the appliances around your home to work (and not completely wasting water).

7. Use Ice Maker to Make Ice

While it sounds counter-intuitive to make ice when the weather is creating ice everywhere else, this little trick works quite well.

Your refrigerator makes ice when it detects that it’s needed. So, empty all the ice out of it. This will cause your fridge to make more ice, thus using more water and helping relieve the pressure that may lead to your pipes freezing.

Keep A Close Eye On Your Pipes

Knowing how to prevent frozen pipes in your home and yard is only part of the battle. If you’re in the home when the cold weather strikes, it’s wise to also keep a close eye on your plumbing.

This includes all faucets inside and outside of your home. Turn them on occasionally, inspecting that the pressure of water is working properly. This should be the first thing you do in the morning, and the last thing you do before you go to sleep.

Visually inspect occasionally to ensure that the preventive measures listed above are working. You want to be able to catch frozen pipes as soon as possible, so you can take the necessary steps to thaw them.


Kale

How to Make Kale Chips (With Recipes & Flavoring Tips)

We hear about many food crazes and diets all the time. Let’s face it. Every time a new food is introduced to the world, restaurants, food critics, television chefs and celebrities go out of their way to talk about the food as they try to show us the infinite possibilities there are for turning an otherwise boring ingredient into something special.

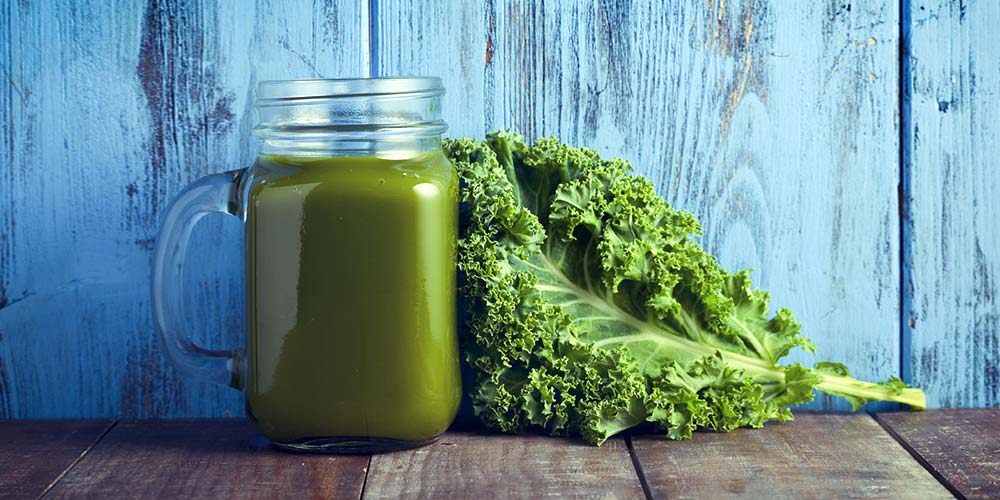
That’s probably the case with kale.

A few years ago, no one ever talked about this green leafy vegetable. Now you see it everywhere. High-end restaurants are finding ways to elevate it from its former role as a garnish on food trays and salad bars. Grocery stores are selling packaged salads that use kale, bags of washed kale, and bunches of kale. It’s even on the shelves of Walmart Supercenters and other discount stores. It’s also become a critical addition to the growing movement that encourages embracing ingredients that go from the farm to your table.

According to a May 2014 news report from Bloomberg, between 2007 and 2012, the number of farms that grow kale in the United States has more than doubled.

How Did Kale Become So Popular?

It’s long been known that kale is healthy for you. But, the popularity of the cruciferous vegetable has skyrocketed in recent years. The story behind this rise is a curious tale.

Fresh Kale

As the story goes, in the year 2013, a New York PR agent and self-proclaimed “punk-at-heart,” Oberon Sinclair, concocted a scheme to get people to believe that the American Kale Association hired a publicist to help desperate farmers who were growing kale while spreading the word about this dark green cruciferous vegetable throughout New York City.

After all, when you want to turn something into a trend, you go to New York to announce it to the world, right?

It’s hard to know whether people believed this story because let’s face it, no self-respecting foodie would ever admit that they’d been conned into believing that the American Kale Association (AKA) launched a campaign to promote the wonders of kale. Especially considering that the American Kale Association did not exist when Sinclair launched her campaign.

Whether or not the American Kale Association actually existed at that particular time, has become somewhat of a moot point. It exists now, and has carried on with the original “kale-awareness” campaign.

However, it must be noted that prior to the curious PR campaign launched by Sinclair, there was another organization already on this precise mission. Founded one year before the curious PR campaign referenced above, the National Kale Day Organization was created with the same vision: To educate people about the nutritional value of kale and helping people learn about different ways to cook, use and eat it.

Cruciferous vegetables are healthy. They are full of vital nutrients. Variety is also good. So if you’re looking for a way to add variety to your diet, include more healthy leafy greens, and eat more vegetables, you might want to consider trying kale. Raw kale can be bitter. But there are other ways to use it. It’s a delicious addition to soup, and if you’re used to sauteing spinach, Swiss chard, mustard, turnip or collard greens, you can add kale to your gustatory library.


Bunch of Kale

How to Select the Best Kale

Before you start the process of making kale chips, you have to buy the vegetable itself. You have a few options to choose from.

Fresh & Raw

You can find fresh bunches of kale in the produce section, typically stocked alongside other cruciferous vegetables, such as spinach, broccoli, lettuce and cauliflower. The key is to get a bunch of kale where all the leaves are dark green and crisp looking.

Starting at the end of summer through winter, you’ll notice the selection and overall price of kale become more competitive, as they are in season.

Organic & Locally-Grown:

If possible, try to buy organic kale that is locally-grown. The Environmental Working Group includes kale on its list of produce items that contain pesticide residue.

Bagged Kale:

If you’re short on time, bagged kale is a good option. Already chopped and washed, the bagged option will save you time. However, this added convenience comes with its own set of pros and cons. Not only do the bags tend to be more expensive, you also sacrifice the ability to hand-pick the bunches you believe would be the best.


How to Prepare Your Kale

Now that you have the kale bought and ready to go, it’s time to prep.

Cleaning:

Before you start, it is strongly recommended that you thoroughly wash all of your produce before cooking with or consuming. This is especially true with kale, as the leaves are often covered with dirt and other loose materials.

Kale

Remove Stems:

Use a herb stripper (if you have one) to remove the stems. Don’t skip this step. Kale stems are tough, and they’ll take much longer to cook. You’ll risk burning your kale leaves if you don’t remove the thick stems.

Tear the Leaves:

Tear each leaf into pieces. The size of your pieces should be comparable to that of a potato chip or tortilla chip. Don’t go to a lot of trouble to make sure that each piece you tear is the same size. That’s not necessary.

Remove Excess Water:

Now that your kale leaves have been torn into smaller chip-size pieces, you’ll want to remove the excess water. A salad spinner is a fantastic tool to help you with this. If you don’t have a salad spinner, give each piece a little shake and the water will roll off.


How to Bake Kale in the Oven

You’ll want to lay your kale pieces in a single layer on a flat baking sheet. If you intend to add salt, spices or herbs for flavor, a small amount of oil will catch the seasoning. Fill a half a tablespoon with extra virgin olive oil. Spread it on the baking sheet and rub each torn piece of kale into the oil, making sure to massage the oil into both sides.

Some recipes recommend using coconut oil. For kale chips, since you’ll be baking them in an oven that’s moderately hot, you won’t have to worry about whether the oil is safe for high heat.

If you line your baking sheet with a piece of parchment, clean up will be easier. You also won’t have to worry about whether anything sticks to the pan.

You don’t have to use a dehydrator to make kale chips. The oven is a fantastic alternative because you can turn the baking sheet during the drying and baking process.


– Advertising –

Recipes recommend oven temperatures but expect to adjust the temperature because of variations in different oven brands and heating methods. Turn the baking sheet periodically during the cooking process to make sure that every piece of kale cooks evenly.

Supplies & Ingredients You’ll Need:

  • Parchment Paper
  • An oven thermometer
  • Baking Sheets
  • Herb stripper or sharp knife to remove tough stems
  • Colander and Salad Spinner
  • Large bowl
  • High quality unrefined and unprocessed oil
  • Sea salt

Tips to Baking Kale Chips:

  1. Be sure you get rid of all of the loose dirt on every kale leaf. Consider using a commercial vegetable cleaning spray to help you remove excess chemical residues and grime.
  2. When you tear up your kale leaves into chip size pieces, take time to tear each leaf so that you remove the woody stem that goes through the center of the leaves. Getting rid of every part of the hard stalks will ensure that every piece of kale gets thoroughly cooked.

Be sure you put your oven thermometer in the oven before turning it on to preheat it.

Don’t get discouraged if you don’t make a perfect batch of kale chips the first time. There are often huge variations in cooking times and temperatures depending on the type of oven you’re using, your location and other environmental circumstances. Consequently, you may need to make several batches of chips before you figure out what oven temperature and the length of time it takes to get your chips as crisp as you like them.

Another thing to consider is that you may want to bake your kale pieces at a lower temperature if you’re topping your chips with herbs, seasonings or other flavorings. A lower oven temperature will force you to keep the chips in the oven longer to get them to the desired crispiness. It may also be effective at infusing your chips with more of the flavor you’re adding to them, thereby allowing you to create an unusual, creative, and flavor-packed snack treat.


Kale Chips

A Starter Recipe for Kale Chips

As you’ll soon find out, there is no limit to the flavor combinations that you can come up with to make your own healthy and delicious kale chips. Regardless of the flavors you add, there are two essential ingredients you’ll need to use no matter what else you decide to add.

You’ll need to add some salt to the kale because the salt is critical to drawing excess water out of the kale leaves. You’ll also need to use some type of high-quality extra virgin, first cold-pressed oil. Since you aren’t going to be baking the chips in a hot oven, you can use any kind of oil that tolerates low-to-medium heat. The first cold-pressed Extra Virgin Olive Oil is probably the most common type of oil used for making homemade vegetable chips. Grapeseed, unrefined sesame or coconut oils are also options.

How to Make Flavored Kale Chips

There are all sorts of flavors and flavor combinations you can use to create different variations on the traditional kale chip.

How to Make Kale Chips

Regardless of the ingredients with which you intend to flavor your chips, don’t forget that you’ll need to use a small amount of oil as a way of ensuring that each piece of kale gets evenly coated with the herb, spice, condiment or flavor.

Unless you want your kale chips to absorb the flavor of the oil you’re using, you will want to use the purest, mildest, and least flavorful oil you can. Also, remember that temperature isn’t a concern since you’ll be cooking your flavored chips at a lower temperature than you use for the plain chips.

Flavor Combinations to Spice Up Your Kale

If you’re used to snacking on corn or potato chips and have a favorite variety, there’s no reason you can’t try to replicate the taste of that chip on kale. The result will be a healthier version of a snack treat you already like.

1. Salt and Vinegar

This may be a tricky taste combination to try to use with kale. Oil is necessary to get the salt to stick to the kale pieces. If you try to use oil and vinegar, you may wind up with something that tastes more like a wilted salad that’s dressed with oil and vinegar dressing.


– Advertising –
How to Add Flavor:

To make this flavor combination work, try soaking your kale leaves in the vinegar for a few minutes. That short “soak” will give your kale the necessary infusion of vinegar for the taste combination that’s so popular with potato chips. You’ll still need to coat each piece of kale with the salt and oil mixture.

Baking Instructions:
  1. Lay the coated pieces of kale on a parchment paper-lined baking sheet. Don’t let any of the pieces touch or overlap.
  2. Cook the chips at a low temperature of around 250-275 degrees.
  3. Bake the chips for 25 minutes and check them to see if they are drying out and getting crisp.
  4. You may need to rotate your baking sheets every 25 minutes or so to make sure that every chip cooks evenly.

Keep checking on the baking sheets to make sure that nothing is burning. Once you’re sure that the chips are fully cooked, remove them from the oven. You can leave them on the baking sheet to cool. As they cool, you’ll see that they become even crispier.

Dehydrated Onion Flakes:

Dehydrated onion flakes are easy to find in the spice section of your favorite grocery store. If you love the taste of onion, and would like to add that flavor to your kale chips, dehydrated onion flakes are going to be a great option for you. Plus, give your kale chips an extra crunch.

Follow the instructions listed above for removing the thick stems on each leaf. Then tear all of the leaves into chip-size pieces.

How to Add Flavor:

Add a couple of tablespoons of high-quality extra-virgin “First Cold” pressed olive oil to a large bowl. Add enough onion flakes to cover all of the kale pieces evenly. Use your hands to massage the oil and onion flake mixture into the bowl full of torn kale leaves.

Baking Instructions:
  1. Line your baking sheets with pieces of parchment paper.
  2. Preheat your oven to 250 degrees.
  3. Carefully lay all of the kale pieces out on the baking sheets, making sure that there is space between each piece.
Plate of Kale

Because you’re baking your kale chips at a lower oven temperature to allow the oil and onion flake flavors penetrate each of the kale pieces, you will need to cook your chips for twice as long as it takes to make kale chips with no added flavoring.

Garlic or Onion-Powder:

If you ever make popcorn at home, you may have learned about the delicious taste of garlic and onion-flavored popcorn. Garlic and onion powder are also excellent flavor enhancers to add to kale chips. This is especially true for anyone looking to introduce finicky family members to a healthier alternative to calorie and salt-laden junk food.

Adding Flavor & Baking Instructions:
  1. Add a couple of tablespoons of olive oil to a large bowl.
  2. Add your kale pieces and use your hands to make sure that every kale piece is evenly coated with the olive oil.
  3. Arrange the kale pieces so that every piece lays flat on the parchment-lined baking sheet.
  4. Sprinkle your garlic or onion powder, or a little of each over the entire baking sheet, making sure that an even coat of powder covers every piece of kale.
  5. Place your baking sheets into a preheated 250-degree oven.
  6. Set an oven timer for 25 minutes.
  7. Rotate the baking sheets to ensure that all of your chips get as crisp as you like them.

Other Spices, Additives & Flavor-Enhancers

Here are a few more options for adding flavor and spices to your homemade kale chips.

  • Sriracha — If you like to add heat to your food, you might want to brush your kale chips with Sriracha sauce before you bake them.
  • Red Pepper Flakes — These add zesty heat and will stick to kale leaves that are coated with oil.
  • Chili & Taco Seasoning — This will give your kale chips a bit of spicy Mexican flavor.
  • Smokey — For an added smokey taste, consider sprinkling ground chipotle peppers or smoked paprika over your oil-coated kale pieces.
  • BBQ — If you like the taste of barbecue-flavored chips, sprinkle your oil-rubbed kale pieces with a barbecue spice mixture or dry rub.
  • Parmesan Cheese — For a cheesy taste, sprinkle grated Parmesan cheese over oil-covered kale pieces.
  • Brewer’s Yeast — This tastes great on popcorn. Capture that distinctive taste by sprinkling an even coating of brewer’s yeast over oil-saturated kale leaves.
  • Chocolate — If you’re the total chocoholic and go to every extreme to get your chocolate fix, consider sprinkling grated chocolate on oil-covered kale leaves. Use a mild or flavorless oil like coconut oil, so the oil doesn’t overpower the additive. You can use bittersweet chocolate to give your kale chips a savory chocolatey taste.

Final Thoughts To Keep In Mind

Here’s a few parting thoughts to keep in mind as you try your hand at homemade kale chips.

  • Be sure you have fresh, crisp kale leaves. If you’re buying kale by the bunch, be certain you remove the thick, hard stems and massage all of the leaves as you wash them. Use your hands to remove embedded sand, dirt and debris. This may seem like a time-consuming process, but your kale chips will be inedible unless you remove all of the ground in dirt.
  • Use a cooking timer to remind you to check on the progress of your chips. An oven thermometer allows you to monitor your oven temperature to ensure that it is consistent. Some electric ovens have less than consistent thermostats.
  • Don’t try to bake all of your chips at once. Use one oven rack. If your rack only holds one or two baking sheets at once, plan to cook your chips in batches.
  • Don’t prepare your kale leaves until you’re going to cook them. Kale is full of water, and it wilts and gets soggy very quickly.

Kale is a fantastically healthy and inexpensive fall and winter vegetable. It’s also fun to create new chip recipes by adding herbs, seasonings, and other flavor enhancers so you can enjoy different versions of your newfound healthy snack treat. Pack a bag full of kale chips to take to work or to add to your children’s school lunches.