Infrared Heaters: How to Keep Your Home & Save Money

For many homeowners, winter is a frigid time of year, full of extreme weather and very low temperatures. Unfortunately, the cost of heating your home using your central air can be rather expensive, especially when you think about all the empty rooms that you’re paying to keep warm, yet aren’t using. These extra energy costs can be worrisome for families on a budget or trying to lower their utility costs.

Thankfully, we may have a solution for you. By following a supplemental heating strategy in your home, you will be able to save on your overall energy costs, without sacrificing your overall comfort levels.

Infrared heaters are a great option to help you accomplish this. They are a comparatively inexpensive yet effective way to keep your home or office warm.

How Do Infrared Heaters Work?

In a nutshell, an infrared heater, or “heat lamp,” uses a process called electromagnetic radiation, in which an entity with a higher temperature transfers heat energy to an entity with a lower temperature. While the term electromagnetic radiation might sound scary or dangerous, it is perfectly safe for use when it comes to infrared heaters.

This type of heater actually projects out infrared light, which we humans lack the ability to see. Though it is invisible, things like our skin, clothes, and furniture absorb the light, and heat up.

In general, objects in the direct line of an infrared heater (infrared light projection) heat up very quickly, while surrounding objects will take slightly longer to warm up and raise the overall temperature of the area.

Remembering that infrared heat is actually light, some larger and more industrial versions of these heaters use a type of gold coating on the tube that reflects the radiation. The element Gold has exceptional oxidation resistance, and reflects approximately 95% of infrared light. This effectively doubles the amount of radiation projected outward.


Types of Infrared Heaters

Infrared heaters vary on the type of fuel or energy needed to power them. Most personal infrared heaters are electric, but propane and natural gas-powered are fairly common as well. All of these heaters are extremely efficient, and project nearly 100% of the heat they generate.

Material

This type of heater also varies when it comes to the material used in their construction. Larger infrared heaters are usually metal or ceramic, and are used mostly for commercial or industrial purposes.

Personal-sized infrared heaters can be metal, ceramic, or made of different types of composite plastics that have the ability to withstand high temperatures. Many personal heaters are made with a combination of these materials, with metal being the most common as the reflectivity of the material may help intensify the heat.

Aesthetics & Decor

As far as aesthetics are concerned, rest assured that infrared heaters have made great strides to fit into various styles of interior décor. Recently, many personal versions have been made to look very stylish and complement their surroundings.

Filament

Still, another way to classify different types of infrared heaters is the material used for the filament. The most effective and most common filament material used for the electric-style heaters is tungsten.

Tungsten has the highest melting point of any metal, which means it can stay strong and withstand extremely hot temperatures.

Alternative filament materials used for lower-temperatures include various alloys of iron, carbon aluminum and chromium. Carbon filament in particular is becoming more popular among personal infrared heaters due to its ability to heat up very quickly.

What Are the Benefits of Infrared Heaters?

Making the decision to use an infrared heater comes with several advantages over central heating, as well as other types of space heaters.

  1. Fast, safe, directed heating.
  2. Silent: They just radiate light.
  3. No reduction in oxygen or humidity levels, which can dry out skin and sinuses.
  4. Infrared heat promotes healthy blood circulation.
  5. No UV radiation.
  6. No pollutants or toxic by-products.
  7. No long fuel lines, open flames or carbon-type combustion.
  8. Extremely efficient and inexpensive to operate: Almost 100% of the heat created is transferred.
  9. Very little maintenance – No moving parts, no motor to wear down, no air filters or lubrication required.


Are Infrared Heaters Safe?

Although infrared heating is considered to be safe among consumers and professionals alike, they still emit heat and can be extremely hot at very close ranges. This means caution should always be exercised if the heater is operating around children or pets.

Much like any other type of heater, proper safety precautions should always be followed when operating. This would include avoid leaving your heater on when you go to bed or leave the room for an extended period of time.

It’s also worth noting that this type of heat can be started and stopped very quickly, as it is literally switching a light on and off. This may be considered to be a safety feature for some homeowners.

Lastly, remember that infrared heating is largely directional and focused. A rise in ambient temperature within a living area may take some time to occur, due to surrounding objects absorbing the light and heating up.

Why You Should Consider Using One

When it comes to using a personal heater to keep you and your family warm, you have many choices to choose from. And for the most part, they will all work great at achieving its purpose. Infrared heaters are a great choice because they require very little maintenance and are extremely quiet.

The heat they produce is gentle, cost-effective and very energy-efficient. You are guaranteed to stay warm and save money with this type of heater.
How to Winterize Your Sprinkler System

Your sprinkler system is an important part of your landscaping. Lawns, trees and plants are very expensive to replace, so it is important to protect and maintain your sprinkler system at all times. Before the temperatures drop with the onset of winter, it’s important that homeowners take the appropriate steps to winterize their sprinklers.

Without the proper preparation, you may be facing expensive repairs to your sprinkler system or the loss of established trees, shrubs, or flowers. And expensive repairs are the last thing that any homeowner wants, especially when a bit of preventative maintenance can avoid this altogether.

Check Your Owner’s Manual

First things first, if possible, look in the owner’s manual for how to winterize your sprinkler system and follow those directions to ensure that you don’t void a warranty or make any other mistakes.

If you’re unable to find the original owner’s manual or just want some quick tips to winterize your sprinklers, we’ve put together several important tips that every homeowner should be aware of.

1. Shut Off the Water

The first thing to do as winter’s freezing temperatures are drawing near is to turn off the water to your sprinklers. Make sure to shut it off at the main valve. Your sprinkler system’s shut-off valve should be housed in a space where it can’t freeze. If this wasn’t done during the installation, perform this task before the frigid weather arrives.

2. Turn Off the Controller

Once you’ve gotten the water turned off, you need to shut off the timer, also known as the controller. Timers sometimes have settings marked rain mode. If yours doesn’t, you will need to disconnect it from the power source.

If your controller is outdated, you may want to update to a model such as a solid-state controller, which has digital displays for time settings as well as efficient energy usage to reduce your electric bills.


3. Remove Backflow Preventer

Your system has a device to prevent backflow, which is great for lawn-watering season, but during the winter, it must be removed and stored safely until spring. After it is removed, it’s time to drain the water.

How to Remove Backflow Preventer:

  • First, you can try to siphon it out.
  • If siphoning doesn’t work, pump it out with a shop vacuum designed for wet/dry use.
  • It’s helpful to attach duct tape to the hose in order to narrow the opening.
  • Drain above ground valves and store them, as well.
  • You can use pipe-heating cables on some areas, but this can be problematic in case of power failures.

4. Drain Water From Pipes

It’s absolutely crucial that you drain all the water from your irrigation system. If any water is left in the system, it’s possible for the pipes to freeze, which will lead to the pipes cracking or bursting once the water starts to expand.

You can use a shop vacuum to do this process, which can be time consuming, or you can take an easier route. The simpler alternative method to clear your sprinkler valves is to blow them out.

How to Blow Out Irrigation System

Below are the steps to help you blow out your sprinkler system and remove all water from the lines. It’s important that you have the right safety eye protection prior to starting this process. If you have any doubts, it would be best to call a professional.

  • Get a large compressor: To drain your valves with the blowout technique, you’re going to need the right equipment: a compressor with 50 cubic feet per minute rating. It’s imperative that the regulator valve gauge on your compressor is accurate.
  • Take off the backflow prevention: If you have an anti-siphoning lock on your valve, remove the entire mechanism.
  • Turn on the air compressor: Connect this equipment to the backflow-prevention riser.
  • Switch on valves: Using the automatic controls, turn on your valves one at a time as you blow out your irrigation system. It’s best to start with the highest elevation and open the hand valves manually.
  • Turn on compressor: Take your time and gradually increase the pressure. If it’s too hot or powerful, attach a hose length to modify it.
  • Blow out the H2O: Watch the pressure gauge and temperature as you slowly blow the water out.
  • Move to the following valve: One by one, move around your yard, blowing out each valve. Repeat this process until the draining process has been completed.
  • Blow out main line: You’ll also need to blow out your irrigation system’s main line if it has one.
  • Finish up: At the end, you’ll need to replace caps, set rain mode or turn your power source off.

5. Protect Spigots & Hoses

In addition to protecting pipes and valves, you can also safeguard other parts of your landscape-watering system, including:

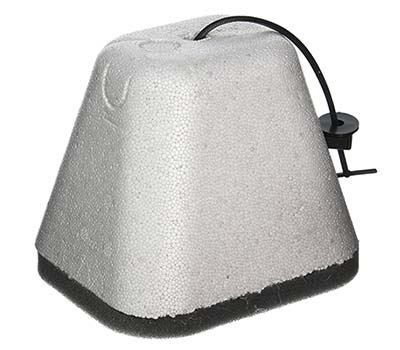
  • Spigots: Protect the spigots by covering them with Styrofoam protective devices that can be found at home improvement stores.
  • Hoses: Drain water from garden hoses and store them in an area away from ice and snow to prevent cracking.


Get to Know Your Irrigation System

While it’s not entirely necessary, it’s wise to have a good understanding of the ins-and-outs of your sprinkler system before you start the winterizing process. You don’t have to be an expert, but, if possible, every homeowner should learn what they can about the following:

  • Drain Valve Locations:

    Your system should have drain valves at each pipe’s low point. You also need them at high points, so air can be released; otherwise, the water won’t be able to drain properly.

  • Slope of the System:

    When a sprinkler system is installed, there should be a slight slope to allow for easy draining.

  • Auto-Drain Valves:

    If you install automatic drain valves, your annual winterization can be greatly streamlined.

Create a Map of Irrigation System

It would be helpful to have a diagram or map that tells you where all of the sprinkler heads, valves, and watering zones are located. This will not only help you stay organized, but also make it easier to upgrade, repair or winterize your sprinkler system.

Once you create your irrigation map, keep it in a waterproof and convenient location. This will ensure that it remains helpful and ready all year round.

Know Your Region’s Climate

Before performing any winterizing steps, take time to think about the climate in that your home is located in.

If it snows only once in the season and the temperature barely hits freezing, then you may not have to winterize your irrigation system at all. On the flip side, if your home is in an area that always has freezing temperatures, snow, and ice, then you will definitely need to prepare your irrigation system for the deep freeze.

This is where a professional can be a real help. They know the area well and will be able to tell you how to best prepare your sprinkler system for winter.

Takeaways

If you want a beautiful yard when spring arrives, there are many tasks that a homeowner should do to prepare their yard for winter. One of the most important is to winterize your sprinkler system.

Because it’s a moderately difficult DIY project, consider hiring a professional to do the job for you. You and your front yard and backyard will be glad you did.

Frozen Pipe

How to Prevent Frozen Pipes

If you live in a cold climate, you probably know all too well the dilemma of frozen pipes. If you’re new to cold climates or, perhaps, new to owning a house, it’s wise to learn all you can about what you should do in the event that your pipes freeze during a cold winter chill.

To help you prepare and protect your home, let’s take a look at why pipes freeze, as well as some simple prevention tips that every homeowner should know as the mercury starts to drop.

Why Do Pipes Freeze?

The reason behind why pipes freeze is likely self-explanatory. When the temperature outside your home drops too low, the water inside the pipes will freeze.

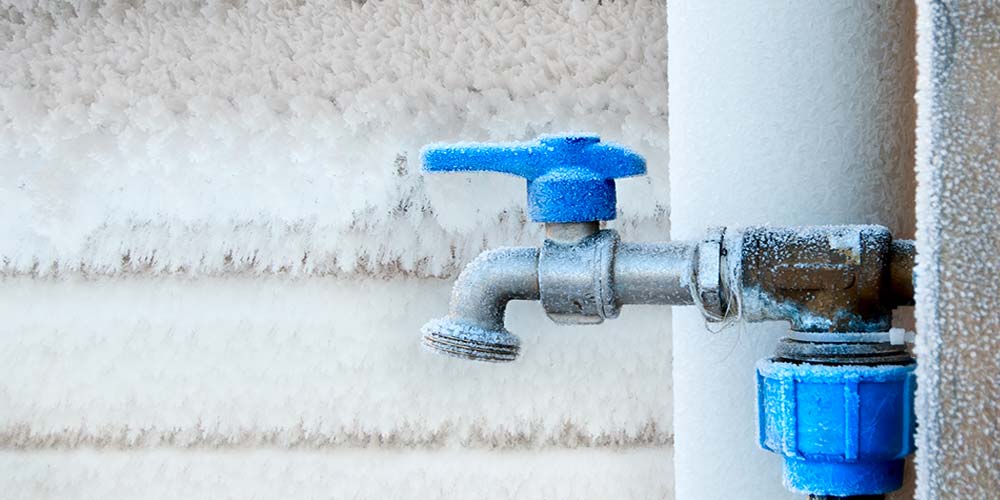
This typically starts with any spigots, faucets or pipes that are exposed to the elements. However, it can have an effect on areas in your home this is not heated or just poorly insulated. Upon hitting this frozen state, the water inside your pipes and spigots will expand, which may cause it to burst. This is where things can go really bad for homeowners, possibly leading to a whole host of other problems.


How to Prevent Frozen Pipes

There are many preventative measures that a homeowner can take to protect their home from a frozen pipe. There’s no single “best” way to prevent your pipes from freezing.

Instead, familiarize yourself with the tips below and use them in conjunction with each other. This will go a long way to make sure your pipes don’t freeze and, hopefully, prevent them from bursting and flooding your home.

1. Add Insulation to Exposed Pipes & Fixtures

By far, this is the easiest thing that a homeowner can do to protect their pipes. By adding a layer of insulation to all plumbing fixtures that are exposed, especially pipes and spigots, you can help prevent them from becoming too cold.

Most homeowners will initially think of the pipes and faucets on the exterior of their home. But, don’t forget about any pipes that are exposed in areas of your home that are not heated or well-insulated. This could be your garage or a basement, but also any of the forgotten crawl spaces. All of the pipes in these areas should be insulated, too.

There are lots of types of insulation that can help you here, all of which are available at home improvement stores or online.

Faucet Cover

Faucet Covers

These are a great way to protect outdoor spigots or faucets. Typically, a faucet cover is only a couple of bucks and they’re incredibly easy to install. If possible, opt for the faucet covers that have a hard plastic shell, as these are a bit more durable and will last for many seasons.

Foam Pipe Insulation

Resembling the colorful “noodles” you kids playing with in a swimming pool, these are pieces of foam that are designed to wrap completely around and insulate all exposed pipes. Extremely affordable and easy to install. The best part about this type of insulation, is that it goes far beyond preventing pipes from freezing, it will actually help cut your energy costs and prevent those same pipes from condensation when the temperature goes back up in the summer.

Pipe Wrap Tape

Very similar to the foam insulation above, but instead of a giant noodle of foam, this type of pipe insulation looks more like a roll of duct tape. You’ll apply it much like you would tape, too. Simply wrap it around any exposed areas and it will add a layer of thermal insulation to prevent it from freezing. Unfortunately, pipe wrap tape is going to be one of the more expensive options.

DIY Insulation

Sometimes, a winter storm will creep up on you and leave you with little to no time to get the necessary supplies or insulation. If you find yourself in this situation, don’t worry, there are still some easy and free insulation options that will protect your pipes.

Perhaps, the oldest method of protecting your pipes. Simply take some old rags or towels, and wrap them around any exposed pipes, spigots or other areas that you think is susceptible to freezing.

Make sure it’s wrapped up tight and won’t come loose during a storm. The best option is to wrap duct tape around the towel. Another option is to use another towel, tying it into a knot around the “insulating” layer to ensure it stays in place.

2. Use Heat Tape to Regulate Temperature

The name “heating tape” can be a bit of a misnomer. While there are different types available, some of which do have adhesive properties, most homeowners will think of this as a type of extension cord or cable.

The heating cable is then strategically wrapped around any exposed pipes. Once installed, simply plug in and turn on. The cord will emit a small amount of heat that will help regulate the temperature around the pipe, thus preventing from freezing.

When used properly, this can be a great way to make sure your pipes never freeze. Unfortunately, they are much more expensive then other types of pipe insulation. Additionally, you also need to be mindful of the type of heating cable you use, as well as the material your pipes are made of.

3. Protective Measures Inside Your Home

For pipes and spigots located on the exterior of your, insulation is about the most you can do to protect them from freezing. However, when it comes to the inside of your home, there are many things that a homeowner can do.

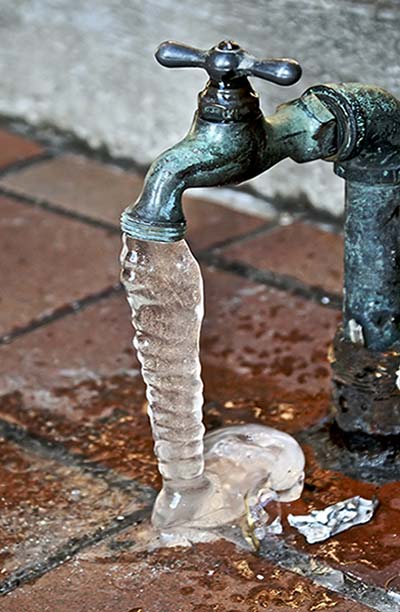
Frozen Water Spigot
  • Maintain Temperature:

    The number one thing you should do is regulate and maintain a steady temperature inside your home. Try to keep it above 60°F at all times, even if you’re not home at the time.

  • Heat & Insulate Exposed Areas:

    If you have a basement, garage or crawl space with an exposed water line, then you may want to consider using a small heater in that area to help prevent the temperature from dropping to a level that will cause water inside to freeze. Of course, a heater should only be used if it is deemed safe by the homeowner. Insulating pipes will be the best prevention, but a heater may also help. The very least you can do, at least for a garage, is keep the door closed and insulated.

  • Weather Sealing Doors & Windows:

    This is something that every homeowner should consider, just for the energy savings alone. No matter how extreme the temperature is outside, this is one easy DIY project that will help you regulate the temperature inside. It’ll help prevent pipes from freezing in the cold winter, as well as help your air conditioner keep the room cool in the hot summer.

  • Heat Circulation Within Cabinetry:

    Inside your home, it’s not uncommon for pipes to be exposed inside the cabinetry. They may be hard to spot, but there they are. Look inside your cabinets and if you see pipes, leave those doors open to ensure that the heat in the room can circulate to those areas.

4. Shut-Off Water Supply & Drain

Your pipes won’t burst if there’s no water inside to expand. Therefore, it would be wise to shut-off the water supply for any pipes that lead to an exterior spigot, as well as drain all the water out.

This would include:

If the weather hits extreme temperatures, then you may also want to drain the water out of any appliances that have a water supply, such as your hot water heater or fridge. This is especially true if they are located in a basement or garage.


5. Let Your Faucet Drip

The most popular way to prevent pipes from freezing, is to allow the faucets in your home to slowly drip water. Sure, it’s a gross waste of water, but it works. This is much better than dealing with a burst pipe.

The slow drip works because it helps moderate the water pressure inside your pipes. This allows the water to keep flowing and pressure lowered, all of which makes it more difficult to freeze.

6. Wash Your Dishes & Clothes (While You Sleep)

Most dishwashers and washing machines have an option that allow you to delay the wash-cycle for a few hours. If you have one of these, schedule a load to start in the middle of the night. This is when the temperatures will be at their lowest, and when your pipes have the highest risk of freezing.

This follows the same principles of a dripping faucet, but instead, you’re putting some of the appliances around your home to work (and not completely wasting water).

7. Use Ice Maker to Make Ice

While it sounds counter-intuitive to make ice when the weather is creating ice everywhere else, this little trick works quite well.

Your refrigerator makes ice when it detects that it’s needed. So, empty all the ice out of it. This will cause your fridge to make more ice, thus using more water and helping relieve the pressure that may lead to your pipes freezing.

Keep A Close Eye On Your Pipes

Knowing how to prevent frozen pipes in your home and yard is only part of the battle. If you’re in the home when the cold weather strikes, it’s wise to also keep a close eye on your plumbing.

This includes all faucets inside and outside of your home. Turn them on occasionally, inspecting that the pressure of water is working properly. This should be the first thing you do in the morning, and the last thing you do before you go to sleep.

Visually inspect occasionally to ensure that the preventive measures listed above are working. You want to be able to catch frozen pipes as soon as possible, so you can take the necessary steps to thaw them.


Bag of Leaves in Yard

13 Tasks Every Homeowner Should Complete Before Winter Rolls In

How to Prepare Your House for Fall & Winter

Fall conjures images of sunset-colored foliage, carved pumpkins and cinnamon in the air. Kids swap boogie boards for backpacks and moms and dads breathe a wistful sigh of relief. But shopping for pencil cases and Halloween candy are not the only important tasks you’ll do this fall.

Below, you’ll find a list of not-so-spooky house care tips that every homeowner should complete during autumn to help keep your home safe and warm all season long.

1. Get Ready for Fall(ing Leaves)

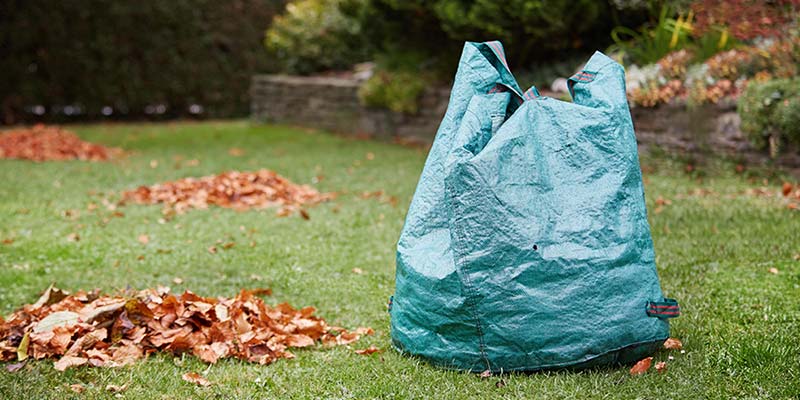
Watching the leaves change from vivid green to amber and gold is one of the highlights of the season. Raking up those leaves once they’ve fallen from the tree is not. Perhaps, composting or mulching all the leaves is your preferred route. But, if you plan on removing them from the yard, you’ll need to have the right tools ready to clear the lawn of debris.

At the very least, you’ll need a good rake to help clear the leaves from your yard. But, if you can get your hands on a leaf blower, you can save a ton of time. And don’t forget to stock up on large bags to help remove the ever-growing pile.

2. Branch Out

Aging trees can pose another threat as the weather gets colder and the winds start to kick up. If the branches of your trees are directly over your home, then you may have a more elevated risk of damage in the event that large branches break off and fall.

If this unfortunate scenario happens to your home, the damage of falling branches could range from minor to quite severe. Common issues may as simple as a few damaged shingles or shattered windows, but when it comes to heavy branches, you may see dented / blocked gutters, or a complete compromise of the integrity of your roof.

This is why it’s important for all homeowners to keep a close eye on the trees surrounding your property. Frequently, inspect them for potential weakness, and strategically trim them as soon as they start to get too close to your home. Use a chainsaw or hire a professional to remove branches that are too close to the house or those that appear to be in danger of falling.

3. Clean Your Gutters

Inspect your roof throughout the season to remove any leaves and branches that have accumulated there. As the leaves fall and pile up in your yard, keep in mind that the same is happening on top of your roof.

If the leaves are not cleared out in a timely manner, the accumulation of leaves or branches may prevent water from draining properly, and sometimes can create a “dam” that prevents water from draining entirely. Dammed up water may damage exterior surfaces and create a leak in your roof, window or walls. As every homeowner knows, a leak in the roof can cause all sort of other damage to items inside your home, possibly even creating an environment that allows mold to grow.

Check your rain-gutters, downspouts and other drainage items frequently to be sure they aren’t blocked by fallen leaves, debris or birds nests.

4. Repair Any Roof Leaks

A minor roof leak can become a major problem as the temperature starts to drop. Frozen water or the weight of snow can exacerbate minor flaws and leave your home vulnerable to major water damage.

This is precisely why every homeowner should make it a habit to climb up on their roof, grab a pair of binoculars or contact a roofing company to do a thorough inspection. Check the shingles and metal flashings for any signs of damage, especially on the ridge and in valleys or around vents and chimneys.

When it comes to roofs, a small amount of preemptive care can save you from an enormous amount of damage down the road.

5. Prepare Your Lawn

When the weather turns colder and the snow is near, some homeowners may breathe a sign of relief knowing that they won’t have to mow their lawn again until spring. For the most part, this is generally true. You will, indeed, have less lawn care responsibilities.

However, before you stash away your lawnmower and turn your grass over to the cold, it’s important to fertilize your lawn one last time. Spread a layer before the ground freezes, and your lawn will wake up in the spring nourished and ready to grow green once again. There’s no better way to start the spring season.

You will also want to winterize your sprinkler system. The last thing you want is to discover that it needs repairs come spring.

6. Walk the Walk. Fill the Crack.

Summer showers and growing roots may have damaged your driveway, or walkway. The wise homeowner will take a few minutes to check if their concrete or pavers have shifted, become loose or are somewhat uneven.

This simple task can prevent a falling hazard throughout all seasons of the year, but are increasingly treacherous in wet or icy weather. No matter how small the crack may seem, if you can spot and fill it before the winter chill, you have a better chance to prevent water from seeping in and freezing when the temperature drops. Once this happens, the cracks may expand and create an even more treacherous hazard as time goes on.

7. Dodge the Draft

Now that you have the windows down and you’re enjoying the cold weather, don’t forget that you need to prepare for the (even) colder temperatures to come.

Cold drafts inside your home can be a real drag. Buy some caulk, and seal cracks and gaps around windows or doors to keep your home energy efficient throughout the year. Check weather stripping for deterioration and replace or repair any sections that look damaged. Window treatments can also reduce energy loss, so consider installing insulating shades, curtains or blinds.

These small improvements are easy DIY projects that can save a ton of money for all homeowners. But this is especially true for those that live in areas that experience extreme temperatures.

8. Get Ready to Heat Things Up

You can also prepare for the cooler, drier winter weather by inspecting and performing routine maintenance on the equipment that heats your home. Perhaps the most important preparation that a homeowner can do to prepare for winter.

If you use a gas heater, hire a professional to inspect it for leaks and ensure it’s ready to warm your home in an efficient and safe manner. A “leaky” heater is not only inefficient but may also fill the air you breathe with dangerous poison. And the wise homeowner knows that they should never compromise their indoor air quality.

9. Change Your Air Filter

The air filter in your home needs to be changed on a frequent basis. While we may sometimes forget or neglect to change the air filter, the dawn of Autumn is a great time to change all the filters in your home.

Not only will this improve your indoor air quality, but it will also increase the overall efficiency of your furnace. If you’ve noticed screeches or whines coming from the belt, or maybe even erratic behavior from your furnace, you may want to have it inspected for blockages or problems with the burners, blower motor or thermostat.

It’s better to do this at the beginning of the Fall season, than to wait until the winter chill sets in.

10. Clear the Chimney (And Fire When Ready)

If you use a wood fireplace in your home, it would be wise to inspect the chimney to ensure there are no blockages or venting problems before you light the first fire of the season. Have your chimney swept, cleaned and cleared before you start any fires inside your home.

For the homeowner looking to save a bit of money, consider adding an energy-efficient fireplace insert or infrared heater to help provide heat to your room while slashing your overall heating bills.

This is also a great time to conduct routine other “home safety” measures, such as replacing the batteries in smoke and carbon monoxide detectors throughout your home.

11. Chill Out. (And Save Money)

After a long, hot summer, the cool weather can be a welcome relief to your body… as well as your budget. You can finally turn down your air conditioner, but may not need heat for a few more months.

Use the colder weather as an opportunity to create a comfortable temperature inside your home. Leave your windows open at night and enjoy the crisp chill of the Fall evening. Strategically tweak your thermostat, enjoy the mild temperatures and think of all the money you’ll save.

12. Add Welcoming Fall Decor

As the Fall season rolls in, there is no better time to change the elements of your interior decor to suit the season and welcome you as you come home.

  • Interior Fall Decor — Whether it’s autumn leaves, orange pumpkins or Fall candles, there are some very easy and cheap improvements that every homeowner can make to add a bit of Fall flair to their home.
  • Exterior Fall Decor — You might add outdoor lanterns along your walkway or fence to welcome visitors as the days become shorter and darkness comes on earlier. Extra light can be great for guiding trick-or-treaters as well. A seasonal doormat, large pumpkins and harvest themed elements create a warm welcome despite the cold.

Embrace the season with these simple upgrades to your decor.

13. Contain Yourself (And Declutter Your Mornings)

While your house may stay cleaner once the kids are back in school, odds are your entryway will not.

Backpacks, jackets and muddy shoes can quickly pile up around your main entrance, creating a mess, as well as a hazard. Now is a good time to add a mudroom bench with hooks to hold all the backpacks and outerwear coming in from the cold day. Extra storage for shoes and other gear will also help cut the clutter and keep your house looking neat. This will all go a long way to getting you ready for the morning rush.


Final Thoughts

Leaves, lawns, furnaces and fires all require attention as the cold weather starts to set in. And while this may be an intimidating task at first glance, getting your home ready for fall doesn’t have to be scary. These simple tips will make fall house care as easy as pumpkin pie.