Portable Air Conditioner in Home

How A Portable Air Conditioner Will Benefit Homeowners

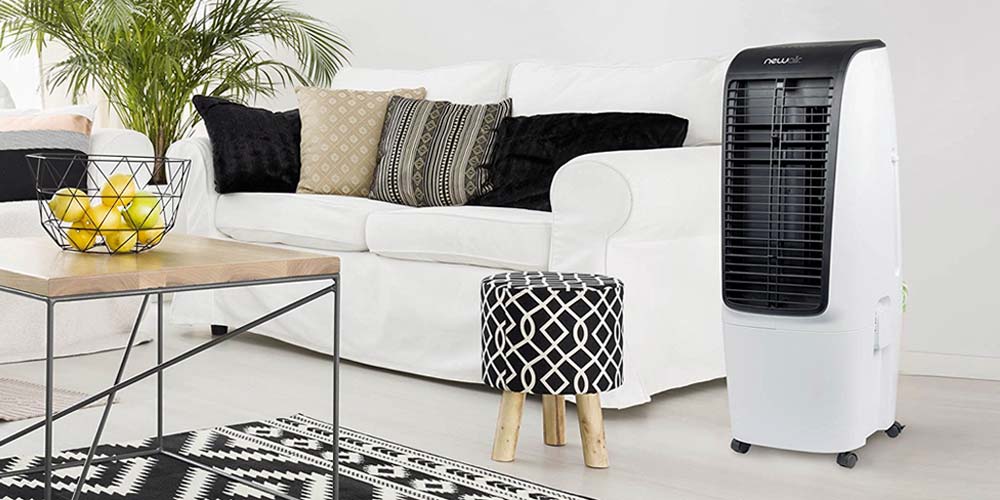
All around the United States, homeowners rely on their central air conditioner to keep their home cool during the hot summer months. While a central AC is one of the best options to keep you and your family cool, more and more homeowners are turning to a more versatile and convenient cooling appliance — the portable air conditioner.

These convenient, yet underrated, cooling appliances can do much more than simply provide cold air throughout your home. This type of “room” air conditioner is designed with many benefits in mind. Below, are five reasons why every homeowner would benefit from using a portable air conditioner in their home.

Portable Air Conditioner

1. Enhanced Temperature Control

If you are the type of person that always feels warmer than everyone else in your home or office, then you may benefit from the use of your a portable air conditioning unit.

Portable air conditioners provide you the freedom to cool a area or room without bothering your coworkers or roommates. As long as the interior space is enclosed, you could benefit from a portable air conditioner by simply cooling that one room. This will keep you in a comfortable temperature, without bothering anyone else nearby.


2. Saves You Money (And Energy Use)

For homeowners that live in warmer climates, using a room air conditioner to help cool their home may be a wise decision when it comes to lowering their utility bills.

Regardless of whether you go with a portable or window air conditioner, these smaller AC units can help homeowners bring the temperature down to a comfortable level in a small area or room that they spend the most time within. Running your central air conditioner at full power all the time tends to result in high energy bills, but a portable air conditioner can give your central AC unit a bit of a break. This not only extends the life of your central air conditioner, but a portable air conditioner can save you money.

This is also particularly useful if you happen to have non-standard windows that won’t fit a general window unit. Most portable A/C units can be installed in all sorts of odd-shaped windows, or even within a ceiling vent. Portable AC units also help save you money by only cooling the area of your home or office that you want to be cooled, which means less wasted energy in unoccupied spaces.

3. Improves Indoor Air Quality

Portable air conditioners do much more than just cool the air in a room. Some units have the ability to generate heat, making them a helpful appliance for year-round necessity use. Other AC units can utilize their built-in air filters to help improve your indoor air quality.

Popular Features & Functionality

  • Heater
  • Air purifier
  • Humidifier
  • Dehumidifier

You have lots of features available. Be sure to research all of the options provided with your preferred model in order to assure that is meets all of your unique needs.


4. Portability on the Road & Sea

For homeowners that enjoy hitting the road and traveling — whether by road or sea — a portable air conditioner is perfect for on-the-go. If you’re traveling in an RV, a portable air conditioner can help keep you cool during long road-trips. These also work great in cabins, vacation homes, and boats.

Simply remove your portable air conditioner from your home (or storage) and take it with you. Portability provides convenience when you need it most.

5. Keep Your Office & Tech Cool

The emergence of the internet and the ability to house processing power into smaller units has made it easier to run advanced businesses right from your own home. This frequently includes the ability to store servers and provide hosting services without leasing office or warehouse space.

If you have servers in your closet, garage, or anywhere else inside your home, then you may need a way to keep these servers cool.

Portable air conditioners can be used as a main cooling option or even as a supplement to your central air conditioning system to keep your equipment at a suitable temperature. These A/C units helps to prevent overheating and hot spots, which can lead to premature equipment failure as well as many other unexpected costs.


What’s the Best Air Conditioner for Your Home?

One way to get the most benefits from your portable air conditioning unit is to make sure you have a strong understanding of the amount of power your space requires to cool. To accomplish this, you just need to know the square footage of the room, as well as the BTU or ASHRAE that your AC unit produces.

For example, if you want to add a portable air conditioner into a typical, average-sized bedroom, then you won’t need a unit with industrial capabilities. However, if you plan on putting an air conditioner into a larger living room or game room, then you may need a larger unit to ensure that it’s capable of cooling the space.

How to Calculate BTU & Room Size

In order to ensure that you are utilizing the correct size, it is necessary that you calculate the BTUs required to achieve the cooling level you prefer.

To do this, you will need to calculate the size of the room you are planning to cool by multiplying the length by the width of the room. This will give you the square footage of the room. Once you have the size of the room, you should have a pretty good idea on what size unit you will need.

Cooling Capacity Chart by Room Size

The below chart is a rough estimation on how much cooling capacity you need for your room size.

  • < 225 sq/ft — 8,000 to 10,000 BTU’s
  • 225-300 sq/ft — 10,000 to 12,000 BTU’s
  • 300-425 sq/ft — 12,000 to 14,000 BTU’s
  • > 425 sq/ft — 14,000 BTU’s (or larger)

Enjoy Your Air Conditioner in a Variety of Ways

Although they have many different uses, portable air conditioners often get overlooked. Investing in a portable AC unit might just be the smartest financial move you can make as we move into these warmer months, and as heaters for your home when the weather beings to cools down.


Gel Fireplace

5 Common Questions About Gel Fireplaces

Gel fireplaces are ideal for individuals who do not have a fireplace in their home, or for those who wish to have a more efficient and environmentally friendly option. To help you decide if it’s the right type of fireplace for you and your home, we’ve listed out five of the most common questions that homeowners have about gel fireplaces.

What is a Gel Fireplace?

As the name implies, a gel fireplace is a specific type of fireplace that uses a specialty gel as its source of fuel.

This may refer to an existing fireplace that has been modified for gel use, or a fireplace that has been specifically built and installed with gel use in mind. Either way, the use of a gel fireplace allows homeowners to have a method at their disposal in which they can have an indoor fire even without the normal ventilation required by a traditional fireplace.

Gel Fireplaces

1. How Does a Gel Fireplace Work?

A gel fireplace is a very clean option in terms of how it functions. The gel itself burns very clean and does not require the use of a ventilation system, nor does it give off any unpleasant odors.

The fireplace that is used for gel usually includes several ceramic logs or other materials to mimic the look of a traditional fireplace, just as many fireplace inserts do. The gel can then be placed in the rear of the fireplace for combustion. The gel comes in canisters, and as many as three of these canisters can be placed in the fireplace at a time, allowing users to have a relatively long-lasting fire.

Gel is not the most effective option in terms of its heat-generating capabilities as it produces about 3,000 BTUs per hour, per can. Given the fact that it is most commonly used in smaller living spaces, the amount of heat it gives off is typically ideal for its intended function.

However, if you want to keep a larger area warm, a gel fireplace may not be the option for you. Each can is estimated to last for about two to three hours, so when used in conjunction with other cans, its endurance potential is solid.


2. How Do I Install a Gel Fireplace?

The installation of a gel fireplace is relatively simple. These fireplaces often come in kits so that they can be assembled inside of the home in which they will be used. The kits are designed in an intuitive manner since the manufacturers are aware of the fact that the kits will not be assembled by professionals.

The fireplaces typically make use of a metal shell. Inside the metal shell should include ceramic logs or other materials that replicate the appearance of a traditional fireplace. This metal shell is then covered by a layer of base wood, and then another layer of finer wood.

In most cases, mahogany or enamel is used. In the case of outdoor gel fireplaces, the metallic or ceramic shell is made to be more durable in order to protect from the elements.

3. Can I Convert an Existing Fireplace to Gel?

An existing fireplace in your home can be easily converted to a gel fireplace as well. First, the gas and ventilation lines must be closed. This will help improve the efficiency of the home, as fireplace ventilation is often a major source of heat loss, particularly during the cold winter months.

Once the gas and ventilation lines have been closed, the ceramic wood or other materials can be placed in the existing fireplace. The gel canisters can then be arranged behind the ceramic wood to give the appearance that the wood is burning in the existing fireplace.


4. What is the Fuel Made Of?

The gel that is made for use in this type of fireplace is typically made of isopropyl alcohol or some other alcohol substance. The substance is treated in order to make it as environmentally-friendly as possible, while also ensuring that it will burn for as long as possible.

There are several varieties of gel available, with thicker gels resulting in longer-lasting flames, and thinner gels producing hotter and brighter flames. As these gels will typically be used indoors, they must adhere to certain standards, being cleared by OSHA and the EPA before they are allowed to be mass-produced.

5. Is A Gel Fireplace Easy to Use?

Every aspect of the gel fireplace, from installation to use, is incredibly easy. Using the fireplace only requires the insertion of a gel canister to have a fire going in seconds. This ease of use coupled with the fact that these types of fireplaces can be used in any home without modification, has made gel fireplaces a very popular option for homeowners. An added benefit is the fact that the fuel that is used is safe for use without ventilation, and is also environmentally sound.

How to Hire an HVAC Technician

8 Tips Every Homeowner Should Know About Hiring an HVAC Technician

When your HVAC unit starts to show signs of needing maintenance, service, or complete replacement, it’s critical that every homeowner knows what to do and who to call (or not call).

During the peak of the summer months or in the thick of the winter months, your ability to find the right HVAC technician can make a huge difference on the timeline that is needed in order to fix whatever indoor air problems you may be experiencing in your home.

If you hire the right contractor to service your HVAC system, you will likely get things fixed or replaced without much of a hassle, and be back to feeling comfortable inside of your home in no time. On the other hand, if you hire the wrong contractor, it may make things much more difficult, causing you to have to wait a long time in the extreme heat or the freezing cold for service, pay too much for repairs, or be left without a working HVAC system.

Below, we will lay out eight tips that every homeowner should know to help you find and hire the best HVAC technician to service your unit.

1. Review Licensing Information

Any time you are considering hiring someone to do work within your home, you need to do a bit of research to ensure everything is on the up and up.

The first important thing to check is your HVAC technician’s license number. Your contractor should have no problem sharing his or her license number with you. If not, move on and find someone else.

Once you get the number, it is possible to look up the license and get an overview of past performance. If your contractor won’t provide a home improvement license to you, this is a red flag that you may need to choose someone else.


2. Ask for and Contact Customer References

What you should do next is to ask your contractor for customer references. A reputable company should be more than happy to provide a list of previous clients who can share their experiences with you.

When you start talking to your technician’s customers, make sure you ask about various things such as the contractor’s timeliness, work habits, ability to finish the job and whether or not the price was within the budget. Learning about another homeowner’s experience may help you make a decision about whether or not this contractor can help you in your situation. If your contractor dodges your questions about references, this is another red flag that they may not be the best technician for you.

3. Look at Experience Within the Industry

Ideally, the HVAC service person that you choose should have a lengthy list of experience. Whether or not you choose a team of contractors or a single proprietor, it’s important to go with someone who has a proven record of success with various types of HVAC systems and room air conditioners.

When you’re paying for time and labor, you want to have someone in your home that can quickly diagnose the problem and efficiently make adjustments or repairs. It may not be necessary to have someone who has been around for decades, but at the very least you want to choose a technician that has been in the industry for a few years.

4. Read Online Reviews

You can check the reputation of your HVAC technician by perusing popular websites dealing with businesses or home improvement. What you can do is conduct an Internet search using the company’s name as your search term.

While you should be on the look out for fallacious or untruthful reviews, most of the time online reviews can help guide you to finding and hiring the best HVAC technician. Just make sure that your read over each review in order to make a decision about choosing a contractor to service your HVAC problems.


5. Evaluate the Pricing

One of the most important things to homeowners when they schedule service to their major appliances is the price. What will come out of your pocket is always an important factor to keep in mind.

Either on the company website or through customer references, look at some of the pricing of the various services the business may offer. Companies that are on the lowest end of the region’s pricing may not be the best bet. The highest priced contractors may offer additional services, so be sure to ask.

Keep in mind, while going with the cheapest company isn’t always smart, you certainly don’t want to pay more than you have to. You get what you pay for.

6. Ask About Rebates & Energy Efficiency

When you’re having work done to your HVAC unit, or if you’re going with a brand new system, a reputable company should offer you additional tips and recommendations that can help you make sure your home is more energy efficient.

Part of any routine service for HVAC systems is a complete run through of the little improvements you can make around the house to support the proper maintenance and efficiency of your air conditioning or heating system. Contractors who take the time to show you how to make your home more energy efficient are typically ones you can trust.


7. Make Sure You Get an Estimate

Every reputable HVAC technician should provide a detailed and itemized price estimate of the work that needs to be done. If you don’t get a line-item or detailed information about how much the project or repairs may cost, then you should consider hiring a different HVAC technician.

It is strongly recommended that every homeowner get several estimates from different HVAC companies, as this will allow you to compare costs and make a data-driven decision. Ask about discounts your contractor may offer to help you keep things within your budget. Perhaps there are rebates available for you to take advantage of.

Some technicians may even offer financing opportunities that can help you purchase an entirely new system for your home. This can break down the cost into manageable monthly payments, making it much more affordable.

8. Get Everything in Writing

Once you have made a choice about which company you want to hire, it’s important to get a solid contract written out. Your contract should detail the entire scope of the project along with the detailed pricing.

Go line-by-line and read over everything that your technician presents to you. Make sure you ask any and all questions if you don’t understand something. An HVAC technician understands that most homeowners will have questions, and they expect you to ask. So, ask away before you sign anything.

Putting everything in writing can help you know exactly what to expect, and how much you’re going to pay before the job is completed. When everything has been finished, make sure you get additional information about your HVAC’s warranty and service requirements if you installed a new system.

Keep in mind that the warranty may vary between the manufacturer and the company that installed the devices. Get this in writing.

The Importance of Researching HVAC Technicians

Finding the right home improvement company or HVAC technician is something that can take some time, research, and effort.

If you skip this important step, you’re setting yourself up to getting a lower standard of service, paying much more than you need to or even becoming victim to an unscrupulous company. Being an informed and smart consumer can help you and your HVAC technician know exactly what to expect and provide a more positive working experience for all.

Infrared Heaters: How to Keep Your Home & Save Money

For many homeowners, winter is a frigid time of year, full of extreme weather and very low temperatures. Unfortunately, the cost of heating your home using your central air can be rather expensive, especially when you think about all the empty rooms that you’re paying to keep warm, yet aren’t using. These extra energy costs can be worrisome for families on a budget or trying to lower their utility costs.

Thankfully, we may have a solution for you. By following a supplemental heating strategy in your home, you will be able to save on your overall energy costs, without sacrificing your overall comfort levels.

Infrared heaters are a great option to help you accomplish this. They are a comparatively inexpensive yet effective way to keep your home or office warm.

How Do Infrared Heaters Work?

In a nutshell, an infrared heater, or “heat lamp,” uses a process called electromagnetic radiation, in which an entity with a higher temperature transfers heat energy to an entity with a lower temperature. While the term electromagnetic radiation might sound scary or dangerous, it is perfectly safe for use when it comes to infrared heaters.

This type of heater actually projects out infrared light, which we humans lack the ability to see. Though it is invisible, things like our skin, clothes, and furniture absorb the light, and heat up.

In general, objects in the direct line of an infrared heater (infrared light projection) heat up very quickly, while surrounding objects will take slightly longer to warm up and raise the overall temperature of the area.

Remembering that infrared heat is actually light, some larger and more industrial versions of these heaters use a type of gold coating on the tube that reflects the radiation. The element Gold has exceptional oxidation resistance, and reflects approximately 95% of infrared light. This effectively doubles the amount of radiation projected outward.


Types of Infrared Heaters

Infrared heaters vary on the type of fuel or energy needed to power them. Most personal infrared heaters are electric, but propane and natural gas-powered are fairly common as well. All of these heaters are extremely efficient, and project nearly 100% of the heat they generate.

Material

This type of heater also varies when it comes to the material used in their construction. Larger infrared heaters are usually metal or ceramic, and are used mostly for commercial or industrial purposes.

Personal-sized infrared heaters can be metal, ceramic, or made of different types of composite plastics that have the ability to withstand high temperatures. Many personal heaters are made with a combination of these materials, with metal being the most common as the reflectivity of the material may help intensify the heat.

Aesthetics & Decor

As far as aesthetics are concerned, rest assured that infrared heaters have made great strides to fit into various styles of interior décor. Recently, many personal versions have been made to look very stylish and complement their surroundings.

Filament

Still, another way to classify different types of infrared heaters is the material used for the filament. The most effective and most common filament material used for the electric-style heaters is tungsten.

Tungsten has the highest melting point of any metal, which means it can stay strong and withstand extremely hot temperatures.

Alternative filament materials used for lower-temperatures include various alloys of iron, carbon aluminum and chromium. Carbon filament in particular is becoming more popular among personal infrared heaters due to its ability to heat up very quickly.

What Are the Benefits of Infrared Heaters?

Making the decision to use an infrared heater comes with several advantages over central heating, as well as other types of space heaters.

  1. Fast, safe, directed heating.
  2. Silent: They just radiate light.
  3. No reduction in oxygen or humidity levels, which can dry out skin and sinuses.
  4. Infrared heat promotes healthy blood circulation.
  5. No UV radiation.
  6. No pollutants or toxic by-products.
  7. No long fuel lines, open flames or carbon-type combustion.
  8. Extremely efficient and inexpensive to operate: Almost 100% of the heat created is transferred.
  9. Very little maintenance – No moving parts, no motor to wear down, no air filters or lubrication required.


Are Infrared Heaters Safe?

Although infrared heating is considered to be safe among consumers and professionals alike, they still emit heat and can be extremely hot at very close ranges. This means caution should always be exercised if the heater is operating around children or pets.

Much like any other type of heater, proper safety precautions should always be followed when operating. This would include avoid leaving your heater on when you go to bed or leave the room for an extended period of time.

It’s also worth noting that this type of heat can be started and stopped very quickly, as it is literally switching a light on and off. This may be considered to be a safety feature for some homeowners.

Lastly, remember that infrared heating is largely directional and focused. A rise in ambient temperature within a living area may take some time to occur, due to surrounding objects absorbing the light and heating up.

Why You Should Consider Using One

When it comes to using a personal heater to keep you and your family warm, you have many choices to choose from. And for the most part, they will all work great at achieving its purpose. Infrared heaters are a great choice because they require very little maintenance and are extremely quiet.

The heat they produce is gentle, cost-effective and very energy-efficient. You are guaranteed to stay warm and save money with this type of heater.

relative-humidity

Relative Humidity: What Every Homeowner Should Know

Relative humidity is an important factor of the indoor air quality in your home. As such, it’s wise for homeowners to educate themselves about what relative humidity is, as well as how they can control it in order to protect their homes and family members.

As weather changes and temperatures move up and down the thermometer, relative humidity changes, as well. Homeowners should learn about how the humidity in their homes impacts air quality, wellbeing, and building structures. Excess moisture can damage the structural integrity of a house, plus lead to mold, mildew, and a wide variety of ailments for anybody living within. By controlling our indoor humidity, homeowners have the ability to prevent all sorts of problems.

What Makes Healthy Indoor Air?

Considering we spend the vast majority of our time inside, the indoor air quality of your home or office is so crucial that the EPA considers it a substantial environmental threat. In order for air inside a structure to be considered healthy, it should be:

  • Free of toxins
  • Fresh & well-ventilated
  • Less than 50% RH

In order to have fresh air, buildings must be well-ventilated to flush out pollution and airborne particulates. An air purifier is a great way to instantly improve the indoor air quality of your home. Outdoor air should flow in and out of a building, and allergens and harmful airborne particles should be kept at an absolute minimum.

What is Relative Humidity?

Relative humidity is a measurement of water vapor being held at a specific temperature compared to the amount it could hold. This calculation is usually expressed as a percentage. As temperatures rise and fall, the capacity of the air to hold the H₂O is impacted. The warmer the temps are, the more moisture the atmosphere can contain. When air cools down naturally, its moisture-holding abilities are diminished.

Once this happens, there are many variables that may affect an individual’s comfort level, such as their health, clothing, or physical activity at the time. Of course, everyone has their own personal preferences, but for the most part, humans are typically most comfortable when relative humidity stays between 20% and 60%.

While this may be the broad comfort range for your average person, however, it is not recommended to allow the relative humidity levels to rise above 50% inside your home.


What is the Ideal Humidity Levels For Homes?

Between 30-50%. To prevent mold growth, the EPA recommends keeping “indoor humidity below 60 percent (ideally between 30 and 50 percent) relative humidity.”

Depending on whether you’re using a heater or air conditioner to help control the temperature, homeowners may change the humidity levels in their home to make the air feel more comfortable.

Confused? The Paper Towel Metaphor.

If the concept of relative humidity seems confusing, you’re not alone. It may help to think of a concrete example such as a paper towel.

Have you tried to mop up a spill with a paper towel? After the towel is saturated, it can’t hold any more liquid. This would be considered 100% capacity; whereas if the sheet could still absorb a bit more, it would be a lesser percentage, such as 70%. Air’s capacity to hold moisture is similar to the paper towel’s; when it can hold no more, it has reached 100%, and this is known as its dew point.

How Can Excessive Humidity Affect Your Home?

You can use your senses to determine if your home has a problem with excess humidity. Unless you live in a dry desert, chances are you’ve noticed a few of these red flags:

  • Mold growth.
  • Warped boards or wood floors.
  • Musty smell, especially in crawl spaces, attics, and basements.
  • Bubbling or peeling paint.
  • Wallpaper peeling away from walls.
  • Stickiness on surfaces.
  • Condensation on windows or other areas.
  • Water stains on ceilings or walls.
  • Sneezing and other allergic reactions to inhaling dust mites.
  • Moisture build-up on ceilings or inside closets.
  • Frequently-fogged windows.

Is Excessive Humidity Unhealthy To Live In?

It is not healthy to live in a house that perpetually has too much moisture in the air. Many of these ailments develop as a result of mold exposure and other issues that homeowners face when there is too much humidity in their home.

For further research, here are a few studies that discuss the potential health effects associated with relative humidity.

  1. “Indoor air humidity, air quality, and health – An overview.” (PMID: 29398406)
  2. “Indirect health effects of relative humidity in indoor environments.” (PMID: 3709462)
  3. “The dichotomy of relative humidity on indoor air quality.” (PMID: 17499853)


Can A Dehumidifier Help With Relative Humidity?

Yes. If there is too much moisture inside your home or office, a dehumidifier can be utilized to help you remove the excess moisture and get your relative humidity back at an ideal level.

These devices have many uses and benefits for homeowners, but its most common purpose is to help extract H₂O from your indoor air, as well as help remove any musty odors that may be lingering as a result of too much moisture. Once that water has been removed, it will either be collected within the unit or pumped away automatically, depending on the type of dehumidifier you are using. To get rid of excess water by vaporizing it, an ionic membrane dehumidifier may be used.

Can A Humidifier Help With Relative Humidity?

Yes. Just as there are many reasons to remove moisture from the air, there are also many reasons why moisture in the air is beneficial. Striking the right balance of relative humidity is the key to having comfortable indoor air.

If your home is lacking humidity, you can help correct this by using a humidifier. Because they add moisture to the air, humidifiers can help alter the relative humidity levels in your home and make your indoor air more comfortable. These are especially important to use in the cold winter months, as you likely have a heater running which may be drying out the air. Just remember to clean your humidifier on a regular basis.

There are different types of humidifiers on the market, including:

  • Portable:

    These models are designed to humidify a space by forcing air to circulate through a wet pad, which then flows into the room in a fine mist.

  • Evaporating:

    A pan or absorbent pads are dipped into water, and then attached to a heating system. This causes moisture to evaporate into the environment.

  • Power:

    Water moves automatically into this unit to allow moisture to be circulated. A humidistat allows a homeowner to control the amount of water generated.

Where Household Moisture Comes From

The world is full of moisture; even your breath and body release droplets of water. While certain percentages of RH are desirable in an environment, too much can lead to trouble. Moisture moves through buildings in several ways:

  • Roof leaks
  • Rain water
  • Plumbing leaks
  • Steam from cooking
  • Steam from showers and bathtubs

No matter how your home becomes saturated with water vapor, condensation may occur on windows or other surfaces. This occurs more readily during chillier seasons. When moist warm air meets the cold glass of a window, it causes the air temps to drop, changes the relative humidity, and results in condensation.

Because a home’s relative humidity can impact family members’ overall well-being and the building structure, it’s crucial that homeowners educate themselves about this important component of air quality. If the RH percentage is kept in the proper range, health problems can be avoided or greatly minimized. For homes with too much moisture, a dehumidifier can create a safer and more comfortable interior. On the flip side, houses that are too dry can add water vapor with a humidifier. Armed with knowledge about humidity, individuals can live happily ever after in their homes.


Mold In Home

How to Remove Mold From Your Home

As a homeowner, it’s critical for you to know and understand the dangers that mold presents to your home. It is a common concern for homeowners and can cause unseen damage to your home and your health.

Mold is a fungus that has the potential to grow within any location that is damp or excessively moist. If these areas are also warm, poorly ventilated, or have no light, then mold is more likely to thrive and cause issues.

At first, mold in your house will only create a musty or unpleasant odor, but as time goes on, mold can lead to some pretty serious damage. In fact, according to the CDC, exposure to mold has the potential to provoke allergies and asthma attacks for people who are prone to them.

In this article, you’ll learn more about how to get rid of mold from your house, as well as how you can spot it and prevent it from growing in the first place. Ask any homeowner, mold is not something you want in your home.

1. Control Humidity & Moisture

Mildew is a thin black or white substance that you typically find growing on grout in a bathroom. It flourishes in warm, humid areas, so the first step in removing and preventing it is to clean the places in a home where it’s mostly likely to show up, and keep them dry.

Mold

Be sure to regularly clean your bathroom and kitchen, stretch out wet shower curtains and dry damp clothing quickly.

If your basement is often damp, there may be crevices in the walls letting moisture in, so replace cracked mortar and make sure you have sufficient outside drainage.

An air conditioner can help by taking in warm air, which holds more moisture, and circulating it back out as cool, dry air. A humidstat or dehumidifier is also useful for reducing humidity.

On days when the air outside is dry, open up your windows and use electric fans to let the outside air circulate into your home and carry the moisture out.


2. Use Cleaning Solutions & Products

There are a number of cleaning solutions you can use, all of which are relatively inexpensive and easy to find.

Bleach

Bleach is very effective when used on moldy surfaces. Mix 1 cup of bleach with 1 gallon of water, then use either a spray bottle or a bucket and sponge to clean the affected area.

If you want to prevent growth, don’t wipe the area afterward. Note that bleach has some drawbacks, the foremost being that it’s useless on porous materials like wood and drywall. It also gives off harsh fumes, and mixing chlorine bleach with ammonia or certain other household cleaners is incredibly dangerous as it produces toxic gas.

Note: Never mix bleach with other chemicals!

Vinegar

Vinegar isn’t quite as effective as bleach, but it’s safe and doesn’t give off harsh fumes. Pour undiluted white vinegar or apple cider vinegar into a spray bottle, spray the affected area, let it sit for an hour, then wipe clean.

If you want to use it to prevent growth, simply don’t wipe afterward, and spray again every few days. Use it only on non-porous surfaces.

Borax

Borax is dangerous if swallowed, but it’s otherwise safe and doesn’t give off dangerous fumes. Create a mixture of 1 cup of borax for every 1 gallon of water, then clean with a scrubbing brush. Once again, only use it on non-porous surfaces, and you can use it to prevent growth by not wiping it off afterward.

Ammonia

Ammonia is similar to bleach in that it can’t be used on porous surfaces, and also that it’s a dangerous chemical. Make sure that you only use clear ammonia. Create a 50/50 mix of water and clear ammonia, and spray the affected surface. Let it sit for a few hours, then wipe and rinse.

Baking Soda

Baking soda is both mild and safe, and it also acts as a deodorizer. What’s more, unlike the other solutions, baking soda can be used on porous surfaces.

Add 2 tablespoons of baking soda to 8 ounces of water and mix thoroughly. Spray the affected area, scrub with a sponge or brush, then rinse. Follow this by spraying a second time, but don’t rinse afterward.


3. Cut Out & Remove Large Infestations

Mold can grow behind the walls and other unseen places in a house, leaving homeowners unaware until they smell it or notice stains on the wall. At that point, it has to be literally cut out of carpets and drywall.

How to Remove Moldy Drywall & Carpets

If you choose to do this on your own, you’ll want to wear old clothing and shoes along with goggles, gloves and N-95 respirator.

N-95 Respirator For Mold Removal

N-95 Respirator For Mold Removal from 3M

Prep & Set-Up

Set a box fan in the window of the room you’re working on. Next, make sure you tape plywood or cardboard around the window openings so spores expelled by the fan can’t get back in. Turn off your air conditioner and/or furnace, and then seal off the airflow within the room by covering the vents and doorways with plastic sheeting and duct tape.

Removing Moldy Carpets

Use a utility knife to cut moldy carpets into 6′ x 8′ sections, and mist the surfaces with a pump sprayer to control spores. Roll up the sections and wrap them in thick plastic trash bags.

Removing Moldy Drywall

Turn off power to the room, and probe stained or soft spots on the wall with a screwdriver to find the infestation and locate any wiring, removing baseboards and trim if necessary. Use a drywall saw or utility knife to cut out the infested drywall and any moldy insulation behind it. Mist with the pump sprayer to control spores, then double-bag the material in heavy plastic bags and tie the bags off.

Clean-Up

Vacuum up the debris with a shop-vac with an extra-long hose, so you can keep the shop vac outside to keep spores from spreading. Use a brush to scrub stained surfaces inside the walls with a water and bleach mixture, and then wipe the areas, but don’t rinse them. Dry any trim you washed in direct sunlight, and use fans and dehumidifiers to dry the room for at least three days.

When you’ve eliminated it all, seal the wood with a pigmented shellac or oil-based primer. Put in new insulation and drywall, replace the trim, and repaint using paint that contains mildewcide.


4. Hire Mold Remediation Professionals

If you have a persistent infestation, you may need to hire a mold remediation specialist.

Do your homework to find one who is reputable. The specialist will thoroughly inspect your home to determine the extent of the infestation, and afterward he or she will let you know if you can take care of the problem yourself, or if you’ll need to hire professionals to handle it.

Make sure the specialist gives you a written report. Note that, to avoid conflicts of interest, the specialist who inspects your home should work independently from the company you hire to clean out the infestation.

Swamp Cooler

Swamp Cooler FAQs

Affordable and energy efficient, swamp coolers are a great way to drop the temperature in your home, without spending the money on a new air conditioner. They don’t use any chemicals or refrigerants, all it needs is water to help you feel cooler.

While this all may sound great, evaporative air coolers are not the right fit for everyone or every home. Only some homeowners will benefit from using a swamp cooler inside their home, and even then, it is hardly ever a suitable alternative to other types of air conditioners.

What Is A Swamp Cooler?

A swamp cooler is an appliance that uses the evaporation of water to help cool the air stream and add humidity back into the air. They are particularly useful for anyone living in arid climates.

Other names for these devices include:

  • Evaporative coolers
  • Wet air coolers
  • Desert coolers

How Does A Swamp Cooler Work?

This type of air cooler utilizes the principles of evaporative cooling.

A swamp cooler is really just a simple contraption that uses a fan to suck in hot air, typically from the outdoors, then pushing the air over a number of wet “cooling” pads.

As the hot air passes over these pads, the liquid water turns into vapor, which is then pushed out of the unit, and into the air inside your home. Once the vapor starts to circulate into the air, the added moisture will extract the heat from the air, helping the ambient temperature feel cooler.

How An Evaporative Cooler Works

The dry air temperature cools during the evaporation process. This is the same method that the human body uses to cool itself down. When we get hot we sweat and the sweat evaporates which lowers our body’s temperature.

Because of this it’s important to use only in hot, dry climates. For optimal performance, only homeowners that have humidity levels below 50% should use a swamp cooler inside their home.


Does It Lower the Ambient Temperature?

A swamp cooler will help make the temperature feel approximately 5°-15° lower in the area within close proximity to where it is located. However, they will not lower the overall ambient temperature in the room.

This is a common misconception and important for homeowners to understand prior to purchasing an evaporative cooler. Unlike an AC unit, you will not feel a significant drop in temperature, nor will you be able to control the temperature with any sort of precision.


What’s the Difference Between a Swamp Cooler & Air Conditioner?

The most notable difference is the method in which they each cool the air that is being circulated within the room.

An air cooler uses water, cooling pads and an internal fan to increase the humidity within the room, whereas an air conditioner uses a compressor and refrigerants that can rapidly cool the air.

While they may have similarities and are both intended to cool a room, it’s very important to understand that they each utilize a distinct cooling method and are not a one-for-one replacement.

Portable Cooling Confusion

The similarities are noticeably obvious when it comes to portable air conditioners. Because of how similar they are in shape, size and design, not to mention they each have “portable” in their name, it’s very common for homeowners to confuse these units with portable evaporative coolers.

Unfortunately, they operate very differently, and this has left plenty of homeowners both confused and disappointed with their purchase.


What’s the Difference Between an Evaporative Cooler & Air Fan?

A fan uses rotating blades to create a current of air but has no real effect on the temperature or humidity within the room. All it does is circulate the air around you. It may feel cooler when you first feel the air circulating around you, but this is due to the “wind chill effect” that it creates and will be temporary, at best.

Whereas, an evaporative cooler utilizes an internal fan to help circulate air, but also goes one step further by using a set of wet cooling pads to help recreate the evaporation process by adding a bit of moisture to the air.


What is the Best Environment to Use a Swamp Cooler?

Due to the evaporative nature of how they operate, swamp coolers are best used in hot, dry climates where the temperature is high, and the humidity levels are low.


Can I Use One If I Live In A Humid Climate?

This is not recommended. If your home is located in an area with a humid climate, then it would be unwise to use a swamp cooler inside your home.

Not only will they be ineffective at cooling, but they will just add unnecessary amounts of moisture to the air. As a result, the excessive humidity levels inside your home will cause more issues and lead to poor indoor air quality.

If you live a humid climate, the better choice would be to use an air conditioner for cooling the interior of your home. However, depending on your location and the fluctuating temperature, there may be certain times in the day that you could use a swamp cooler to help supplement your air conditioner.


Will a Swamp Cooler Help Cool a Garage or Workshop?

Yes. An evaporative air cooler can be a great choice for cooling your garage or workshop. Due to the large doors and poor insulation, you are less-likely to experience the negative effects of too much humidity.

Ironically, it’s because of these same reasons that garages often don’t have an air conditioner. As a result, a swamp cooler could be the ideal choice to provide cooler airflow, especially on those hot summer days.


What Size Swamp Cooler Do I Need?

Once you’ve made the decision to purchase an air cooler, you need to determine the right size unit. Air coolers are measured by cubic feet per minute (CFM). This is the measurement used to determine the amount of air that will be circulated each minute.

How to Calculate CFM:

Figuring out the CFM is pretty easy and shouldn’t take more than a couple of minutes. Here’s the steps you will take.

  1. Determine the square footage of the room.
  2. Multiply the room’s square footage by the height of the ceilings.
  3. Then divide that number by 2.
  4. This is your suggested CFM for that room.

For Example:

To illustrate how this works, we’ll be calculating the amount of CFM needed to cool a room with 150 square feet and 9ft. tall ceilings.

  • Room Sq. Ft — 150 square feet
  • Ceiling Height — 9 ft
  • 150 x 9 = 1350 / 2 = 675 CFM

In the example above, I would need to find a unit that has a minimum of 675 CFM.

If the CFM falls in between units or you have an odd-shaped room with lots of corners, you would want to purchase an air cooler that is slightly larger. If it is too small will have to worker harder to keep the area cool and waste energy doing so.


How Do You Clean A Swamp Cooler?

A swamp cooler will follow a similar cleaning process as a humidifier. Any part of the device that gets wet, needs to be cleaned and sanitized on a regular basis.

To ensure proper cooling and the prevention of mold or mildew, the tank and cooling pads should be cleaned with soap and water at least once every 7-10 days. Allow all parts to dry thoroughly.

This will prevent dust, dirt, and mildew from building up. Cleaning the unit regularly is especially important if you are using the air cooler for long periods of time.

External – Cleaning the outside of the air cooler can be done periodically by simply wiping it down with a damp cloth.


How Often Do You Refill the Tank?

This depends on many factors, ranging from how you are using the device to the brand/model itself. Generally speaking, you should not have to refill the tank for at least 4-6 hours.

Refilling Swamp Cooler Tank

Below, are a few considerations that will play a role in how long your tank will last before it needs to be refilled.

  • How big is the device?
  • How / where often are you using it?
  • What is the temperature of the room / surrounding area?
  • What is the relative humidity of the room / surrounding area?
  • What is the insulation like in the room it is being used in?

Depending on how you answered the above questions, you to help you determine whether or not you can use your swamp cooler in a more efficient manner.


How Often Do You Replace the Cooling Pads?

This depends on how you are using and caring for the device. If you clean your swamp cooler on a regular basis, then your cooling pads will last for quite a while.

As the summer season sets in and you prepare to use the evaporative cooler for the first time, inspect the pads to make sure that they have no damage. If you notice any cracks, then they will need to be replaced.


Do you have a question about evaporative air coolers that you didn’t see listed here? If so, leave it down in the comments below.


Carbon Monoxide Dectector in Home

Carbon Monoxide: What Every Homeowner Should Know

Nicknamed the “Silent Killer,” carbon monoxide is more common in homes than you may think. In fact, it’s likely in your home right now as you read this.

Should you be concerned by its presence? And, what can you do about it?

Let’s take a look at some of the most common questions homeowners have about carbon monoxide, and why you should have a CO detector in your home.

What is Carbon Monoxide?

A toxic gas that has no visible appearance or noticeable odor, carbon monoxide (CO) can pose serious health risks when it accumulates beyond a certain level.

Because it is completely indiscernible to the human senses, detecting it can pose a bit of a challenge for homeowners. It’s important to note that carbon monoxide is constantly present within your indoor air, but poses little risk until it hits a certain threshold.

Does Carbon Monoxide Smell?

No. You cannot smell carbon monoxide. Nor can you see, taste or otherwise notice its presence unless you have the right equipment.

Carbon Monoxide

It is precisely because of its inconspicuous nature that CO has earned the nickname as being a “Silent Killer” or “Invisible Killer.”

Sadly, unless you have the a carbon monoxide detector installed in your home, you won’t know that levels have reached a toxic level until it is too late.

What Causes Carbon Monoxide in a House?

The short answer is that CO can originate from anything that burns fuel for power. This can include everything from automobiles to gas-powered stove ranges, even water heaters and fireplaces. Carbon monoxide occurs as result of partial oxidation of compounds which contain carbon, forming when insufficient oxygen exists to produce carbon dioxide.

An average home will usually contain up to 5 ppm of CO in the air at any given time, a level that is near to the natural atmospheric concentration and is safe for people and animals to breathe. If you have a gas stove in your home, the level may be slightly higher, but still not high enough to cause significant health concerns.

However, problems with appliances or inadequate ventilation can cause carbon monoxide to collect in parts of a home, eventually elevating to levels where it may be unsafe to remain inside.


How Does a CO Detector Work?

A carbon monoxide detector works much like a typical smoke detector. Equipped with built-in sensors that can identify and measure the concentration of CO in the air.

When unsafe levels of CO are discovered, the device will broadcast an alarm that will alert the occupants inside the home. In theory, this would give anyone within the immediate area an opportunity to respond quickly in order to avoid overexposure to the gas.

Carbon Monoxide Detector

Where Should I Install My CO Detector?

While there are many factors to consider, it is important to pay particularly close attention to what the manufacturer states is best for that specific model. Within the user manual, you will find all the information you need to install it in your home.

Determining the Best Placement:

Aside from the manufacturer’s recommendations, there are a few general guidelines that can help you determine the best placement of a CO detector within your home.

  • Inside Bedrooms — It’s wise to have a carbon monoxide detector in all your bedrooms or any other area of your home where occupants may fall asleep.
  • Central Locations — Spread evenly throughout your home, you should place a CO detector on all levels near any main rooms where residents may be found, including your living room, dining room and near doorways that lead into a garage.
  • Unobstructed Areas — Wherever you install your carbon monoxide detector, make sure that you do not place it anywhere that may be blocked by furniture, drapes or other objects.
Where to Install CO Detector in Home

Just like you would with smoke detectors, it’s wise for homeowners to install these near any potential sources of carbon monoxide output or areas where it may accumulate.


Is Carbon Monoxide Heavier Than Air?

No. Carbon monoxide is lighter than air. Apparently, there is much debate surrounding this question, which has lead to further confusion about where homeowners should install a CO detector.

Hopefully, this 2012 study published in The Journal of Emergency Medicine will settle the debate and give homeowners some reassurance about the location they decide to install their unit. Researchers came to the following conclusions:

CO did not layer on the floor, float at the middle of the chamber, or rise to the top… Mixing would be even faster in the home environment, with drafts due to motion or temperature. It would be reasonable to place a residential CO alarm at any height within the room.


What Are the Symptoms of CO Poisoning?

Any exposure to CO can be potentially dangerous. It is because of this that every homeowner should take any necessary precautions to protect their family and ensure that the air inside their home is safe.

Call for Help!

American Association of Poison Control Centers
1-800-222-1222

For the majority of homeowners, it is unlikely that minimal exposure will cause any issues, however, this is still a toxic gas that has no health benefits associated with it. If you have babies, young children or small pets in your home, you should be especially mindful of how much CO is in your air.

Symptoms may include the following:
  • Respiratory issues.
  • Fatigue and weakness.
  • Headaches, ranging from dull to severe.
  • Dizziness, nausea and vomiting.
  • Impaired judgement and sense of confusion.
  • Faintness and loss of consciousness.
Symptoms, Safe Levels & Duration of Exposure:

While the actual duration and concentration amounts may vary, below is a general guide to help homeowners learn what symptoms they may experience when exposed to different levels of this poisonous gas.

  • Constant exposure to a CO concentration of 35 ppm for 6-8 hours can result in headaches and dizziness.
  • Exposure to 100 ppm can result in headache symptoms in just 2-3 hours.
  • Exposure to 200 ppm may produce headaches and impaired judgment within 2-3 hours.
  • With exposure to 400 ppm, more severe frontal headaches can occur in 1-2 hours.
  • 800 ppm of CO concentration can lead to nausea, dizziness, and convulsions within 45 minutes.
  • 1,600 ppm concentration levels will produce the above symptoms in just 15-20 minutes, and can cause death within 2 hours.
  • Concentration levels greater than 3,200 ppm will cause severe symptoms in 5-10 minutes, and death within a half-hour.
  • As levels increase above 10,000 ppm, unconsciousness will occur after just a few breaths. A full-grown adult will not be able to survive more than a few moments of such exposure before death occurs.

Note: If you believe you or your family is in any sort of danger, get out of the house immediately. Call 911. Call poison control at 1-800-222-1222.


How Can I Protect My Family From CO Poisoning?

No matter how large or small your home may be, there are several ways that a homeowner can prevent and protect their family from this poisonous gas.

Carbon Monoxide in Your Home
  • Install New CO Detector:

    Install a new carbon monoxide detector that meets all current requirements of UL 2034 safety standards. It is suggested that you install at least one detector for each level of a multi-story home, and one unit near each separate sleeping area of a home and/or near locations where gas might collect (such as near a garage).

  • Proper Installation & Maintenance of Fuel-Burning Appliances:

    Ensure that fuel-burning appliances are properly installed and maintained per manufacturer’s instructions, and with respect to local building codes. Professional inspections and servicing of heating systems and chimneys should be performed annually. Never attempt to complete repairs or servicing without qualified knowledge and proper equipment.

  • Never Use Gas-Powered Engines Inside:

    Never operate generators or tools with gas-powered engines indoors, including in garages. Even with doors and windows open, enclosed spaces can trap CO and allow it to quickly accumulate to dangerous levels. Never leave cars running in an attached garage, even with the door fully opened.

  • Never Use Gas-Powered Heaters Inside:

    Do not heat your home using gas-powered appliances such as ovens or ranges, and never operate fuel-burning appliances in unvented rooms where people are asleep.

  • Ensure Chimney is Clear & Unobstructed:

    If performing renovations or repairs on your home, be sure that chimneys and appliance vents remain unobstructed. Verify that all such appliances are in good working condition after work has been completed.


The Best Resources For Homeowners

As your install a CO alarm in your home, take a few minutes to familiarize yourself with the resources listed below. While it is unlikely that you’ll experience an issue, especially now that you have the right equipment to alert you, it is still wise to know what to do if needed.


Cleaning A Humidifier

How to Clean Your Humidifier

One of the most important factors in determining your indoor air quality is the amount of moisture in the air. The relative humidity inside your home becomes particularly important as winter sets in.

This is because as the temperature starts to drop and you start to crank up the heat, the warm air circulating around your home will dry out the air you breathe. When the air in your home is too dry, you may start to experience a whole bunch of issues, all of which may range from minor annoyances to significant health complications, such as the flu.

Now that the seasons are starting to change and the mercury is starting to drop, we created the below guide to help homeowners learn how to clean their humidifier, and have it ready on those long, chilly nights.

How Often Do I Need to Clean My Humidifier?

Every 24-36 hours. If water has been standing inside your humidifier for longer than that time, you should not use it inside your home. While inconvenient, it is strongly recommended that you clean your humidifier prior to every use.


Why Do I Need to Clean My Humidifier?

Cleaning the humidifier will prevent any sort of bacterial growth or mold from developing inside the device. If you have this sort of contamination inside your humidifier, and you do not clean it before you turn it on, then you may inadvertently disperse harmful particulates into the air.

Not only is this detrimental to your indoor air quality, but it can immediately impact the health of anyone inside your home. This is not only detrimental to your indoor air quality, but it also puts everyone in your home at risk for developing respiratory issues. This is especially true for young children, the elderly and anyone that breathes it in for an extended period of time.

Check the Cleaning Instructions In Manual

Before you try using any of the cleaning methods listed below, it is wise to take a look at what the user manual that came with your humidifier says and follow the care instructions from the manufacturer. These guidelines are the best way to keep your humidifier in good working order, and prevent any unexpected damage that voids the warranty or leads to you having to replace it.


3 Ways to Clean Your Humidifier

Without proper care and regular cleaning, your humidifier puts your indoor air quality at risk. Below, we have highlighted three methods that you can follow to clean your humidifier.

1. Use White Vinegar & Tea Tree Oil

Due to their natural disinfectant properties, the easiest and “all-natural” way to clean your humidifier is to use a mixture of vinegar and tea tree oil.

Vinegar & Tea Tree Oil

Supplies You Need:

  • White vinegar
  • Tea tree oil (optional)
  • Bottle brush if required for your humidifier
  • Water

Cleaning Instructions:

Begin by disassembling your humidifier. Pour any standing water from the tank and lay all pieces out as you take it apart.

Next, add a generous amount of white vinegar to the base of your humidifier, as well as a few drops of tea tree oil. Do the same for the water tank, as well as submerge all other external parts into a similar mixture. Allow it to soak for at least 20-30 minutes.

Before you pour out the vinegar, use a brush or washcloth to scrub all parts of the humidifier. Try to remove any deposit buildup that may be visible.

Once you have scrubbed it thoroughly, rinse all parts of your humidifier with warm water. You may need to do this several times to get rid of the vinegar smell before reassembling your humidifier.

2. Disinfect With Bleach or Hydrogen Peroxide

To give your humidifier a deep clean, try following the cleaning instructions listed above but substitute the tea tree oil with bleach or hydrogen peroxide. By using one of these two chemicals, you ensure that all bacteria and mold spores inside your humidifier is killed off.

Bleach & Hydrogen Peroxide

Supplies You Need:

  • Bleach or Hydrogen Peroxide
  • Clean Towels
  • Safety Goggles & Gloves
  • A Soft-Bristle Brush
  • Water
  • Optional: White Vinegar*

Cleaning Instructions:

For the most part, this process will follow the same instructions recommended for the vinegar and tea tree oil option. However, if you decide to use bleach, you should wear gloves and goggles to protect yourself from the chemicals. *And never mix bleach and vinegar together!*

When using bleach, you can choose to do so at the same time you are cleaning the tank or you can disinfect after the tank is clean. Disinfecting a humidifier with bleach will take an additional 30 minutes, so if you are short on time, it is probably beneficial to do both at once.

Step 1: Begin by disassembling your humidifier. Don’t forget to remove the air filter, if there is one. You can clean the filter by using cool water and letting it air dry.

Step 2: Mix about 1 teaspoon of bleach — or use 3 percent hydrogen peroxide — into a gallon of water and fill the tank with it. Ensure the entire inside is coated by stirring the mixture around.

Step 3: Once you’ve completed both steps, rinse the base, tank and all of its small parts. Shake it well to dislodge any trapped moisture. Remember to do this several times to get rid of any vinegar or bleach odors. Set the pieces on clean towels to air dry.

Once everything is dry, you can reassemble your machine.

Optional Step: After the humidifier has been disassembled, fill the base with vinegar and submerge the smaller parts. Allow it to soak for at least 20-30 minutes, use a brush or washcloth to dislodge any deposits or buildup, and thoroughly rinse out the vinegar. Do not mix vinegar and bleach together.

3. Buy & Use a Humidifier Disinfectant (Bacteriostat)

Humidifier Bacteriostat Treatment

If you don’t want to fool around with any of the cleaning options listed above, you can also buy a ready-made disinfectant or cleanser online. Often labeled as a descaler or bacteriostat, there are plenty of these cleanser available online. (View your options on Amazon.)

All you would do is simply follow the instructions that comes with the product. That’s it, your humidifier is clean and ready.

Effective, but Expensive:

While it is easy and convenient, and no doubt effective at disinfecting your humidifier, this option is not recommended for homeowners as it is grossly more expensive than all the others options listed here.

Vinegar, bleach and peroxide are all very effective at cleaning your humidifier, and they are also all incredibly cheap. You can buy all of them at every grocery store or corner store, and you’ll get a larger supply at a fraction of the cost.


Humidifier Maintenance & Care Tips

Now that you know how to clean your humidifier, it’s recommended that you also learn some simple maintenance tips to prolong its life and overall effectiveness.

How to Clean Humidifier

Empty Basin / Limit Standing Water

Besides weekly deep cleaning of your humidifier, you should be sure to rinse the water basin before every use. Doing so helps to keep bacteria from growing, keeps your unit working properly, and ensures your family is breathing the best air possible.

If possible, disinfect the humidifier any time that water has been standing for more than four hours.

Use Distilled Water

When you do fill your humidifier, only use distilled water. Tap water usually has added minerals. These minerals could be released into the air and create a thin layer of white dust on the surfaces in the room. Additionally, added minerals can build up as deposits in the machine and harbor the bacteria and mold you’re trying to prevent.

Drain & Dry Before Storing

Finally, be sure to drain and clean your humidifier and allow it to dry completely before storing it for the season. Storing a damp unit in a dark place, such as a closet or garage, only creates an optimal breeding ground that encourages bacteria and mold to grow. This will lead to a very gross discovery when it comes time to pull the unit out of storage.


The Homeowner Payoff

Knowing how to clean your humidifier ensures the air you and your family breathes is as pure as possible and leaves you comfortable and healthy. Even better, proper cleaning helps your machine to work for as many seasons as possible so you will be able to save money instead of purchasing a new unit each winter.