FAQs
- What is Carbon Monoxide?
- Does Carbon Monoxide Smell?
- What Causes Carbon Monoxide in a House?
- How Does a CO Detector Work?
- Where to Install CO Detector?
- Is Carbon Monoxide Heavier Than Air?
- What Are the Symptoms of CO Poisoning?
- How Can I Protect My Family?
Nicknamed the “Silent Killer,” carbon monoxide is more common in homes than you may think. In fact, it’s likely in your home right now as you read this.
Should you be concerned by its presence? And, what can you do about it?
Let’s take a look at some of the most common questions homeowners have about carbon monoxide, and why you should have a CO detector in your home.
What is Carbon Monoxide?
A toxic gas that has no visible appearance or noticeable odor, carbon monoxide (CO) can pose serious health risks when it accumulates beyond a certain level.
Because it is completely indiscernible to the human senses, detecting it can pose a bit of a challenge for homeowners. It’s important to note that carbon monoxide is constantly present within your indoor air, but poses little risk until it hits a certain threshold.
Does Carbon Monoxide Smell?
No. You cannot smell carbon monoxide. Nor can you see, taste or otherwise notice its presence unless you have the right equipment.

It is precisely because of its inconspicuous nature that CO has earned the nickname as being a “Silent Killer” or “Invisible Killer.”
Sadly, unless you have the a carbon monoxide detector installed in your home, you won’t know that levels have reached a toxic level until it is too late.
What Causes Carbon Monoxide in a House?
The short answer is that CO can originate from anything that burns fuel for power. This can include everything from automobiles to gas-powered stove ranges, even water heaters and fireplaces. Carbon monoxide occurs as result of partial oxidation of compounds which contain carbon, forming when insufficient oxygen exists to produce carbon dioxide.
An average home will usually contain up to 5 ppm of CO in the air at any given time, a level that is near to the natural atmospheric concentration and is safe for people and animals to breathe. If you have a gas stove in your home, the level may be slightly higher, but still not high enough to cause significant health concerns.
However, problems with appliances or inadequate ventilation can cause carbon monoxide to collect in parts of a home, eventually elevating to levels where it may be unsafe to remain inside.
How Does a CO Detector Work?
A carbon monoxide detector works much like a typical smoke detector. Equipped with built-in sensors that can identify and measure the concentration of CO in the air.
When unsafe levels of CO are discovered, the device will broadcast an alarm that will alert the occupants inside the home. In theory, this would give anyone within the immediate area an opportunity to respond quickly in order to avoid overexposure to the gas.

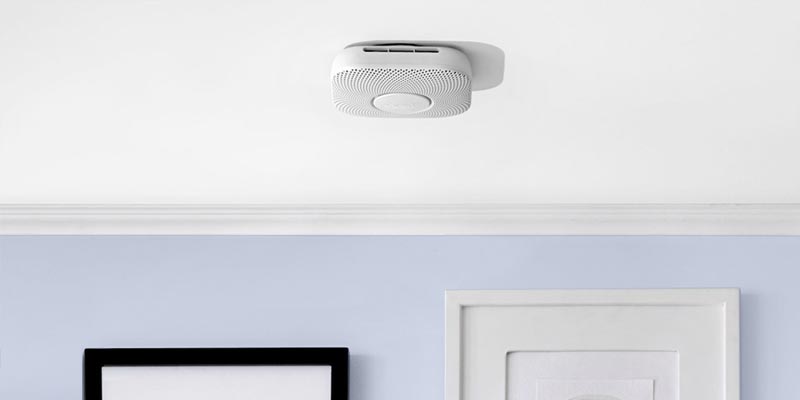
Where Should I Install My CO Detector?
While there are many factors to consider, it is important to pay particularly close attention to what the manufacturer states is best for that specific model. Within the user manual, you will find all the information you need to install it in your home.
Determining the Best Placement:
Aside from the manufacturer’s recommendations, there are a few general guidelines that can help you determine the best placement of a CO detector within your home.
- Inside Bedrooms — It’s wise to have a carbon monoxide detector in all your bedrooms or any other area of your home where occupants may fall asleep.
- Central Locations — Spread evenly throughout your home, you should place a CO detector on all levels near any main rooms where residents may be found, including your living room, dining room and near doorways that lead into a garage.
- Unobstructed Areas — Wherever you install your carbon monoxide detector, make sure that you do not place it anywhere that may be blocked by furniture, drapes or other objects.

Just like you would with smoke detectors, it’s wise for homeowners to install these near any potential sources of carbon monoxide output or areas where it may accumulate.
Is Carbon Monoxide Heavier Than Air?
No. Carbon monoxide is lighter than air. Apparently, there is much debate surrounding this question, which has lead to further confusion about where homeowners should install a CO detector.
Hopefully, this 2012 study published in The Journal of Emergency Medicine will settle the debate and give homeowners some reassurance about the location they decide to install their unit. Researchers came to the following conclusions:
CO did not layer on the floor, float at the middle of the chamber, or rise to the top… Mixing would be even faster in the home environment, with drafts due to motion or temperature. It would be reasonable to place a residential CO alarm at any height within the room.
What Are the Symptoms of CO Poisoning?
Any exposure to CO can be potentially dangerous. It is because of this that every homeowner should take any necessary precautions to protect their family and ensure that the air inside their home is safe.
Call for Help!
American Association of Poison Control Centers
1-800-222-1222
For the majority of homeowners, it is unlikely that minimal exposure will cause any issues, however, this is still a toxic gas that has no health benefits associated with it. If you have babies, young children or small pets in your home, you should be especially mindful of how much CO is in your air.
Symptoms may include the following:
- Respiratory issues.
- Fatigue and weakness.
- Headaches, ranging from dull to severe.
- Dizziness, nausea and vomiting.
- Impaired judgement and sense of confusion.
- Faintness and loss of consciousness.
Symptoms, Safe Levels & Duration of Exposure:
While the actual duration and concentration amounts may vary, below is a general guide to help homeowners learn what symptoms they may experience when exposed to different levels of this poisonous gas.
- Constant exposure to a CO concentration of 35 ppm for 6-8 hours can result in headaches and dizziness.
- Exposure to 100 ppm can result in headache symptoms in just 2-3 hours.
- Exposure to 200 ppm may produce headaches and impaired judgment within 2-3 hours.
- With exposure to 400 ppm, more severe frontal headaches can occur in 1-2 hours.
- 800 ppm of CO concentration can lead to nausea, dizziness, and convulsions within 45 minutes.
- 1,600 ppm concentration levels will produce the above symptoms in just 15-20 minutes, and can cause death within 2 hours.
- Concentration levels greater than 3,200 ppm will cause severe symptoms in 5-10 minutes, and death within a half-hour.
- As levels increase above 10,000 ppm, unconsciousness will occur after just a few breaths. A full-grown adult will not be able to survive more than a few moments of such exposure before death occurs.
Note: If you believe you or your family is in any sort of danger, get out of the house immediately. Call 911. Call poison control at 1-800-222-1222.
How Can I Protect My Family From CO Poisoning?
No matter how large or small your home may be, there are several ways that a homeowner can prevent and protect their family from this poisonous gas.

-
Install New CO Detector:
Install a new carbon monoxide detector that meets all current requirements of UL 2034 safety standards. It is suggested that you install at least one detector for each level of a multi-story home, and one unit near each separate sleeping area of a home and/or near locations where gas might collect (such as near a garage).
-
Proper Installation & Maintenance of Fuel-Burning Appliances:
Ensure that fuel-burning appliances are properly installed and maintained per manufacturer’s instructions, and with respect to local building codes. Professional inspections and servicing of heating systems and chimneys should be performed annually. Never attempt to complete repairs or servicing without qualified knowledge and proper equipment.
-
Never Use Gas-Powered Engines Inside:
Never operate generators or tools with gas-powered engines indoors, including in garages. Even with doors and windows open, enclosed spaces can trap CO and allow it to quickly accumulate to dangerous levels. Never leave cars running in an attached garage, even with the door fully opened.
-
Never Use Gas-Powered Heaters Inside:
Do not heat your home using gas-powered appliances such as ovens or ranges, and never operate fuel-burning appliances in unvented rooms where people are asleep.
-
Ensure Chimney is Clear & Unobstructed:
If performing renovations or repairs on your home, be sure that chimneys and appliance vents remain unobstructed. Verify that all such appliances are in good working condition after work has been completed.
The Best Resources For Homeowners
As your install a CO alarm in your home, take a few minutes to familiarize yourself with the resources listed below. While it is unlikely that you’ll experience an issue, especially now that you have the right equipment to alert you, it is still wise to know what to do if needed.
- CDC — Research & Studies About Carbon Monoxide Poisoning
- EPA — Carbon Monoxide’s Impact on Indoor Air Quality
- NIH — Compound Summary from PubChem
- OSHA — Fact Sheet About Carbon Monoxide Poisoning (PDF)
- WHO — Guidelines for Indoor Air Quality, Selected Pollutants (PDF)