How to Save Energy in Your Kitchen

5 Tips Every Homeowner Should Know

Whether it’s cooking, baking, or washing dishes, the kitchen is one of the main areas within your home where you will be consuming energy. There’s no way around this, but you can, however, reduce the amount of energy used by being a smart and frugal consumer.

Here in this article, we will discuss some easy ways that homeowners can learn how to cut their energy use in the kitchen while still preparing delicious meals and keeping a tidy — and functional — cooking space. Here’s how.

1. Buy Energy Efficient Appliances

If you’re in the market for new kitchen appliances, look for the Energy Star label before you buy. This is a designation given only to items that have been deemed highly efficient by the EPA (Environmental Protection Agency) and the Department of Energy. If you have perfectly good appliances that are not Energy Star, don’t just trade them in for new models.

2. Make Your Refrigerator More Efficient

Your fridge can cost you approximately $90 a year to operate, unless you outsmart it with a few frugal maneuvers, such as:

  • Change the Thermostat Setting:

    If you set your refrigerator’s thermostat to too cold of a setting, you are spending more money than you need to. Adjust your fridge’s temperature to a range between 37° & 40° F. Your freezer should be set between 0-5°F. Buy two appliance thermometers to monitor the temperatures if your appliance doesn’t have them already built-in. By raising your fridge temperature, you can save around $20 annually.

  • Make Your Own Ice:

    A built-in ice maker may be convenient, but it’s costing you extra cash. By relying on this feature, you could be spending 14 to 20 percent more than you need to be. Turning off this auto-feature is fairly simple, and by doing so, you can keep more money in your bank account.

  • Clean Off Your Coils:

    When your refrigerator’s coils get dusty, the cool-air flow is restricted, which makes your appliance struggle to do its job. You can remove this dust with a vacuum cleaner attachment, and save yourself nearly five dollars a year after performing the task.

  • Limit Yourself to One Fridge:

    Do you have an extra fridge in the basement, garage, or game room for beer, holiday turkeys, and party food? If so, you are shelling out hard-earned cash for something you only use seasonally. Find a way to make one refrigerator work for your household and save yourself $90 a year.

3. Spend Less on Cooking by Altering Your Oven/Stove Habits

The gas or electric oven and stovetop in your kitchen can cost you less if you change a few of your cooking habits. When you pay attention to the way you use your range, you can shave dollars off your utility bills. Follow these tips:

  • Stop preheating your oven: It’s not necessary to preheat your oven for every single recipe you prepare. There are a few items, such as fragile cakes like angel food, that may require preheating, but most dishes don’t necessarily need this step performed. If you want to be extra sure that you can skip this step with your meal preparation, it might be a good idea to do a bit of research beforehand, but for the most part it isn’t a big deal. If you skip preheating, you can save a couple dollars each month, which adds up to big dollars over time.
  • Use the right size burner: When you have a large pot or pan, use a larger burner. If you’re cooking with a small saucepan, use a smaller burner. Putting small pans on oversize burners is a waste of gas or electricity. It’s also not great for the pan. This practice will save you money on your energy bills, plus protect your pans for years to come.
  • Turn the power off early: You don’t have to leave your oven or burner on till your food is fully cooked, because plenty of heat will still be present when you turn the switch to “off”. Take advantage of the lingering heat and save cash in energy costs.
  • Clean your burners: The shinier your burner pans are, the more they will reflect and magnify the heat.

4. Save While Operating Your Dishwasher

If you have a dishwasher, you can save money while using it by doing the following things:

  • Use it: Most people think that hand washing dishes is cheaper than running the dishwasher, but this is actually not true. It is cheaper to run a full dishwasher than to hand wash every dish along the way. When you hand wash dishes, more water is lost down the drain than is used to wash and rinse the dishes.
  • Load it up: Be sure to wait until your dishwasher is full of plates, cups, bowls, and utensils before running it. It takes the same amount of water, energy, and soap to run a half-full load and a completely full load, so be sure to fill it all the way up before washing the load.
  • Skip heated-dry feature: Your dishes will dry without the extra heat, so skip this feature and save money. If your machine has an energy-efficient setting, be sure to utilize it.

5. Cut Costs During Cooking

You can cut dollars from your budget if you practice a few frugal cooking practices, such as:

  • Use your microwave as much as possible, because it’s a fairly economical machine and won’t heat up the rest of your home.
  • When using the oven, reduce the amount of heat you need to cook foods by baking your meals in glass or ceramic dishes.
  • Stop opening the oven door to check your meal, because you’re wasting heat.
  • Cover pots and pans on top of your stove for faster cooking times.
  • Boil foods in smaller amounts of water, to reduce energy needed to bring liquids to a boil.
  • Use a pressure cooker, because foods cook quickly and efficiently.
  • Double or triple recipes so you have leftovers.
  • Cut foods into smaller pieces, because they will require less energy to be cooked.
  • Use your barbecue on your patio to avoid using your oven and to keep your house cooler during the summer months.
  • Instead of using a blender, mixer, food processor, or electric coffee grinder, use your muscles to chop, blend, beat, or grind.

Your kitchen is the heart of your home. It’s where your family congregates, and where food and beverages are prepared to feed appetites and provide comfort. You can keep this important room warm and welcoming, but still trim dollars off your energy bills. When you know how to cut energy use in your kitchen and make “green” practices the norm, everyone benefits.
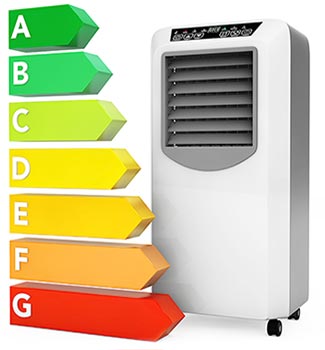
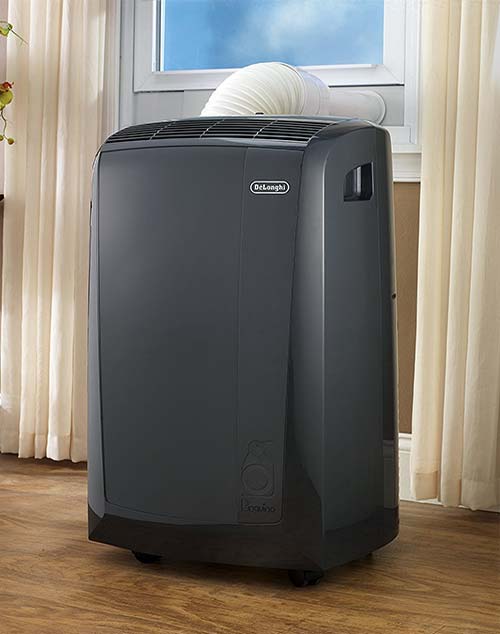
Portable Air Conditioner

Can A Portable Air Conditioner Save Money On Energy Bills?

This is one of the most common questions that homeowners have when they are considering whether or not a portable air conditioner is the right fit for them. And, the answer is wholly determined by how you plan on using the air conditioner itself.

The Quick Answer

Yes. Portable air conditioners can save you money and lower your energy bills, but only if you are strategic in how use it.

The Long Answer

Okay, now that we got the cliff-notes answer out of way, let’s dive a little deeper into how you can use a portable air conditioning unit to save money on your monthly energy bills.

Energy Efficient Portable Air Conditioner

Are Portable AC’s Energy Efficient?

No, not really. Out of all the various types of air conditioners available to homeowners, portable AC units are generally one of the worst in regard to energy efficiency.

When you compare portable air conditioners to other types of room AC units, you’ll find that they score terribly in a side-to-side comparison. You’ll find that both window and ductless AC units all have higher CEER and EER ratings, making them the cheaper choice for daily operation.

The simple truth — Portable AC units will use more energy to hit your ideal cooling temperature.

But, that doesn’t mean that you can’t use this type of air conditioner to help you save money and lower your energy bills.

3 Cooling Strategies That Save Money

I know what you’re thinking. If a portable air conditioner is such an energy hog, then how will it save money?

There’s a couple of strategies that you can follow to help you save money, and use your portable AC to stay cool. But again, it all comes down to how you use it.

The “Portable” Cooling Strategy

Portable air conditioners still have one notable advantage, and it’s so obvious that it’s baked right into the name.

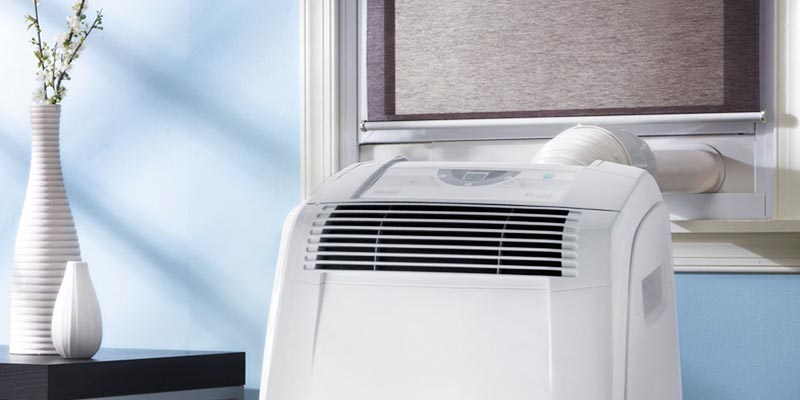
Portable Air Conditioner

This is the only type of room air conditioner that doesn’t require permanent installation. By taking advantage of a few extra accessories, you can easily move a portable AC from one room to another.

  • Rolling vs Carrying:

    The majority of manufacturers will include castors with the unit, but these can also be bought from any home improvement store. If you plan on moving a portable air conditioner from room to room, these are strongly recommended. They will make it easy to roll around, and you won’t have to worry about straining your back by picking it up.

  • The Venting Challenge:

    The only significant challenge is whether you need to install the window vent every time you want to move the AC unit. If so, this will become tiresome. Instead of bothering with this inconvenience, yu should consider buying an extra venting kit and installing it in the rooms you frequent the most.

Why This Saves Money

If you live in a small home or apartment, this is a great way to save some money. Instead of buying an air conditioner for each room, and dealing with the hassle of multiple installations, you can simply move a portable unit when you need.

The extra venting kits are just a simple click into place, and the castors allow you to roll it around your home with ease.

The only inconvenience is remember to actually move it when you need.

The Supplemental Cooling Strategy

This is where the real money saving opportunities come in to play, and is applicable for every homeowner, no matter how large or small your home may be. And it’s especially useful for anyone that is using a central air conditioner to cool their home.

Take a moment to consider how often all the rooms in your house are occupied at the same time. This is probably a rare occurrence, yet… every single day, you pay to keep those rooms cool.


Think about that.

How much money do you think you’ve lost, by cooling rooms that don’t really need to be cooled? Instead, try setting your thermostat at a reasonable, yet still relatively comfortable, temperature, and then use a portable air conditioner to quickly cool down the most important rooms.

This is called the supplemental cooling strategy. And it will save you lots of money, when used correctly.

Why This Saves Money

You no longer have to pay for your entire home to be cool, when only one or two rooms are being used.

As an example, think about your bedroom. You spend roughly 8-10 hours in that room every day. And a good night’s sleep is dependent on how comfortable you are. However, as you drift away into deep sleep, you’re continuously paying to keep the rest of your empty home at that same temperature. This happens every time your head hits the pillow. The energy cost adds up over time, and the amount of money that you’re wasting may just give you nightmares.

As an alternative, use a portable air conditioner to cool just your bedroom. And set your central air conditioner to a more energy efficient temperature. This gives you the flexibility to stay cool all night long, but save money by using less energy in total.

Note: When the cool nip of winter starts to hit, this same supplemental strategy can be applied when heating costs start to rise. Just swap out your AC unit for a heater, or plan ahead and buy a portable air conditioner that has heating functionality.

The “Don’t Piss Off Your HOA” Strategy

A quick glance at the reviews for popular window AC units, and it’s hard to miss the obligatory complaint about how somebody’s Homeowners Association made them take down their window unit.

Portable Air Conditioning Unit

This is actually a pretty common scenario.

While every neighborhood and HOA have their own set of rules, one of the most common restrictions found across them all is about window air conditioners. They’re an eyesore. They may not be safe. They are too loud. There’s a plenty of reasons they are restricted.

Unfortunately, most homeowners don’t even realize it, until it’s too late. It’s already installed in your window, and you’re living the comfy life as you open that HOA notice.

Why This Saves Money

Unlike the other cooling strategies above, this one will prevent you from wasting time and money with a window air conditioner that is only going to upset your HOA.

Nobody has time to deal with an overzealous HOA, and returning a large appliance is a hassle in itself.

If you’re one of the unfortunate homeowners that has already bought and installed a window air conditioner, then you may have already lost money. Hopefully, the manufacturer of the AC unit has an accommodating return policy and a low restocking fee.

Final Thoughts

Portable air conditioners get a bad rap. It’s true that they are not the most energy efficient air conditioner available, but if you are clever in how you use the device, there is no doubt that it can save you quite a bit of money and lower your energy bills.


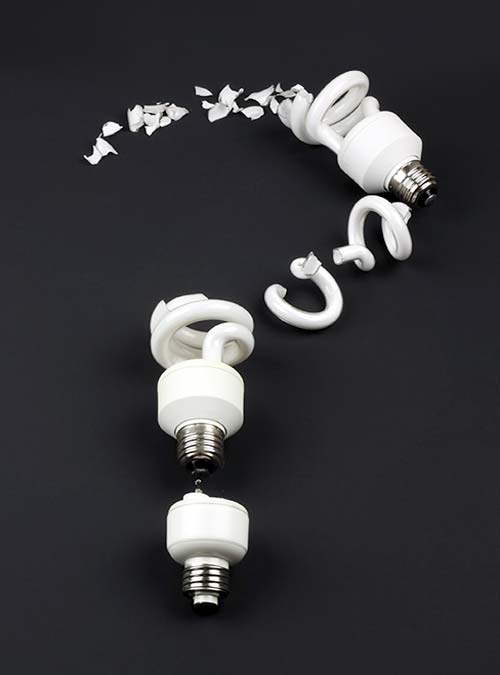
Broken CFL Bulb

How to Clean Up a Broken CFL Bulb

Using compact fluorescent light (CFL) bulbs in your house is a great way to use less energy, save a little bit of money on your utility bills and help protect the environment.

However, breaking one of these bulbs, as simple as it may seem, can create a dangerous situation. Because of the trace amounts of mercury inside the bulb, it’s important that you take proper precautions if you ever find yourself having to clean up a broken one.

Is a Broken CFL Bulb Dangerous?

Yes, it can be a potential safety concern. The tiny shards of glass that come from the broken bulb can easily cut open your skin.

But, that’s probably not why you’re reading this. I’m willing to guess that you’re concerned about the small amounts of mercury inside of a CFL bulb, and, perhaps, what it’s going to do to your indoor air quality. This is a valid concern.


Is There Mercury In CFL Bulbs?

Yes. It’s true that CFL bulbs have mercury inside them. And yes, if one of these bulbs break open inside your home, your indoor air quality could deteriorate if you don’t take proper precautions.

However, this scenario is much like many other emergency-like situations that homeowners often face. When something goes wrong, you take action before it gets worse. It’s simple.

Let’s look at the science:
  • Study from 2008: CFL bulbs tested contained about 3-5 mg of mercury, but the energy savings of each bulb prevents about 4.5 mg of mercury from being emitted into the air by power plants. Interestingly, this study also found that CFL bulbs contain about 1% of the mercury as old thermostats (500 mg).
  • Study from 2011: CFL bulbs tested only contained 0.1 to 3.6 mg of mercury, and would take up to ten weeks to emit vapors that would be considered hazardous to human health.
  • Study from 2012: Concluded that young infants were at the highest risk, and clean-up within the first four hours after a bulb breaks is “critical.” The study also noted that the temperature and ventilation of the room play a big role in whether the air is safe to breathe.

So, yes… A broken CFL bulb can be dangerous, especially for younger kids. But the danger can be minimized if you act quickly and follow a proper cleanup process.

For more information about the dangers of mercury, please visit the EPA’s website.


How to Clean Up Broken CFL Bulb

Cleaning up a broken CFL bulb isn’t a difficult or harrowing task. It’s a rather simple process that doesn’t require a professional and can be completed within a few minutes. However, because CFL bulbs contain mercury, the process for cleaning it up is a bit more complicated than simply picking up glass.

Below, we have explained the process you should follow if you break a CFL bulb, as well as some general tips that every homeowner should know before they start.

How to Clean a Broken CFL Bulb

Gather Your Materials:

  • Cardboard, heavy-duty paper or plastic scoop.
  • Tape, damp paper towels, or cleaning wipes.
  • Plastic bag or glass jar with lid.

Procedure for Clean-Up:

  1. First, use your cardboard or stiff paper to scoop-up the large pieces of the broken CFL glass.
  2. Next, use tape or damp paper towels to help remove the smaller shards of glass.
  3. Continue previous step until you feel confident that all glass shards have been removed.
  4. Wipe area with disinfectant wipes.
  5. Put all materials into your bag or glass jar, and seal completely.
  6. Dispose immediately.

Note: A glass jar with a tight fitting metal lid is the best item to dispose of the broken shards of glass because it keeps the mercury vapor sealed inside.

If one is not available, a sealable plastic bag, such as a large ziploc bag, will suffice. However, if you go this route, try to handle it as little as possible. You may also want to wear disposable gloves or gloves you don’t mind throwing away in order to prevent the glass shards from cutting your hands.


General Tips Every Homeowner Should Know

Know that you have a better understanding of how to clean up a broken CFL bulb, let’s take a closer look at a few other factors that will help protect you from the mercury inside.

1) Shut Off Central AC

The first step is to turn off your air conditioner, heater, fans or any other appliance that circulates air throughout your home.

The goal with this first step is to prevent the air in the “zone” with the broken bulb from spreading throughout your home. If the area has been exposed to elemental mercury, than it is important that you prevent the air from dissipating to other areas of your home.

2) Air Out & Ventilate Room

Now that you’ve shut off all air conditioners in the room, open the windows and allow the room to “air out” a bit. As noted in the studies above, a well-ventilated room is an important step to limit your exposure.

It would be wise to instruct all people and pets to leave the room immediately, taking precautions to avoid the area where the bulb was broken. Once everyone has left the room, you should open windows, doors and vents to the outside, but not into the house. Use this time to gather your materials.

CFL Bulb

3) Clean Up Within Four Hours

Allowing the mercury to sit, undisturbed, in a room with no ventilation is extremely unsafe and will quickly degrade the indoor air quality of your home. If you’re using an air conditioner, no matter what kind it may be, turn it off.

As the study above concluded, the first four hours are the most important. Try to clean it up within that time frame.

You have absolutely nothing to gain by waiting.

4) Safely Collect & Seal Debris

After you’ve gathered what you need, re-enter the room where the CFL bulb was broken. Leave the windows, vents and doors to the outside open in order to continue to let the mercury vapor dissipate.

Scoop up the larger pieces of glass from the floor. Place the shards into the glass jar or ziploc bag. Use the tape to pick up the smaller pieces of glass. Make sure that all glass is removed from the hard surface or carpet.

Once the glass has been picked up and placed in the jar, use the damp paper towels to clean the affected area. Disposable disinfectant towels will also be good for this purpose. All of these wet wipes should be placed inside the jar or ziploc bag. If you wear disposable gloves while cleaning up the mess, those too should be discarded inside the container

Once this has all be completed, tightly seal the jar or ziploc bag.

5) Remove From Home Immediately

Now that the broken bulb has been picked up, remove it from the house immediately. This is especially important if you used a plastic bag. This is because the plastic may not completely contain the mercury vapor inside. If not, it may then leak out into the air inside your home.

6) Never Use a Vacuum Cleaner. Ever.

Trying to vacuum up the glass from a broken bulb will only further fan the mercury vapor into the air. This is exactly what you want to avoid. Contain, not circulate.

Of course, depending on the type of floors that the broken bulb is on, this is easier said than done. Below, we have listed out some tips for cleanup based on the type of flooring.

  • Hardwood & Tiled Floors — It would be avoid the vacuum cleaner entirely. Stick with using a steam mop, swiffer or wet wipes to clean up the tiny shards of glass.
  • Carpets & Rugs — On a carpeted area, it can be difficult to find all the smaller pieces of glass from a broken bulb. Vacuuming can help, but it should be done with windows open and entry ways into the rest of the house closed.


No matter what type of flooring you have, once you completed the cleanup process listed above and picked up as much of the broken bulb as possible, you will be able to then — and only then — use the vacuum cleaner.

Note: If you decide to use the vacuum cleaner, it would be wise to use the hose attachment, keep the area well-ventilated and dispose of the bag / empty the canister as soon as possible. You don’t want CFL debris sitting inside your vacuum cleaner for an extended period of time.

7) Always Wash Your Hands Immediately After

Even if you wear gloves when you clean up the broken bulb, there is no guarantee that mercury didn’t get onto your hands. After cleaning up the shards of glass and throwing all the debris away in the best possible way, thoroughly wash your hands with soap and hot water.

This will help remove any small pieces of glass that may be lingering on your hands. It will also give you more peace of mind about residual mercury.

8) Dispose Hazardous Waste Correctly

Check your local regulations for the best way to properly dispose of broken CFL’s. Some municipalities may require you to dispose of the hazardous waste in different manners. Some simply allow you to throw it out with your garbage.

Of course, you could always toss it out and know one would ever know. But, you don’t want to inadvertently contaminate another area of our community. So, be a good neighbor, follow the law and dispose accordingly.


Summary

Cleanup of any broken CFL bulbs should be prompt and precise. Shut off your air conditioner to prevent circulation of air. Open windows to ventilate air in the area. Never, ever use a vacuum cleaner. And, seal the broken shards in bag or jar and remove from your home as soon as possible.

Garage Door

How to Insulate Your Garage (And Why Every Homeowner Should)

No matter what the weather is like outside, the temperature of your garage will typically follow the same temperature pattern. For the average homeowner, the garage is an area where temperature control can be a bit of a challenge.

The garage is well-known to be plagued by constant temperature fluctuations. Not only do these fluctuations have the potential to damage all the items you store in side, but it can wreak havok on your energy bills. Depending on the layout of your home, a poorly-insulated garage can ever have an affect on the temperature inside your home, especially within any rooms with a connecting wall to the garage.

So, what’s a homeowner to do? An easy solution is to add insulation to the garage door. Here’s why every homeowner should invest in this (relatively) cheap project.

Why You Should Insulate Your Garage

The most notable benefit of adding insulation in your garage is the ability to have better comfortable over the temperature. However, there are many other benefits you can expect from this easy DIY improvement.

One important benefit is the amount of energy you can potentially save. This can equate to a dramatic slash in your bills long after the insulation has been installed.

Another lesser-known benefit is that it can help create a sound-proof environment, keeping sounds out or in, depending on your situation. For example, if you live on a busy street, garage insulation can help quiet the loud noise of traffic. Or, perhaps, you are using your garage as a workshop or to learn to play the drums, insulation will help prevent that noise pollution from becoming an annoyance to your neighbors.


Areas You Can Add Insulation

Within your garage, you have three main areas in which you can add insulation. While it would be ideal to sure all three areas are properly insulated, it’s not always going to be feasible, as least not for the average homeowner.

1) Garage Door:

The easiest and cheapest area is to add insulation on your garage door. You can buy different types of insulation or buy a garage door insulation kit that has everything you need. Either way you go, this DIY project should only take a few hours to complete, and will save you thousands of dollars over the course of its lifetime.

As the main barrier to the exterior, adding insulation on your garage door is strongly recommended for every homeowner. This is especially true for anyone that has an interior wall connected to the garage.

2) Garage Walls:

Adding insulation to your garage walls is going to be a little more complex of a project. Likely, this is one area you shouldn’t need to be concerned about as homes, by law, are built with insulation in the walls. This is primarily due to the fire hazards associated with garages. Specifically, the type of combustible materials stored in the area, as well as the fact that most garages do not have a smoke detector.

Regardless, insulating the walls in your garage is something you should consider, especially when your home has an interior wall connected to it.

3) The Ceiling

The often forgotten about area in your garage, the ceiling is an incredibly important area to have insulation. If you have a bedroom directly above the garage, that room will experience the wrath of the weather outside if your garage does not have proper insulation.

Of course, adding insulation inside a ceiling is a very complex project that your average homeowner will be hesitant to embark on. You would need to consider the air flow and whether condensation may build up, which could lead to mold. This is definitely a job for a professional.

While installing insulation in the ceiling of your garage will certainly slash your energy bills and add comfort to the room above, it’s going to be significantly more expensive and time-consuming to complete and you may never fully see a return on your investment.


Types of Garage Door Insulation

Before you attempt this project, you should have a pretty good understanding of the different types of garage insulation available to you. While each of them will help you regulate the temperature and create a favorable environment within your garage, they do come with their own set of pros and cons.

1) Foam Boards:

Relatively cheap and easy to work with, foam boards are a stiff, firm insulation option that is a great choice for your garage door. Usually made from polystyrene, foam board insulation is easy to install, extremely lightweight and durable enough to handle extreme environments.

Available in large panels, foam board insulation is the easiest material for your average homeowner to work with. All you need is a measuring tape, box cutter, and an adhesive to adhere the board to the garage door. Out of all garage insulation options, this is the one that most homeowners will be interested in.

  • Ideal For: Installing on garage doors.

2) Batt Insulation:

Another cheap option that is easy to work with, batt insulation is going to be a great choice to install inside the walls and directly between studs. This type of insulation is typically made from fiberglass and available in precut sizes. It’s not the best choice for insulating your garage door, but can still be strategically used in this area.

  • Ideal For: Behind drywall, inside walls and ceilings.

3) Loose & Blown-In Insulation:

Often used within attics or between walls, this type of insulation is loose and, as the name suggests, blown into place. You can find this available in a variety of materials and is relatively cheap to buy and install. Because of the nature of how it is applied, you can fill the small crawlspaces, corners and crevices within your attic.

However, for your garage, this type of insulation may prove somewhat difficult to use.

  • Ideal For: Attics, crawlspaces and wall cavities.

4) Insulating Foam Sealant:

Another insulation option is spray foam, also called insulating foam sealant. This type of insulation is available in different forms. You can buy large quantities that work great for attics, or a small can of spray foam that work great at sealing the flow of air around windows or doors. For the purpose of insulating your garage door, we will only discuss insulating foam sealants available in small cans.

While a can of foam sealant is relatively cheap, these aren’t going to be the cheapest option for insulating a garage. These are best used to seal the flow of air around the edges of your garage door, or any other area that is hard to reach.

  • Ideal For: Small cracks, crevices and hard-to-reach areas.

Are Garage Door Insulation Kits Worth It?

This largely depends on your situation, the size of your garage door and how much time you’re willing to put into completing the project. For most homeowners, a garage door insulation kit is going to be the easiest option.

Featuring fiberglass or polystyrene panels, these kits will generally come with enough pre-cut panels to cover a garage door with a width of 9 ft. Equipped with pretty much everything you need, you can buy a garage insulation kit at a variety of retailers, including Home Depot, Lowes or Amazon. The cost of an insulation kit will range from about $70 to $100.

The Downside of Pre-Packaged Insulation Kits

The downside of buying a pre-made insulation kit is that they are all designed for the same size garage door in mind. This may leave you too much, or not enough, insulation to complete the project.

While this is an easy problem to resolve, nobody wants to pay for something that they don’t need. Or, be forced to make a second trip to the hardware store because you discovered at the tail-end of the insulation process that you don’t have enough materials to complete the job.


Do-It-Yourself Garage Door Insulation

While a garage door insulation kit is certainly a convenient option, you can often get better results by simply building our own kit. This is an easy DIY project that shouldn’t take more than a day.

It entails separately buying all the materials you’d find in a garage insulation kit, and then replicating your own insulation and putting in a little bit of work on your own. Customizing the insulation to fit your garage door ensures that you get maximum coverage, leading to increased savings and comfort.

How to Install Insulation on Your Garage Door

Below are some general tips you can follow to help you install insulation on your garage door.

Materials You Will Need:

  • Foam insulation panels
  • Box cutter or razor blade
  • Adhesive or glue

Installation Instructions:

  1. Measure Door & Calculate Material Needs — First, measure your garage door and calculate how much insulation you will need. Measure the dimensions of each panel on your garage door. Typically, these panels will be the same size, making it easy to calculate how much insulation you will need.
  2. Buy Materials — Next, head over to Lowes, Home Depot or your preferred hardware store and purchase the required insulation. While you’re there, you will also want to pick up some adhesive to glue the foam insulation to the garage door. Also, a box cutter, if you don’t already have one.
  3. Cut Foam Insulation to Size — Now that you know the dimensions for each panel on your garage door, cut the foam insulation to size. Repeat this step until you have cut enough insulation to cover the entire door.
  4. Adhere Insulation to Garage Door — Open your adhesive and start adhering your cut insulation to the door. If needed, you can use a little bit of masking or duct tape to help you hold each foam panel in place as the glue dries.
  5. Let Dry — Allow plenty of time to completely dry. The amount of time may differ depending on the type of adhesive you use. Generally, a few hours will be sufficient, but it may be wise to wait a full day to allow the adhesive to bond.
  6. *Optional: Apply Foam Sealant &mash; To really put the final touches on this project, you can use a can of foam sealant to help fill in any small gaps. This could include between the foam panels on the garage door, or even the small openings along the wall just inside the garage.

Please Note: The DIY option may cost a bit more in materials and time, but it’s well worth it in the long run.


Other Questions?

Thinking about adding insulation in your garage, but still have questions we didn’t address here? Or, perhaps, you’ve already completed this project and would like to add a few tips to help others?

Let’s hear it! Please contribute to the conversation by adding your questions, tips or concerns down in the comments below.