Water Quality

How to Test the Quality of Your Drinking Water

The majority of homeowners in the United States get their drinking water from public water treatment facilities, and we tend to accept without question that the water that flows from our taps is clean and safe to drink.

But is it?

Americans use thousands of different chemicals every day. Unbeknownst to us, many of these substances ends up in our lakes, rivers and aquifers. These may include pesticides, pharmaceuticals, solvents, weed killers, cleaning agents, you name it — all of these contaminants eventually finds its way into our water supply.

How Does Our Water Become Contaminated?

The contaminants that degrade the water quality come from a number of sources. Some of it gets there from people dumping it down their toilets, while other chemicals show up thanks to runoff from farms or mining, leaching from landfills, or improper storage and disposal at manufacturing plants. In addition to the chemicals, many of our waterways are filled with harmful bacteria, such as E. coli.

Some of these contaminants get removed during sewage treatment procedures, but others find their way into the waterways around our homes. It’s up to our water treatment facilities to properly process the water, removing all toxins to make it safe for us to drink before piping it to our homes.
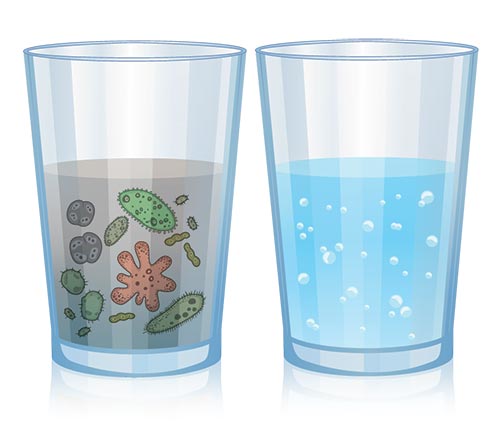
Water Contamination

Is Your Drinking Water Safe?

The Environmental Protection Agency regulates a number of harmful substances, such as uranium, lead, and arsenic. For each of these, the EPA sets a Maximum Contaminant Level indicating at what concentration these chemicals and minerals can exist in our drinking water before it is considered unsafe to drink.

Each summer, the EPA issues a report for most municipal water systems in the country. These Consumer Confidence Reports (CCR) can be searched on the EPA’s website.

In the CCR, at minimum you can expect to find the following information:

  • The source of your drinking water.
  • A discussion of the general risks of contamination.
  • A list of regulated contaminants and their levels in the water at the time of testing.
  • Possible health risks from these contaminants found in excess of EPA standards.
  • What your local water treatment facility is doing to correct any problems.

The Downside of the EPA’s Annual Water Quality Report

While these reports are a great resource that provide a high-level overview of what’s in the pipes in your home, they cannot reliably provide a complete picture of your water quality.

EPA Water

For the reports, water is tested only once or twice a year and contaminant levels are averaged out across 12 months. Contamination can occur outside of testing periods, or there can be occasional spikes in certain contaminants that exceed EPA regulations, and these issues may not be captured in the report. Furthermore, it’s possible for your water to become contaminated after it leaves the treatment facility.

Contaminants Not Measured by the EPA

As another point of concern, just a few of the chemicals that can be found in our drinking water are measured or regulated by the EPA. Independent water testing laboratories confirm a wide variety of contaminants that may be found in our water supplies. In water samples taken from across the country, these labs have discovered measurable quantities of contaminants as varied as antidepressant medications, artificial hormones and gasoline additives.

The EPA doesn’t regulate most of these chemicals in our drinking water. Although most will only occur in trace amounts, there’s no way to know what the chemical cocktail might be doing to our health. Most of these unmeasured contaminants have no taste or color and pass through our water and into our bodies undetected. While many of these substances may be harmless in and of themselves, there are few studies to suggest what these different chemicals might do in combination with others.


When Should You Get Your Water Tested?

The EPA recommends you test your water annually to get a sense for what you may be drinking and if there are changes over time. In addition to yearly water tests, some of the things that should prompt you to test your tap water immediately include:
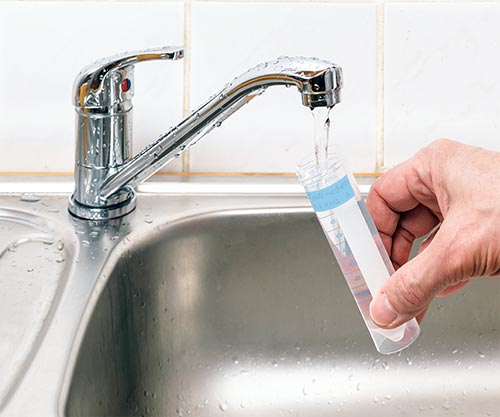
Water Quality Testing
  • Recurring stomach or digestive issues: This may be a sign of bacterial contamination.
  • Cloudy, frothy, discolored or smelly water: This can be caused by a number of contaminants.
  • Living in an older home: Aging plumbing may leach copper and lead into the drinking water.
  • Red or rust-colored stains on your sink or clothing: This is a sign that your water has high levels of iron or other minerals.
  • Nearby coal, gas or agricultural activities, especially fracking: These industrial areas may lead to pesticides, herbicides or solvents leaching into your water.
  • Living close to landfills, gas stations, industrial plants, dry cleaners: Many substances can leach into the ground and, possibly, contaminate local water supplies.

For a more comprehensive list, the EPA offers this handy chart (PDF) that can help you determine when you might want to test your water, with symptoms that can occur with certain contaminants.


How to Find Out What’s in Your Water

If you’re experiencing any signs that indicate something could be in your water, or if you want to test your water for your own peace of mind, you have a few options to choose from. The cost and accuracy will vary, so it’s important to do some research on your options prior to investing.

Sending Samples to a Testing Lab

There are many professional water testing labs that can provide extensive testing on water samples you provide. They send you a kit and instructions on how to collect water samples, and then you send the samples to the lab for evaluation.
How to Test Water Quality

Generally you can choose which kinds of tests these labs will perform, from testing for common contaminants to specialized tests for radon, uranium or other substances depending on your location and personal concerns.

These labs provide tests for tap water from both water from city treatment plants and well water, so they’re a good option for the majority of homeowners. The least expensive tests run about $50 and the most extensive ones can cost over $400, so it’s a good idea to know what you’re looking for before purchasing a test kit.

Is a DIY Water Testing Kit Worth the Cost?

Those costs may seem exorbitant, and you do have other options. There are inexpensive home testing kits you can purchase from home improvement stores and online merchants. These kits purport to test for bacteria, lead, pesticides, chlorine, nitrates and nitrites, and can also tell you the hardness and pH of your water.

These kits may seem like a great way to check your water quality and identify potential problems, but they cannot test for all contaminants, including fluoride and glyphosate. They are also far less reliable than laboratory tests, so the results should be taken with a grain of salt.

Do These Types of Kits Even Work?

Good Housekeeping performed a review of different do-it-yourself home water testing kits. Their results showed that most of the common tests inaccurately measured levels of certain contaminants, while entirely missing others. Even worse, many of these tests have given false positives that may cause you to take expensive preventative action when no such need exists.

So, what should you do?

If you’re just curious about your water but have no serious concerns, trying out a DIY kit may be a good place to start. However, if you have any concerns about your water quality, or you have anyone with health issues, small children, or elderly family members, you should probably consider a professional testing lab.

Just be careful: There are some labs out there that offer “free” water testing, but those usually are fronts for companies that want to try to sell you expensive filtration solutions you don’t need. You can find some of these “free” options available near many Home Depot locations.

If you have evidence of contaminants in your water, you can report it to the EPA’s Safe Drinking Water Hotline, 1-800-426-4791.


How Can You Remove Contaminants?

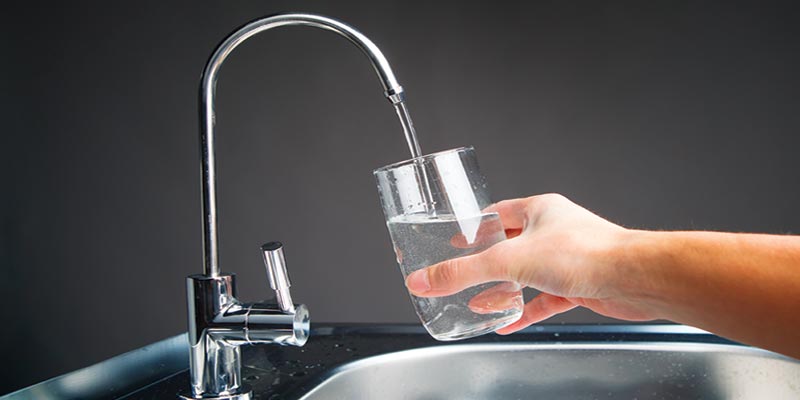
For some contaminants, it’s easy to remove them with a filter that attaches directly to your faucet or by using a water pitcher filter.

These filters are inexpensive and easy to maintain, using activated charcoal as their primary filtration medium. They are perfect for removing chlorine (commonly added to disinfect municipal water). Depending on the manufacturer and freshness of the filter, they can also remove trace amounts of minerals such as zinc, lead, copper, and asbestos, as well as some bacteria or other biological contaminants.

Removing Lead from Drinking Water

Because of the significant health problems associated with consuming any levels of lead, if you’re concerned about the lead content in your water, be sure to do your homework. Most pitchers and faucet filters are not certified to remove lead from drinking water.
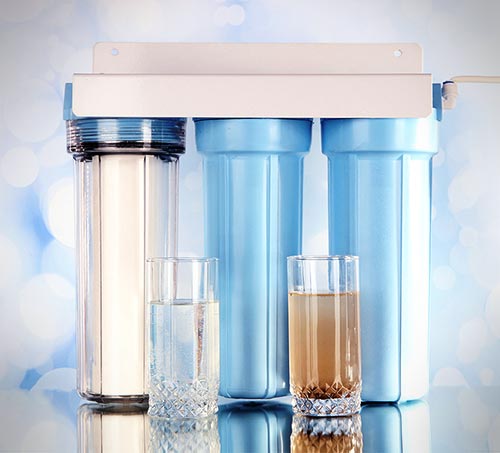
Reverse Osmosis System

Furthermore, a number of other contaminants cannot be removed with inexpensive filtration solutions. For safe removal of lead, pesticides, glyphosate, fluoride, and many other contaminants, a reverse osmosis filter might be the best solution. For many homeowners, the best choice will be a reverse osmosis filtration system that is installed directly under the kitchen sink, but you can also install a “whole-house” unit that works for the water in the entire home.

What is Reverse Osmosis?

Reverse osmosis is the process many bottlers use to produce ‘purified’ water, and this type of filtration will remove the majority of contaminants from your water. The downsides of these units include a high initial setup cost and a higher consumption of water as part of the filtration, which will increase utility bills.

Hopefully now that you’re armed with all of this information about water quality and filtration, you will be able to make an informed decision about when and why to get your water tested, as well as have some solutions if you find out you do have unwanted substances in your drinking water.
Egg Shells

Why You Should Never Put Eggshells Down Your Garbage Disposal

For many homeowners, the garbage disposal in the sink is an afterthought. It’s where the food waste goes because you don’t want it to stink up your trash can.

This is understandable. Nobody wants the unpleasant aroma of trash lingering in their home. But, many homeowners don’t realize that some foods should never be put into a garbage disposal.

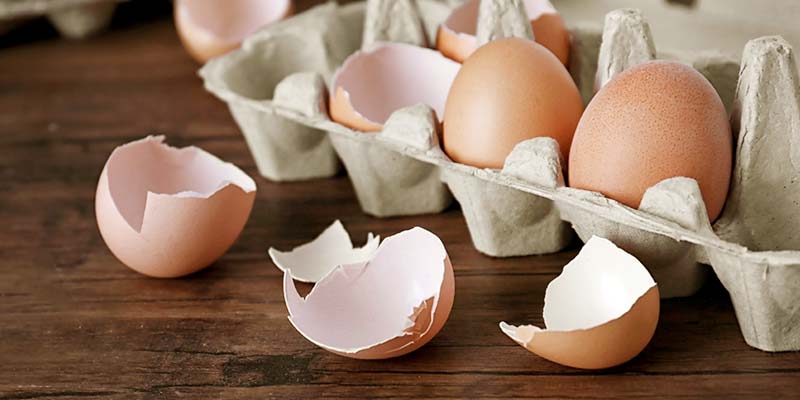
Today, we’d like to highlight one food item in particular: eggshells.

For many families, eggs are a staple in the home. Consumed daily and prepared in countless ways. But, while you’re busy thinking about cooking your eggs, the shells are likely something you don’t put much thought into. Most homeowners simply toss them in the trash or the sink, while keeping the focus on not burning the eggs (again).

Below, we discuss some of the most common questions about eggshells, why you shouldn’t put them in your garbage disposal, and what you should do with them instead.

Can You Put Eggshells in the Garbage Disposal?

No. This is not a wise idea.

When they are ground up, eggshells can quickly turn into tiny particles that, in turn, may lead to a clog in your garbage disposal, or even in your pipes.

To help you visualize what could potentially happen, pretend for a moment that ground-up eggshells are like sand. Tiny particles that may flow with water, but may also clump together and create a blockage. When confined in small spaces, such as the inside of a pipe, it is more likely that the eggshell-sand will clump together.


Do Eggshells Sharpen Garbage Disposal Blades?

This is unlikely. In fact, a garbage disposal doesn’t use “blades” to break down your food.

But, it is also worth noting that you will likely get different answers depending on who you ask. The general consensus is that eggshells will not sharpen any of the components inside the unit. In fact, these may actually cause more problems than you set out to resolve.

Try Using Ice

If you’re looking to sharpen the “blades” — they’re actually grinders — inside your disposal, you should try using ice. Any size or shape will work, as long as the ice is frozen solid. Avoid the softer flake or nugget ice, as those won’t pose a significant challenge to the unit.

The upside to using ice, is that nothing will be left behind that may cause issues or clog your disposal. Unlike eggshells or citrus peels, the melted ice water will simply go down the drain.


Is This the Same For All Disposals?

Probably not. The usage tips will likely vary for all brands, as well as all models manufactured by those brands. It would be wise to refer to the user manual for your model to get the precise answer.

However, despite what may be listed in the user manual or what type of waste your disposal is capable of handling, it is still wise to avoid putting eggshells down the unit.

Even with the best of the best garbage disposals, you will be unable to eliminate the potential problems that finely-ground eggshells may create inside your pipes. Over time, they may build-up and create a clog. This can lead to some very costly repairs.


What Can You Do With Eggshells?

While your average person may consider to them to be waste, eggshells have many uses. The below suggestions are simple and easy for every homeowner.

  • Dry, Grind & Add to Soil — You can use egg shells in your yard or garden to help replenish nutrients in the soil. For maximum effectiveness, it is recommended that you grind your shells as fine as possible, and then sprinkle it around your yard or garden.
  • Compost — Similar to tossing them in your yard, you can also add egg shells to your compost bin. This will expedite the decomposition process, giving the compost a boost of calcium. For gardeners, this is an easy way to avoid your pepper important nutrient.
  • Use For Seedlings — Instead of buying a seed-starter pot, you can use old egg shells to start seedlings. This is not only an easy way to get kids involved with gardening, but the shell also acts as a natural source of food for your plants as it decomposes. More on that below.

What Are Egg Shells Made Of?

When broken down and analyzed, egg shells are comprised almost entirely of calcium carbonate.

With the same molecular formula as limestone, calcium carbonate is commonly used for calcium supplements, antacids and chalk.


Are Eggshells Good for Plants?

Yes, but not as a substitute for fertilizer or other liming material.

According to multiple studies, egg shells can be used to help supplement the soil with calcium. However, to have any meaningful effect, the shells need to be ground as fine as possible. Simply tossing the shells in your yard and crushing them with your hands or feet is not going to provide the soil with any sort of timely benefits. The decomposition process is incredibly slow.

With that said, there is no harm of adding large shells to your yard. While you may not replenish the soil as quickly as you hoped, there is no risk to your grass or plants.


Garage Door

How to Insulate Your Garage (And Why Every Homeowner Should)

No matter what the weather is like outside, the temperature of your garage will typically follow the same temperature pattern. For the average homeowner, the garage is an area where temperature control can be a bit of a challenge.

The garage is well-known to be plagued by constant temperature fluctuations. Not only do these fluctuations have the potential to damage all the items you store in side, but it can wreak havok on your energy bills. Depending on the layout of your home, a poorly-insulated garage can ever have an affect on the temperature inside your home, especially within any rooms with a connecting wall to the garage.

So, what’s a homeowner to do? An easy solution is to add insulation to the garage door. Here’s why every homeowner should invest in this (relatively) cheap project.

Why You Should Insulate Your Garage

The most notable benefit of adding insulation in your garage is the ability to have better comfortable over the temperature. However, there are many other benefits you can expect from this easy DIY improvement.

One important benefit is the amount of energy you can potentially save. This can equate to a dramatic slash in your bills long after the insulation has been installed.

Another lesser-known benefit is that it can help create a sound-proof environment, keeping sounds out or in, depending on your situation. For example, if you live on a busy street, garage insulation can help quiet the loud noise of traffic. Or, perhaps, you are using your garage as a workshop or to learn to play the drums, insulation will help prevent that noise pollution from becoming an annoyance to your neighbors.


Areas You Can Add Insulation

Within your garage, you have three main areas in which you can add insulation. While it would be ideal to sure all three areas are properly insulated, it’s not always going to be feasible, as least not for the average homeowner.

1) Garage Door:

The easiest and cheapest area is to add insulation on your garage door. You can buy different types of insulation or buy a garage door insulation kit that has everything you need. Either way you go, this DIY project should only take a few hours to complete, and will save you thousands of dollars over the course of its lifetime.

As the main barrier to the exterior, adding insulation on your garage door is strongly recommended for every homeowner. This is especially true for anyone that has an interior wall connected to the garage.

2) Garage Walls:

Adding insulation to your garage walls is going to be a little more complex of a project. Likely, this is one area you shouldn’t need to be concerned about as homes, by law, are built with insulation in the walls. This is primarily due to the fire hazards associated with garages. Specifically, the type of combustible materials stored in the area, as well as the fact that most garages do not have a smoke detector.

Regardless, insulating the walls in your garage is something you should consider, especially when your home has an interior wall connected to it.

3) The Ceiling

The often forgotten about area in your garage, the ceiling is an incredibly important area to have insulation. If you have a bedroom directly above the garage, that room will experience the wrath of the weather outside if your garage does not have proper insulation.

Of course, adding insulation inside a ceiling is a very complex project that your average homeowner will be hesitant to embark on. You would need to consider the air flow and whether condensation may build up, which could lead to mold. This is definitely a job for a professional.

While installing insulation in the ceiling of your garage will certainly slash your energy bills and add comfort to the room above, it’s going to be significantly more expensive and time-consuming to complete and you may never fully see a return on your investment.


Types of Garage Door Insulation

Before you attempt this project, you should have a pretty good understanding of the different types of garage insulation available to you. While each of them will help you regulate the temperature and create a favorable environment within your garage, they do come with their own set of pros and cons.

1) Foam Boards:

Relatively cheap and easy to work with, foam boards are a stiff, firm insulation option that is a great choice for your garage door. Usually made from polystyrene, foam board insulation is easy to install, extremely lightweight and durable enough to handle extreme environments.

Available in large panels, foam board insulation is the easiest material for your average homeowner to work with. All you need is a measuring tape, box cutter, and an adhesive to adhere the board to the garage door. Out of all garage insulation options, this is the one that most homeowners will be interested in.

  • Ideal For: Installing on garage doors.

2) Batt Insulation:

Another cheap option that is easy to work with, batt insulation is going to be a great choice to install inside the walls and directly between studs. This type of insulation is typically made from fiberglass and available in precut sizes. It’s not the best choice for insulating your garage door, but can still be strategically used in this area.

  • Ideal For: Behind drywall, inside walls and ceilings.

3) Loose & Blown-In Insulation:

Often used within attics or between walls, this type of insulation is loose and, as the name suggests, blown into place. You can find this available in a variety of materials and is relatively cheap to buy and install. Because of the nature of how it is applied, you can fill the small crawlspaces, corners and crevices within your attic.

However, for your garage, this type of insulation may prove somewhat difficult to use.

  • Ideal For: Attics, crawlspaces and wall cavities.

4) Insulating Foam Sealant:

Another insulation option is spray foam, also called insulating foam sealant. This type of insulation is available in different forms. You can buy large quantities that work great for attics, or a small can of spray foam that work great at sealing the flow of air around windows or doors. For the purpose of insulating your garage door, we will only discuss insulating foam sealants available in small cans.

While a can of foam sealant is relatively cheap, these aren’t going to be the cheapest option for insulating a garage. These are best used to seal the flow of air around the edges of your garage door, or any other area that is hard to reach.

  • Ideal For: Small cracks, crevices and hard-to-reach areas.

Are Garage Door Insulation Kits Worth It?

This largely depends on your situation, the size of your garage door and how much time you’re willing to put into completing the project. For most homeowners, a garage door insulation kit is going to be the easiest option.

Featuring fiberglass or polystyrene panels, these kits will generally come with enough pre-cut panels to cover a garage door with a width of 9 ft. Equipped with pretty much everything you need, you can buy a garage insulation kit at a variety of retailers, including Home Depot, Lowes or Amazon. The cost of an insulation kit will range from about $70 to $100.

The Downside of Pre-Packaged Insulation Kits

The downside of buying a pre-made insulation kit is that they are all designed for the same size garage door in mind. This may leave you too much, or not enough, insulation to complete the project.

While this is an easy problem to resolve, nobody wants to pay for something that they don’t need. Or, be forced to make a second trip to the hardware store because you discovered at the tail-end of the insulation process that you don’t have enough materials to complete the job.


Do-It-Yourself Garage Door Insulation

While a garage door insulation kit is certainly a convenient option, you can often get better results by simply building our own kit. This is an easy DIY project that shouldn’t take more than a day.

It entails separately buying all the materials you’d find in a garage insulation kit, and then replicating your own insulation and putting in a little bit of work on your own. Customizing the insulation to fit your garage door ensures that you get maximum coverage, leading to increased savings and comfort.

How to Install Insulation on Your Garage Door

Below are some general tips you can follow to help you install insulation on your garage door.

Materials You Will Need:

  • Foam insulation panels
  • Box cutter or razor blade
  • Adhesive or glue

Installation Instructions:

  1. Measure Door & Calculate Material Needs — First, measure your garage door and calculate how much insulation you will need. Measure the dimensions of each panel on your garage door. Typically, these panels will be the same size, making it easy to calculate how much insulation you will need.
  2. Buy Materials — Next, head over to Lowes, Home Depot or your preferred hardware store and purchase the required insulation. While you’re there, you will also want to pick up some adhesive to glue the foam insulation to the garage door. Also, a box cutter, if you don’t already have one.
  3. Cut Foam Insulation to Size — Now that you know the dimensions for each panel on your garage door, cut the foam insulation to size. Repeat this step until you have cut enough insulation to cover the entire door.
  4. Adhere Insulation to Garage Door — Open your adhesive and start adhering your cut insulation to the door. If needed, you can use a little bit of masking or duct tape to help you hold each foam panel in place as the glue dries.
  5. Let Dry — Allow plenty of time to completely dry. The amount of time may differ depending on the type of adhesive you use. Generally, a few hours will be sufficient, but it may be wise to wait a full day to allow the adhesive to bond.
  6. *Optional: Apply Foam Sealant &mash; To really put the final touches on this project, you can use a can of foam sealant to help fill in any small gaps. This could include between the foam panels on the garage door, or even the small openings along the wall just inside the garage.

Please Note: The DIY option may cost a bit more in materials and time, but it’s well worth it in the long run.


Other Questions?

Thinking about adding insulation in your garage, but still have questions we didn’t address here? Or, perhaps, you’ve already completed this project and would like to add a few tips to help others?

Let’s hear it! Please contribute to the conversation by adding your questions, tips or concerns down in the comments below.