How to Winterize Your Sprinkler System

Your sprinkler system is an important part of your landscaping. Lawns, trees and plants are very expensive to replace, so it is important to protect and maintain your sprinkler system at all times. Before the temperatures drop with the onset of winter, it’s important that homeowners take the appropriate steps to winterize their sprinklers.

Without the proper preparation, you may be facing expensive repairs to your sprinkler system or the loss of established trees, shrubs, or flowers. And expensive repairs are the last thing that any homeowner wants, especially when a bit of preventative maintenance can avoid this altogether.

Check Your Owner’s Manual

First things first, if possible, look in the owner’s manual for how to winterize your sprinkler system and follow those directions to ensure that you don’t void a warranty or make any other mistakes.

If you’re unable to find the original owner’s manual or just want some quick tips to winterize your sprinklers, we’ve put together several important tips that every homeowner should be aware of.

1. Shut Off the Water

The first thing to do as winter’s freezing temperatures are drawing near is to turn off the water to your sprinklers. Make sure to shut it off at the main valve. Your sprinkler system’s shut-off valve should be housed in a space where it can’t freeze. If this wasn’t done during the installation, perform this task before the frigid weather arrives.

2. Turn Off the Controller

Once you’ve gotten the water turned off, you need to shut off the timer, also known as the controller. Timers sometimes have settings marked rain mode. If yours doesn’t, you will need to disconnect it from the power source.

If your controller is outdated, you may want to update to a model such as a solid-state controller, which has digital displays for time settings as well as efficient energy usage to reduce your electric bills.


3. Remove Backflow Preventer

Your system has a device to prevent backflow, which is great for lawn-watering season, but during the winter, it must be removed and stored safely until spring. After it is removed, it’s time to drain the water.

How to Remove Backflow Preventer:

  • First, you can try to siphon it out.
  • If siphoning doesn’t work, pump it out with a shop vacuum designed for wet/dry use.
  • It’s helpful to attach duct tape to the hose in order to narrow the opening.
  • Drain above ground valves and store them, as well.
  • You can use pipe-heating cables on some areas, but this can be problematic in case of power failures.

4. Drain Water From Pipes

It’s absolutely crucial that you drain all the water from your irrigation system. If any water is left in the system, it’s possible for the pipes to freeze, which will lead to the pipes cracking or bursting once the water starts to expand.

You can use a shop vacuum to do this process, which can be time consuming, or you can take an easier route. The simpler alternative method to clear your sprinkler valves is to blow them out.

How to Blow Out Irrigation System

Below are the steps to help you blow out your sprinkler system and remove all water from the lines. It’s important that you have the right safety eye protection prior to starting this process. If you have any doubts, it would be best to call a professional.

  • Get a large compressor: To drain your valves with the blowout technique, you’re going to need the right equipment: a compressor with 50 cubic feet per minute rating. It’s imperative that the regulator valve gauge on your compressor is accurate.
  • Take off the backflow prevention: If you have an anti-siphoning lock on your valve, remove the entire mechanism.
  • Turn on the air compressor: Connect this equipment to the backflow-prevention riser.
  • Switch on valves: Using the automatic controls, turn on your valves one at a time as you blow out your irrigation system. It’s best to start with the highest elevation and open the hand valves manually.
  • Turn on compressor: Take your time and gradually increase the pressure. If it’s too hot or powerful, attach a hose length to modify it.
  • Blow out the H2O: Watch the pressure gauge and temperature as you slowly blow the water out.
  • Move to the following valve: One by one, move around your yard, blowing out each valve. Repeat this process until the draining process has been completed.
  • Blow out main line: You’ll also need to blow out your irrigation system’s main line if it has one.
  • Finish up: At the end, you’ll need to replace caps, set rain mode or turn your power source off.

5. Protect Spigots & Hoses

In addition to protecting pipes and valves, you can also safeguard other parts of your landscape-watering system, including:

  • Spigots: Protect the spigots by covering them with Styrofoam protective devices that can be found at home improvement stores.
  • Hoses: Drain water from garden hoses and store them in an area away from ice and snow to prevent cracking.


Get to Know Your Irrigation System

While it’s not entirely necessary, it’s wise to have a good understanding of the ins-and-outs of your sprinkler system before you start the winterizing process. You don’t have to be an expert, but, if possible, every homeowner should learn what they can about the following:

  • Drain Valve Locations:

    Your system should have drain valves at each pipe’s low point. You also need them at high points, so air can be released; otherwise, the water won’t be able to drain properly.

  • Slope of the System:

    When a sprinkler system is installed, there should be a slight slope to allow for easy draining.

  • Auto-Drain Valves:

    If you install automatic drain valves, your annual winterization can be greatly streamlined.

Create a Map of Irrigation System

It would be helpful to have a diagram or map that tells you where all of the sprinkler heads, valves, and watering zones are located. This will not only help you stay organized, but also make it easier to upgrade, repair or winterize your sprinkler system.

Once you create your irrigation map, keep it in a waterproof and convenient location. This will ensure that it remains helpful and ready all year round.

Know Your Region’s Climate

Before performing any winterizing steps, take time to think about the climate in that your home is located in.

If it snows only once in the season and the temperature barely hits freezing, then you may not have to winterize your irrigation system at all. On the flip side, if your home is in an area that always has freezing temperatures, snow, and ice, then you will definitely need to prepare your irrigation system for the deep freeze.

This is where a professional can be a real help. They know the area well and will be able to tell you how to best prepare your sprinkler system for winter.

Takeaways

If you want a beautiful yard when spring arrives, there are many tasks that a homeowner should do to prepare their yard for winter. One of the most important is to winterize your sprinkler system.

Because it’s a moderately difficult DIY project, consider hiring a professional to do the job for you. You and your front yard and backyard will be glad you did.
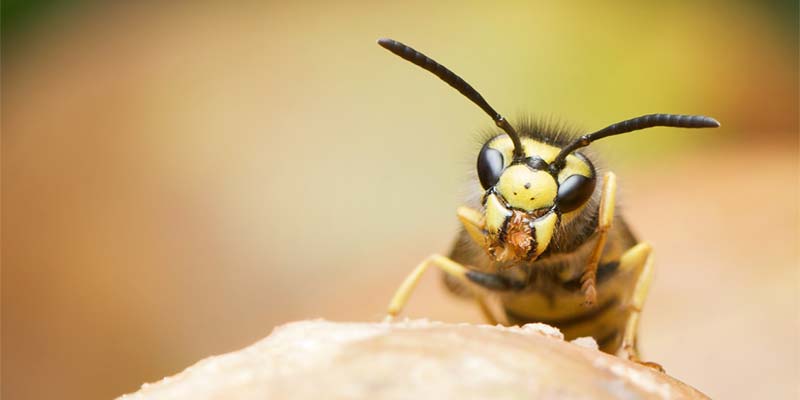
Wasp

How to Get Rid of Wasps & Hornets Around Your Home

Wasps. The winged menace that take over patios and gardens all around the world. The evil cousin of the honey bee that fears no human.

Well, that’s their reputation, but an obvious exaggeration.

For the most part, wasps, hornets and yellow jackets generally try to avoid human interactions. Regardless, very few homeowners welcome the spring invasion of nests. It’s always preferable to ensure that these insects are kept away, especially if their nest is near a doorway or other area that increases your chances of crossing paths.

With this in mind, let’s discuss some methods that every homeowner should know to get rid of wasps, create an unwelcome environment, and, most importantly, help you avoid getting stung.

How to Keep Wasps Away From Your House

Like many other insects in your garden, wasps are going to go where they believe food is. So, if you want to limit the amount of wasps living near your home, then you need to attempt to limit their food source. This means ensuring that no food is left out in the open. Especially, sugar sweets and fruit.

During the summer, you may enjoy having a meal in your backyard. All that food can be rather enticing for wasps, yellow jackets and other insects. That is especially true if you have anything sweet in the vicinity such as an open can of soda or juice box. Always cover your drinks if you are outside.

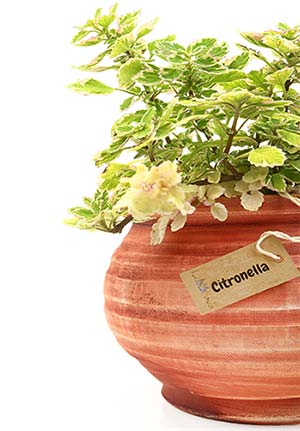
Citronella Plant

Grow Plants That Wasps Don’t Like

A great way to prevent wasps from living around your home is to grow plants that will deter them. This is an ideal solution for homeowners that want to keep wasps at bay, while also adding beauty to their yard.

Generally, wasps do not go near the following plants:

  • Citronella
  • Mint
  • Eucalyptus
  • Wormwood

Incorporating these plants into your landscaping will help create an environment that wasps and hornets do not like. Therefore, they will likely look for another location to build their nest.

Bonus: A few of these plants also repel other pesky insects, such as mosquitoes.

Maintain Your Fruit Trees

Additionally, you want to be mindful if you have any fruit trees in your yard. Throughout the year, a piece of fruit may fall off and smash to the ground. With all the sweet juices now in the open, it can attract certain pests, including wasps.

Try not to make the area more appealing than it needs to be. Regularly inspect underneath your fruit trees and remove any pieces of fruit as soon as they hit the ground.

Create & Hang a Fake Nest

Wasp colonies are incredibly territorial. If wasps believe there is another colony already living in the area, then they are likely going to look elsewhere to make a home.

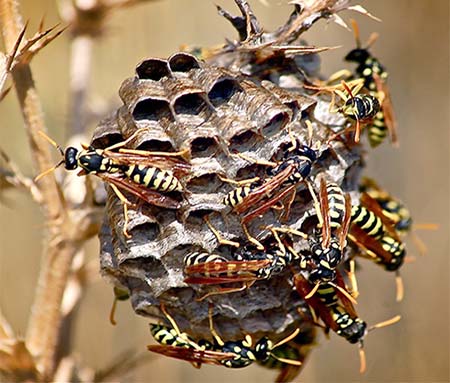
Hornet Nest

There are a couple of ways to accomplish this. The easiest method would be to buy a fake nest online. Or, you can make a fake nest with a brown paper bag.

How to make a fake wasp nest:

  1. Fill your brown paper bag with crumpled newspaper or debris.
  2. Close off the opening with sting or tape.
  3. Crumple the bag a little bit, to give it the appearance of a hornets nest.
  4. Hang it in the area where you don’t want wasps buzzing around.

This is a great way to deter wasps, as they will not want a confrontation with other colonies already living in the area.

Other Ways to Prevent Wasps From Living Near Your Home

While the food source is going to be the best method, there are a few other ways you can deter wasps and yellow jackets from living around your home.

  • Seal Cracks, Window Frames & Entry Points:

    Before summer comes around, you should thoroughly inspect your house to see if there are any cracks or other entry points in the siding. You should also inspect door and window frames to make sure there are no areas for wasps to get into.

  • Sweet Perfume:

    You also want to avoid wearing any sweet perfume during the summer. The scent you are emitting can attract the pests.

  • Bright Clothes:

    Finally, avoid wearing clothing that contains flower imagery or is generally bright. That can catch wasps’ attention, and they may curiously come to you to see if you are actually a flower.

TL;DR — If you do not give wasps a reason to buzz around your property, then they are probably going to go elsewhere and leave you alone.


General Tips to Removing a Nest

If you decide you want to get rid of a wasp nest on your own, then it would be wise to understand and follow these general tips.

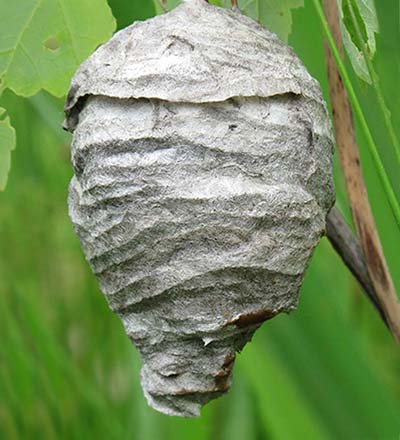
Wasp Nest
  • Wear Protective Equipment:

    Keep yourself safe by wearing long sleeves, protective eyewear, and gloves. If you have a bee hat, that would be ideal. But, most homeowners will not have these.

  • Neutralize at Night:

    To ensure you kill the entire colony, as well as the queen, it is recommended that you exterminate the nest at dusk or night. Not only are wasps and hornets less aggressive at this time, but the entire colony will be back in the nest for the night.

  • Locate & Target the Opening:

    If possible, try to locate the opening of the nest. This will usually be located near the bottom. Spray your soapy water or pesticide in this area first, and then target the rest.

  • Do Not Stand Below the Nest:

    Most wasps and hornets will fall the moment they get sprayed. Because of this, you should not stand directly below the nest, unless you want to be exposed to chemicals or get stung by falling wasps.


4 Methods to Kill & Remove Wasps

In the event that you notice wasps, hornets or yellow jackets buzzing around your home, then your already beyond prevention. You’ll need to find a way to remove them.

The easy way would be to simply spray them with pesticide. But, do you really want to spend money to spray a poisonous substance around your home? Instead, try using a few of these tips to help you get rid of wasps naturally.

1) Spray With Soapy Water

An easy, DIY alternative to spraying pesticide is to create a solution of dish soap and hot water. Spray this onto the nest. This is the recommended first step that every homeowner should try. This will kill the wasps naturally and, most of the time, instantaneously.

How to Make:

  1. Mix solution in a spray bottle.
  2. For every cup of hot water, you’ll want to add 2-3 oz of dish soap.
  3. Shake vigorously.
  4. Spray directly onto nest while the water is still hot.
  5. Run.

Stay mindful of your escape route. Once you apply the soapy water, it is likely that you will agitate the hornet nest and they may try to attack. You could also try mixing in other detergents that are around your home.

Benefits:

  • Safe for all occupants and pets.
  • Cheap and easy to make.
  • Likely, you already have all supplies.
How to Get Rid of Hornets Nest

2) Suck Them Up With A Vacuum

Another easy way to remove wasps are to suck them into your vacuum cleaner. Most homeowners have a vacuum in their home, making this a zero cost way to remove adult insects.

Simply use the attachment hose, get close to the nest and turn it on. This will suck the adult wasps into the vacuum, containing them in an area where they pose no risk to you. Of course, this means you have to be brave enough to get close to the nest.

Benefits:

  • Costs nothing.

Disadvantages:

  • Need to get close to the nest, and are more likely to get stung.
  • You still need to destroy the nest.

3) Set Up Traps

If you don’t want to go near a nest and risk getting stung, you should consider setting up a few traps. There are a variety of different traps that will work.

You will want to hang these traps in areas where you, your family and your guests are not going near.

These traps consist of sweet-smelling solutions so wasps and other pests go to it and end up getting stuck. You can purchase wasp nests or make your own if you want to make it a DIY project.

  • Glue Trap — Widely available online and at many retailers, this type of trap is covered in sticky adhesive that makes it difficult, if not entirely impossible, for wasps to fly away after they’ve landed on it. While an effective method, this type of trap is often criticized due to its ability to trap other insects and the slow nature in which they die.
  • Bait & Lure Trap — Another trap you can use is a bait and lure trap. There are many versions available, including a few you can make yourself, but they all essentially accomplish the same task: Use bait to lure a wasp into the trap, where they are unable to escape.

How to Make Your Own Wasp Trap

  1. Cut the top off of a plastic 2-liter bottle.
  2. Fill the bottom part with sugary water.
  3. Turn the top part upside down, with the bottle top pointing downward.
  4. This configuration makes it difficult for a wasp to fly out.

4) Spray Nest With Insecticide

If the above methods fail or you just prefer to start with a commercial insecticide, here are some general tips you should know before you buy.

  • Active Ingredient:

    It’s important that you get an pyrethrin or pyrethroid insecticide. The EPA has tested and determined that these “do not pose risk concerns for children or adults.”

  • Look Closely at the Label:

    The words on the label are important. If you’re trying to kill wasps or hornets, make sure to buy an insecticide that is specially formulated for these pests. These will typically have “WASP” prominently displayed.

  • Caution vs. Warning:

    Another important factor are the “signal words” on the label. Insecticides labeled with “Caution” are going to pose less of a risk to humans than those labeled with “Warning.” Either way, they’re both toxic. With this in mind, you should always exercise caution and take measures to protect yourself while using any insecticide.


Final Thoughts

Keep in mind: Simply knocking down a nest is not a complete solution. The remaining wasps will build a new one.

These are a few of the tips to get rid of wasps around your home. However, despite your best efforts, the day may come when you get stung. Clean the site immediately when this occurs. You may need to apply some antihistamine if it begins to hurt. In the event you have an allergic reaction to a wasp sting, you need to seek medical attention immediately.