FAQs
- How Often Should You Clean It?
- Why Do I Need to Clean My Humidifier?
- How to Clean With Vinegar & Tea Tree Oil
- How to Disinfect With Bleach or Peroxide
- Buy A Humidifier Disinfectant
- More Maintenance & Care Tips
One of the most important factors in determining your indoor air quality is the amount of moisture in the air. The relative humidity inside your home becomes particularly important as winter sets in.
This is because as the temperature starts to drop and you start to crank up the heat, the warm air circulating around your home will dry out the air you breathe. When the air in your home is too dry, you may start to experience a whole bunch of issues, all of which may range from minor annoyances to significant health complications, such as the flu.
Now that the seasons are starting to change and the mercury is starting to drop, we created the below guide to help homeowners learn how to clean their humidifier, and have it ready on those long, chilly nights.
How Often Do I Need to Clean My Humidifier?
Every 24-36 hours. If water has been standing inside your humidifier for longer than that time, you should not use it inside your home. While inconvenient, it is strongly recommended that you clean your humidifier prior to every use.
Why Do I Need to Clean My Humidifier?
Cleaning the humidifier will prevent any sort of bacterial growth or mold from developing inside the device. If you have this sort of contamination inside your humidifier, and you do not clean it before you turn it on, then you may inadvertently disperse harmful particulates into the air.
Not only is this detrimental to your indoor air quality, but it can immediately impact the health of anyone inside your home. This is not only detrimental to your indoor air quality, but it also puts everyone in your home at risk for developing respiratory issues. This is especially true for young children, the elderly and anyone that breathes it in for an extended period of time.
Check the Cleaning Instructions In Manual
Before you try using any of the cleaning methods listed below, it is wise to take a look at what the user manual that came with your humidifier says and follow the care instructions from the manufacturer. These guidelines are the best way to keep your humidifier in good working order, and prevent any unexpected damage that voids the warranty or leads to you having to replace it.
3 Ways to Clean Your Humidifier
Without proper care and regular cleaning, your humidifier puts your indoor air quality at risk. Below, we have highlighted three methods that you can follow to clean your humidifier.
1. Use White Vinegar & Tea Tree Oil
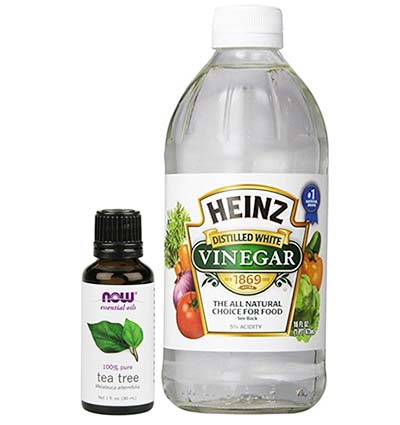
Due to their natural disinfectant properties, the easiest and “all-natural” way to clean your humidifier is to use a mixture of vinegar and tea tree oil.
Supplies You Need:
- White vinegar
- Tea tree oil (optional)
- Bottle brush if required for your humidifier
- Water
Cleaning Instructions:
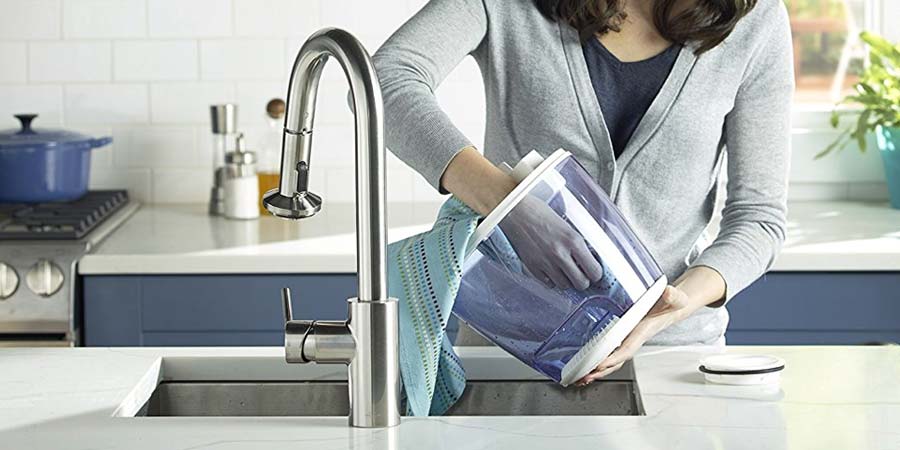
Begin by disassembling your humidifier. Pour any standing water from the tank and lay all pieces out as you take it apart.
Next, add a generous amount of white vinegar to the base of your humidifier, as well as a few drops of tea tree oil. Do the same for the water tank, as well as submerge all other external parts into a similar mixture. Allow it to soak for at least 20-30 minutes.
Before you pour out the vinegar, use a brush or washcloth to scrub all parts of the humidifier. Try to remove any deposit buildup that may be visible.
Once you have scrubbed it thoroughly, rinse all parts of your humidifier with warm water. You may need to do this several times to get rid of the vinegar smell before reassembling your humidifier.
2. Disinfect With Bleach or Hydrogen Peroxide
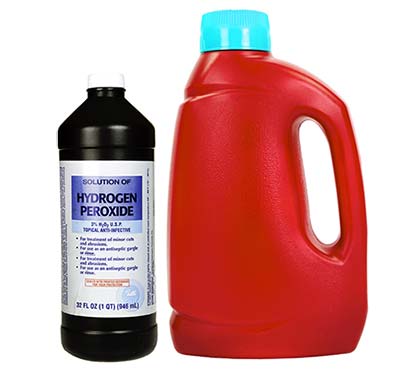
To give your humidifier a deep clean, try following the cleaning instructions listed above but substitute the tea tree oil with bleach or hydrogen peroxide. By using one of these two chemicals, you ensure that all bacteria and mold spores inside your humidifier is killed off.
Supplies You Need:
- Bleach or Hydrogen Peroxide
- Clean Towels
- Safety Goggles & Gloves
- A Soft-Bristle Brush
- Water
- Optional: White Vinegar*
Cleaning Instructions:
For the most part, this process will follow the same instructions recommended for the vinegar and tea tree oil option. However, if you decide to use bleach, you should wear gloves and goggles to protect yourself from the chemicals. *And never mix bleach and vinegar together!*
When using bleach, you can choose to do so at the same time you are cleaning the tank or you can disinfect after the tank is clean. Disinfecting a humidifier with bleach will take an additional 30 minutes, so if you are short on time, it is probably beneficial to do both at once.
Step 1: Begin by disassembling your humidifier. Don’t forget to remove the air filter, if there is one. You can clean the filter by using cool water and letting it air dry.
Step 2: Mix about 1 teaspoon of bleach — or use 3 percent hydrogen peroxide — into a gallon of water and fill the tank with it. Ensure the entire inside is coated by stirring the mixture around.
Step 3: Once you’ve completed both steps, rinse the base, tank and all of its small parts. Shake it well to dislodge any trapped moisture. Remember to do this several times to get rid of any vinegar or bleach odors. Set the pieces on clean towels to air dry.
Once everything is dry, you can reassemble your machine.
Optional Step: After the humidifier has been disassembled, fill the base with vinegar and submerge the smaller parts. Allow it to soak for at least 20-30 minutes, use a brush or washcloth to dislodge any deposits or buildup, and thoroughly rinse out the vinegar. Do not mix vinegar and bleach together.
3. Buy & Use a Humidifier Disinfectant (Bacteriostat)
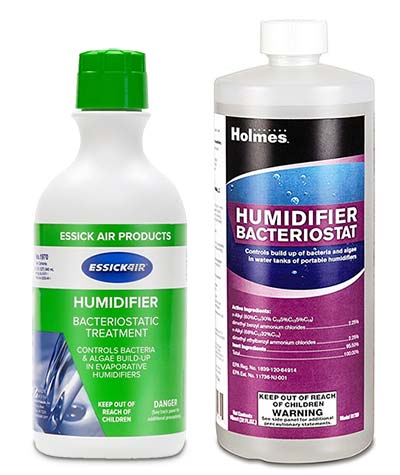
If you don’t want to fool around with any of the cleaning options listed above, you can also buy a ready-made disinfectant or cleanser online. Often labeled as a descaler or bacteriostat, there are plenty of these cleanser available online. (View your options on Amazon.)
All you would do is simply follow the instructions that comes with the product. That’s it, your humidifier is clean and ready.
Effective, but Expensive:
While it is easy and convenient, and no doubt effective at disinfecting your humidifier, this option is not recommended for homeowners as it is grossly more expensive than all the others options listed here.
Vinegar, bleach and peroxide are all very effective at cleaning your humidifier, and they are also all incredibly cheap. You can buy all of them at every grocery store or corner store, and you’ll get a larger supply at a fraction of the cost.
Humidifier Maintenance & Care Tips
Now that you know how to clean your humidifier, it’s recommended that you also learn some simple maintenance tips to prolong its life and overall effectiveness.
Empty Basin / Limit Standing Water
Besides weekly deep cleaning of your humidifier, you should be sure to rinse the water basin before every use. Doing so helps to keep bacteria from growing, keeps your unit working properly, and ensures your family is breathing the best air possible.
If possible, disinfect the humidifier any time that water has been standing for more than four hours.
Use Distilled Water
When you do fill your humidifier, only use distilled water. Tap water usually has added minerals. These minerals could be released into the air and create a thin layer of white dust on the surfaces in the room. Additionally, added minerals can build up as deposits in the machine and harbor the bacteria and mold you’re trying to prevent.
Drain & Dry Before Storing
Finally, be sure to drain and clean your humidifier and allow it to dry completely before storing it for the season. Storing a damp unit in a dark place, such as a closet or garage, only creates an optimal breeding ground that encourages bacteria and mold to grow. This will lead to a very gross discovery when it comes time to pull the unit out of storage.
The Homeowner Payoff
Knowing how to clean your humidifier ensures the air you and your family breathes is as pure as possible and leaves you comfortable and healthy. Even better, proper cleaning helps your machine to work for as many seasons as possible so you will be able to save money instead of purchasing a new unit each winter.
