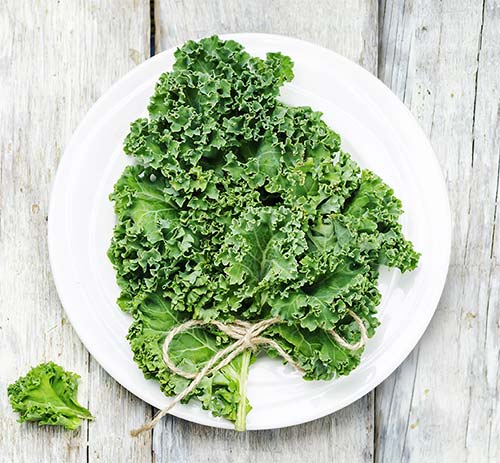
Gardening

5 Sustainable Gardening Tips Every Homeowner Should Know

Sustainability is more than just a buzzword or a flavor-of-the-month cause; it’s a way of life that supports the Earth! And, sustainability begins at home – which is why creating a sustainable, natural garden is always a wonderful idea.

Many homeowners use harmful fertilizers or pesticides, or even excess water, in their gardens, but these types of conventional gardening techniques may often be more detrimental to our planet’s health than you intended. Instead, it’s important for homeowners to create a self-sustaining, organic garden that’s free of as many chemicals as possible.

Are you just getting started on your environmentally-conscious journey? If so, it’s time to read up on five our sustainable gardening tips that every homeowner should know!


1. Use Native Plants

Using native plants in your garden is one of the overall best ways to ensure that your garden is in tip-top, sustainable shape.

But first… what are native plants?

In short, native plants are types of plants that are uniquely indigenous to your region or ecosystem and are adapted to local soils and your climate. There are tons of benefits when it comes to transitioning to a native landscape! Namely, this type of garden requires much less maintenance than a typical garden or lawn – this is because minimal watering is required, and you don’t have to use harmful pesticides or fertilizers.

In addition to this, a native plant garden has the added benefit of becoming a wildlife habitat for local birds and insects. Bottom line: Native plant usage allows for your developed landscape to coexist peacefully with nature, which is always the goal for any sustainable garden.

To get started, it’s recommended that you checki in with local garden experts to get ideas for plants that thrive in your area and vegetables that mature easily during your area’s growing season.

2. Mulch Your Garden

If you’re truly committed to a sustainable garden, using mulch is the way to go. Basically, mulch comes from organic materials, which helps to make your garden more resistant to pests; it also provides tons of valuable nutrients.

Mulching is also the best sustainable method for providing soil moisture and for preventing weeds from growing in your garden. Simply add a 2-inch layer of mulch to your garden beds and around your plants, and let the sustainable magic begin!

3. Cut Down On Watering

It’s important to use the least amount of water possible, when making the shift to sustainable gardening.

There are a few different ways to do this:

  • Native Plants Require Less Water — First, as we’ve already noted, using more native plants in your garden will automatically mean using less water.
  • Use a Rain Barrel — A popular option for homeowners is to install a rain barrel on one of your home’s downspouts, for collecting water to use for your plants.
  • Collect Leftover Water — Another water-saving trick we love is to use a shower bucket – just place a bucket in your shower to collect leftover water runoff, and then use that water for your garden and any other plants. Simple yet effective!


4. Grow Your Own Food

There are so many reasons to grow your own food! First, selfishly, it just tastes better — garden-fresh fruits and veggies are far superior to the same fruits and veggies you’ll find in a supermarket. And, from a sustainability standpoint, growing your own food just makes sense.

You get to control your garden’s growing environment, which means you can elect NOT to use dangerous chemicals and pesticides.

Plus, harvesting our own veggies and other garden items can help contribute to overall waste reduction, considering that organic waste is the second highest component of landfills in the U.S.

Need other incentives? Growing food in your home garden can help save money and become a super-fun hobby!

5. Start Composting

Composting is an integral component of any sustainable garden. Seriously, one of the best ways to jump-start your sustainable garden is by composting all your food waste.

Composting does a lot of great things for our planet: it enriches the soil, provides much-needed nutrients to our gardens, and contributes to less waste being produced at the landfill.

In addition, composting will also help you to use less water in your garden – this is because the organic material from your compost pile allows your soil to become more fertile and able to retain more water.


Ready to get started?

When it comes to creating your personal compost pile, you have a few options. First, you could elect to simply rake your leaves over your garden bed in the fall and winter; and/or you could collect all yard waste and organic materials, such as (eggshells, coffee grounds, all your veggie and fruit scraps, grass clippings, and even shredded newspaper, and place everything in a bin or a pile.

Over time, these combined materials will start to decompose back into the earth – like a science project, but for the earth’s benefit!

Do you use sustainable gardening practices in your home garden? Did we miss an important sustainable gardening tip or technique? Tell us in the comments below!


Composter

Composter Buying Guide: How to Find the Best Composter For You

It’s estimated that about a third of all food produced annually is thrown away before it can be consumed. Food waste is a growing problem… But, composting is a very simple alternative that allows homeowners to put some of their food waste to good use to help your garden grow and enrich the soil around your home.

Why You Should Start Composting

Composting is one of those great things in life that really does accomplish two things at once. You’ll not only generate less waste, but you can create rich fertilizer for your plants all at the same time. You can do your part to reduce the amount of rotting food and food scraps filling landfills while developing one of the best types of fertilizer possible.

To do composting well, you do need the right supplies and a basic understanding of how composting works. To help you find the best composter for your home, we have put together the following “Composter Buyers Guide” to get you started.


Types of Composters

There are three main types of composters you have to choose from, with a couple of subcategories within them.

Compost Bin

Compost Bin

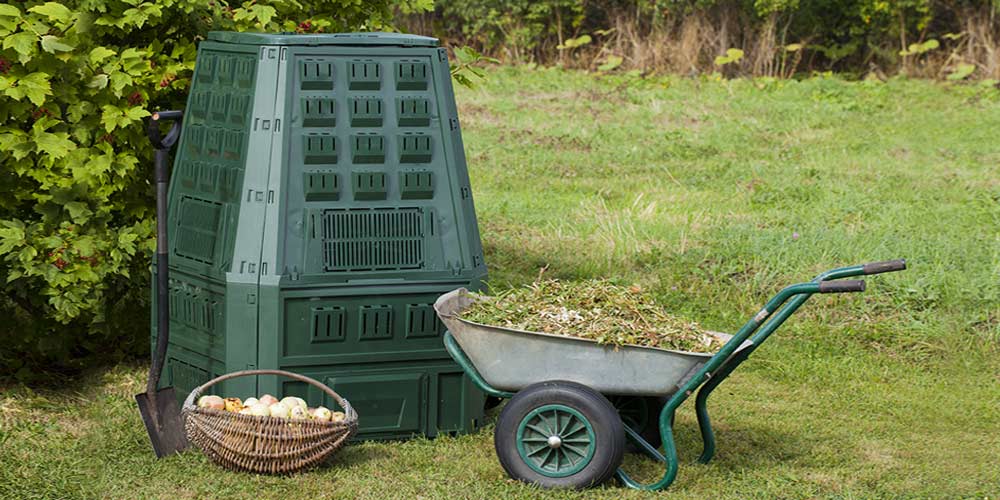
The most basic type of composters on the market are stationary compost bins. These often look somewhat like trash bins, are meant to stay in one spot, and you can add to them from an opening in the top.

This type of composter often features a large capacity and a removable lid, to protect your compost from the elements and interested animals (although these do tend to attract animals more than some of the other options).

These break down compost more slowly than other options and you have to do the work of mixing the compost manually to keep the process going. And it can be a little more difficult to remove the compost and transport it to your garden with these. But they’re the most affordable option and their simplicity appeals to a lot of gardeners.

Why You Should Buy a Compost Bin:

  • Affordable.
  • High capacity.
  • Slower than other type of composters.
  • Require more work than other options.

Compost Tumbler/Rolling Composters
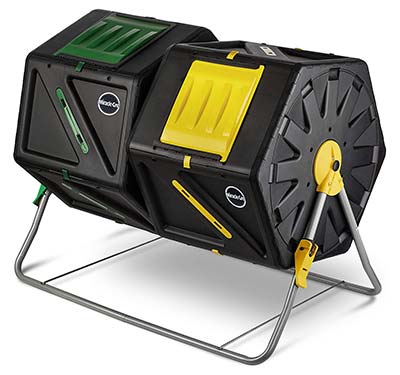
Composter Tumbler

Compost tumblers and rolling composters are designed to make it easier to turn the compost regularly as you go, mixing it more often to speed the process of breaking it down.

This type of composter generally come up off the ground, which makes them more animal-proof than any composters that sit on the ground. And it’s relatively easy to empty them into a container when the compost is ready in order to transport it to your plants.

Rolling composters are similar to compost tumblers in being easy to turn so you speed up the composting process, but they’re less stationary. If you want, you can roll the composter up the house to make adding to it easier, and roll it over to your garden or plants when it comes time to empty it.

Both types are more expensive than stationary compost bins and, while generally easier to use, can become harder to turn as they get heavier. But if you want something that makes the process easier and faster and is likely to hold up to longer use over time, a tumbler or rolling composter is worth investing in.

Why You Should Buy a Compost Tumbler:

  • More expensive than stationary bins.
  • Creates compost faster.
  • Very easy to use.
  • More animal-proof than other types of composters.
  • Can get harder to use as you add more to them.

Worm Bin / Worm Composter
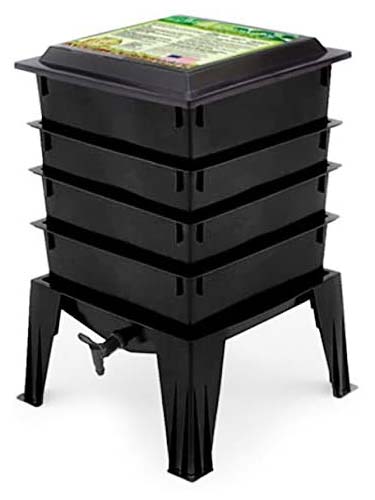
Worm Composter

While both of the other options should definitely only be used outdoors, worm bins can actually be kept inside. These composters allow you to keep worms living in the compost bin where they can eat the kitchen scraps you toss in and convert them into nutrient-rich compost.

It’s the fastest option available and the worms consume your kitchen scraps before they start to get smelly, so you remove concerns about odors entirely. They’re also extremely low maintenance. The worms do most of the work for you so you don’t have to worry about turning or stirring the compost.

Worm bins are often more expensive than your other options, but for those with limited yard space or who want a faster, easier option, they’re worth the higher cost.

Why You Should Buy a Worm Bin:

  • Often more expensive than other types of composters.
  • Low maintenance.
  • Fast.
  • Can be used indoors.
  • Takes up very little space.

Gardening with Compost

12 Factors to Finding the Best Composter

In addition to selecting the right type of composter, you have a number of different factors to consider in order to help you select the right model.

1. Size

One of the first things to think about is size. If you’ll be keeping a composter in your yard (which is necessary for any type of composter other than worm composters), you should have a spot in mind for it before you choose which composter to buy so you can make sure to buy one that will properly fit. If you’ll be going with a worm composter and plan to keep it indoors, the same thing goes: where in your house will you be keeping it and how much space can you afford to give over to it?

Generally speaking, bigger composters will cost more and be harder to move if the need ever comes to do so. But they’ll have a higher capacity so you’re able to create more compost. If you have a lot of plants or a particularly large garden, being able to create a higher quantity of compost will be important.

2. Speed

The decomposition that turns your old leaves and food scraps into fertilizer takes time. With some composters, it will take a lot more time than others.

If you want compost fast, then a worm composter is your fastest option. Tumbler composters are usually more affordable than worm composters and not as fast, but if you stay on top of turning them regularly will break down the compost much faster than stationary composters.

There are a few other factors that influence how fast the composting process is:

  • Color — A black composter will absorb heat more, which cooks the compost and speeds up the decomposition process.
  • Aeration — Compost needs exposure to a certain amount of air in order to break down. Stationary bins should therefore have some slits or openings that let air in, and you should plan on turning tumblers or stirring the compost in stationary bins to give more of the materials the chance to be exposed to air. But you have to be careful, as too much aeration can mean the compost doesn’t get hot enough to cook adequately – which is why most tumblers are fully enclosed.
  • Moisture — Compost should be a little bit moist, without being too wet. If your compost gets either too wet or too dry, the composting process won’t work as efficiently. You ideally want your compost to have a moisture level equivalent to a wrung out sponge. When it gets too dry, water it a bit. When it gets too wet, add some more dry materials to it.
  • The Carbon to Nitrogen Ratio — This is where composting can get a little complicated. If you want your compost sooner rather than later, you need to get the ratio of green materials (kitchen scraps, grass clippings, egg shells) and brown materials (sawdust, fall leaves, straw, twigs) right. Experts recommend a ratio of about 30 parts brown materials to one part green materials. If you get the ratio wrong, you should still end up with compost, it will just take longer.

The composter you buy can make a difference in how fast the composting process goes, but you can also do a little bit to speed up the process with whatever type you get, if you so desire.
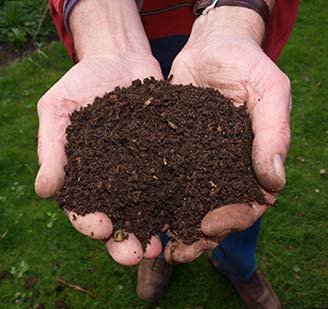
Compost Soil

3. Price

There’s a pretty wide range in the cost of composters. People that prefer to take the DIY route can throw something together pretty cheaply or even just create a pile for composting (although you risk attracting animals and having to deal with a nasty smell if you go that route). But if you opt to purchase a composter, you’re looking at anywhere from $50 for a low-end stationary compost bin to about $300 for a high-end worm composter.

Most composters of all types fall somewhere in the $80-$150 range though. If you’re able to spend somewhere within that range, you’ll have plenty of options to choose from.

When considering how much to spend, keep in mind that composting can save you money on fertilizer and reduce the amount of waste you produce each week. Your upfront cost will help you spend less over time.

4. Ease of Use

There are a few main factors that affect ease of use. One is how often you have to mix or turn it, and how much work is involved in doing so. Stationary compost bins can be hard to stir, whereas tumblers usually have a lever you can turn to mix the compost fairly easily. Of course, worm composters are the easiest of all since you never have to do anything to mix the compost.

Another factor to consider is getting the mix of nitrogen and carbon just right. This primarily matters if you’re hoping to speed up the process, but can get a little complicated to keep up with and get enough of the right materials at the right time. A big appeal of worm composters in comparison to the other types is that you simply don’t have to worry about any of this stuff at all.

And finally, you have to consider how difficult a composter will be to empty at the point where you need to access finished compost. With stationary composters, this can be difficult as you have to figure out how to get to the finished compost on the bottom while leaving the unfinished compost on the top – that is, unless you keep two stationary bins so one can cook while the other has new items added to it. Even in that case though, you have to remove all the compost from the bin and transport it to where you’ll be using it, which can be tricky.

Tumbler composters are often off the ground, so you can spin the composter to where the opening is facing the ground and dump the finished compost into a wheelbarrow or other container to transport it. And roller composters let you roll the composter right up to where you’ll be using it, but you’ll still need to deal with getting the compost out and spreading it around.

This is another category where the clear winner is the worm composter. Worm composters are designed to have several levels and the worms eat their way up the food scraps. That means the finished compost ends up in the bottom layer, which can be easily removed so you can empty the compost where needed.

5.How Durable the Composter Is

The durability of the composter you choose will generally have more to do with the material it’s made of and the quality of the construction than the type of composter it is. That said, in looking over reviews of various types of composters from different brands, tumbler and worm composters tend to fare better in this category than stationary composters.

Your best option for determining how durable a composter is likely to be before buying is to peruse the user reviews. People often take time to mention it if a composter they buy starts to show problems within the first few months or first couple of years, and some people will even come back years later to praise a brand or particular composter for lasting a long time.


6. How the Composter is Ventilated

As previously discussed, one of the key components in the composting process is making sure that the compost is exposed to just enough air (but not too much). For that reason, most stationary and rolling composters need to have some kind of slits or holes to let a little bit of air in. Tumbler composters don’t always include slits or holes, since the spinning process ensures the different parts of the compost get more access to air.

7. Pests

While most garden bugs that may access your compost are beneficial, larger animals like raccoons, opossums, and rodents are not. Compost piles and some stationary bins are at risk of attracting critters that make a mess of your compost in order to take advantage of the kitchen scraps. Compost tumblers and worm composters are generally more protected from critters and reduce your risk of having to deal with cleanup (and a slowed down process) after a raccoon scatters your compost about the yard.

8. Will the Composter Emit Unpleasant Odors & Smells

The composting process can be smelly. Worm composters manage to eliminate this issue entirely, since the worms consume the food scraps before they get the chance to rot. But for other types of composters, that rotting is simply part of the process.

A composter that’s made of a thicker material can reduce the amount of smell you have to deal with. You’ll probably notice the smell when you open your bin or tumbler to add more, but will be spared from it the rest of the time. Nonetheless, most people will want to keep their composter some distance from the house to be safe.

9. What the Composter is Made From

Most composters are made of plastic which is good for absorbing heat, which speeds up the composting process – especially if the plastic’s in a dark color. A few composters are made of wood, which means they’ll look nicer in your yard, but you have to be more concerned about rot, they won’t heat up as fast, and they don’t usually have as snug of a lid for keeping animals out. If you want a bin that looks nicer in your yard though, they pretty handily beat plastic composters in that category.

10. Is it a Multi-Bin Composter?

Many tumbler composters include multiple compartments so you can fill up one side and let it cook, while you start to fill the other side. That way the composting process isn’t slowed by the continual addition of new materials. Many people who compost will want either a composter with two compartments, or to get two composters for this reason.

With stationary bins, you can try to access the finished compost on the bottom while the new materials on top continue to cook, but that’s a tricky (and messy) process. Two compartments or bins side by side are much simpler.

Worm composters are the one exception. Their design makes it pretty easy to remove the bottom section where the compost is finished without having to worry about the food scraps above that aren’t done yet.

11. The Weight of the Composter

For stationary composters, weight doesn’t have to be much of a consideration, at least not once you have them installed and put into place. For anything you expect to have to move or turn, the heavier it gets, the harder that will be.

Consider the weight before you start filling it, and imagine what it’s going to be like once it’s full. If you’ll have a hard time turning the composter or moving it as needed, then you might need to consider a lighter alternative or plan on not filling it all the way.

12. How Easy it is to Assemble

While this is only an issue once, it can make a big difference in how satisfied with your composter you are soon after purchase. This is another factor where your best bet is to check the reviews of a composter before buying to see if it’s likely to be difficult to put together.

If you’ll be dealing with the assembly alone or know you generally aren’t great at putting things together, then you can steer clear of composters with a reputation for being difficult (or know in advance to ask a friend over to help).


Composting Accessories & Extras

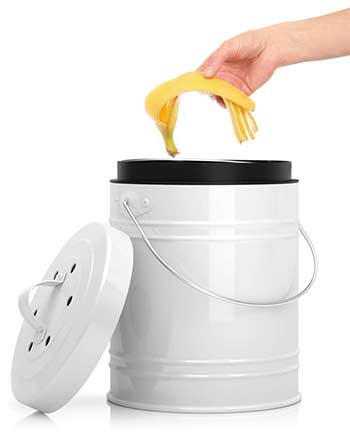
  • Compost Bucket — Most people won’t want to run outside every time they do food prep to throw items in the composter. A compost bucket can sit on your kitchen counter and be added to until it’s full and you head out to dump it.
  • Compost Starter — Compost starter can help speed up the process of getting your compost cooking so it’s done sooner.

Conclusion

Compost is a fairly easy way to reduce your waste and make your plants happier. Figure out which composter makes the most sense for your home and make a move toward becoming greener in general, and more of a green thumb as well.
Garden Slug

How to Get Rid of Garden Pests

Growing a successful and productive garden is a lot of work. It can be rather frustrating to tend to your garden, only to watch a variety of bugs, insects, and other pests destroy it before you can harvest.

Before deciding to use chemical pesticides which may be harmful to the overall ecosystem of your garden, homeowners should consider using a natural approach to getting rid of those annoying plant-eaters and garden disturbers. Any number of homemade sprays and methods can be helpful in deterring garden pests from your yard, all while keeping your plants healthy.

To start, it is helpful to identify the particular pests that have invaded your yard or to discover common pests to your area so you know what you’re up against. Then, consider using a few of these tips to keep your plants thriving and bug-free.

1. Slow Down the Slugs

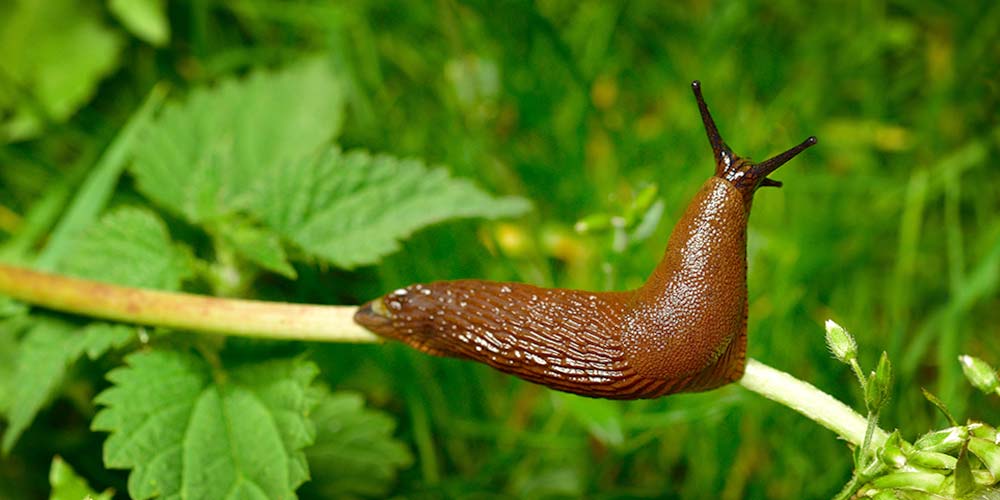
Slugs can be good at eating other bugs, but unfortunately they also tend to target your garden veggies. Fortunately there are a number of ways you can deter these slimy garden pests.

One way to keep the slugs from destroying your plants is by distracting them with copper flashing. The copper will give the slugs a slight electrical shock when they come in contact with it. This means that the copper will act as a barrier to keep the slugs out of the blocked off area or away from a particularly susceptible plant.

Because slugs have soft bodies, you can utilize certain materials as garden borders that the slugs would avoid coming in contact with. Try applying gravel or lava rock in strips around your plants or garden in order to keep the little slugs from crawling across and into your garden. Wood ashes are another good choice for this sort of slug warfare because not only are the ashes good for deterring these pests, but the potassium in the ashes is good for the soil too.


2. Avoiding Aphids

Aphids come in a variety of colors and are excellent at sucking the sap from new growth in a plant. Often, you can get rid of these garden pests simply by hosing them off, but you will need to be vigilant.

If you are looking for a method that is a little more effective and permanent, you could try creating your own aphid-repelling spray. For this method, you will be creating a blend of cooking oil, water, and dish soap. Mix approximately one cup of fresh cooking oil with a tablespoon of dish soap.

Then, dilute the mixture in a spray bottle by taking four teaspoons of the oil/soap mix and blending it with one pint of water. As you spray this on your vegetables, it can help keep aphids away, and also thrips, spider mites, and whiteflies. You should reapply this mixture to your plants once a week for the best results.

3. Utilize Citrus Peels

Citrus peels from lemons or oranges are a great way to add nitrogen to your compost pile, but they can also be used as garden defense. This method will not only deter garden pests, but it will also improve the health of your soil.

If you dry the peels first, you will be able to grind them up and sift the powder directly into the soil. This will make your entire garden more resistant to a bug invasion.

A whole orange peel is also able to help keep aphids and mosquitoes away. For this method, all you need to do is cut a slit in an orange peel and carefully slide it over an aphid-susceptible plant, or else simply rub the peels on the plants to act as a mosquito repellent. Even cats are supposedly deterred by citrus peel. Sprinkle leftover orange peels in spots where your or neighborhood cats tend to prowl.

4. Sprinkle Diatomaceous Earth

Diatomaceous earth is a powder made of fossilized bodies of tiny, aquatic organisms, also known as diatoms. The particles in diatomaceous earth are abrasive and excellent for deterring soft-skinned insects, such as slugs.

All you need to do is sprinkle the diatomaceous earth over plants and around the garden’s perimeter to control flea beetles, twig borer, thrips, cockroaches, ants, earwigs and spider mites. The sharp edges of the dirt dry out and kill these undesirable pests. It also works to destroy these pests if they ingest the diatomaceous earth.


5. Use Garlic on Your Garden Pests

Garlic, a seasoning we all have in our kitchen pantries, is surprisingly useful in the garden as well. If you are dealing with apple maggots, caterpillars, sowbugs, grasshoppers, grubs, leafminers, mealybugs or whiteflies, garlic spray is an effective and natural way to battle the bugs.

To make a natural garlic pesticide, you need to blend 12 cloves of garlic with one and a half cups of water. Strain the pulp and then dilute the strained garlic water with a gallon of water. Shake it well, and then use the mixture in a spray bottle once a week on your plants to keep the bugs away.

6. Use Your Chickens

If you keep a coop of chickens, know that you can use them for more than a food source. While you may want to keep your chickens out of your garden beds, you might consider constructing a chicken moat around your gardening area.

A chicken moat is essentially a strip of dry ground fenced in on both sides which surrounds the plants. This space allows for the chickens to go to town eating weeds and grasshoppers and any other bug or beetle attempting to enter your garden plot. This is an effective method for controlling the pest population while giving your chickens plenty to feast upon.

If you are a homeowner interested in more details on how to construct a good chicken moat, check out this blog post. The double fence has the advantage of keeping deer and rabbits away from your plants, as well.

7. Invite Friendly Birds

Hornworms and other bugs are destructive to your tomato plants and can easily gobble up leaf after leaf if left unchecked. To prevent this, try attracting birds to eat these worms by placing bird feeders or a bird bath around your vegetable garden.

Check your plants once or twice a day for hornworms, and if the birds aren’t getting them all, you can always create another homemade spray. Try mixing garlic, soap and cayenne pepper with water to spray over your plants for added protection. This green pesticide helps to keep the moths that lay hornworm eggs out of your garden.


8. The Five-Finger Trap

One of the most common, cheap, and effective ways a homeowner can get rid of squash bugs, slugs, Japanese Beetles and hornworms is handpicking. It is tedious and not for the squeamish, yes, but very effective because you can see exactly what bugs you are removing and from where.

If you happen to have chickens, you can feed the insects and critters to the chickens or hope that some local robins may come scoop up the handpicked pests. Handpicking, along with some of the other remedies in this series, is a great way to be sure you have a pest-free garden.


As you prepare your garden, find out which pests are common to your area, and then arm yourself with these natural remedies for keeping the bugs out of your vegetable beds. By following these tips, you will find that garden care isn’t so challenging after all.


Downsizing

9 Reasons Why Downsizing Your Home Makes Sense

When we consider the benefits of downsizing, we need to go far beyond the idea that the term “downsizing” simply refers to just moving into smaller living quarters. That’s not a fair definition for homeowners to go by.

What Is Downsizing?

Downsizing can be defined as an intentional reduction in size. This could be as simple as the amount of belongings you own or the size house you live in.

However, we would suggest that it is larger than that. Downsizing is a complete overhaul in your lifestyle. It’s more than just a smaller home, it’s a move towards the simple life.

For the purposes of this article, we will be examining all the reasons why your average homeowner should consider this change in mindset, the benefits of downsizing and how the simple life can bring happiness to your front door.

The Benefits You Should Expect by Downsizing

Once we focus on the totality of downsizing, the benefits increase exponentially. From the testimonials of many who have discovered the wonders of downsizing, here are nine benefits that they smile about.

1. Less Stress, More Happiness

This is a huge benefit that cannot be overestimated. From losing a large mortgage on an oversized house to not running around an urban area trying to have the family involved in so many different activities, downsizing brings less stress, which means more serenity and a much greater chance of actually enjoying life.

You may also will find yourself arriving early for appointments, not always being late. In short, you will be more on top of your weekly schedule, not sweating bullets as you pull up to the dentist 20 minutes late. Another related perk is the ability to find lost items more quickly. With less stuff to clutter your living room, you can locate your keys and purse much faster. Who can put a price tag on that stress-buster?

2. Saving Money on Monthly Expenses

When possessions are jettisoned, one has to spend far less on maintaining them. When the McMansion is left behind, so is the monster mortgage payment.

Downsizing Saves Money

It is almost impossible to downsize and not be in a better position financially. Many people who have downsized have experienced an immediate windfall as they have money left over from the sale of their previous home.

Others see a better balance each month even if they don’t move, as one car needs regular maintenance, not three, as the gasoline bill dips precipitously when the family’s schedule is de-cluttered.

Whether you see this improved picture clearly during Day One of downsizing or after six months, it will be clear at one time or another. Enjoy the view.

3. Better for the Environment

Smaller house equals fewer trees felled. Less driving equals less CO2 that you put into the air. Fewer or smaller appliances equal less electricity consumed. The list can go on and on. You will be the “green” person you’ve always aspired to be without even trying!

4. More Energy to Focus on What Matters

Someone once wrote that the opposite of happiness is boredom. That statement can be debated, but the weariness that comes with routine is well known by many. Downsizing your life could very well push you out of your comfort zone. That change very well may energize you as you re-create your life and become a happier, less stressful person.

As you see the benefits on this list take shape, you will become even more excited about the possibilities of your new minimalistic lifestyle, and rather than sleeping away your precious spare time, you will want to be spending your new free time in constructive ways.


5. More Time to Do What You Want

Do you have any idea how much time you will gain every Saturday when you don’t have to clean so many rooms? You can easily add another hour or two instantly to the weekend!

You will have more time to pursue the passions you’ve always wanted to develop, from painting to reading, from traveling to tennis. Less time cleaning, less time driving, less time shopping — the hours add up rapidly and you will find new joy as you are able to spend more time on pursuits that bring you joy.

6. Fewer Temptations to Buy Stuff

This might not sound like a benefit, but when you really think about it, it does have many upsides.

9 Reasons Why You Should Downsize

Less space means less temptation to buy new items and clutter your living space. Downsizing your living space also means less cleaning.

In another benefit that apartment dwellers have long understood, it can also cause you to spend more time outside, which always equates to better health.

7. Opportunity to Get To Know Your Neighbors

It has been said that when people live on top of each other, they tend to keep to themselves. That necessary social distance in urban areas is true, but it is also true that the opportunities to get to know your neighbors and local shopkeepers multiply when you live in smaller spaces.

Many Americans, in particular, have traditionally sought to live on large lots, separated from other human beings. They have ended up with huge yards to mow, mortgages to pay and a gnawing sense of loneliness.

Of course, not all apartment dwellers revel in community spirit, but don’t be surprised if you see the same people again and again and begin to build a relationship with them. It’s much easier in an apartment or condo building, or in townhouses that adjoin without giant lots in between.

8. More Control On Your Everyday Life

This benefit comes up again and again as veteran downsizers talk about their new way of life.

They offer perspectives such as, “My stuff used to run me. Now, I control my stuff,” or “I was a slave to my possessions. Now, I’m free.” A more open schedule, a less cluttered living space and life, and a realignment that puts you in the driver’s seat–not your things–can surprise you with a far greater sense of control than you’ve previously experienced in life.

9. The Freedom to Live Simple

Whether that freedom comes from you dictating your schedule, not the other way around, or simply feeling liberated by getting rid of junk that has cluttered your mind and life, downsizers all revel in the new freedom that they feel.

Add to this list as you downsize. Fill in the gaps that we may have missed in the list above. Begin the great adventure of living with less and gaining far more in return than you anticipated.

Have you downsized your life? What benefits did you experience? Let’s hear them in the comments below.


Cleaning A Humidifier

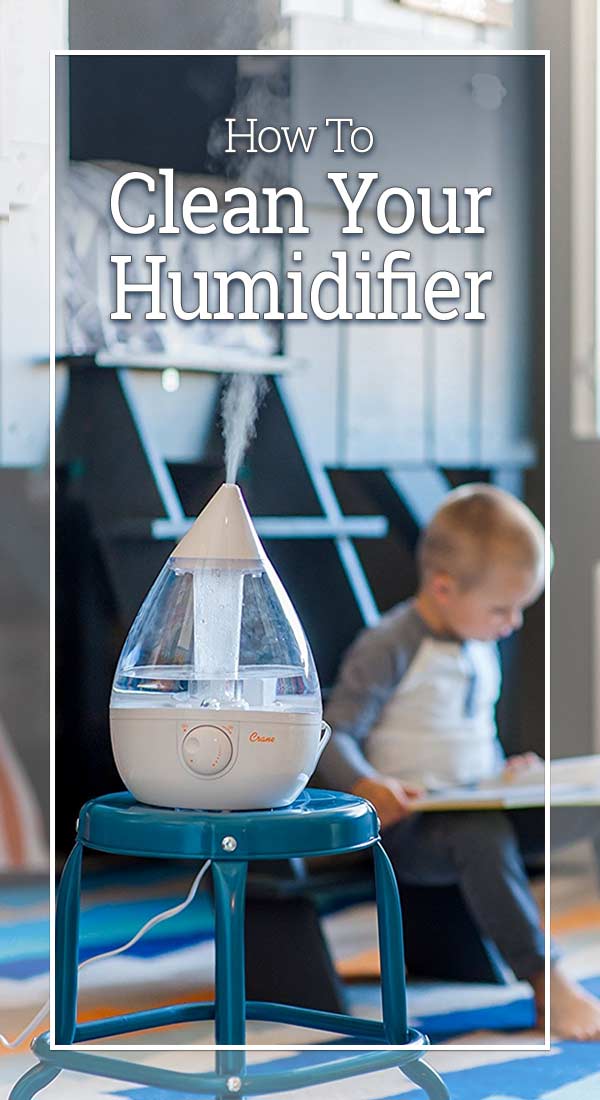
How to Clean Your Humidifier

One of the most important factors in determining your indoor air quality is the amount of moisture in the air. The relative humidity inside your home becomes particularly important as winter sets in.

This is because as the temperature starts to drop and you start to crank up the heat, the warm air circulating around your home will dry out the air you breathe. When the air in your home is too dry, you may start to experience a whole bunch of issues, all of which may range from minor annoyances to significant health complications, such as the flu.

Now that the seasons are starting to change and the mercury is starting to drop, we created the below guide to help homeowners learn how to clean their humidifier, and have it ready on those long, chilly nights.

How Often Do I Need to Clean My Humidifier?

Every 24-36 hours. If water has been standing inside your humidifier for longer than that time, you should not use it inside your home. While inconvenient, it is strongly recommended that you clean your humidifier prior to every use.


Why Do I Need to Clean My Humidifier?

Cleaning the humidifier will prevent any sort of bacterial growth or mold from developing inside the device. If you have this sort of contamination inside your humidifier, and you do not clean it before you turn it on, then you may inadvertently disperse harmful particulates into the air.

Not only is this detrimental to your indoor air quality, but it can immediately impact the health of anyone inside your home. This is not only detrimental to your indoor air quality, but it also puts everyone in your home at risk for developing respiratory issues. This is especially true for young children, the elderly and anyone that breathes it in for an extended period of time.

Check the Cleaning Instructions In Manual

Before you try using any of the cleaning methods listed below, it is wise to take a look at what the user manual that came with your humidifier says and follow the care instructions from the manufacturer. These guidelines are the best way to keep your humidifier in good working order, and prevent any unexpected damage that voids the warranty or leads to you having to replace it.


3 Ways to Clean Your Humidifier

Without proper care and regular cleaning, your humidifier puts your indoor air quality at risk. Below, we have highlighted three methods that you can follow to clean your humidifier.

1. Use White Vinegar & Tea Tree Oil

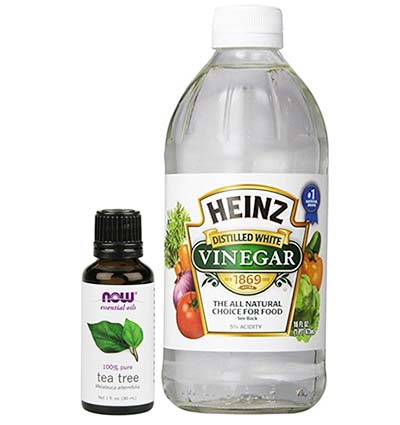
Due to their natural disinfectant properties, the easiest and “all-natural” way to clean your humidifier is to use a mixture of vinegar and tea tree oil.

Vinegar & Tea Tree Oil

Supplies You Need:

  • White vinegar
  • Tea tree oil (optional)
  • Bottle brush if required for your humidifier
  • Water

Cleaning Instructions:

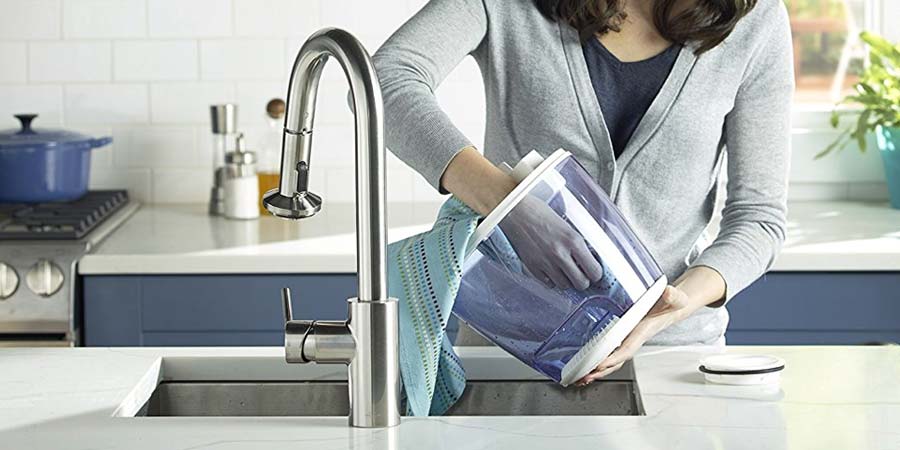
Begin by disassembling your humidifier. Pour any standing water from the tank and lay all pieces out as you take it apart.

Next, add a generous amount of white vinegar to the base of your humidifier, as well as a few drops of tea tree oil. Do the same for the water tank, as well as submerge all other external parts into a similar mixture. Allow it to soak for at least 20-30 minutes.

Before you pour out the vinegar, use a brush or washcloth to scrub all parts of the humidifier. Try to remove any deposit buildup that may be visible.

Once you have scrubbed it thoroughly, rinse all parts of your humidifier with warm water. You may need to do this several times to get rid of the vinegar smell before reassembling your humidifier.

2. Disinfect With Bleach or Hydrogen Peroxide

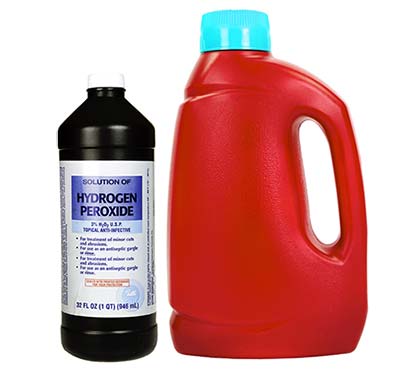
To give your humidifier a deep clean, try following the cleaning instructions listed above but substitute the tea tree oil with bleach or hydrogen peroxide. By using one of these two chemicals, you ensure that all bacteria and mold spores inside your humidifier is killed off.

Bleach & Hydrogen Peroxide

Supplies You Need:

  • Bleach or Hydrogen Peroxide
  • Clean Towels
  • Safety Goggles & Gloves
  • A Soft-Bristle Brush
  • Water
  • Optional: White Vinegar*

Cleaning Instructions:

For the most part, this process will follow the same instructions recommended for the vinegar and tea tree oil option. However, if you decide to use bleach, you should wear gloves and goggles to protect yourself from the chemicals. *And never mix bleach and vinegar together!*

When using bleach, you can choose to do so at the same time you are cleaning the tank or you can disinfect after the tank is clean. Disinfecting a humidifier with bleach will take an additional 30 minutes, so if you are short on time, it is probably beneficial to do both at once.

Step 1: Begin by disassembling your humidifier. Don’t forget to remove the air filter, if there is one. You can clean the filter by using cool water and letting it air dry.

Step 2: Mix about 1 teaspoon of bleach — or use 3 percent hydrogen peroxide — into a gallon of water and fill the tank with it. Ensure the entire inside is coated by stirring the mixture around.

Step 3: Once you’ve completed both steps, rinse the base, tank and all of its small parts. Shake it well to dislodge any trapped moisture. Remember to do this several times to get rid of any vinegar or bleach odors. Set the pieces on clean towels to air dry.

Once everything is dry, you can reassemble your machine.

Optional Step: After the humidifier has been disassembled, fill the base with vinegar and submerge the smaller parts. Allow it to soak for at least 20-30 minutes, use a brush or washcloth to dislodge any deposits or buildup, and thoroughly rinse out the vinegar. Do not mix vinegar and bleach together.

3. Buy & Use a Humidifier Disinfectant (Bacteriostat)

Humidifier Bacteriostat Treatment

If you don’t want to fool around with any of the cleaning options listed above, you can also buy a ready-made disinfectant or cleanser online. Often labeled as a descaler or bacteriostat, there are plenty of these cleanser available online. (View your options on Amazon.)

All you would do is simply follow the instructions that comes with the product. That’s it, your humidifier is clean and ready.

Effective, but Expensive:

While it is easy and convenient, and no doubt effective at disinfecting your humidifier, this option is not recommended for homeowners as it is grossly more expensive than all the others options listed here.

Vinegar, bleach and peroxide are all very effective at cleaning your humidifier, and they are also all incredibly cheap. You can buy all of them at every grocery store or corner store, and you’ll get a larger supply at a fraction of the cost.


Humidifier Maintenance & Care Tips

Now that you know how to clean your humidifier, it’s recommended that you also learn some simple maintenance tips to prolong its life and overall effectiveness.

How to Clean Humidifier

Empty Basin / Limit Standing Water

Besides weekly deep cleaning of your humidifier, you should be sure to rinse the water basin before every use. Doing so helps to keep bacteria from growing, keeps your unit working properly, and ensures your family is breathing the best air possible.

If possible, disinfect the humidifier any time that water has been standing for more than four hours.

Use Distilled Water

When you do fill your humidifier, only use distilled water. Tap water usually has added minerals. These minerals could be released into the air and create a thin layer of white dust on the surfaces in the room. Additionally, added minerals can build up as deposits in the machine and harbor the bacteria and mold you’re trying to prevent.

Drain & Dry Before Storing

Finally, be sure to drain and clean your humidifier and allow it to dry completely before storing it for the season. Storing a damp unit in a dark place, such as a closet or garage, only creates an optimal breeding ground that encourages bacteria and mold to grow. This will lead to a very gross discovery when it comes time to pull the unit out of storage.


The Homeowner Payoff

Knowing how to clean your humidifier ensures the air you and your family breathes is as pure as possible and leaves you comfortable and healthy. Even better, proper cleaning helps your machine to work for as many seasons as possible so you will be able to save money instead of purchasing a new unit each winter.


Kale

How to Make Kale Chips (With Recipes & Flavoring Tips)

We hear about many food crazes and diets all the time. Let’s face it. Every time a new food is introduced to the world, restaurants, food critics, television chefs and celebrities go out of their way to talk about the food as they try to show us the infinite possibilities there are for turning an otherwise boring ingredient into something special.

That’s probably the case with kale.

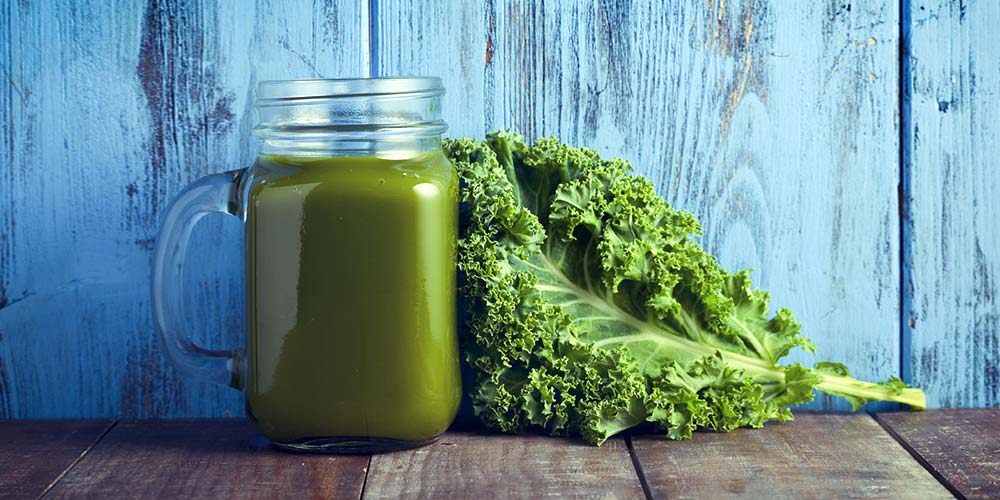
A few years ago, no one ever talked about this green leafy vegetable. Now you see it everywhere. High-end restaurants are finding ways to elevate it from its former role as a garnish on food trays and salad bars. Grocery stores are selling packaged salads that use kale, bags of washed kale, and bunches of kale. It’s even on the shelves of Walmart Supercenters and other discount stores. It’s also become a critical addition to the growing movement that encourages embracing ingredients that go from the farm to your table.

According to a May 2014 news report from Bloomberg, between 2007 and 2012, the number of farms that grow kale in the United States has more than doubled.

How Did Kale Become So Popular?

It’s long been known that kale is healthy for you. But, the popularity of the cruciferous vegetable has skyrocketed in recent years. The story behind this rise is a curious tale.

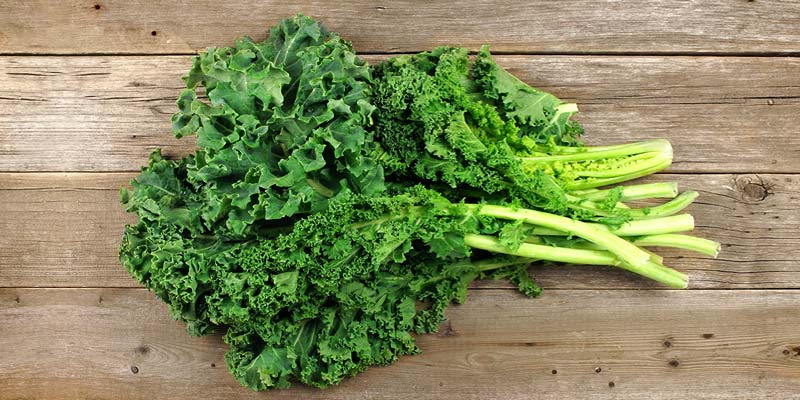
Fresh Kale

As the story goes, in the year 2013, a New York PR agent and self-proclaimed “punk-at-heart,” Oberon Sinclair, concocted a scheme to get people to believe that the American Kale Association hired a publicist to help desperate farmers who were growing kale while spreading the word about this dark green cruciferous vegetable throughout New York City.

After all, when you want to turn something into a trend, you go to New York to announce it to the world, right?

It’s hard to know whether people believed this story because let’s face it, no self-respecting foodie would ever admit that they’d been conned into believing that the American Kale Association (AKA) launched a campaign to promote the wonders of kale. Especially considering that the American Kale Association did not exist when Sinclair launched her campaign.

Whether or not the American Kale Association actually existed at that particular time, has become somewhat of a moot point. It exists now, and has carried on with the original “kale-awareness” campaign.

However, it must be noted that prior to the curious PR campaign launched by Sinclair, there was another organization already on this precise mission. Founded one year before the curious PR campaign referenced above, the National Kale Day Organization was created with the same vision: To educate people about the nutritional value of kale and helping people learn about different ways to cook, use and eat it.

Cruciferous vegetables are healthy. They are full of vital nutrients. Variety is also good. So if you’re looking for a way to add variety to your diet, include more healthy leafy greens, and eat more vegetables, you might want to consider trying kale. Raw kale can be bitter. But there are other ways to use it. It’s a delicious addition to soup, and if you’re used to sauteing spinach, Swiss chard, mustard, turnip or collard greens, you can add kale to your gustatory library.


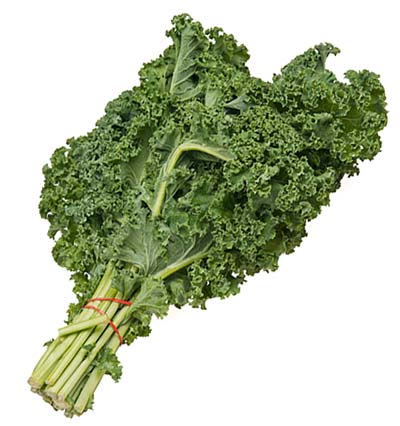
Bunch of Kale

How to Select the Best Kale

Before you start the process of making kale chips, you have to buy the vegetable itself. You have a few options to choose from.

Fresh & Raw

You can find fresh bunches of kale in the produce section, typically stocked alongside other cruciferous vegetables, such as spinach, broccoli, lettuce and cauliflower. The key is to get a bunch of kale where all the leaves are dark green and crisp looking.

Starting at the end of summer through winter, you’ll notice the selection and overall price of kale become more competitive, as they are in season.

Organic & Locally-Grown:

If possible, try to buy organic kale that is locally-grown. The Environmental Working Group includes kale on its list of produce items that contain pesticide residue.

Bagged Kale:

If you’re short on time, bagged kale is a good option. Already chopped and washed, the bagged option will save you time. However, this added convenience comes with its own set of pros and cons. Not only do the bags tend to be more expensive, you also sacrifice the ability to hand-pick the bunches you believe would be the best.


How to Prepare Your Kale

Now that you have the kale bought and ready to go, it’s time to prep.

Cleaning:

Before you start, it is strongly recommended that you thoroughly wash all of your produce before cooking with or consuming. This is especially true with kale, as the leaves are often covered with dirt and other loose materials.

Kale

Remove Stems:

Use a herb stripper (if you have one) to remove the stems. Don’t skip this step. Kale stems are tough, and they’ll take much longer to cook. You’ll risk burning your kale leaves if you don’t remove the thick stems.

Tear the Leaves:

Tear each leaf into pieces. The size of your pieces should be comparable to that of a potato chip or tortilla chip. Don’t go to a lot of trouble to make sure that each piece you tear is the same size. That’s not necessary.

Remove Excess Water:

Now that your kale leaves have been torn into smaller chip-size pieces, you’ll want to remove the excess water. A salad spinner is a fantastic tool to help you with this. If you don’t have a salad spinner, give each piece a little shake and the water will roll off.


How to Bake Kale in the Oven

You’ll want to lay your kale pieces in a single layer on a flat baking sheet. If you intend to add salt, spices or herbs for flavor, a small amount of oil will catch the seasoning. Fill a half a tablespoon with extra virgin olive oil. Spread it on the baking sheet and rub each torn piece of kale into the oil, making sure to massage the oil into both sides.

Some recipes recommend using coconut oil. For kale chips, since you’ll be baking them in an oven that’s moderately hot, you won’t have to worry about whether the oil is safe for high heat.

If you line your baking sheet with a piece of parchment, clean up will be easier. You also won’t have to worry about whether anything sticks to the pan.

You don’t have to use a dehydrator to make kale chips. The oven is a fantastic alternative because you can turn the baking sheet during the drying and baking process.


– Advertising –

Recipes recommend oven temperatures but expect to adjust the temperature because of variations in different oven brands and heating methods. Turn the baking sheet periodically during the cooking process to make sure that every piece of kale cooks evenly.

Supplies & Ingredients You’ll Need:

  • Parchment Paper
  • An oven thermometer
  • Baking Sheets
  • Herb stripper or sharp knife to remove tough stems
  • Colander and Salad Spinner
  • Large bowl
  • High quality unrefined and unprocessed oil
  • Sea salt

Tips to Baking Kale Chips:

  1. Be sure you get rid of all of the loose dirt on every kale leaf. Consider using a commercial vegetable cleaning spray to help you remove excess chemical residues and grime.
  2. When you tear up your kale leaves into chip size pieces, take time to tear each leaf so that you remove the woody stem that goes through the center of the leaves. Getting rid of every part of the hard stalks will ensure that every piece of kale gets thoroughly cooked.

Be sure you put your oven thermometer in the oven before turning it on to preheat it.

Don’t get discouraged if you don’t make a perfect batch of kale chips the first time. There are often huge variations in cooking times and temperatures depending on the type of oven you’re using, your location and other environmental circumstances. Consequently, you may need to make several batches of chips before you figure out what oven temperature and the length of time it takes to get your chips as crisp as you like them.

Another thing to consider is that you may want to bake your kale pieces at a lower temperature if you’re topping your chips with herbs, seasonings or other flavorings. A lower oven temperature will force you to keep the chips in the oven longer to get them to the desired crispiness. It may also be effective at infusing your chips with more of the flavor you’re adding to them, thereby allowing you to create an unusual, creative, and flavor-packed snack treat.


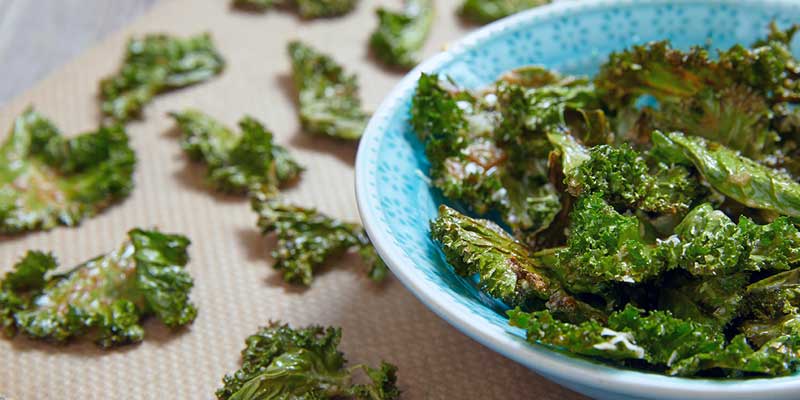
Kale Chips

A Starter Recipe for Kale Chips

As you’ll soon find out, there is no limit to the flavor combinations that you can come up with to make your own healthy and delicious kale chips. Regardless of the flavors you add, there are two essential ingredients you’ll need to use no matter what else you decide to add.

You’ll need to add some salt to the kale because the salt is critical to drawing excess water out of the kale leaves. You’ll also need to use some type of high-quality extra virgin, first cold-pressed oil. Since you aren’t going to be baking the chips in a hot oven, you can use any kind of oil that tolerates low-to-medium heat. The first cold-pressed Extra Virgin Olive Oil is probably the most common type of oil used for making homemade vegetable chips. Grapeseed, unrefined sesame or coconut oils are also options.

How to Make Flavored Kale Chips

There are all sorts of flavors and flavor combinations you can use to create different variations on the traditional kale chip.

How to Make Kale Chips

Regardless of the ingredients with which you intend to flavor your chips, don’t forget that you’ll need to use a small amount of oil as a way of ensuring that each piece of kale gets evenly coated with the herb, spice, condiment or flavor.

Unless you want your kale chips to absorb the flavor of the oil you’re using, you will want to use the purest, mildest, and least flavorful oil you can. Also, remember that temperature isn’t a concern since you’ll be cooking your flavored chips at a lower temperature than you use for the plain chips.

Flavor Combinations to Spice Up Your Kale

If you’re used to snacking on corn or potato chips and have a favorite variety, there’s no reason you can’t try to replicate the taste of that chip on kale. The result will be a healthier version of a snack treat you already like.

1. Salt and Vinegar

This may be a tricky taste combination to try to use with kale. Oil is necessary to get the salt to stick to the kale pieces. If you try to use oil and vinegar, you may wind up with something that tastes more like a wilted salad that’s dressed with oil and vinegar dressing.


– Advertising –
How to Add Flavor:

To make this flavor combination work, try soaking your kale leaves in the vinegar for a few minutes. That short “soak” will give your kale the necessary infusion of vinegar for the taste combination that’s so popular with potato chips. You’ll still need to coat each piece of kale with the salt and oil mixture.

Baking Instructions:
  1. Lay the coated pieces of kale on a parchment paper-lined baking sheet. Don’t let any of the pieces touch or overlap.
  2. Cook the chips at a low temperature of around 250-275 degrees.
  3. Bake the chips for 25 minutes and check them to see if they are drying out and getting crisp.
  4. You may need to rotate your baking sheets every 25 minutes or so to make sure that every chip cooks evenly.

Keep checking on the baking sheets to make sure that nothing is burning. Once you’re sure that the chips are fully cooked, remove them from the oven. You can leave them on the baking sheet to cool. As they cool, you’ll see that they become even crispier.

Dehydrated Onion Flakes:

Dehydrated onion flakes are easy to find in the spice section of your favorite grocery store. If you love the taste of onion, and would like to add that flavor to your kale chips, dehydrated onion flakes are going to be a great option for you. Plus, give your kale chips an extra crunch.

Follow the instructions listed above for removing the thick stems on each leaf. Then tear all of the leaves into chip-size pieces.

How to Add Flavor:

Add a couple of tablespoons of high-quality extra-virgin “First Cold” pressed olive oil to a large bowl. Add enough onion flakes to cover all of the kale pieces evenly. Use your hands to massage the oil and onion flake mixture into the bowl full of torn kale leaves.

Baking Instructions:
  1. Line your baking sheets with pieces of parchment paper.
  2. Preheat your oven to 250 degrees.
  3. Carefully lay all of the kale pieces out on the baking sheets, making sure that there is space between each piece.
Plate of Kale

Because you’re baking your kale chips at a lower oven temperature to allow the oil and onion flake flavors penetrate each of the kale pieces, you will need to cook your chips for twice as long as it takes to make kale chips with no added flavoring.

Garlic or Onion-Powder:

If you ever make popcorn at home, you may have learned about the delicious taste of garlic and onion-flavored popcorn. Garlic and onion powder are also excellent flavor enhancers to add to kale chips. This is especially true for anyone looking to introduce finicky family members to a healthier alternative to calorie and salt-laden junk food.

Adding Flavor & Baking Instructions:
  1. Add a couple of tablespoons of olive oil to a large bowl.
  2. Add your kale pieces and use your hands to make sure that every kale piece is evenly coated with the olive oil.
  3. Arrange the kale pieces so that every piece lays flat on the parchment-lined baking sheet.
  4. Sprinkle your garlic or onion powder, or a little of each over the entire baking sheet, making sure that an even coat of powder covers every piece of kale.
  5. Place your baking sheets into a preheated 250-degree oven.
  6. Set an oven timer for 25 minutes.
  7. Rotate the baking sheets to ensure that all of your chips get as crisp as you like them.

Other Spices, Additives & Flavor-Enhancers

Here are a few more options for adding flavor and spices to your homemade kale chips.

  • Sriracha — If you like to add heat to your food, you might want to brush your kale chips with Sriracha sauce before you bake them.
  • Red Pepper Flakes — These add zesty heat and will stick to kale leaves that are coated with oil.
  • Chili & Taco Seasoning — This will give your kale chips a bit of spicy Mexican flavor.
  • Smokey — For an added smokey taste, consider sprinkling ground chipotle peppers or smoked paprika over your oil-coated kale pieces.
  • BBQ — If you like the taste of barbecue-flavored chips, sprinkle your oil-rubbed kale pieces with a barbecue spice mixture or dry rub.
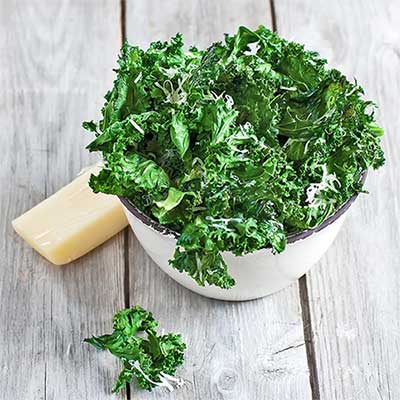
  • Parmesan Cheese — For a cheesy taste, sprinkle grated Parmesan cheese over oil-covered kale pieces.
  • Brewer’s Yeast — This tastes great on popcorn. Capture that distinctive taste by sprinkling an even coating of brewer’s yeast over oil-saturated kale leaves.
  • Chocolate — If you’re the total chocoholic and go to every extreme to get your chocolate fix, consider sprinkling grated chocolate on oil-covered kale leaves. Use a mild or flavorless oil like coconut oil, so the oil doesn’t overpower the additive. You can use bittersweet chocolate to give your kale chips a savory chocolatey taste.

Final Thoughts To Keep In Mind

Here’s a few parting thoughts to keep in mind as you try your hand at homemade kale chips.

  • Be sure you have fresh, crisp kale leaves. If you’re buying kale by the bunch, be certain you remove the thick, hard stems and massage all of the leaves as you wash them. Use your hands to remove embedded sand, dirt and debris. This may seem like a time-consuming process, but your kale chips will be inedible unless you remove all of the ground in dirt.
  • Use a cooking timer to remind you to check on the progress of your chips. An oven thermometer allows you to monitor your oven temperature to ensure that it is consistent. Some electric ovens have less than consistent thermostats.
  • Don’t try to bake all of your chips at once. Use one oven rack. If your rack only holds one or two baking sheets at once, plan to cook your chips in batches.
  • Don’t prepare your kale leaves until you’re going to cook them. Kale is full of water, and it wilts and gets soggy very quickly.

Kale is a fantastically healthy and inexpensive fall and winter vegetable. It’s also fun to create new chip recipes by adding herbs, seasonings, and other flavor enhancers so you can enjoy different versions of your newfound healthy snack treat. Pack a bag full of kale chips to take to work or to add to your children’s school lunches.