How to Save Energy in Your Kitchen

5 Tips Every Homeowner Should Know

Whether it’s cooking, baking, or washing dishes, the kitchen is one of the main areas within your home where you will be consuming energy. There’s no way around this, but you can, however, reduce the amount of energy used by being a smart and frugal consumer.

Here in this article, we will discuss some easy ways that homeowners can learn how to cut their energy use in the kitchen while still preparing delicious meals and keeping a tidy — and functional — cooking space. Here’s how.

1. Buy Energy Efficient Appliances

If you’re in the market for new kitchen appliances, look for the Energy Star label before you buy. This is a designation given only to items that have been deemed highly efficient by the EPA (Environmental Protection Agency) and the Department of Energy. If you have perfectly good appliances that are not Energy Star, don’t just trade them in for new models.

2. Make Your Refrigerator More Efficient

Your fridge can cost you approximately $90 a year to operate, unless you outsmart it with a few frugal maneuvers, such as:

  • Change the Thermostat Setting:

    If you set your refrigerator’s thermostat to too cold of a setting, you are spending more money than you need to. Adjust your fridge’s temperature to a range between 37° & 40° F. Your freezer should be set between 0-5°F. Buy two appliance thermometers to monitor the temperatures if your appliance doesn’t have them already built-in. By raising your fridge temperature, you can save around $20 annually.

  • Make Your Own Ice:

    A built-in ice maker may be convenient, but it’s costing you extra cash. By relying on this feature, you could be spending 14 to 20 percent more than you need to be. Turning off this auto-feature is fairly simple, and by doing so, you can keep more money in your bank account.

  • Clean Off Your Coils:

    When your refrigerator’s coils get dusty, the cool-air flow is restricted, which makes your appliance struggle to do its job. You can remove this dust with a vacuum cleaner attachment, and save yourself nearly five dollars a year after performing the task.

  • Limit Yourself to One Fridge:

    Do you have an extra fridge in the basement, garage, or game room for beer, holiday turkeys, and party food? If so, you are shelling out hard-earned cash for something you only use seasonally. Find a way to make one refrigerator work for your household and save yourself $90 a year.

3. Spend Less on Cooking by Altering Your Oven/Stove Habits

The gas or electric oven and stovetop in your kitchen can cost you less if you change a few of your cooking habits. When you pay attention to the way you use your range, you can shave dollars off your utility bills. Follow these tips:

  • Stop preheating your oven: It’s not necessary to preheat your oven for every single recipe you prepare. There are a few items, such as fragile cakes like angel food, that may require preheating, but most dishes don’t necessarily need this step performed. If you want to be extra sure that you can skip this step with your meal preparation, it might be a good idea to do a bit of research beforehand, but for the most part it isn’t a big deal. If you skip preheating, you can save a couple dollars each month, which adds up to big dollars over time.
  • Use the right size burner: When you have a large pot or pan, use a larger burner. If you’re cooking with a small saucepan, use a smaller burner. Putting small pans on oversize burners is a waste of gas or electricity. It’s also not great for the pan. This practice will save you money on your energy bills, plus protect your pans for years to come.
  • Turn the power off early: You don’t have to leave your oven or burner on till your food is fully cooked, because plenty of heat will still be present when you turn the switch to “off”. Take advantage of the lingering heat and save cash in energy costs.
  • Clean your burners: The shinier your burner pans are, the more they will reflect and magnify the heat.

4. Save While Operating Your Dishwasher

If you have a dishwasher, you can save money while using it by doing the following things:

  • Use it: Most people think that hand washing dishes is cheaper than running the dishwasher, but this is actually not true. It is cheaper to run a full dishwasher than to hand wash every dish along the way. When you hand wash dishes, more water is lost down the drain than is used to wash and rinse the dishes.
  • Load it up: Be sure to wait until your dishwasher is full of plates, cups, bowls, and utensils before running it. It takes the same amount of water, energy, and soap to run a half-full load and a completely full load, so be sure to fill it all the way up before washing the load.
  • Skip heated-dry feature: Your dishes will dry without the extra heat, so skip this feature and save money. If your machine has an energy-efficient setting, be sure to utilize it.

5. Cut Costs During Cooking

You can cut dollars from your budget if you practice a few frugal cooking practices, such as:

  • Use your microwave as much as possible, because it’s a fairly economical machine and won’t heat up the rest of your home.
  • When using the oven, reduce the amount of heat you need to cook foods by baking your meals in glass or ceramic dishes.
  • Stop opening the oven door to check your meal, because you’re wasting heat.
  • Cover pots and pans on top of your stove for faster cooking times.
  • Boil foods in smaller amounts of water, to reduce energy needed to bring liquids to a boil.
  • Use a pressure cooker, because foods cook quickly and efficiently.
  • Double or triple recipes so you have leftovers.
  • Cut foods into smaller pieces, because they will require less energy to be cooked.
  • Use your barbecue on your patio to avoid using your oven and to keep your house cooler during the summer months.
  • Instead of using a blender, mixer, food processor, or electric coffee grinder, use your muscles to chop, blend, beat, or grind.

Your kitchen is the heart of your home. It’s where your family congregates, and where food and beverages are prepared to feed appetites and provide comfort. You can keep this important room warm and welcoming, but still trim dollars off your energy bills. When you know how to cut energy use in your kitchen and make “green” practices the norm, everyone benefits.
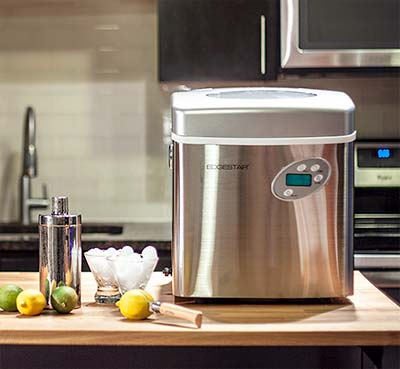
Portable Ice Maker

Portable Ice Maker FAQs

What is a Portable Ice Maker?

A portable ice maker is a small appliance that is designed to make ice, but doesn’t require permanent installation or a dedicated water line. You can plug it in and make ice at your convenience, or store it out of the way when you don’t need it.

How does a portable ice machine work?

Portable ice makers operate by quickly making small batches of ice from water that you pour into the unit. Once a batch is ready to serve, the machine will drop the ice down onto the tray for you to scoop out when needed. Simply plug it in, pour in some water and you’ll have ice within a few minutes.

However, unlike other types of ice makers, portable units don’t have a drain, so as the ice begins to melt, the water simply drips back down into the basin whereupon it is turned back into ice.

The cycle repeats until there is no more water in the ice maker.


How do you clean a portable ice maker?

Cleaning your portable ice maker is a simple task, and just about the only maintenance needed to keep it operating in an efficient manner.

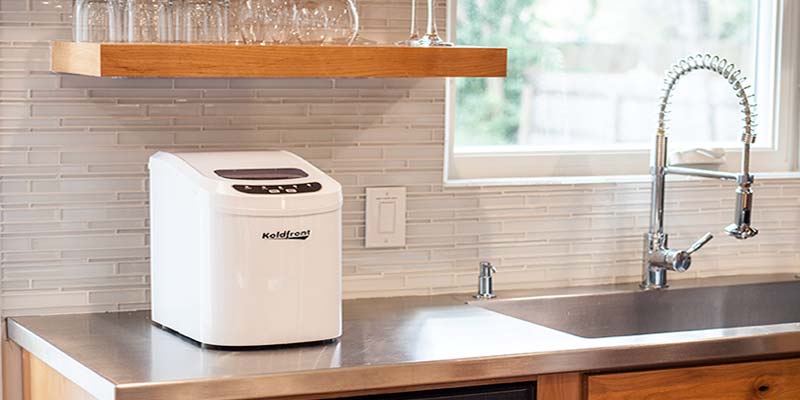
Portable Ice Maker

Every ice maker will have their own specific cleaning instructions in the manual that came with the device. You may also be able to download them from the manufacturer’s website.

If you don’t have access to the cleaning instructions for your specific model, you can follow these steps:

  1. Unplug the ice machine.
  2. Empty all water or ice.
  3. Disassemble interior pieces and wash separately.
  4. Clean the interior with a towel.
  5. Pour a generous amount of vinegar into the unit with some water.
  6. Allow device to run a few cycles and discard all ice with vinegar.
  7. Allow machine to dry before using.
  8. Add fresh water and enjoy.

Note: You can substitute vinegar with a cleanser made for ice machines.


How long does it take to make ice?

This will vary between different models, but generally, a portable ice maker will produce ice within 7-15 minutes after you add water.

It’s important to note that there are a few other variables that can play a role in slowing down production of an ice maker.

  • The type of water you use.
  • How often you clean the ice maker.
  • The age of the ice machine.
  • Frequency of use.

If you use hard water and don’t clean your ice maker on a frequent basis, then it is likely that mineral build-up will start to happen inside the device. This will slow down production time and quality.


Do portable ice makers need a dedicated water line?

No. A portable ice maker does not need or even require a dedicated water line to work. As the name suggests, this appliance is designed to be portable, allowing you to plug it in when and wherever you need it.

When you want it to produce ice, you simply plug it into an outlet and fill the reservoir with water. The unit will start producing ice relatively quickly.

This lack of a water line is one of the main differences that sets a portable ice maker apart from other types of ice machines. This may be considered both an advantage and disadvantage, depending on how you plan on using it.


Do portable ice makers need a dedicated drain line?

No. A portable ice maker does not need or require a dedicated drain line to operate. Much like a dedicated water line, a built-in drain line would make it less portable.

Due to how this type of ice machine works, it has no need for a drain line. As the ice melts, the water goes back down into the basin where the machine turns it back into ice. This process repeats until you have consumed all the ice, or add more water.

Note: To ensure that your ice is fresh and tasty, it would be wise to drain any water that has been sitting in the unit for more than a day.


Does it matter what type of water I use?

Yes, to some extent. The overall quality of the ice produced by the machine is largely determined by the quality of the water you pour into it. But, the type of water you add to the unit can also play a role in its ability to produce ice, how often you have to clean the unit, and its overall lifespan.

Obviously, the water should be potable. If it’s not safe to drink, then there’s no reason it should be inside an ice machine. But outside of whether it’s safe to consume, determining the “best” type of water is going to be subjective.

  • Hard Water — Generally, it would be wise to avoid “hard water,” as it will eventually lead to mineral build-up inside your ice machine and diminish the quality of ice that is produced. This applies to all appliances.
  • Distilled Water — While this type of water has less minerals, it may also cause performance issues with some ice makers. This is due to the usage of sensors inside most portable ice machines that rely on mineral content to determine whether more ice needs to be made.
  • Filtered & Purified Water — These fall somewhere in the middle. The mineral content will be lower than hard water, but not low enough that the sensors inside are unable to perform their duty. The water quality is usually better, which means you should get ice that smells and tastes fresh.

With all of that said, the best type of water should always come down to the experience you get from the ice.


How does ice production differ from ice storage?

Often overlooked, the product/storage capacity are two considerations that one must take into account before buying any type of ice maker. All manufacturers will have these listed somewhere in their spec sheet.

  • Storage — This defines the maximum amount of ice the unit can have ready to serve.
  • Production — This defines the maximum amount of ice the unit can produce in a day.

This is also another major difference between portable ice makers and other types available. Because they are designed to take with you on-the-go, portable units will be significantly lower in both capacities.


Is a portable ice maker a freezer?

No. This type of ice machine is not a freezer, nor is it a suitable alternative to a freezer.

While the design will vary from model to model, all portable ice makers have an insulated exterior to help keep the ice frozen and ready to consume. However, there are no portable machines that double as a freezer. This means that the ice will slowly start to melt the moment it hits the tray.

Once it melts, the water goes back down into the basin where it is used to make another batch of ice.


How much electricity does a portable ice maker use?

Like all appliances, the amount of electricity will differ between brands and models, as well as how you are using the device and the frequency you clean it.

Countertop Ice Maker

For the most part, portable ice makers are not known to be very energy efficient. We are unable to find any portable ice makers that are EnergyStar certified.

However, that doesn’t mean that they are going to cost a lot to run. In fact, they use far less electricity than undercounter ice machines or refrigerators with an ice maker built-in. And if you only plug it in when you need ice, then it is very unlikely that you’ll notice any increase in your utility bills.

For more insight, we would encourage you to read this article from Wired Mag where they analyze, calculate and estimate precisely how much it would cost to use an ice machine.


Do these work with standard 120v wall outlets?

Yes. All portable ice machines will work with a typical 120v wall outlet commonly found in homes and offices. You should not need any other equipment to make ice.


What do I need to do before using the ice maker?

Once you unbox your portable ice maker, it is recommended that you make a few batches of ice and discard it. This will remove any possible dust or debris that may have gather inside the unit during packaging or shipping.


Who makes the best countertop ice maker?

We try to stay impartial when it comes to brands. Certainly, some brands are going to be more reputable than others, just based on how long they’ve been manufacturing this type of product. Of course, this is not an indication of a “better” brand, but does offer a glimpse at how reputable a company is.

To help you determine which brand is best for you, make sure you look over the warranty that comes with the product, as well as the return policy from where you purchased it. Also, take some time to read over some reviews that customers have left. While the reviews are never going to be an accurate assessment of the brand, you may gain more perspective of what to expect from that brands’ customer service.


What is the best portable ice maker?

There is no correct answer to this question. The best portable ice maker is going to depend on your needs. And for many homeowners, a portable ice maker may not even be the best fit for them.

To find the best portable ice maker, you should do careful research on the brands and models available within your budget, and then compare their features to narrow down the one you deem to be the best unit for you.


Where can you buy a portable ice maker?

You can buy portable ice maker from a wide variety of retailers, both online or in stores. You’ll find that you have a better selection online.

Before you buy a portable ice machine at Walmart or Home Depot, we would recommend browsing your options online and narrowing down which model would be best for your home. You don’t have to buy online, but you’ll at least have comfort in knowing that you made an educated buying decision.


Have a question that you didn’t see listed here? If so, please add it don in the comments below.
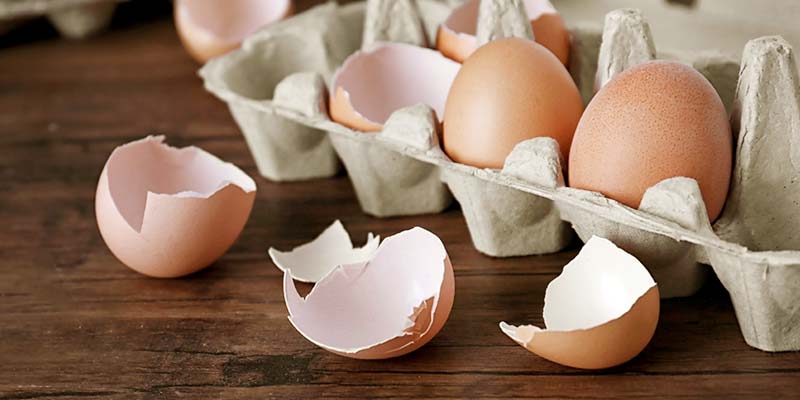
Egg Shells

Why You Should Never Put Eggshells Down Your Garbage Disposal

For many homeowners, the garbage disposal in the sink is an afterthought. It’s where the food waste goes because you don’t want it to stink up your trash can.

This is understandable. Nobody wants the unpleasant aroma of trash lingering in their home. But, many homeowners don’t realize that some foods should never be put into a garbage disposal.

Today, we’d like to highlight one food item in particular: eggshells.

For many families, eggs are a staple in the home. Consumed daily and prepared in countless ways. But, while you’re busy thinking about cooking your eggs, the shells are likely something you don’t put much thought into. Most homeowners simply toss them in the trash or the sink, while keeping the focus on not burning the eggs (again).

Below, we discuss some of the most common questions about eggshells, why you shouldn’t put them in your garbage disposal, and what you should do with them instead.

Can You Put Eggshells in the Garbage Disposal?

No. This is not a wise idea.

When they are ground up, eggshells can quickly turn into tiny particles that, in turn, may lead to a clog in your garbage disposal, or even in your pipes.

To help you visualize what could potentially happen, pretend for a moment that ground-up eggshells are like sand. Tiny particles that may flow with water, but may also clump together and create a blockage. When confined in small spaces, such as the inside of a pipe, it is more likely that the eggshell-sand will clump together.


Do Eggshells Sharpen Garbage Disposal Blades?

This is unlikely. In fact, a garbage disposal doesn’t use “blades” to break down your food.

But, it is also worth noting that you will likely get different answers depending on who you ask. The general consensus is that eggshells will not sharpen any of the components inside the unit. In fact, these may actually cause more problems than you set out to resolve.

Try Using Ice

If you’re looking to sharpen the “blades” — they’re actually grinders — inside your disposal, you should try using ice. Any size or shape will work, as long as the ice is frozen solid. Avoid the softer flake or nugget ice, as those won’t pose a significant challenge to the unit.

The upside to using ice, is that nothing will be left behind that may cause issues or clog your disposal. Unlike eggshells or citrus peels, the melted ice water will simply go down the drain.


Is This the Same For All Disposals?

Probably not. The usage tips will likely vary for all brands, as well as all models manufactured by those brands. It would be wise to refer to the user manual for your model to get the precise answer.

However, despite what may be listed in the user manual or what type of waste your disposal is capable of handling, it is still wise to avoid putting eggshells down the unit.

Even with the best of the best garbage disposals, you will be unable to eliminate the potential problems that finely-ground eggshells may create inside your pipes. Over time, they may build-up and create a clog. This can lead to some very costly repairs.


What Can You Do With Eggshells?

While your average person may consider to them to be waste, eggshells have many uses. The below suggestions are simple and easy for every homeowner.

  • Dry, Grind & Add to Soil — You can use egg shells in your yard or garden to help replenish nutrients in the soil. For maximum effectiveness, it is recommended that you grind your shells as fine as possible, and then sprinkle it around your yard or garden.
  • Compost — Similar to tossing them in your yard, you can also add egg shells to your compost bin. This will expedite the decomposition process, giving the compost a boost of calcium. For gardeners, this is an easy way to avoid your pepper important nutrient.
  • Use For Seedlings — Instead of buying a seed-starter pot, you can use old egg shells to start seedlings. This is not only an easy way to get kids involved with gardening, but the shell also acts as a natural source of food for your plants as it decomposes. More on that below.

What Are Egg Shells Made Of?

When broken down and analyzed, egg shells are comprised almost entirely of calcium carbonate.

With the same molecular formula as limestone, calcium carbonate is commonly used for calcium supplements, antacids and chalk.


Are Eggshells Good for Plants?

Yes, but not as a substitute for fertilizer or other liming material.

According to multiple studies, egg shells can be used to help supplement the soil with calcium. However, to have any meaningful effect, the shells need to be ground as fine as possible. Simply tossing the shells in your yard and crushing them with your hands or feet is not going to provide the soil with any sort of timely benefits. The decomposition process is incredibly slow.

With that said, there is no harm of adding large shells to your yard. While you may not replenish the soil as quickly as you hoped, there is no risk to your grass or plants.