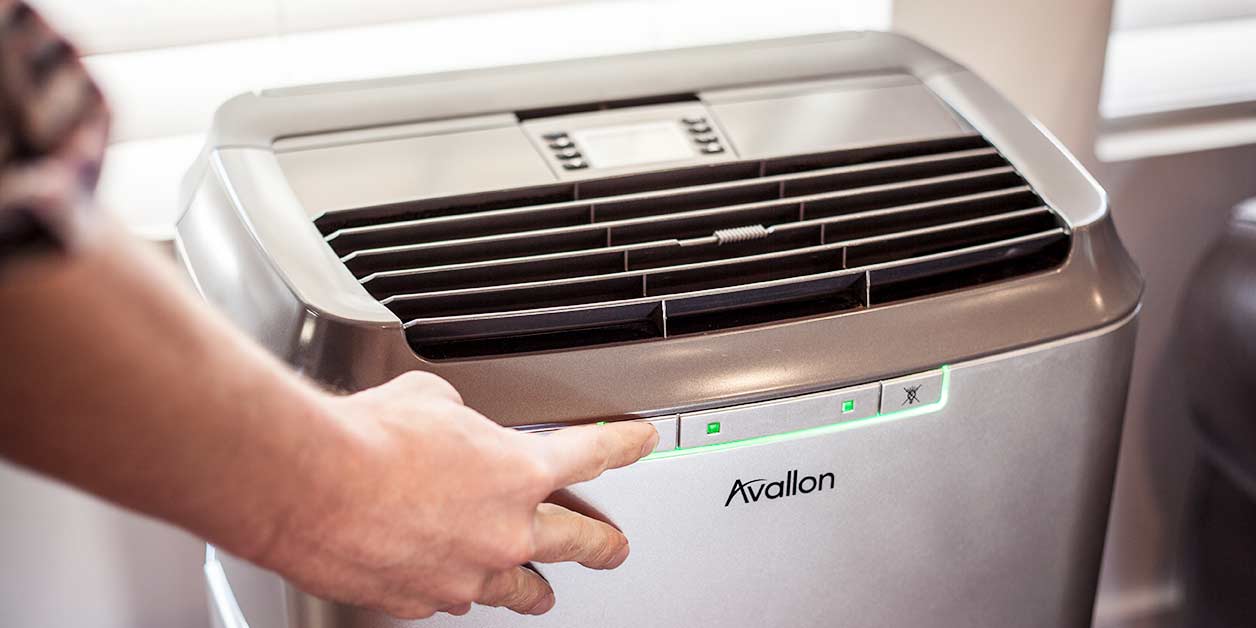
Portable Air Conditioner in Home

How A Portable Air Conditioner Will Benefit Homeowners

All around the United States, homeowners rely on their central air conditioner to keep their home cool during the hot summer months. While a central AC is one of the best options to keep you and your family cool, more and more homeowners are turning to a more versatile and convenient cooling appliance — the portable air conditioner.

These convenient, yet underrated, cooling appliances can do much more than simply provide cold air throughout your home. This type of “room” air conditioner is designed with many benefits in mind. Below, are five reasons why every homeowner would benefit from using a portable air conditioner in their home.
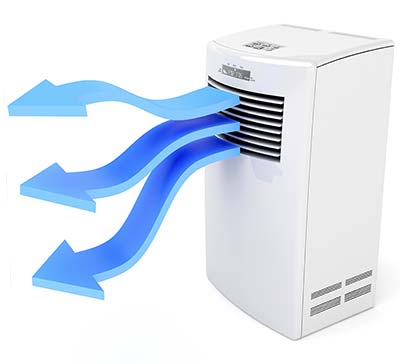
Portable Air Conditioner

1. Enhanced Temperature Control

If you are the type of person that always feels warmer than everyone else in your home or office, then you may benefit from the use of your a portable air conditioning unit.

Portable air conditioners provide you the freedom to cool a area or room without bothering your coworkers or roommates. As long as the interior space is enclosed, you could benefit from a portable air conditioner by simply cooling that one room. This will keep you in a comfortable temperature, without bothering anyone else nearby.


2. Saves You Money (And Energy Use)

For homeowners that live in warmer climates, using a room air conditioner to help cool their home may be a wise decision when it comes to lowering their utility bills.

Regardless of whether you go with a portable or window air conditioner, these smaller AC units can help homeowners bring the temperature down to a comfortable level in a small area or room that they spend the most time within. Running your central air conditioner at full power all the time tends to result in high energy bills, but a portable air conditioner can give your central AC unit a bit of a break. This not only extends the life of your central air conditioner, but a portable air conditioner can save you money.

This is also particularly useful if you happen to have non-standard windows that won’t fit a general window unit. Most portable A/C units can be installed in all sorts of odd-shaped windows, or even within a ceiling vent. Portable AC units also help save you money by only cooling the area of your home or office that you want to be cooled, which means less wasted energy in unoccupied spaces.

3. Improves Indoor Air Quality

Portable air conditioners do much more than just cool the air in a room. Some units have the ability to generate heat, making them a helpful appliance for year-round necessity use. Other AC units can utilize their built-in air filters to help improve your indoor air quality.

Popular Features & Functionality

  • Heater
  • Air purifier
  • Humidifier
  • Dehumidifier

You have lots of features available. Be sure to research all of the options provided with your preferred model in order to assure that is meets all of your unique needs.


4. Portability on the Road & Sea

For homeowners that enjoy hitting the road and traveling — whether by road or sea — a portable air conditioner is perfect for on-the-go. If you’re traveling in an RV, a portable air conditioner can help keep you cool during long road-trips. These also work great in cabins, vacation homes, and boats.

Simply remove your portable air conditioner from your home (or storage) and take it with you. Portability provides convenience when you need it most.

5. Keep Your Office & Tech Cool

The emergence of the internet and the ability to house processing power into smaller units has made it easier to run advanced businesses right from your own home. This frequently includes the ability to store servers and provide hosting services without leasing office or warehouse space.

If you have servers in your closet, garage, or anywhere else inside your home, then you may need a way to keep these servers cool.

Portable air conditioners can be used as a main cooling option or even as a supplement to your central air conditioning system to keep your equipment at a suitable temperature. These A/C units helps to prevent overheating and hot spots, which can lead to premature equipment failure as well as many other unexpected costs.


What’s the Best Air Conditioner for Your Home?

One way to get the most benefits from your portable air conditioning unit is to make sure you have a strong understanding of the amount of power your space requires to cool. To accomplish this, you just need to know the square footage of the room, as well as the BTU or ASHRAE that your AC unit produces.

For example, if you want to add a portable air conditioner into a typical, average-sized bedroom, then you won’t need a unit with industrial capabilities. However, if you plan on putting an air conditioner into a larger living room or game room, then you may need a larger unit to ensure that it’s capable of cooling the space.

How to Calculate BTU & Room Size

In order to ensure that you are utilizing the correct size, it is necessary that you calculate the BTUs required to achieve the cooling level you prefer.

To do this, you will need to calculate the size of the room you are planning to cool by multiplying the length by the width of the room. This will give you the square footage of the room. Once you have the size of the room, you should have a pretty good idea on what size unit you will need.

Cooling Capacity Chart by Room Size

The below chart is a rough estimation on how much cooling capacity you need for your room size.

  • < 225 sq/ft — 8,000 to 10,000 BTU’s
  • 225-300 sq/ft — 10,000 to 12,000 BTU’s
  • 300-425 sq/ft — 12,000 to 14,000 BTU’s
  • > 425 sq/ft — 14,000 BTU’s (or larger)

Enjoy Your Air Conditioner in a Variety of Ways

Although they have many different uses, portable air conditioners often get overlooked. Investing in a portable AC unit might just be the smartest financial move you can make as we move into these warmer months, and as heaters for your home when the weather beings to cools down.
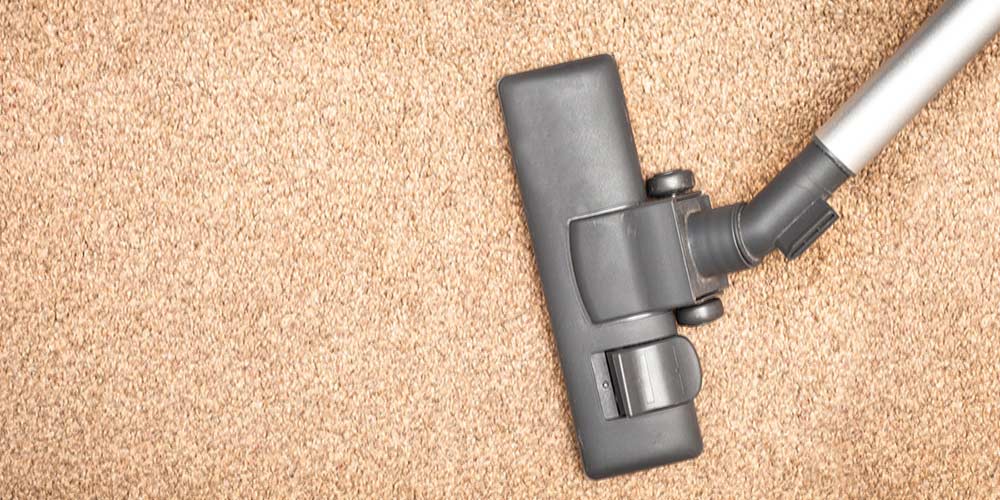
Stick Vacuum Cleaner

7 Benefits of Stick Vacuums

Vacuum cleaners are a convenience of modern times and as all technologies, these cleaning devices have improved quite a bit over time. Today, vacuums come with more attachments then you’ll probably ever need.

A stick vacuum cleaner may not be the most powerful type of vacuum cleaner, but they do offer some pretty compelling features, such as swivel steering, a multitude of attachments, cordless and rechargeable, a motorized brush, ability to easily transition between a floor and light handheld, and even HEPA filtration.

This portfolio of features has taken stick vacuums well beyond the old carpet sweepers, and transformed them into a serious consideration in the cleaning arsenal for homeowners. Below are some of the reasons why homeowners should consider buying a stick vacuum cleaner.

What is a Stick Vacuum?

A stick vacuum is a lightweight version of an upright vacuum cleaner. It’s likely not as powerful as its larger counterpart, or come with as many attachments or accessories. They are simple to use and easy to store, which are two of the main reasons why people love their stick vacuums.


What to Expect From a Stick Vacuum Cleaner

While this type of vacuum cleaner is a popular choice for homeowners, that doesn’t mean it’s the best cleaning device for you and your home. To help you figure out whether this is the right choice for you, let’s take a closer look at seven common benefits that come with a stick vacuum.

1. Smaller Size & Weight

By definition, stick vacuums are smaller, lighter, and easier to move around. Who wants to haul around a heavy vacuum cleaner, especially if you only need to spot-clean a single spill. This is where a stick or handheld vacuum cleaner really excels. When it comes to the size and weight, other types of vacuums can’t even begin to compete.

Most stick vacuums come in under ten pounds, with some models weighing about half that. This is a huge benefit for any homeowner that may have difficulty carrying or pushing around heavier machines, including the disabled or elderly consumers. Their lightweight designs not only increases its maneuverability and ease of use, but it also makes it easier to store when its not in use.

2. Lower Cost

Stick vacuums typically cost far less than their bigger counterparts. There are many reasons for this, but it really comes down to three things:

  1. They use less powerful motors.
  2. They have a compact build that makes them easy to store.
  3. They usually don’t come with a bunch of attachments or accessories.

If any of these seem like cons to you, then perhaps a stick vacuum isn’t the right device for you. Otherwise, you will soon discover that finding one within your budget is extremely easy to do.

3. Great for Quick Cleanups

Had a surprise call from a friend wanting to get together and you feel like maybe you should clean the high traffic areas before they arrive? Did your dog knock over a house plant again? Another great benefit of a stick vacuum is that they are perfect for those quick cleanings between your regular full-on household cleaning days.


4. Easy to Store

One of the most noticeable benefits of a stick vacuum is how easy they are to store. This is especially important to those who live in small apartments or tiny houses.

Much like a robot vacuum cleaner, these take far less room then the more popular canister vacuums, with some models even coming with a wall mount to help you preserve floor space. Because of their compact size and weight they can even be stored high on a closet shelf or inside your pantry where they are less noticeable and out of the way, yet still within quick reach when you need them.

5. Very Easy to Use

For many homeowners out there, this is one of the most important benefits of not only vacuum cleaners in general, but all appliances. And for the record, stick vacuums are incredibly easy to use. This ease is mainly due to the upright and lightweight design, as well as the added technologies that makes cleaning less of a chore and more of a quickly done afterthought. That’s what a stick vacuum can do for you.

Many of these devices have motorized brushes which increase its overall cleaning potential and maneuverability. Some models offer attached containers that make emptying the dust and debris a breeze. Just be sure to empty these containers outside to avoid contaminating your indoor air quality, which is an issue that hits right into the heart of the “bag vs bagless vacuum cleaner debate.”

While the attachments may be limited, most stick vacuums do come with wands that give you easier access to clean places in your home that are hard to reach. Another huge benefit of stick vacuums is their upright build. Often they feature a height adjustable design, which increases proper body positioning during cleaning, as well as protecting your back against unnecessary fatigue and strain.

6. Make Less Noise

Depending on the type of vacuum cleaner you buy, you’ll have to deal with the noise that comes with it. There’s just no way around it… they all make noise. Too much noise, despite the brand or model or type.

Unfortunately, some of those big vacuums not only have the power of a cyclone but they also sound like one too. And nobody wants that in their home.

Whether you have a pet that perceives the vacuum cleaner as their mortal enemy, or maybe you’re just timid of vacuuming at certain times because of disturbing the neighbors or sleeping family members; one of the main benefits of a stick vacuum is that it allows you to get those messes cleaned up and forgotten about with less chance of disturbing anyone in your home.

Most stick vacuum cleaners have a pretty low decibel level. Whether or not the product page that you buy it from states the Db level, for the most part, they are much quieter than than their larger counterparts.


7. Versatility

Another great feature of stick vacuums is their versatility. Most can easily be converted to very light handhelds and some models, such as the popular Dyson V11 Vacuum Cleaner, are completely cordless, running instead on a rechargeable battery.

This not only makes cleaning easier, but gives you the option of cleaning away from an outlet without stringing two or three extension cords. Some models even use HEPA filtration to help keep your air clean and free of the tiny particles that may get kicked up while vacuuming.


Stick Vacuum Cleaners: The Best Choice For You?

Though these vacuums may not be as deep cleaning or as powerful as many other types of vacuum cleaners, there are many benefits to owning one. They are a great addition for quick cleanups and if you live in a tiny house, smaller apartment, or don’t have carpeted floors it is very likely that they could completely take the place of their bigger brothers, making the costly, noisy, and cumbersome vacuum obsolete.


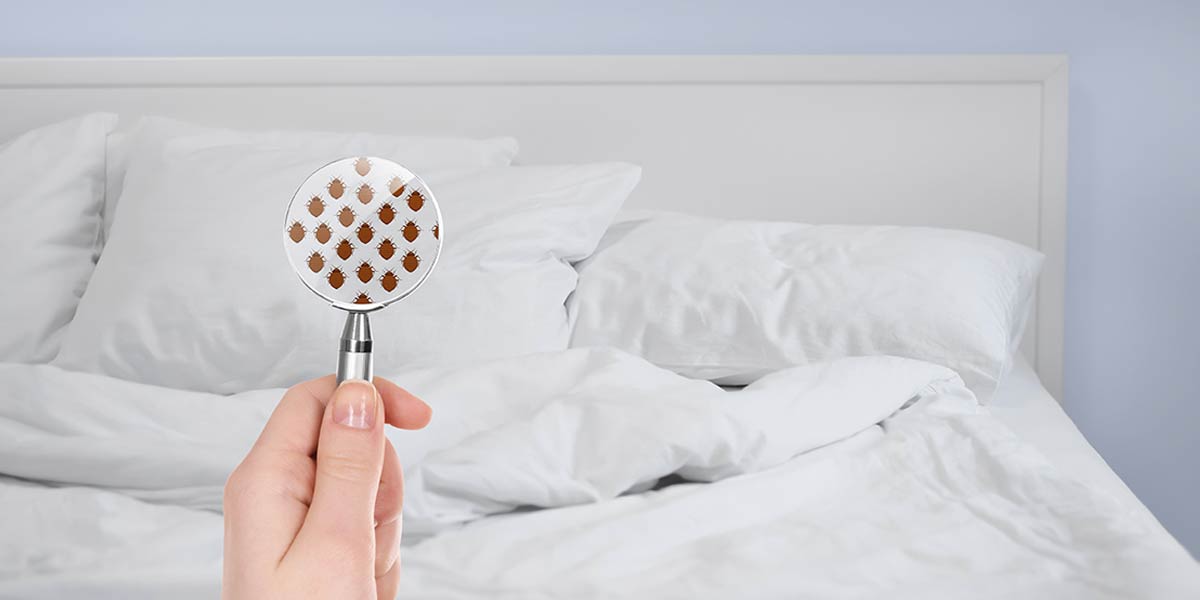
Bed Bugs

6 Signs of a Bed Bug Infestation

One of a homeowner’s worst nightmares, bed bugs are a serious concern that requires prompt action in order to prevent from spreading. The sooner you are able to recognize the signs of an infestation and get a professional exterminator out to your house to diagnose and treat, the easier it will be for you to kill and remove bed bugs from your home.

Unfortunately, far too many homeowners allow the situation to escalate before seeking help because they simply do not recognize the signs of a bed bug infestation.

That’s what we’re here to talk about today.

How to Tell if You Have Bed Bugs

To help you get back to a having a restful night’s sleep, let’s take a look at some of the most common symptoms, signs, and indicators that every homeowner should be familiar with. Here are six of the most common indicators to be on the lookout for.


1. Bites, Bumps & Redness On Skin

This is easily the most common sign that homeowners will recognize right away. If you start noticing red or pink bumps on your skin, then you may be looking at a bed bug bite. In fact, you may not even notice you have these bumps until the itching or burning sensation starts to set in.

If it’s feasible, take a photo of the bites with your phone. This will help your doctor diagnose whether the bites are from bed bugs. At this time, it may be wise for you to contact your doctor to ensure you are getting the appropriate medical care.

What Do Bed Bug Bites Look Like?

Pay particularly close attention to the pattern and number of red bumps, as it is common for bed bugs to bite several times in a straight line or in one area. Are there numerous bites all appearing within the same localized area? This is a sign of bed bugs.

Bed Bug Infestation

2. Actually Seeing Bed Bugs

If you have a heavy infestation, it’s entirely possible that homeowners will actually be able to see bugs crawling around your bed sheets. If you are able to see them for yourself, then an exterminator needs to be contacted right away.

Spotting bed bugs for yourself is not always as easy as it seems. This is because bed bugs tend to be nocturnal, which means you may not be able to see them during the day. If you suspect you have an infestation of bed bugs in your home, try to inspect your sheets at night. Check every area of your bed, including all of the crevices and edges. Inspect and remove all of your bedding. You should also take a look at your box spring.

Bed bugs are very tiny, so you may need to look closely. They are almond-shaped with a reddish-brown color. It is also possible that you will see eggs in your bed, which means you have several generations of bugs that are infested within your sheets. In addition to the bed bugs themselves, look out for any excrement or skin that may have been left behind as well.


3. Presence of Exoskeletons

You may not see bed bugs for yourself after the infestation has grown, but it should be easier to spot the presence of exoskeletons. These are the hard shells that are used to provide structure to the bed bugs’ organs and muscles.

As bed bugs grow, they molt this skin and leave it behind. Seeing an exoskeleton on its own might be easy to dismiss, but remember, it is incredibly unlikely that an infestation has moved away or resolved itself on its own. If you find exoskeletons in your bed, then it’s very likely that you have bed bugs.


4. Blood Spots on Your Mattress

Another sign that you may have bed bugs in your home is if you notice tiny spots of blood on your bed sheets. This is because bed bugs feed by biting your skin and drinking your blood.

They will be more noticeable if your sheets are white or lighter in color. If you have dark sheets, then you may not notice them right away. You should also pay attention if there are any small, unexplained blood spots on your clothing or furniture. It is not unheard of for bed bugs to attach to clothing and become mobile. Unfortunately, this is a very common way for bed bug infestations to spread to other parts of your home.


5. Fecal Matter on Your Mattress

This one may be a little disgusting to think about, but another common sign of bed bugs is discovering small black or brownish spots on your bed sheets or mattress. These small spots could be feces produced by bed bugs.

To confirm whether these spots are actually excrement from a bed bug, you can take a mildly damp cloth and gently rub it over the spots.

Because bed bug excrement is generally just dried blood, a damp cloth will make these brownish spots red again. This is a strong indication that you may have an infestation in your home.


6. Strange Odor

It is also very common for bed bugs to create a very unpleasant odor. The description of the scent can vary, but many people describe it as either smelling like coriander or spoiled raspberries.

This smell is generally the result of the bed bugs releasing pheromones, but it can also be created by crushing the bugs. These odors are most often created when the infestation of bed bugs has increased drastically, so if you start smelling something in your mattress, then it is highly likely that your bed bug problem has escalated quite a bit.

Spot the Signs & Act Quickly!

Out of all signs and indications listed above, the most important one that homeowners should watch out for is actually seeing the bugs in your bed. If possible, try to capture one or more of the bugs to show an exterminator. This will prove beyond a doubt that the culprits are bed bugs and you can then proceed with the proper treatment to eliminate the infestation.

Obviously, no homeowner ever wants to deal with a bed bug infestation. But the sooner you can spot the signs of an infestation, the easier and more cost-effective it will be to kill and get rid of these unwanted pests. At the first sign of trouble, contact a pest extermination company near you in order to get a professional out to your home or business so that you can go back to getting a good night of sleep.


How to Save Energy in Your Kitchen

5 Tips Every Homeowner Should Know

Whether it’s cooking, baking, or washing dishes, the kitchen is one of the main areas within your home where you will be consuming energy. There’s no way around this, but you can, however, reduce the amount of energy used by being a smart and frugal consumer.

Here in this article, we will discuss some easy ways that homeowners can learn how to cut their energy use in the kitchen while still preparing delicious meals and keeping a tidy — and functional — cooking space. Here’s how.

1. Buy Energy Efficient Appliances

If you’re in the market for new kitchen appliances, look for the Energy Star label before you buy. This is a designation given only to items that have been deemed highly efficient by the EPA (Environmental Protection Agency) and the Department of Energy. If you have perfectly good appliances that are not Energy Star, don’t just trade them in for new models.

2. Make Your Refrigerator More Efficient

Your fridge can cost you approximately $90 a year to operate, unless you outsmart it with a few frugal maneuvers, such as:

  • Change the Thermostat Setting:

    If you set your refrigerator’s thermostat to too cold of a setting, you are spending more money than you need to. Adjust your fridge’s temperature to a range between 37° & 40° F. Your freezer should be set between 0-5°F. Buy two appliance thermometers to monitor the temperatures if your appliance doesn’t have them already built-in. By raising your fridge temperature, you can save around $20 annually.

  • Make Your Own Ice:

    A built-in ice maker may be convenient, but it’s costing you extra cash. By relying on this feature, you could be spending 14 to 20 percent more than you need to be. Turning off this auto-feature is fairly simple, and by doing so, you can keep more money in your bank account.

  • Clean Off Your Coils:

    When your refrigerator’s coils get dusty, the cool-air flow is restricted, which makes your appliance struggle to do its job. You can remove this dust with a vacuum cleaner attachment, and save yourself nearly five dollars a year after performing the task.

  • Limit Yourself to One Fridge:

    Do you have an extra fridge in the basement, garage, or game room for beer, holiday turkeys, and party food? If so, you are shelling out hard-earned cash for something you only use seasonally. Find a way to make one refrigerator work for your household and save yourself $90 a year.

3. Spend Less on Cooking by Altering Your Oven/Stove Habits

The gas or electric oven and stovetop in your kitchen can cost you less if you change a few of your cooking habits. When you pay attention to the way you use your range, you can shave dollars off your utility bills. Follow these tips:

  • Stop preheating your oven: It’s not necessary to preheat your oven for every single recipe you prepare. There are a few items, such as fragile cakes like angel food, that may require preheating, but most dishes don’t necessarily need this step performed. If you want to be extra sure that you can skip this step with your meal preparation, it might be a good idea to do a bit of research beforehand, but for the most part it isn’t a big deal. If you skip preheating, you can save a couple dollars each month, which adds up to big dollars over time.
  • Use the right size burner: When you have a large pot or pan, use a larger burner. If you’re cooking with a small saucepan, use a smaller burner. Putting small pans on oversize burners is a waste of gas or electricity. It’s also not great for the pan. This practice will save you money on your energy bills, plus protect your pans for years to come.
  • Turn the power off early: You don’t have to leave your oven or burner on till your food is fully cooked, because plenty of heat will still be present when you turn the switch to “off”. Take advantage of the lingering heat and save cash in energy costs.
  • Clean your burners: The shinier your burner pans are, the more they will reflect and magnify the heat.

4. Save While Operating Your Dishwasher

If you have a dishwasher, you can save money while using it by doing the following things:

  • Use it: Most people think that hand washing dishes is cheaper than running the dishwasher, but this is actually not true. It is cheaper to run a full dishwasher than to hand wash every dish along the way. When you hand wash dishes, more water is lost down the drain than is used to wash and rinse the dishes.
  • Load it up: Be sure to wait until your dishwasher is full of plates, cups, bowls, and utensils before running it. It takes the same amount of water, energy, and soap to run a half-full load and a completely full load, so be sure to fill it all the way up before washing the load.
  • Skip heated-dry feature: Your dishes will dry without the extra heat, so skip this feature and save money. If your machine has an energy-efficient setting, be sure to utilize it.

5. Cut Costs During Cooking

You can cut dollars from your budget if you practice a few frugal cooking practices, such as:

  • Use your microwave as much as possible, because it’s a fairly economical machine and won’t heat up the rest of your home.
  • When using the oven, reduce the amount of heat you need to cook foods by baking your meals in glass or ceramic dishes.
  • Stop opening the oven door to check your meal, because you’re wasting heat.
  • Cover pots and pans on top of your stove for faster cooking times.
  • Boil foods in smaller amounts of water, to reduce energy needed to bring liquids to a boil.
  • Use a pressure cooker, because foods cook quickly and efficiently.
  • Double or triple recipes so you have leftovers.
  • Cut foods into smaller pieces, because they will require less energy to be cooked.
  • Use your barbecue on your patio to avoid using your oven and to keep your house cooler during the summer months.
  • Instead of using a blender, mixer, food processor, or electric coffee grinder, use your muscles to chop, blend, beat, or grind.

Your kitchen is the heart of your home. It’s where your family congregates, and where food and beverages are prepared to feed appetites and provide comfort. You can keep this important room warm and welcoming, but still trim dollars off your energy bills. When you know how to cut energy use in your kitchen and make “green” practices the norm, everyone benefits.

How to Hire an HVAC Technician

8 Tips Every Homeowner Should Know About Hiring an HVAC Technician

When your HVAC unit starts to show signs of needing maintenance, service, or complete replacement, it’s critical that every homeowner knows what to do and who to call (or not call).

During the peak of the summer months or in the thick of the winter months, your ability to find the right HVAC technician can make a huge difference on the timeline that is needed in order to fix whatever indoor air problems you may be experiencing in your home.

If you hire the right contractor to service your HVAC system, you will likely get things fixed or replaced without much of a hassle, and be back to feeling comfortable inside of your home in no time. On the other hand, if you hire the wrong contractor, it may make things much more difficult, causing you to have to wait a long time in the extreme heat or the freezing cold for service, pay too much for repairs, or be left without a working HVAC system.

Below, we will lay out eight tips that every homeowner should know to help you find and hire the best HVAC technician to service your unit.

1. Review Licensing Information

Any time you are considering hiring someone to do work within your home, you need to do a bit of research to ensure everything is on the up and up.

The first important thing to check is your HVAC technician’s license number. Your contractor should have no problem sharing his or her license number with you. If not, move on and find someone else.

Once you get the number, it is possible to look up the license and get an overview of past performance. If your contractor won’t provide a home improvement license to you, this is a red flag that you may need to choose someone else.


2. Ask for and Contact Customer References

What you should do next is to ask your contractor for customer references. A reputable company should be more than happy to provide a list of previous clients who can share their experiences with you.

When you start talking to your technician’s customers, make sure you ask about various things such as the contractor’s timeliness, work habits, ability to finish the job and whether or not the price was within the budget. Learning about another homeowner’s experience may help you make a decision about whether or not this contractor can help you in your situation. If your contractor dodges your questions about references, this is another red flag that they may not be the best technician for you.

3. Look at Experience Within the Industry

Ideally, the HVAC service person that you choose should have a lengthy list of experience. Whether or not you choose a team of contractors or a single proprietor, it’s important to go with someone who has a proven record of success with various types of HVAC systems and room air conditioners.

When you’re paying for time and labor, you want to have someone in your home that can quickly diagnose the problem and efficiently make adjustments or repairs. It may not be necessary to have someone who has been around for decades, but at the very least you want to choose a technician that has been in the industry for a few years.

4. Read Online Reviews

You can check the reputation of your HVAC technician by perusing popular websites dealing with businesses or home improvement. What you can do is conduct an Internet search using the company’s name as your search term.

While you should be on the look out for fallacious or untruthful reviews, most of the time online reviews can help guide you to finding and hiring the best HVAC technician. Just make sure that your read over each review in order to make a decision about choosing a contractor to service your HVAC problems.


5. Evaluate the Pricing

One of the most important things to homeowners when they schedule service to their major appliances is the price. What will come out of your pocket is always an important factor to keep in mind.

Either on the company website or through customer references, look at some of the pricing of the various services the business may offer. Companies that are on the lowest end of the region’s pricing may not be the best bet. The highest priced contractors may offer additional services, so be sure to ask.

Keep in mind, while going with the cheapest company isn’t always smart, you certainly don’t want to pay more than you have to. You get what you pay for.

6. Ask About Rebates & Energy Efficiency

When you’re having work done to your HVAC unit, or if you’re going with a brand new system, a reputable company should offer you additional tips and recommendations that can help you make sure your home is more energy efficient.

Part of any routine service for HVAC systems is a complete run through of the little improvements you can make around the house to support the proper maintenance and efficiency of your air conditioning or heating system. Contractors who take the time to show you how to make your home more energy efficient are typically ones you can trust.


7. Make Sure You Get an Estimate

Every reputable HVAC technician should provide a detailed and itemized price estimate of the work that needs to be done. If you don’t get a line-item or detailed information about how much the project or repairs may cost, then you should consider hiring a different HVAC technician.

It is strongly recommended that every homeowner get several estimates from different HVAC companies, as this will allow you to compare costs and make a data-driven decision. Ask about discounts your contractor may offer to help you keep things within your budget. Perhaps there are rebates available for you to take advantage of.

Some technicians may even offer financing opportunities that can help you purchase an entirely new system for your home. This can break down the cost into manageable monthly payments, making it much more affordable.

8. Get Everything in Writing

Once you have made a choice about which company you want to hire, it’s important to get a solid contract written out. Your contract should detail the entire scope of the project along with the detailed pricing.

Go line-by-line and read over everything that your technician presents to you. Make sure you ask any and all questions if you don’t understand something. An HVAC technician understands that most homeowners will have questions, and they expect you to ask. So, ask away before you sign anything.

Putting everything in writing can help you know exactly what to expect, and how much you’re going to pay before the job is completed. When everything has been finished, make sure you get additional information about your HVAC’s warranty and service requirements if you installed a new system.

Keep in mind that the warranty may vary between the manufacturer and the company that installed the devices. Get this in writing.

The Importance of Researching HVAC Technicians

Finding the right home improvement company or HVAC technician is something that can take some time, research, and effort.

If you skip this important step, you’re setting yourself up to getting a lower standard of service, paying much more than you need to or even becoming victim to an unscrupulous company. Being an informed and smart consumer can help you and your HVAC technician know exactly what to expect and provide a more positive working experience for all.

Infrared Heaters: How to Keep Your Home & Save Money

For many homeowners, winter is a frigid time of year, full of extreme weather and very low temperatures. Unfortunately, the cost of heating your home using your central air can be rather expensive, especially when you think about all the empty rooms that you’re paying to keep warm, yet aren’t using. These extra energy costs can be worrisome for families on a budget or trying to lower their utility costs.

Thankfully, we may have a solution for you. By following a supplemental heating strategy in your home, you will be able to save on your overall energy costs, without sacrificing your overall comfort levels.

Infrared heaters are a great option to help you accomplish this. They are a comparatively inexpensive yet effective way to keep your home or office warm.

How Do Infrared Heaters Work?

In a nutshell, an infrared heater, or “heat lamp,” uses a process called electromagnetic radiation, in which an entity with a higher temperature transfers heat energy to an entity with a lower temperature. While the term electromagnetic radiation might sound scary or dangerous, it is perfectly safe for use when it comes to infrared heaters.

This type of heater actually projects out infrared light, which we humans lack the ability to see. Though it is invisible, things like our skin, clothes, and furniture absorb the light, and heat up.

In general, objects in the direct line of an infrared heater (infrared light projection) heat up very quickly, while surrounding objects will take slightly longer to warm up and raise the overall temperature of the area.

Remembering that infrared heat is actually light, some larger and more industrial versions of these heaters use a type of gold coating on the tube that reflects the radiation. The element Gold has exceptional oxidation resistance, and reflects approximately 95% of infrared light. This effectively doubles the amount of radiation projected outward.


Types of Infrared Heaters

Infrared heaters vary on the type of fuel or energy needed to power them. Most personal infrared heaters are electric, but propane and natural gas-powered are fairly common as well. All of these heaters are extremely efficient, and project nearly 100% of the heat they generate.

Material

This type of heater also varies when it comes to the material used in their construction. Larger infrared heaters are usually metal or ceramic, and are used mostly for commercial or industrial purposes.

Personal-sized infrared heaters can be metal, ceramic, or made of different types of composite plastics that have the ability to withstand high temperatures. Many personal heaters are made with a combination of these materials, with metal being the most common as the reflectivity of the material may help intensify the heat.

Aesthetics & Decor

As far as aesthetics are concerned, rest assured that infrared heaters have made great strides to fit into various styles of interior décor. Recently, many personal versions have been made to look very stylish and complement their surroundings.

Filament

Still, another way to classify different types of infrared heaters is the material used for the filament. The most effective and most common filament material used for the electric-style heaters is tungsten.

Tungsten has the highest melting point of any metal, which means it can stay strong and withstand extremely hot temperatures.

Alternative filament materials used for lower-temperatures include various alloys of iron, carbon aluminum and chromium. Carbon filament in particular is becoming more popular among personal infrared heaters due to its ability to heat up very quickly.

What Are the Benefits of Infrared Heaters?

Making the decision to use an infrared heater comes with several advantages over central heating, as well as other types of space heaters.

  1. Fast, safe, directed heating.
  2. Silent: They just radiate light.
  3. No reduction in oxygen or humidity levels, which can dry out skin and sinuses.
  4. Infrared heat promotes healthy blood circulation.
  5. No UV radiation.
  6. No pollutants or toxic by-products.
  7. No long fuel lines, open flames or carbon-type combustion.
  8. Extremely efficient and inexpensive to operate: Almost 100% of the heat created is transferred.
  9. Very little maintenance – No moving parts, no motor to wear down, no air filters or lubrication required.


Are Infrared Heaters Safe?

Although infrared heating is considered to be safe among consumers and professionals alike, they still emit heat and can be extremely hot at very close ranges. This means caution should always be exercised if the heater is operating around children or pets.

Much like any other type of heater, proper safety precautions should always be followed when operating. This would include avoid leaving your heater on when you go to bed or leave the room for an extended period of time.

It’s also worth noting that this type of heat can be started and stopped very quickly, as it is literally switching a light on and off. This may be considered to be a safety feature for some homeowners.

Lastly, remember that infrared heating is largely directional and focused. A rise in ambient temperature within a living area may take some time to occur, due to surrounding objects absorbing the light and heating up.

Why You Should Consider Using One

When it comes to using a personal heater to keep you and your family warm, you have many choices to choose from. And for the most part, they will all work great at achieving its purpose. Infrared heaters are a great choice because they require very little maintenance and are extremely quiet.

The heat they produce is gentle, cost-effective and very energy-efficient. You are guaranteed to stay warm and save money with this type of heater.

How to Prepare Your House to Sell

If you are preparing to sell your house, then you probably know that taking care of a few basic maintenance concerns and making it look great are keys to selling it at a better price. What you might not have heard about, though, are the directed strategies that pay off best and how to put them into place for your sale.

Below, we highlight a few of the key home improvements that may pay off when you are trying to raise the value of your home before you put it on the market. While every house has a maximum reasonable asking price that is mostly determined by its size, location, and architecture, these strategies will get you as close to that number as you can get without overspending.

1. Make Simple Upgrades

Full remodels tend to be more expensive than they are worth for sellers, regardless of which room you do them in. They are great ways to make a home your own, but when you want to sell, you really need to be concerned with the cost-to-value ratio, and the only value that matters is the final sale price. Here are the cost-effective upgrades that you might want to try out in your home:

House for Sale
  • Add a Fresh Coat of Paint

    Prioritize rooms with walls that show a little wear or damage, and keep your color choices light, inviting, and relatively neutral. Just don’t be boring or flashy, keep things in the middle.

  • Repair damage with fills, plasters, and other bonding agents.

    Whether it is wood, porcelain, drywall, or whatever, you do not want cracks, chips, divots, and other signs of wear showing up. For woodwork, many hardware stores carry blending touch-up pens that can be a huge help.

  • Reglaze damaged countertops, tubs, and sinks.

    This one is easy to lose money on if you do not really need it, but it is better to spend a few hundred dollars reglazing a chipping or peeling formica countertop than it is to lose thousands because show features are damaged. If you have questions about whether this option is right for your home, talk to your realtor about it.

  • Consider simple fixture replacement.

    New cabinet handles, faucet features, and other basic fixtures can often be purchased and installed cheaply as DIY projects. A few simple swaps for tarnished, over-painted, or just out-of-date fixtures and your new additions make the room look up-to-date without investing in a full remodel.


2. Depersonalize Your Space

The hardest step for most homeowners is coming to terms with the need to cut back on their personal clutter.

Your house is your refuge, and even when it’s time to sell, it can be difficult to transition into treating it like a space for other people, but you really need to do that if you are going to get the most out of your sale. Think in terms of how a professional might come and stage your home before a showing. These steps will help you to make your home showroom-ready, and they can also help your move be easier in the long run.

  • Declutter Everything.

    Box up items that really do not need to be around the house, like old photo albums and keepsakes that are mostly out for display, take down most of your old family photos, and try for a minimalist approach to wall decor. You do want a few pictures or paintings for accent pieces, but it can be hard for a buyer to see the house behind your stuff if it is too full.

  • Tidy Up Your Storage Space

    Even if you normally organize your tools or books with piles that are mostly the same size and color, your buyers are looking to see what is possible in a space, so storing some items and arranging others to showcase the best uses of your cabinets and other built-in storage areas will help prospective buyers see that.

  • Trim Your Furniture to a Tasteful Minimum

    You want each room to have the pieces that are necessary to say it is completely furnished, but most of us like to over-furnish our rooms as part of our personal decorating style. Pulling that back makes it easier to see the room for itself, and it also helps you to stage it in a way that takes advantage of natural light.

  • Clean Up After Your Pets

    If possible, get them out of the house, even if it is just during the days when the house is being shown. Having strange animals around can be off-putting to some people, and you never know who is going to be allergic.

Having some of your family’s extra belongings in storage, including that extra furniture, makes moving simpler because it gets everything that is not essential out of your way until you are ready for it.


3. Clean the House from Top to Bottom

A deep and thorough home cleaning is actually a house improvement, because it rolls back some of the wear and tear that can become damage in the long-term if it is not taken care of. This can include the growth of mold or mildew, especially in the bathroom and window sills, air purity issues that come from allergen buildups in the carpet, and moisture that can lead to problems with your basement and crawl spaces. Take these steps to get a solid deep cleaning, so that buyers see your home in the best possible light.

  • Remove all the stains

    From hard water buildup to soap scum, rings around the drop sink, and rust marks in the basement, you will want to get rid of any signs of regular wear from your home’s fixtures. There are a variety of products, including natural alternatives, that will help with everything from rust stains to limescale. Inventory the sites in your house that need to be treated, and hit them systematically until you see no signs of the deposits.

  • Shampoo Carpets and Rugs

    Even if they are not permanent installations in the home, a deep cleaning on all the rugs and carpets helps purify your home air quality and takes years off the appearance of the rugs. Sometimes, it can even rescue a carpet that looks like it needs to be replaced.

If you follow through with these basic upgrades and house improvement strategies, then it should be easy to maximize your home’s resale value for today’s market. Just remember, the key is to find low-cost solutions. Anything that involves major remodeling should wait for your next house.

How to Winterize Your Sprinkler System

Your sprinkler system is an important part of your landscaping. Lawns, trees and plants are very expensive to replace, so it is important to protect and maintain your sprinkler system at all times. Before the temperatures drop with the onset of winter, it’s important that homeowners take the appropriate steps to winterize their sprinklers.

Without the proper preparation, you may be facing expensive repairs to your sprinkler system or the loss of established trees, shrubs, or flowers. And expensive repairs are the last thing that any homeowner wants, especially when a bit of preventative maintenance can avoid this altogether.

Check Your Owner’s Manual

First things first, if possible, look in the owner’s manual for how to winterize your sprinkler system and follow those directions to ensure that you don’t void a warranty or make any other mistakes.

If you’re unable to find the original owner’s manual or just want some quick tips to winterize your sprinklers, we’ve put together several important tips that every homeowner should be aware of.

1. Shut Off the Water

The first thing to do as winter’s freezing temperatures are drawing near is to turn off the water to your sprinklers. Make sure to shut it off at the main valve. Your sprinkler system’s shut-off valve should be housed in a space where it can’t freeze. If this wasn’t done during the installation, perform this task before the frigid weather arrives.

2. Turn Off the Controller

Once you’ve gotten the water turned off, you need to shut off the timer, also known as the controller. Timers sometimes have settings marked rain mode. If yours doesn’t, you will need to disconnect it from the power source.

If your controller is outdated, you may want to update to a model such as a solid-state controller, which has digital displays for time settings as well as efficient energy usage to reduce your electric bills.


3. Remove Backflow Preventer

Your system has a device to prevent backflow, which is great for lawn-watering season, but during the winter, it must be removed and stored safely until spring. After it is removed, it’s time to drain the water.

How to Remove Backflow Preventer:

  • First, you can try to siphon it out.
  • If siphoning doesn’t work, pump it out with a shop vacuum designed for wet/dry use.
  • It’s helpful to attach duct tape to the hose in order to narrow the opening.
  • Drain above ground valves and store them, as well.
  • You can use pipe-heating cables on some areas, but this can be problematic in case of power failures.

4. Drain Water From Pipes

It’s absolutely crucial that you drain all the water from your irrigation system. If any water is left in the system, it’s possible for the pipes to freeze, which will lead to the pipes cracking or bursting once the water starts to expand.

You can use a shop vacuum to do this process, which can be time consuming, or you can take an easier route. The simpler alternative method to clear your sprinkler valves is to blow them out.

How to Blow Out Irrigation System

Below are the steps to help you blow out your sprinkler system and remove all water from the lines. It’s important that you have the right safety eye protection prior to starting this process. If you have any doubts, it would be best to call a professional.

  • Get a large compressor: To drain your valves with the blowout technique, you’re going to need the right equipment: a compressor with 50 cubic feet per minute rating. It’s imperative that the regulator valve gauge on your compressor is accurate.
  • Take off the backflow prevention: If you have an anti-siphoning lock on your valve, remove the entire mechanism.
  • Turn on the air compressor: Connect this equipment to the backflow-prevention riser.
  • Switch on valves: Using the automatic controls, turn on your valves one at a time as you blow out your irrigation system. It’s best to start with the highest elevation and open the hand valves manually.
  • Turn on compressor: Take your time and gradually increase the pressure. If it’s too hot or powerful, attach a hose length to modify it.
  • Blow out the H2O: Watch the pressure gauge and temperature as you slowly blow the water out.
  • Move to the following valve: One by one, move around your yard, blowing out each valve. Repeat this process until the draining process has been completed.
  • Blow out main line: You’ll also need to blow out your irrigation system’s main line if it has one.
  • Finish up: At the end, you’ll need to replace caps, set rain mode or turn your power source off.

5. Protect Spigots & Hoses

In addition to protecting pipes and valves, you can also safeguard other parts of your landscape-watering system, including:

  • Spigots: Protect the spigots by covering them with Styrofoam protective devices that can be found at home improvement stores.
  • Hoses: Drain water from garden hoses and store them in an area away from ice and snow to prevent cracking.


Get to Know Your Irrigation System

While it’s not entirely necessary, it’s wise to have a good understanding of the ins-and-outs of your sprinkler system before you start the winterizing process. You don’t have to be an expert, but, if possible, every homeowner should learn what they can about the following:

  • Drain Valve Locations:

    Your system should have drain valves at each pipe’s low point. You also need them at high points, so air can be released; otherwise, the water won’t be able to drain properly.

  • Slope of the System:

    When a sprinkler system is installed, there should be a slight slope to allow for easy draining.

  • Auto-Drain Valves:

    If you install automatic drain valves, your annual winterization can be greatly streamlined.

Create a Map of Irrigation System

It would be helpful to have a diagram or map that tells you where all of the sprinkler heads, valves, and watering zones are located. This will not only help you stay organized, but also make it easier to upgrade, repair or winterize your sprinkler system.

Once you create your irrigation map, keep it in a waterproof and convenient location. This will ensure that it remains helpful and ready all year round.

Know Your Region’s Climate

Before performing any winterizing steps, take time to think about the climate in that your home is located in.

If it snows only once in the season and the temperature barely hits freezing, then you may not have to winterize your irrigation system at all. On the flip side, if your home is in an area that always has freezing temperatures, snow, and ice, then you will definitely need to prepare your irrigation system for the deep freeze.

This is where a professional can be a real help. They know the area well and will be able to tell you how to best prepare your sprinkler system for winter.

Takeaways

If you want a beautiful yard when spring arrives, there are many tasks that a homeowner should do to prepare their yard for winter. One of the most important is to winterize your sprinkler system.

Because it’s a moderately difficult DIY project, consider hiring a professional to do the job for you. You and your front yard and backyard will be glad you did.

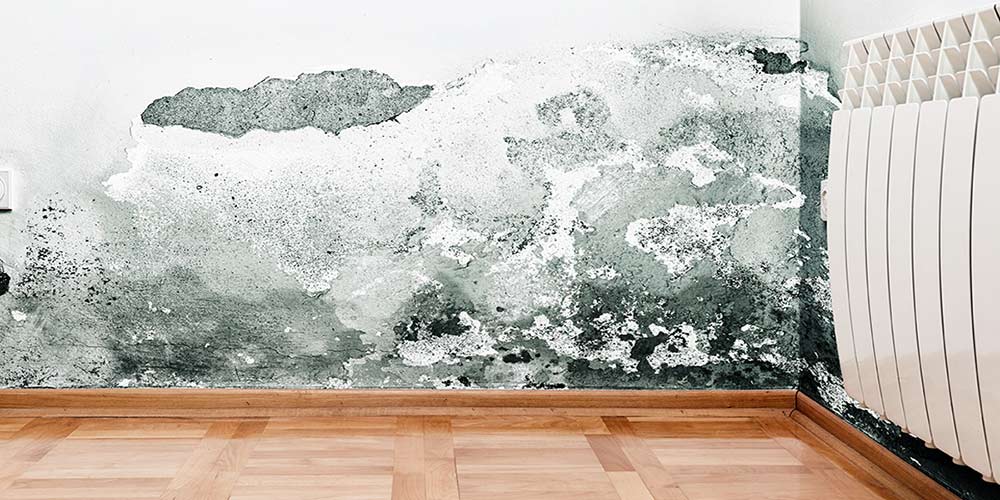
Mold In Home

How to Remove Mold From Your Home

As a homeowner, it’s critical for you to know and understand the dangers that mold presents to your home. It is a common concern for homeowners and can cause unseen damage to your home and your health.

Mold is a fungus that has the potential to grow within any location that is damp or excessively moist. If these areas are also warm, poorly ventilated, or have no light, then mold is more likely to thrive and cause issues.

At first, mold in your house will only create a musty or unpleasant odor, but as time goes on, mold can lead to some pretty serious damage. In fact, according to the CDC, exposure to mold has the potential to provoke allergies and asthma attacks for people who are prone to them.

In this article, you’ll learn more about how to get rid of mold from your house, as well as how you can spot it and prevent it from growing in the first place. Ask any homeowner, mold is not something you want in your home.

1. Control Humidity & Moisture

Mildew is a thin black or white substance that you typically find growing on grout in a bathroom. It flourishes in warm, humid areas, so the first step in removing and preventing it is to clean the places in a home where it’s mostly likely to show up, and keep them dry.

Mold

Be sure to regularly clean your bathroom and kitchen, stretch out wet shower curtains and dry damp clothing quickly.

If your basement is often damp, there may be crevices in the walls letting moisture in, so replace cracked mortar and make sure you have sufficient outside drainage.

An air conditioner can help by taking in warm air, which holds more moisture, and circulating it back out as cool, dry air. A humidstat or dehumidifier is also useful for reducing humidity.

On days when the air outside is dry, open up your windows and use electric fans to let the outside air circulate into your home and carry the moisture out.


2. Use Cleaning Solutions & Products

There are a number of cleaning solutions you can use, all of which are relatively inexpensive and easy to find.

Bleach

Bleach is very effective when used on moldy surfaces. Mix 1 cup of bleach with 1 gallon of water, then use either a spray bottle or a bucket and sponge to clean the affected area.

If you want to prevent growth, don’t wipe the area afterward. Note that bleach has some drawbacks, the foremost being that it’s useless on porous materials like wood and drywall. It also gives off harsh fumes, and mixing chlorine bleach with ammonia or certain other household cleaners is incredibly dangerous as it produces toxic gas.

Note: Never mix bleach with other chemicals!

Vinegar

Vinegar isn’t quite as effective as bleach, but it’s safe and doesn’t give off harsh fumes. Pour undiluted white vinegar or apple cider vinegar into a spray bottle, spray the affected area, let it sit for an hour, then wipe clean.

If you want to use it to prevent growth, simply don’t wipe afterward, and spray again every few days. Use it only on non-porous surfaces.

Borax

Borax is dangerous if swallowed, but it’s otherwise safe and doesn’t give off dangerous fumes. Create a mixture of 1 cup of borax for every 1 gallon of water, then clean with a scrubbing brush. Once again, only use it on non-porous surfaces, and you can use it to prevent growth by not wiping it off afterward.

Ammonia

Ammonia is similar to bleach in that it can’t be used on porous surfaces, and also that it’s a dangerous chemical. Make sure that you only use clear ammonia. Create a 50/50 mix of water and clear ammonia, and spray the affected surface. Let it sit for a few hours, then wipe and rinse.

Baking Soda

Baking soda is both mild and safe, and it also acts as a deodorizer. What’s more, unlike the other solutions, baking soda can be used on porous surfaces.

Add 2 tablespoons of baking soda to 8 ounces of water and mix thoroughly. Spray the affected area, scrub with a sponge or brush, then rinse. Follow this by spraying a second time, but don’t rinse afterward.


3. Cut Out & Remove Large Infestations

Mold can grow behind the walls and other unseen places in a house, leaving homeowners unaware until they smell it or notice stains on the wall. At that point, it has to be literally cut out of carpets and drywall.

How to Remove Moldy Drywall & Carpets

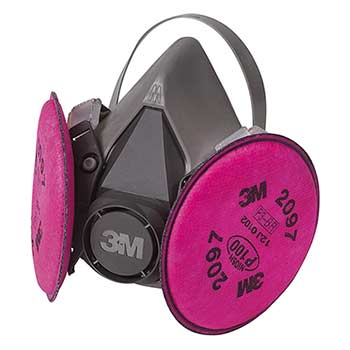
If you choose to do this on your own, you’ll want to wear old clothing and shoes along with goggles, gloves and N-95 respirator.

N-95 Respirator For Mold Removal

N-95 Respirator For Mold Removal from 3M

Prep & Set-Up

Set a box fan in the window of the room you’re working on. Next, make sure you tape plywood or cardboard around the window openings so spores expelled by the fan can’t get back in. Turn off your air conditioner and/or furnace, and then seal off the airflow within the room by covering the vents and doorways with plastic sheeting and duct tape.

Removing Moldy Carpets

Use a utility knife to cut moldy carpets into 6′ x 8′ sections, and mist the surfaces with a pump sprayer to control spores. Roll up the sections and wrap them in thick plastic trash bags.

Removing Moldy Drywall

Turn off power to the room, and probe stained or soft spots on the wall with a screwdriver to find the infestation and locate any wiring, removing baseboards and trim if necessary. Use a drywall saw or utility knife to cut out the infested drywall and any moldy insulation behind it. Mist with the pump sprayer to control spores, then double-bag the material in heavy plastic bags and tie the bags off.

Clean-Up

Vacuum up the debris with a shop-vac with an extra-long hose, so you can keep the shop vac outside to keep spores from spreading. Use a brush to scrub stained surfaces inside the walls with a water and bleach mixture, and then wipe the areas, but don’t rinse them. Dry any trim you washed in direct sunlight, and use fans and dehumidifiers to dry the room for at least three days.

When you’ve eliminated it all, seal the wood with a pigmented shellac or oil-based primer. Put in new insulation and drywall, replace the trim, and repaint using paint that contains mildewcide.


4. Hire Mold Remediation Professionals

If you have a persistent infestation, you may need to hire a mold remediation specialist.

Do your homework to find one who is reputable. The specialist will thoroughly inspect your home to determine the extent of the infestation, and afterward he or she will let you know if you can take care of the problem yourself, or if you’ll need to hire professionals to handle it.

Make sure the specialist gives you a written report. Note that, to avoid conflicts of interest, the specialist who inspects your home should work independently from the company you hire to clean out the infestation.

Frozen Pipe

How to Prevent Frozen Pipes

If you live in a cold climate, you probably know all too well the dilemma of frozen pipes. If you’re new to cold climates or, perhaps, new to owning a house, it’s wise to learn all you can about what you should do in the event that your pipes freeze during a cold winter chill.

To help you prepare and protect your home, let’s take a look at why pipes freeze, as well as some simple prevention tips that every homeowner should know as the mercury starts to drop.

Why Do Pipes Freeze?

The reason behind why pipes freeze is likely self-explanatory. When the temperature outside your home drops too low, the water inside the pipes will freeze.

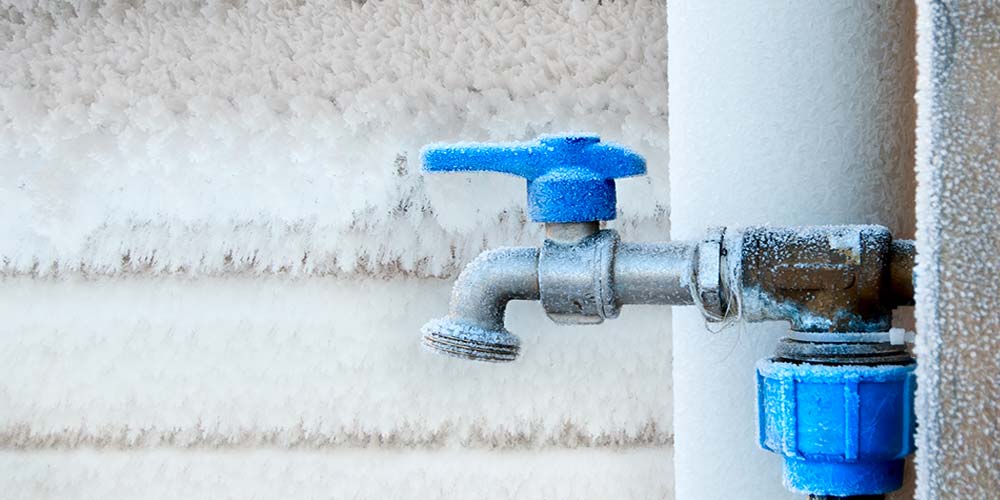
This typically starts with any spigots, faucets or pipes that are exposed to the elements. However, it can have an effect on areas in your home this is not heated or just poorly insulated. Upon hitting this frozen state, the water inside your pipes and spigots will expand, which may cause it to burst. This is where things can go really bad for homeowners, possibly leading to a whole host of other problems.


How to Prevent Frozen Pipes

There are many preventative measures that a homeowner can take to protect their home from a frozen pipe. There’s no single “best” way to prevent your pipes from freezing.

Instead, familiarize yourself with the tips below and use them in conjunction with each other. This will go a long way to make sure your pipes don’t freeze and, hopefully, prevent them from bursting and flooding your home.

1. Add Insulation to Exposed Pipes & Fixtures

By far, this is the easiest thing that a homeowner can do to protect their pipes. By adding a layer of insulation to all plumbing fixtures that are exposed, especially pipes and spigots, you can help prevent them from becoming too cold.

Most homeowners will initially think of the pipes and faucets on the exterior of their home. But, don’t forget about any pipes that are exposed in areas of your home that are not heated or well-insulated. This could be your garage or a basement, but also any of the forgotten crawl spaces. All of the pipes in these areas should be insulated, too.

There are lots of types of insulation that can help you here, all of which are available at home improvement stores or online.

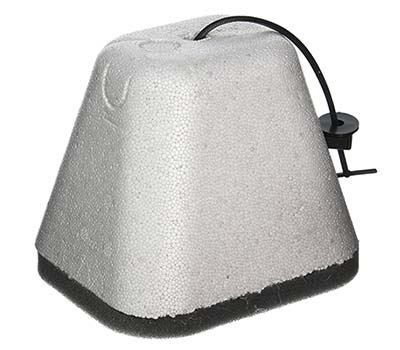
Faucet Cover

Faucet Covers

These are a great way to protect outdoor spigots or faucets. Typically, a faucet cover is only a couple of bucks and they’re incredibly easy to install. If possible, opt for the faucet covers that have a hard plastic shell, as these are a bit more durable and will last for many seasons.

Foam Pipe Insulation

Resembling the colorful “noodles” you kids playing with in a swimming pool, these are pieces of foam that are designed to wrap completely around and insulate all exposed pipes. Extremely affordable and easy to install. The best part about this type of insulation, is that it goes far beyond preventing pipes from freezing, it will actually help cut your energy costs and prevent those same pipes from condensation when the temperature goes back up in the summer.

Pipe Wrap Tape

Very similar to the foam insulation above, but instead of a giant noodle of foam, this type of pipe insulation looks more like a roll of duct tape. You’ll apply it much like you would tape, too. Simply wrap it around any exposed areas and it will add a layer of thermal insulation to prevent it from freezing. Unfortunately, pipe wrap tape is going to be one of the more expensive options.

DIY Insulation

Sometimes, a winter storm will creep up on you and leave you with little to no time to get the necessary supplies or insulation. If you find yourself in this situation, don’t worry, there are still some easy and free insulation options that will protect your pipes.

Perhaps, the oldest method of protecting your pipes. Simply take some old rags or towels, and wrap them around any exposed pipes, spigots or other areas that you think is susceptible to freezing.

Make sure it’s wrapped up tight and won’t come loose during a storm. The best option is to wrap duct tape around the towel. Another option is to use another towel, tying it into a knot around the “insulating” layer to ensure it stays in place.

2. Use Heat Tape to Regulate Temperature

The name “heating tape” can be a bit of a misnomer. While there are different types available, some of which do have adhesive properties, most homeowners will think of this as a type of extension cord or cable.

The heating cable is then strategically wrapped around any exposed pipes. Once installed, simply plug in and turn on. The cord will emit a small amount of heat that will help regulate the temperature around the pipe, thus preventing from freezing.

When used properly, this can be a great way to make sure your pipes never freeze. Unfortunately, they are much more expensive then other types of pipe insulation. Additionally, you also need to be mindful of the type of heating cable you use, as well as the material your pipes are made of.

3. Protective Measures Inside Your Home

For pipes and spigots located on the exterior of your, insulation is about the most you can do to protect them from freezing. However, when it comes to the inside of your home, there are many things that a homeowner can do.

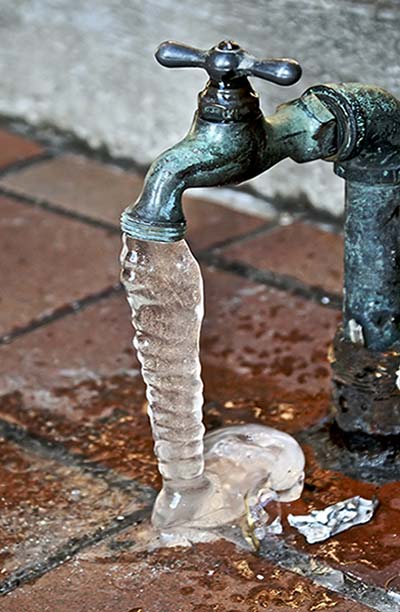
Frozen Water Spigot
  • Maintain Temperature:

    The number one thing you should do is regulate and maintain a steady temperature inside your home. Try to keep it above 60°F at all times, even if you’re not home at the time.

  • Heat & Insulate Exposed Areas:

    If you have a basement, garage or crawl space with an exposed water line, then you may want to consider using a small heater in that area to help prevent the temperature from dropping to a level that will cause water inside to freeze. Of course, a heater should only be used if it is deemed safe by the homeowner. Insulating pipes will be the best prevention, but a heater may also help. The very least you can do, at least for a garage, is keep the door closed and insulated.

  • Weather Sealing Doors & Windows:

    This is something that every homeowner should consider, just for the energy savings alone. No matter how extreme the temperature is outside, this is one easy DIY project that will help you regulate the temperature inside. It’ll help prevent pipes from freezing in the cold winter, as well as help your air conditioner keep the room cool in the hot summer.

  • Heat Circulation Within Cabinetry:

    Inside your home, it’s not uncommon for pipes to be exposed inside the cabinetry. They may be hard to spot, but there they are. Look inside your cabinets and if you see pipes, leave those doors open to ensure that the heat in the room can circulate to those areas.

4. Shut-Off Water Supply & Drain

Your pipes won’t burst if there’s no water inside to expand. Therefore, it would be wise to shut-off the water supply for any pipes that lead to an exterior spigot, as well as drain all the water out.

This would include:

If the weather hits extreme temperatures, then you may also want to drain the water out of any appliances that have a water supply, such as your hot water heater or fridge. This is especially true if they are located in a basement or garage.


5. Let Your Faucet Drip

The most popular way to prevent pipes from freezing, is to allow the faucets in your home to slowly drip water. Sure, it’s a gross waste of water, but it works. This is much better than dealing with a burst pipe.

The slow drip works because it helps moderate the water pressure inside your pipes. This allows the water to keep flowing and pressure lowered, all of which makes it more difficult to freeze.

6. Wash Your Dishes & Clothes (While You Sleep)

Most dishwashers and washing machines have an option that allow you to delay the wash-cycle for a few hours. If you have one of these, schedule a load to start in the middle of the night. This is when the temperatures will be at their lowest, and when your pipes have the highest risk of freezing.

This follows the same principles of a dripping faucet, but instead, you’re putting some of the appliances around your home to work (and not completely wasting water).

7. Use Ice Maker to Make Ice

While it sounds counter-intuitive to make ice when the weather is creating ice everywhere else, this little trick works quite well.

Your refrigerator makes ice when it detects that it’s needed. So, empty all the ice out of it. This will cause your fridge to make more ice, thus using more water and helping relieve the pressure that may lead to your pipes freezing.

Keep A Close Eye On Your Pipes

Knowing how to prevent frozen pipes in your home and yard is only part of the battle. If you’re in the home when the cold weather strikes, it’s wise to also keep a close eye on your plumbing.

This includes all faucets inside and outside of your home. Turn them on occasionally, inspecting that the pressure of water is working properly. This should be the first thing you do in the morning, and the last thing you do before you go to sleep.

Visually inspect occasionally to ensure that the preventive measures listed above are working. You want to be able to catch frozen pipes as soon as possible, so you can take the necessary steps to thaw them.