Portable Air Conditioner in Home

How A Portable Air Conditioner Will Benefit Homeowners

All around the United States, homeowners rely on their central air conditioner to keep their home cool during the hot summer months. While a central AC is one of the best options to keep you and your family cool, more and more homeowners are turning to a more versatile and convenient cooling appliance — the portable air conditioner.

These convenient, yet underrated, cooling appliances can do much more than simply provide cold air throughout your home. This type of “room” air conditioner is designed with many benefits in mind. Below, are five reasons why every homeowner would benefit from using a portable air conditioner in their home.
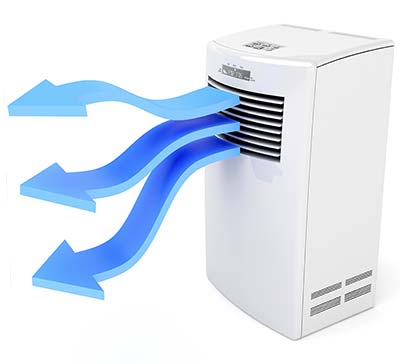
Portable Air Conditioner

1. Enhanced Temperature Control

If you are the type of person that always feels warmer than everyone else in your home or office, then you may benefit from the use of your a portable air conditioning unit.

Portable air conditioners provide you the freedom to cool a area or room without bothering your coworkers or roommates. As long as the interior space is enclosed, you could benefit from a portable air conditioner by simply cooling that one room. This will keep you in a comfortable temperature, without bothering anyone else nearby.


2. Saves You Money (And Energy Use)

For homeowners that live in warmer climates, using a room air conditioner to help cool their home may be a wise decision when it comes to lowering their utility bills.

Regardless of whether you go with a portable or window air conditioner, these smaller AC units can help homeowners bring the temperature down to a comfortable level in a small area or room that they spend the most time within. Running your central air conditioner at full power all the time tends to result in high energy bills, but a portable air conditioner can give your central AC unit a bit of a break. This not only extends the life of your central air conditioner, but a portable air conditioner can save you money.

This is also particularly useful if you happen to have non-standard windows that won’t fit a general window unit. Most portable A/C units can be installed in all sorts of odd-shaped windows, or even within a ceiling vent. Portable AC units also help save you money by only cooling the area of your home or office that you want to be cooled, which means less wasted energy in unoccupied spaces.

3. Improves Indoor Air Quality

Portable air conditioners do much more than just cool the air in a room. Some units have the ability to generate heat, making them a helpful appliance for year-round necessity use. Other AC units can utilize their built-in air filters to help improve your indoor air quality.

Popular Features & Functionality

  • Heater
  • Air purifier
  • Humidifier
  • Dehumidifier

You have lots of features available. Be sure to research all of the options provided with your preferred model in order to assure that is meets all of your unique needs.


4. Portability on the Road & Sea

For homeowners that enjoy hitting the road and traveling — whether by road or sea — a portable air conditioner is perfect for on-the-go. If you’re traveling in an RV, a portable air conditioner can help keep you cool during long road-trips. These also work great in cabins, vacation homes, and boats.

Simply remove your portable air conditioner from your home (or storage) and take it with you. Portability provides convenience when you need it most.

5. Keep Your Office & Tech Cool

The emergence of the internet and the ability to house processing power into smaller units has made it easier to run advanced businesses right from your own home. This frequently includes the ability to store servers and provide hosting services without leasing office or warehouse space.

If you have servers in your closet, garage, or anywhere else inside your home, then you may need a way to keep these servers cool.

Portable air conditioners can be used as a main cooling option or even as a supplement to your central air conditioning system to keep your equipment at a suitable temperature. These A/C units helps to prevent overheating and hot spots, which can lead to premature equipment failure as well as many other unexpected costs.


What’s the Best Air Conditioner for Your Home?

One way to get the most benefits from your portable air conditioning unit is to make sure you have a strong understanding of the amount of power your space requires to cool. To accomplish this, you just need to know the square footage of the room, as well as the BTU or ASHRAE that your AC unit produces.

For example, if you want to add a portable air conditioner into a typical, average-sized bedroom, then you won’t need a unit with industrial capabilities. However, if you plan on putting an air conditioner into a larger living room or game room, then you may need a larger unit to ensure that it’s capable of cooling the space.

How to Calculate BTU & Room Size

In order to ensure that you are utilizing the correct size, it is necessary that you calculate the BTUs required to achieve the cooling level you prefer.

To do this, you will need to calculate the size of the room you are planning to cool by multiplying the length by the width of the room. This will give you the square footage of the room. Once you have the size of the room, you should have a pretty good idea on what size unit you will need.

Cooling Capacity Chart by Room Size

The below chart is a rough estimation on how much cooling capacity you need for your room size.

  • < 225 sq/ft — 8,000 to 10,000 BTU’s
  • 225-300 sq/ft — 10,000 to 12,000 BTU’s
  • 300-425 sq/ft — 12,000 to 14,000 BTU’s
  • > 425 sq/ft — 14,000 BTU’s (or larger)

Enjoy Your Air Conditioner in a Variety of Ways

Although they have many different uses, portable air conditioners often get overlooked. Investing in a portable AC unit might just be the smartest financial move you can make as we move into these warmer months, and as heaters for your home when the weather beings to cools down.
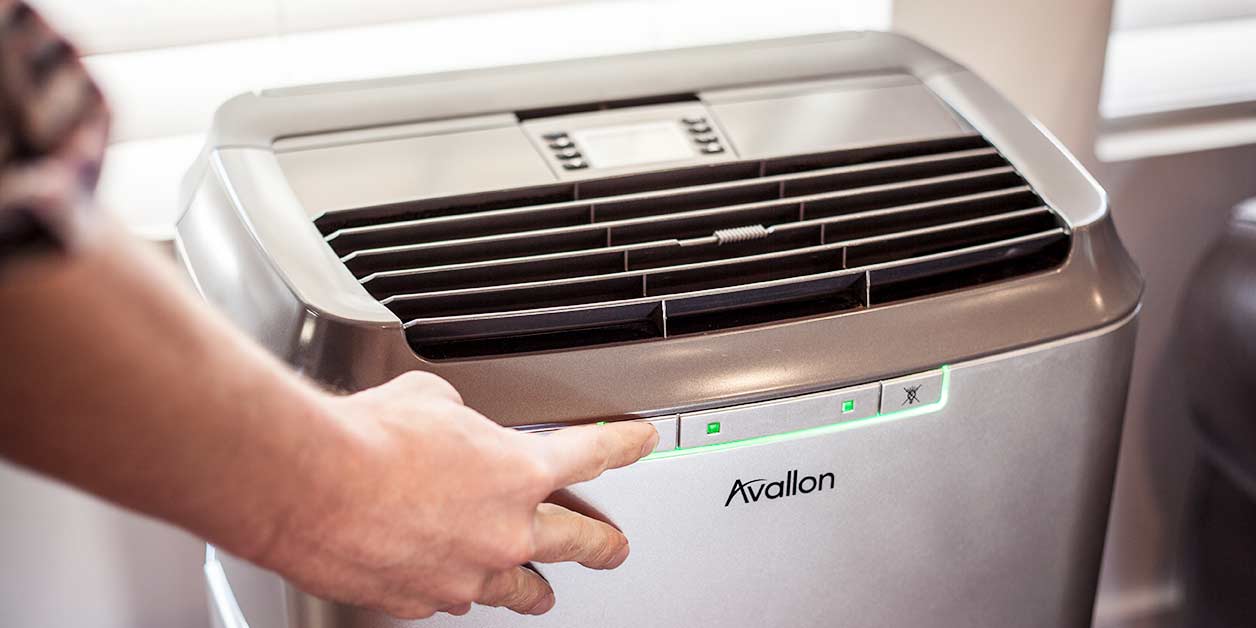
Stick Vacuum Cleaner

7 Benefits of Stick Vacuums

Vacuum cleaners are a convenience of modern times and as all technologies, these cleaning devices have improved quite a bit over time. Today, vacuums come with more attachments then you’ll probably ever need.

A stick vacuum cleaner may not be the most powerful type of vacuum cleaner, but they do offer some pretty compelling features, such as swivel steering, a multitude of attachments, cordless and rechargeable, a motorized brush, ability to easily transition between a floor and light handheld, and even HEPA filtration.

This portfolio of features has taken stick vacuums well beyond the old carpet sweepers, and transformed them into a serious consideration in the cleaning arsenal for homeowners. Below are some of the reasons why homeowners should consider buying a stick vacuum cleaner.

What is a Stick Vacuum?

A stick vacuum is a lightweight version of an upright vacuum cleaner. It’s likely not as powerful as its larger counterpart, or come with as many attachments or accessories. They are simple to use and easy to store, which are two of the main reasons why people love their stick vacuums.


What to Expect From a Stick Vacuum Cleaner

While this type of vacuum cleaner is a popular choice for homeowners, that doesn’t mean it’s the best cleaning device for you and your home. To help you figure out whether this is the right choice for you, let’s take a closer look at seven common benefits that come with a stick vacuum.

1. Smaller Size & Weight

By definition, stick vacuums are smaller, lighter, and easier to move around. Who wants to haul around a heavy vacuum cleaner, especially if you only need to spot-clean a single spill. This is where a stick or handheld vacuum cleaner really excels. When it comes to the size and weight, other types of vacuums can’t even begin to compete.

Most stick vacuums come in under ten pounds, with some models weighing about half that. This is a huge benefit for any homeowner that may have difficulty carrying or pushing around heavier machines, including the disabled or elderly consumers. Their lightweight designs not only increases its maneuverability and ease of use, but it also makes it easier to store when its not in use.

2. Lower Cost

Stick vacuums typically cost far less than their bigger counterparts. There are many reasons for this, but it really comes down to three things:

  1. They use less powerful motors.
  2. They have a compact build that makes them easy to store.
  3. They usually don’t come with a bunch of attachments or accessories.

If any of these seem like cons to you, then perhaps a stick vacuum isn’t the right device for you. Otherwise, you will soon discover that finding one within your budget is extremely easy to do.

3. Great for Quick Cleanups

Had a surprise call from a friend wanting to get together and you feel like maybe you should clean the high traffic areas before they arrive? Did your dog knock over a house plant again? Another great benefit of a stick vacuum is that they are perfect for those quick cleanings between your regular full-on household cleaning days.


4. Easy to Store

One of the most noticeable benefits of a stick vacuum is how easy they are to store. This is especially important to those who live in small apartments or tiny houses.

Much like a robot vacuum cleaner, these take far less room then the more popular canister vacuums, with some models even coming with a wall mount to help you preserve floor space. Because of their compact size and weight they can even be stored high on a closet shelf or inside your pantry where they are less noticeable and out of the way, yet still within quick reach when you need them.

5. Very Easy to Use

For many homeowners out there, this is one of the most important benefits of not only vacuum cleaners in general, but all appliances. And for the record, stick vacuums are incredibly easy to use. This ease is mainly due to the upright and lightweight design, as well as the added technologies that makes cleaning less of a chore and more of a quickly done afterthought. That’s what a stick vacuum can do for you.

Many of these devices have motorized brushes which increase its overall cleaning potential and maneuverability. Some models offer attached containers that make emptying the dust and debris a breeze. Just be sure to empty these containers outside to avoid contaminating your indoor air quality, which is an issue that hits right into the heart of the “bag vs bagless vacuum cleaner debate.”

While the attachments may be limited, most stick vacuums do come with wands that give you easier access to clean places in your home that are hard to reach. Another huge benefit of stick vacuums is their upright build. Often they feature a height adjustable design, which increases proper body positioning during cleaning, as well as protecting your back against unnecessary fatigue and strain.

6. Make Less Noise

Depending on the type of vacuum cleaner you buy, you’ll have to deal with the noise that comes with it. There’s just no way around it… they all make noise. Too much noise, despite the brand or model or type.

Unfortunately, some of those big vacuums not only have the power of a cyclone but they also sound like one too. And nobody wants that in their home.

Whether you have a pet that perceives the vacuum cleaner as their mortal enemy, or maybe you’re just timid of vacuuming at certain times because of disturbing the neighbors or sleeping family members; one of the main benefits of a stick vacuum is that it allows you to get those messes cleaned up and forgotten about with less chance of disturbing anyone in your home.

Most stick vacuum cleaners have a pretty low decibel level. Whether or not the product page that you buy it from states the Db level, for the most part, they are much quieter than than their larger counterparts.


7. Versatility

Another great feature of stick vacuums is their versatility. Most can easily be converted to very light handhelds and some models, such as the popular Dyson V11 Vacuum Cleaner, are completely cordless, running instead on a rechargeable battery.

This not only makes cleaning easier, but gives you the option of cleaning away from an outlet without stringing two or three extension cords. Some models even use HEPA filtration to help keep your air clean and free of the tiny particles that may get kicked up while vacuuming.


Stick Vacuum Cleaners: The Best Choice For You?

Though these vacuums may not be as deep cleaning or as powerful as many other types of vacuum cleaners, there are many benefits to owning one. They are a great addition for quick cleanups and if you live in a tiny house, smaller apartment, or don’t have carpeted floors it is very likely that they could completely take the place of their bigger brothers, making the costly, noisy, and cumbersome vacuum obsolete.


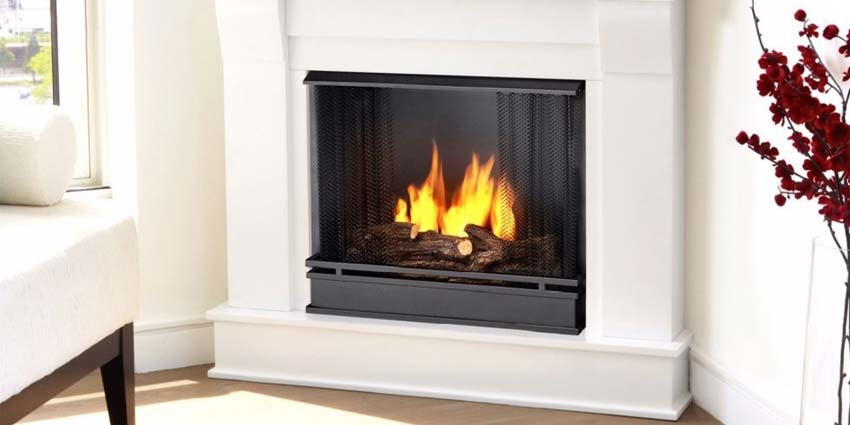
Gel Fireplace

5 Common Questions About Gel Fireplaces

Gel fireplaces are ideal for individuals who do not have a fireplace in their home, or for those who wish to have a more efficient and environmentally friendly option. To help you decide if it’s the right type of fireplace for you and your home, we’ve listed out five of the most common questions that homeowners have about gel fireplaces.

What is a Gel Fireplace?

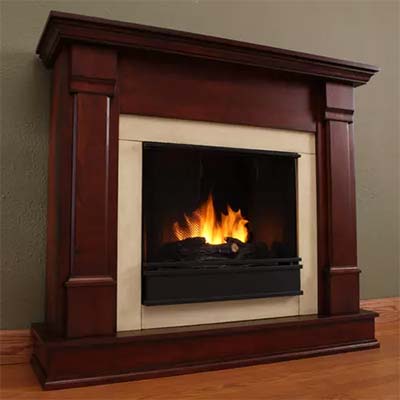
As the name implies, a gel fireplace is a specific type of fireplace that uses a specialty gel as its source of fuel.

This may refer to an existing fireplace that has been modified for gel use, or a fireplace that has been specifically built and installed with gel use in mind. Either way, the use of a gel fireplace allows homeowners to have a method at their disposal in which they can have an indoor fire even without the normal ventilation required by a traditional fireplace.

Gel Fireplaces

1. How Does a Gel Fireplace Work?

A gel fireplace is a very clean option in terms of how it functions. The gel itself burns very clean and does not require the use of a ventilation system, nor does it give off any unpleasant odors.

The fireplace that is used for gel usually includes several ceramic logs or other materials to mimic the look of a traditional fireplace, just as many fireplace inserts do. The gel can then be placed in the rear of the fireplace for combustion. The gel comes in canisters, and as many as three of these canisters can be placed in the fireplace at a time, allowing users to have a relatively long-lasting fire.

Gel is not the most effective option in terms of its heat-generating capabilities as it produces about 3,000 BTUs per hour, per can. Given the fact that it is most commonly used in smaller living spaces, the amount of heat it gives off is typically ideal for its intended function.

However, if you want to keep a larger area warm, a gel fireplace may not be the option for you. Each can is estimated to last for about two to three hours, so when used in conjunction with other cans, its endurance potential is solid.


2. How Do I Install a Gel Fireplace?

The installation of a gel fireplace is relatively simple. These fireplaces often come in kits so that they can be assembled inside of the home in which they will be used. The kits are designed in an intuitive manner since the manufacturers are aware of the fact that the kits will not be assembled by professionals.

The fireplaces typically make use of a metal shell. Inside the metal shell should include ceramic logs or other materials that replicate the appearance of a traditional fireplace. This metal shell is then covered by a layer of base wood, and then another layer of finer wood.

In most cases, mahogany or enamel is used. In the case of outdoor gel fireplaces, the metallic or ceramic shell is made to be more durable in order to protect from the elements.

3. Can I Convert an Existing Fireplace to Gel?

An existing fireplace in your home can be easily converted to a gel fireplace as well. First, the gas and ventilation lines must be closed. This will help improve the efficiency of the home, as fireplace ventilation is often a major source of heat loss, particularly during the cold winter months.

Once the gas and ventilation lines have been closed, the ceramic wood or other materials can be placed in the existing fireplace. The gel canisters can then be arranged behind the ceramic wood to give the appearance that the wood is burning in the existing fireplace.


4. What is the Fuel Made Of?

The gel that is made for use in this type of fireplace is typically made of isopropyl alcohol or some other alcohol substance. The substance is treated in order to make it as environmentally-friendly as possible, while also ensuring that it will burn for as long as possible.

There are several varieties of gel available, with thicker gels resulting in longer-lasting flames, and thinner gels producing hotter and brighter flames. As these gels will typically be used indoors, they must adhere to certain standards, being cleared by OSHA and the EPA before they are allowed to be mass-produced.

5. Is A Gel Fireplace Easy to Use?

Every aspect of the gel fireplace, from installation to use, is incredibly easy. Using the fireplace only requires the insertion of a gel canister to have a fire going in seconds. This ease of use coupled with the fact that these types of fireplaces can be used in any home without modification, has made gel fireplaces a very popular option for homeowners. An added benefit is the fact that the fuel that is used is safe for use without ventilation, and is also environmentally sound.

6 Ways An Extra Freezer Can Save You Time & Money

How an Extra Freezer Can Save You Money

Economic inflation is causing the price of food to skyrocket and families are looking for ways to reduce their monthly expenses in order to maintain the quality of life they have become accustomed to. One way that consumers can combat the ever-rising cost of food prices is to invest in an extra freezer.

Whether you have a chest freezer in your garage or an upright freezer down in the basement, the extra space you’ll gain to store your frozen goods will bring many benefits to you and your family.

Here are six reasons why having another freezer in your home is a practical investment that will not only save you time and money, but also promote a healthy lifestyle for you and your family.

1. Save Money on Grocery Bills

The average person goes grocery shopping one to two times a week. While there is nothing wrong with this, those frequent trips to the grocery store can quickly add up.

Having an extra freezer in the home will encourage you to take an in-depth look at your shopping habits and tweak them. By tweaking your shopping habits, you can save hundreds of dollars every month on groceries, without having to use coupons. You can also save more money on gas since you will not have to drive to the grocery store as often.

Extra Freezer Can Save You Money

2. Purchase Food in Bulk

Purchasing food in bulk quantities means that you can purchase better quality food for a cheaper price, or just save more money on the food you would’ve normally bought. Most importantly, meats and cheese have a lower price per unit when they are purchased in larger quantities.

By dividing your bulk food purchases and preparing them in advance, you will not have to go to the grocery store as often. Purchasing food in large quantities also gives you the flexibility to purchase food only when it is on sale to save additional money. Purchasing food in bulk sizes makes it easier to store and prepare meals in advance.


3. More Storage Room

The average person has a limited amount of storage space for their food. Less space means frequent trips to the grocery store. Frequent trips can actually put a significant dent in your budget, because there is always the risk of waste due to purchasing more food than you can immediately use.

With an extra freezer inside of your home, you will have enough freezer space to store your groceries. You can purchase large quantities of meats, fruits, and vegetables and freeze them for future use.

Common ways to store freezer foods include:

  • Place pre-measured portions of cut up vegetables and meats into a storage bags and containers for future oven and crock-pot meals.
  • Label all foods with the date they are placed into the freezer for storage.
  • Use small containers to prevent freezer burn and preserve quality.
  • Always cool hot foods prior to freezing them.

4. Better Time Management

One reason why so many people avoid cooking is that they simply do not have the time or energy to do so. With an additional freezer in the home, one can prepare meals in advance and freeze them. If you happen to have a free day such as Sunday, use that day to prepare your meals for the rest of the week.

Once the meals are frozen, you can pull a meal out each day and heat it up in the oven while you handle other tasks. It is not necessary for one to be in the kitchen the whole time their meal is cooking. Preparing your meals in advance will give you time to deal with other things and give you more personal freedom.

This will also help put an end to any impulse grocery shopping and restaurant trips.


5. Reduce Food Waste

How much food do you throw away each month? Have you ever noticed that some of the food you are tossing in the trash has not been touched since it came from the supermarket?

Have you noticed that wasted leftovers are a frequent occurrence in your home? Your lack of time and frequent trips to the grocery store cost you money that you don’t have to spend.

Instead of resolving to be a savvier shopper, start using an extra freezer in your home. That freezer will keep you from throwing away so much food each month, and keep you from having to repurchase items anytime soon. Leftovers can be frozen for future consumption. By freezing your meats, fruits, vegetables, and leftovers, you gain more time to use them.

Standard Times for Frozen Foods Include:

  • Ground meats can last up to three to four months in the freezer.
  • Cooked meats can be frozen up to four months.
  • Different cuts of meat can last up to a year in the freezer.
  • Fruits and vegetables can last as long as eight to twelve months in the freezer.
  • Soups and stews can be frozen anywhere from two to three months.
  • Cooked leftovers can be stored in the freezer for as long as two months.

6. Incorporate More Healthy Foods Into Meals

Prepackaged and processed foods may seem like they are convenient items to add to your grocery bill, however they cost more money and often have unhealthy ingredients. This can cause you to become dependent and addicted to certain foods, although they hold no nutritional value for you and your family.

Encourage healthy eating habits by purchasing healthier foods. Purchase fresh fruits and vegetables in bulk when they are in season, and freeze them for use throughout the rest of the year.

Save Time & Money with an Extra Freezer

It doesn’t matter what type of freezer you use, having this extra appliance can be a real life-saver for you and your family. From reducing waste to helping you prepare meals in advance to saving you time and money, there’s no doubt that having an extra freezer is guaranteed to improve the quality of your life.

Swamp Cooler

Swamp Cooler FAQs

Affordable and energy efficient, swamp coolers are a great way to drop the temperature in your home, without spending the money on a new air conditioner. They don’t use any chemicals or refrigerants, all it needs is water to help you feel cooler.

While this all may sound great, evaporative air coolers are not the right fit for everyone or every home. Only some homeowners will benefit from using a swamp cooler inside their home, and even then, it is hardly ever a suitable alternative to other types of air conditioners.

What Is A Swamp Cooler?

A swamp cooler is an appliance that uses the evaporation of water to help cool the air stream and add humidity back into the air. They are particularly useful for anyone living in arid climates.

Other names for these devices include:

  • Evaporative coolers
  • Wet air coolers
  • Desert coolers

How Does A Swamp Cooler Work?

This type of air cooler utilizes the principles of evaporative cooling.

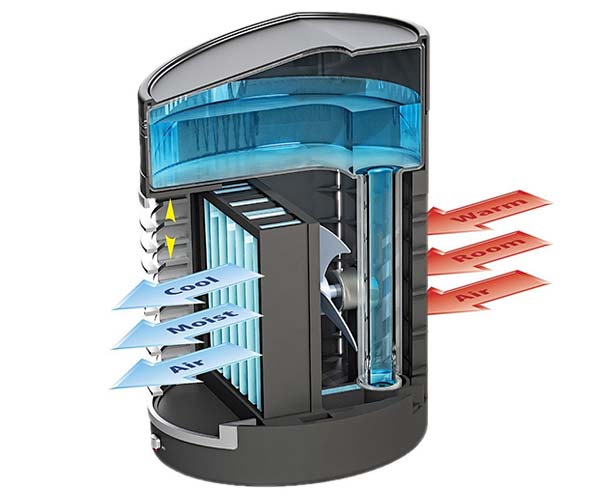
A swamp cooler is really just a simple contraption that uses a fan to suck in hot air, typically from the outdoors, then pushing the air over a number of wet “cooling” pads.

As the hot air passes over these pads, the liquid water turns into vapor, which is then pushed out of the unit, and into the air inside your home. Once the vapor starts to circulate into the air, the added moisture will extract the heat from the air, helping the ambient temperature feel cooler.

How An Evaporative Cooler Works

The dry air temperature cools during the evaporation process. This is the same method that the human body uses to cool itself down. When we get hot we sweat and the sweat evaporates which lowers our body’s temperature.

Because of this it’s important to use only in hot, dry climates. For optimal performance, only homeowners that have humidity levels below 50% should use a swamp cooler inside their home.


Does It Lower the Ambient Temperature?

A swamp cooler will help make the temperature feel approximately 5°-15° lower in the area within close proximity to where it is located. However, they will not lower the overall ambient temperature in the room.

This is a common misconception and important for homeowners to understand prior to purchasing an evaporative cooler. Unlike an AC unit, you will not feel a significant drop in temperature, nor will you be able to control the temperature with any sort of precision.


What’s the Difference Between a Swamp Cooler & Air Conditioner?

The most notable difference is the method in which they each cool the air that is being circulated within the room.

An air cooler uses water, cooling pads and an internal fan to increase the humidity within the room, whereas an air conditioner uses a compressor and refrigerants that can rapidly cool the air.

While they may have similarities and are both intended to cool a room, it’s very important to understand that they each utilize a distinct cooling method and are not a one-for-one replacement.

Portable Cooling Confusion

The similarities are noticeably obvious when it comes to portable air conditioners. Because of how similar they are in shape, size and design, not to mention they each have “portable” in their name, it’s very common for homeowners to confuse these units with portable evaporative coolers.

Unfortunately, they operate very differently, and this has left plenty of homeowners both confused and disappointed with their purchase.


What’s the Difference Between an Evaporative Cooler & Air Fan?

A fan uses rotating blades to create a current of air but has no real effect on the temperature or humidity within the room. All it does is circulate the air around you. It may feel cooler when you first feel the air circulating around you, but this is due to the “wind chill effect” that it creates and will be temporary, at best.

Whereas, an evaporative cooler utilizes an internal fan to help circulate air, but also goes one step further by using a set of wet cooling pads to help recreate the evaporation process by adding a bit of moisture to the air.


What is the Best Environment to Use a Swamp Cooler?

Due to the evaporative nature of how they operate, swamp coolers are best used in hot, dry climates where the temperature is high, and the humidity levels are low.


Can I Use One If I Live In A Humid Climate?

This is not recommended. If your home is located in an area with a humid climate, then it would be unwise to use a swamp cooler inside your home.

Not only will they be ineffective at cooling, but they will just add unnecessary amounts of moisture to the air. As a result, the excessive humidity levels inside your home will cause more issues and lead to poor indoor air quality.

If you live a humid climate, the better choice would be to use an air conditioner for cooling the interior of your home. However, depending on your location and the fluctuating temperature, there may be certain times in the day that you could use a swamp cooler to help supplement your air conditioner.


Will a Swamp Cooler Help Cool a Garage or Workshop?

Yes. An evaporative air cooler can be a great choice for cooling your garage or workshop. Due to the large doors and poor insulation, you are less-likely to experience the negative effects of too much humidity.

Ironically, it’s because of these same reasons that garages often don’t have an air conditioner. As a result, a swamp cooler could be the ideal choice to provide cooler airflow, especially on those hot summer days.


What Size Swamp Cooler Do I Need?

Once you’ve made the decision to purchase an air cooler, you need to determine the right size unit. Air coolers are measured by cubic feet per minute (CFM). This is the measurement used to determine the amount of air that will be circulated each minute.

How to Calculate CFM:

Figuring out the CFM is pretty easy and shouldn’t take more than a couple of minutes. Here’s the steps you will take.

  1. Determine the square footage of the room.
  2. Multiply the room’s square footage by the height of the ceilings.
  3. Then divide that number by 2.
  4. This is your suggested CFM for that room.

For Example:

To illustrate how this works, we’ll be calculating the amount of CFM needed to cool a room with 150 square feet and 9ft. tall ceilings.

  • Room Sq. Ft — 150 square feet
  • Ceiling Height — 9 ft
  • 150 x 9 = 1350 / 2 = 675 CFM

In the example above, I would need to find a unit that has a minimum of 675 CFM.

If the CFM falls in between units or you have an odd-shaped room with lots of corners, you would want to purchase an air cooler that is slightly larger. If it is too small will have to worker harder to keep the area cool and waste energy doing so.


How Do You Clean A Swamp Cooler?

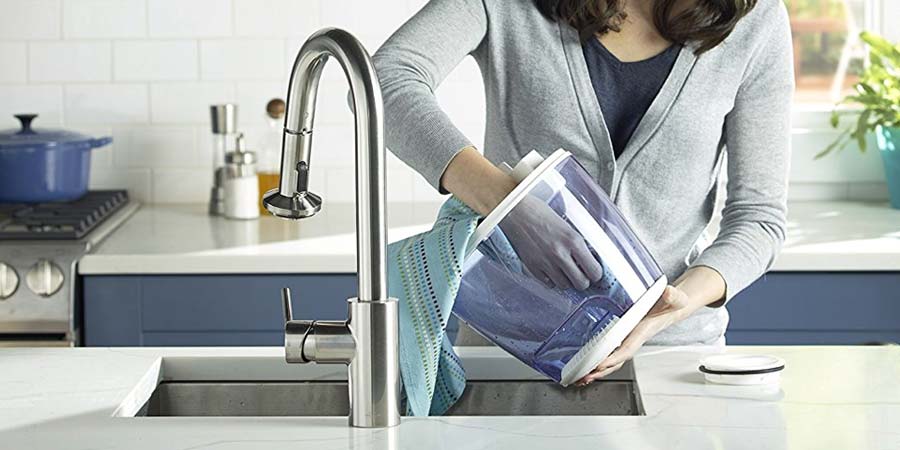
A swamp cooler will follow a similar cleaning process as a humidifier. Any part of the device that gets wet, needs to be cleaned and sanitized on a regular basis.

To ensure proper cooling and the prevention of mold or mildew, the tank and cooling pads should be cleaned with soap and water at least once every 7-10 days. Allow all parts to dry thoroughly.

This will prevent dust, dirt, and mildew from building up. Cleaning the unit regularly is especially important if you are using the air cooler for long periods of time.

External – Cleaning the outside of the air cooler can be done periodically by simply wiping it down with a damp cloth.


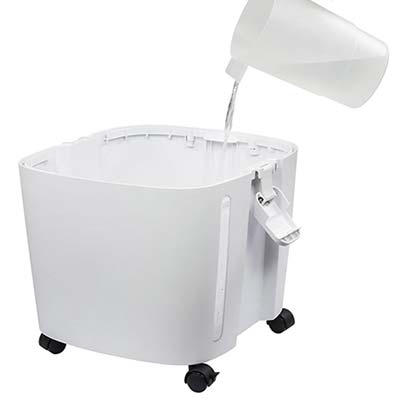
How Often Do You Refill the Tank?

This depends on many factors, ranging from how you are using the device to the brand/model itself. Generally speaking, you should not have to refill the tank for at least 4-6 hours.

Refilling Swamp Cooler Tank

Below, are a few considerations that will play a role in how long your tank will last before it needs to be refilled.

  • How big is the device?
  • How / where often are you using it?
  • What is the temperature of the room / surrounding area?
  • What is the relative humidity of the room / surrounding area?
  • What is the insulation like in the room it is being used in?

Depending on how you answered the above questions, you to help you determine whether or not you can use your swamp cooler in a more efficient manner.


How Often Do You Replace the Cooling Pads?

This depends on how you are using and caring for the device. If you clean your swamp cooler on a regular basis, then your cooling pads will last for quite a while.

As the summer season sets in and you prepare to use the evaporative cooler for the first time, inspect the pads to make sure that they have no damage. If you notice any cracks, then they will need to be replaced.


Do you have a question about evaporative air coolers that you didn’t see listed here? If so, leave it down in the comments below.


Robot Vacuum

Robot Vacuums: Are They Really Worth It?

Robot vacuum cleaners have really taken off in the last few years and it’s fairly easy to understand why. With their ease of use and practical, hands-free action, homeowners are discovering the many advantages of purchasing this type of vacuum cleaner. But, are they really worth the higher cost? Let’s take a look at some of the benefits you can expect from using one.

What Are Robot Vacuum Cleaners?

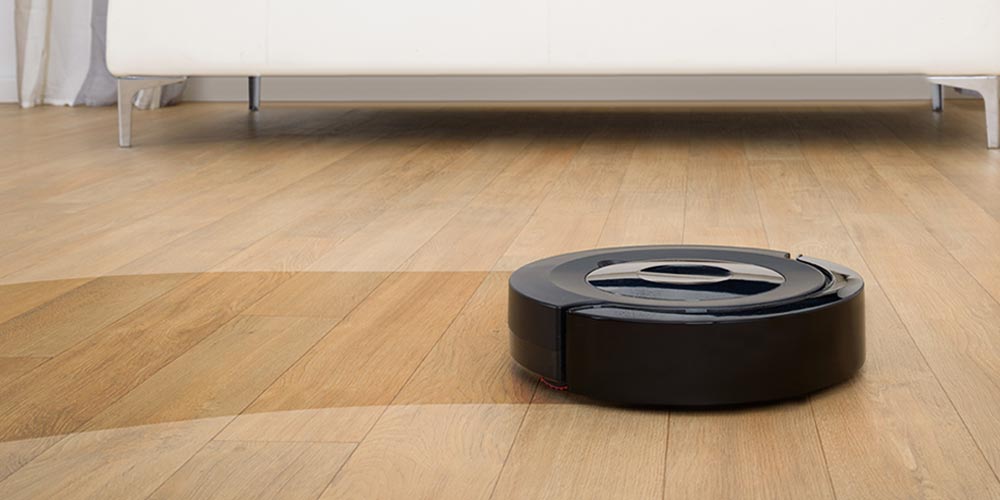
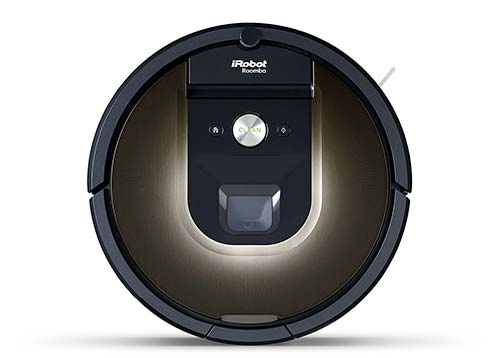
Robot vacuums are an autonomous device that is designed to clean carpet, tiles and hardwood floors of all dirt and debris, much like other types of vacuum cleaners. The main difference of robotic versions is their ability to minimize the amount of work hat homeowners need to do.

Upon their release in the late ’90s, robotic vacuums initially struggled with homeowners. However, after two decades of innovation and the continual rise in Smart Home devices, robot vacuums have never been more popular.

In recent years, there is no denying their spike of interest from homeowners, partly because they’ve become more affordable, but mostly because they’ve become more efficient at accomplishing their intended purpose — cleaning your floors without requiring you to put in much work.

The Benefits of Owning a Robot Vacuum

If you’re currently looking to buy a vacuum cleaner, you would be doing yourself a disservice by not considering a robotic vacuum. To help you determine if this is the right device for you, let’s take a closer look at some of the benefits you can expect to receive from a robot vacuum.

1. Easy To Use

Perhaps the number one benefit of owning a robot vacuum cleaner is that they are extremely easy to use. Once the machine is programmed for a given space and the timer is set for a predetermined start time, the product virtually runs itself. Simply place the device on the floor in an appropriate starting spot and you’re good to go.

In addition, many models have been refined over the years to be self-regulating and nearly foolproof, meaning mishaps are becoming more and more unlikely as the technology evolves. That means you don’t have to worry about your vacuum malfunctioning or becoming stuck on a surface.

2. Incredibly Efficient

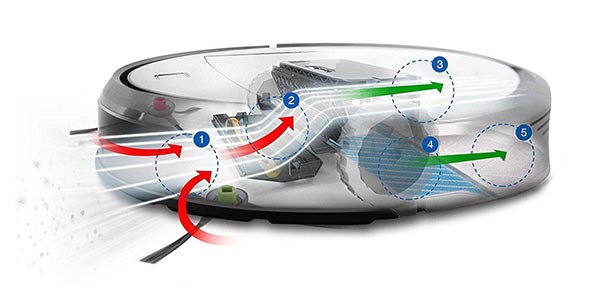
Today’s robot vacuum cleaners provide multiple tasks. They not only clean, they remember the layout of your space, are able to dump the dirt they collect, and then find their way back to the charging station.

Some higher-end models have advanced sensors and are also able to transition between bare floors and carpeted areas without manually switching settings. Other allow you to control them through a smartphone app.

The methodical, back-and-forth or circular motion of the machines also ensures that every inch of a floor or space is covered, which translates to a more thorough cleaning overall.

ECOVACS Robotic Vacuum Cleaner

Photo Credit: ECOVACS Robotics

3. Saves You Time

It is a universal experience that everyone’s lives have become increasingly busier in the 21st century. Indeed, multi-tasking has become paramount to, and part of, modern-day existence. One of the most desirable benefits of robot vacuum cleaners is that you don’t have to be present when the vacuum is operating.

Simply turn it on before you leave the house and it will do all the work for you while you’re out of the house. Therefore, time not spent manually vacuuming can be spent working, relaxing, playing with your kids, or doing whatever your heart desires. Indeed, the old adage that time is money certainly applies to this product as well.

4. Works on Different Surfaces

Another benefit of the robot vacuum cleaner is that it works on multiple types of surfaces, from carpets to wood floors to linoleum to concrete.

As mentioned, higher-end models are able to transition between different types of surfaces during the same cleaning cycle. With other models, you simply change the setting, place the product at a designated starting point, and set the programmer and timer as usual.

5. Detects All Levels of Dirt

Along with working on all types of surfaces, autonomous vacuum cleaners are able to tackle all types of dirt as well. From dust that has barely settled to deeply-embedded debris in your carpet, the vast majority of these vacuums are designed with increasingly powerful suction capabilities, despite their compact size.

Using built-in sensors, the machines also can detect the amount of cleaning required in different situations and will repeatedly go over an area until it is clean. This level of detail when it comes to cleaning is unmatched in other similar products.

6. Sets Boundaries

Another advantage of robot vacuum cleaners is their inherent ability to perform in — and only in — a given space that they are programmed for.

For instance, if you have children playing in another room while the product is operating, you can set virtual walls in the programming function to prevent the machine from going across doorways and other openings. Likewise, if you have pets alone at home while the machine is operating, you can easily limit the scope of the machine so it won’t frighten them.


7. Small, Compact & Easy to Store

A robot vacuum is much smaller than an upright or canister vacuum cleaner and, as such, can easily be stored in just about any space — in a closet, under a bed, or wherever you have room. This makes the product ideal for any homeowner that has limited storage space or is trying to downsize their belongings.

These smaller vacuums can also be easily transported from one location to another because of its size. You don’t need to clear out your trunk or borrow somebodies truck to move it from one place to another. As an added benefit, the small, low-slung nature of the product means it can get under furniture and reach areas that a regular vacuum cleaner cannot.

8. Makes Housecleaning Go Faster

Because a robot vacuum cleaner is self-sufficient and self-operating, it is an ideal product to help you maximize the amount of time spent on housecleaning.

Indeed, while your robotic vacuum is doing its thing on your floors, it frees up your time to work on cleaning other areas of the house. Working in tandem, you’ll be able to significantly cut down on the time it takes to clean your house. And, the result of more efficient cleaning is that you’ll be more likely to clean your house more thoroughly more often.

9. Ideal Solution for the Handicapped & Elderly

People with mobility issues, such as the elderly and handicapped, can truly benefit from owning a robot vacuum cleaner.

With its ease of use and hands-free operation, a robot vacuum cleaner can be a liberating product for this demographic, who would otherwise be forced to hire house-cleaners at a much greater expense. In addition, the money saved that would otherwise be spent on doing so makes this a product worth investing in.

Another alternative to consider that offers similar benefits would be a stick vacuum cleaner.

10. Economical and Cost-Efficient

Because robotic vacuum cleaners have been on the market for a number of years, both the price and features have improved significantly, and continue to improve as the years roll by.

The good news is that you don’t have to spend a fortune to get a decent product that does the job right for your particular needs. Starting at approximately $150, with high-end models running upwards of $1,000 to $1,500, there is something for everyone’s budget when it comes to this type of product.

Takeaways

When considering the reasons why you should buy a robot vacuum cleaner, the previous ten benefits should be at the top of your list. If you can see your life improving with 8, 5, or even 1 of the benefits outlined, then purchasing a robot vacuum cleaner is worth it and then some. For efficient and effective cleaning power, a robot vacuum cleaner is becoming the hands-down choice among many homeowners, businesses, and commercial establishments alike.


Cleaning A Humidifier

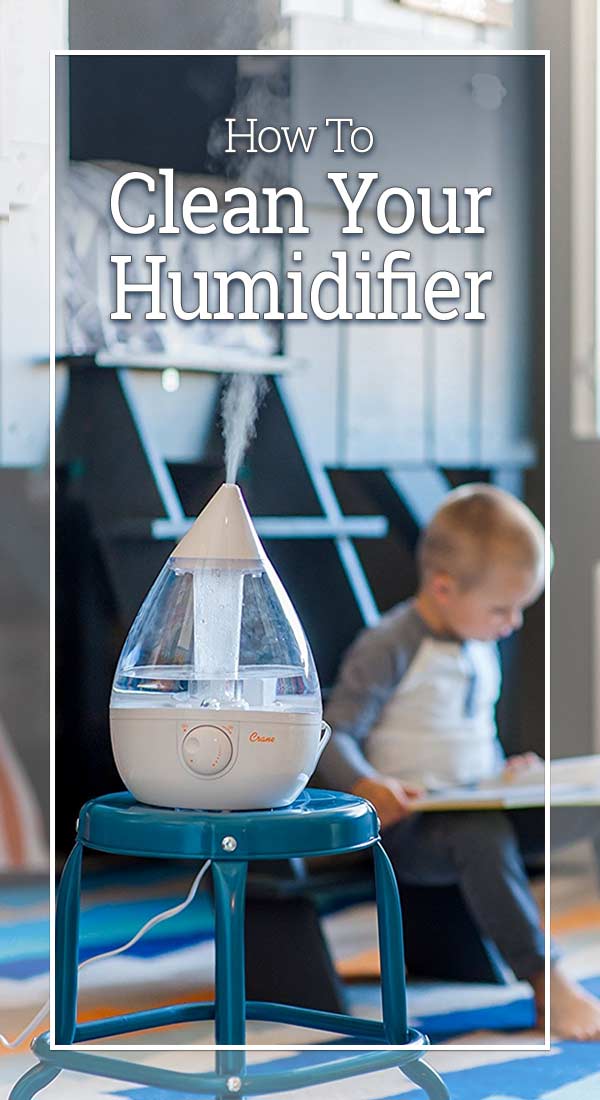
How to Clean Your Humidifier

One of the most important factors in determining your indoor air quality is the amount of moisture in the air. The relative humidity inside your home becomes particularly important as winter sets in.

This is because as the temperature starts to drop and you start to crank up the heat, the warm air circulating around your home will dry out the air you breathe. When the air in your home is too dry, you may start to experience a whole bunch of issues, all of which may range from minor annoyances to significant health complications, such as the flu.

Now that the seasons are starting to change and the mercury is starting to drop, we created the below guide to help homeowners learn how to clean their humidifier, and have it ready on those long, chilly nights.

How Often Do I Need to Clean My Humidifier?

Every 24-36 hours. If water has been standing inside your humidifier for longer than that time, you should not use it inside your home. While inconvenient, it is strongly recommended that you clean your humidifier prior to every use.


Why Do I Need to Clean My Humidifier?

Cleaning the humidifier will prevent any sort of bacterial growth or mold from developing inside the device. If you have this sort of contamination inside your humidifier, and you do not clean it before you turn it on, then you may inadvertently disperse harmful particulates into the air.

Not only is this detrimental to your indoor air quality, but it can immediately impact the health of anyone inside your home. This is not only detrimental to your indoor air quality, but it also puts everyone in your home at risk for developing respiratory issues. This is especially true for young children, the elderly and anyone that breathes it in for an extended period of time.

Check the Cleaning Instructions In Manual

Before you try using any of the cleaning methods listed below, it is wise to take a look at what the user manual that came with your humidifier says and follow the care instructions from the manufacturer. These guidelines are the best way to keep your humidifier in good working order, and prevent any unexpected damage that voids the warranty or leads to you having to replace it.


3 Ways to Clean Your Humidifier

Without proper care and regular cleaning, your humidifier puts your indoor air quality at risk. Below, we have highlighted three methods that you can follow to clean your humidifier.

1. Use White Vinegar & Tea Tree Oil

Due to their natural disinfectant properties, the easiest and “all-natural” way to clean your humidifier is to use a mixture of vinegar and tea tree oil.

Vinegar & Tea Tree Oil

Supplies You Need:

  • White vinegar
  • Tea tree oil (optional)
  • Bottle brush if required for your humidifier
  • Water

Cleaning Instructions:

Begin by disassembling your humidifier. Pour any standing water from the tank and lay all pieces out as you take it apart.

Next, add a generous amount of white vinegar to the base of your humidifier, as well as a few drops of tea tree oil. Do the same for the water tank, as well as submerge all other external parts into a similar mixture. Allow it to soak for at least 20-30 minutes.

Before you pour out the vinegar, use a brush or washcloth to scrub all parts of the humidifier. Try to remove any deposit buildup that may be visible.

Once you have scrubbed it thoroughly, rinse all parts of your humidifier with warm water. You may need to do this several times to get rid of the vinegar smell before reassembling your humidifier.

2. Disinfect With Bleach or Hydrogen Peroxide

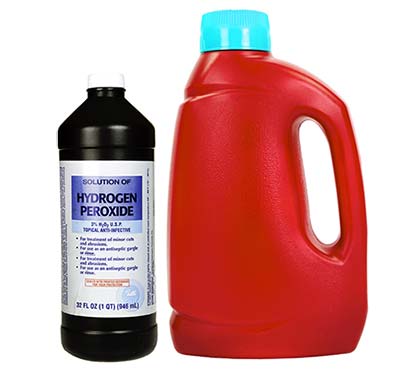
To give your humidifier a deep clean, try following the cleaning instructions listed above but substitute the tea tree oil with bleach or hydrogen peroxide. By using one of these two chemicals, you ensure that all bacteria and mold spores inside your humidifier is killed off.

Bleach & Hydrogen Peroxide

Supplies You Need:

  • Bleach or Hydrogen Peroxide
  • Clean Towels
  • Safety Goggles & Gloves
  • A Soft-Bristle Brush
  • Water
  • Optional: White Vinegar*

Cleaning Instructions:

For the most part, this process will follow the same instructions recommended for the vinegar and tea tree oil option. However, if you decide to use bleach, you should wear gloves and goggles to protect yourself from the chemicals. *And never mix bleach and vinegar together!*

When using bleach, you can choose to do so at the same time you are cleaning the tank or you can disinfect after the tank is clean. Disinfecting a humidifier with bleach will take an additional 30 minutes, so if you are short on time, it is probably beneficial to do both at once.

Step 1: Begin by disassembling your humidifier. Don’t forget to remove the air filter, if there is one. You can clean the filter by using cool water and letting it air dry.

Step 2: Mix about 1 teaspoon of bleach — or use 3 percent hydrogen peroxide — into a gallon of water and fill the tank with it. Ensure the entire inside is coated by stirring the mixture around.

Step 3: Once you’ve completed both steps, rinse the base, tank and all of its small parts. Shake it well to dislodge any trapped moisture. Remember to do this several times to get rid of any vinegar or bleach odors. Set the pieces on clean towels to air dry.

Once everything is dry, you can reassemble your machine.

Optional Step: After the humidifier has been disassembled, fill the base with vinegar and submerge the smaller parts. Allow it to soak for at least 20-30 minutes, use a brush or washcloth to dislodge any deposits or buildup, and thoroughly rinse out the vinegar. Do not mix vinegar and bleach together.

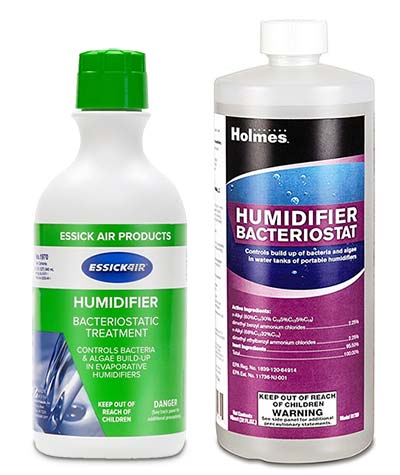
3. Buy & Use a Humidifier Disinfectant (Bacteriostat)

Humidifier Bacteriostat Treatment

If you don’t want to fool around with any of the cleaning options listed above, you can also buy a ready-made disinfectant or cleanser online. Often labeled as a descaler or bacteriostat, there are plenty of these cleanser available online. (View your options on Amazon.)

All you would do is simply follow the instructions that comes with the product. That’s it, your humidifier is clean and ready.

Effective, but Expensive:

While it is easy and convenient, and no doubt effective at disinfecting your humidifier, this option is not recommended for homeowners as it is grossly more expensive than all the others options listed here.

Vinegar, bleach and peroxide are all very effective at cleaning your humidifier, and they are also all incredibly cheap. You can buy all of them at every grocery store or corner store, and you’ll get a larger supply at a fraction of the cost.


Humidifier Maintenance & Care Tips

Now that you know how to clean your humidifier, it’s recommended that you also learn some simple maintenance tips to prolong its life and overall effectiveness.

How to Clean Humidifier

Empty Basin / Limit Standing Water

Besides weekly deep cleaning of your humidifier, you should be sure to rinse the water basin before every use. Doing so helps to keep bacteria from growing, keeps your unit working properly, and ensures your family is breathing the best air possible.

If possible, disinfect the humidifier any time that water has been standing for more than four hours.

Use Distilled Water

When you do fill your humidifier, only use distilled water. Tap water usually has added minerals. These minerals could be released into the air and create a thin layer of white dust on the surfaces in the room. Additionally, added minerals can build up as deposits in the machine and harbor the bacteria and mold you’re trying to prevent.

Drain & Dry Before Storing

Finally, be sure to drain and clean your humidifier and allow it to dry completely before storing it for the season. Storing a damp unit in a dark place, such as a closet or garage, only creates an optimal breeding ground that encourages bacteria and mold to grow. This will lead to a very gross discovery when it comes time to pull the unit out of storage.


The Homeowner Payoff

Knowing how to clean your humidifier ensures the air you and your family breathes is as pure as possible and leaves you comfortable and healthy. Even better, proper cleaning helps your machine to work for as many seasons as possible so you will be able to save money instead of purchasing a new unit each winter.


Portable AC Unit

Portable Air Conditioners Get New Energy Guide Labels

On October 1, 2017, the Federal Trade Commission (FTC) officially rolled out changes to the Energy Guide labels for portable AC units. This change largely flew below the radar. To help provide some clarity for both consumers and manufacturers, we’ve outlined some of the most common questions that this change may present.

What Changed?

The Federal Trade Commission introduced new Energy Guide labels for portable air conditioners that more accurately reflect the energy efficiency of each unit. This specific change to the labeling is intended to have two immediate changes:

  1. The Energy Guide Labels are more accurate.
  2. Retailers and manufacturers have to update their marketing materials to help consumers.

However, the recent change to the Energy Labeling Rule was more of a reaction to another change made by the Department of Energy (DOE).

How New Energy Testing Forced a Change in Labeling

This proposal from the FTC actually stemmed from new energy testing guidelines that the Department of Energy implemented for both single-hose and dual-hose portable AC Units. The new energy test was initially proposed on February 25, 2015. After a few changes to the initial proposal, the new testing procedure went into effect on June 1, 2016.

New Testing Methods for Portable AC Units

While the new testing methods from the DOE were largely considered to be a step in the right direction for consumers, there were numerous unintended consequences that had a direct effect on the Energy Guide labels. The main concern was the inconsistent testing results that had the potential to mislead consumers comparing portable AC units to other types of room air conditioners.

Portable Air Conditioner

The energy efficiency testing made a few significant changes.

  • Introduced the concept of Seasonally Adjusted Cooling Capacity (SACC).
  • Made revisions to how the DOE calculates and determines Combined Energy Efficiency Ratio (CEER).

Despite rigorous debate from numerous manufacturers, the FTC concluded that the new DOE efficiency model painted portable air conditioners in a favorable light. Due to variables within the new testing procedure, the Energy Guide labels portrayed portable AC units to be more efficient than they actually were.

To mitigate this, the FTC proposed a new rule change with the intention to create more accurate Energy Guide Labels that will help guide consumers as they shop, and help them make an educated buying decision.


When Did the Changes Start?

Officially, the changes to how portable AC units are labeled and marketed by retailers went into effect on October 1, 2017. However, while this may seem out-of-the-blue for consumers, these changes actually been long in the making. With even more changes possibly coming in the years ahead.

The Federal Trade Commission initially proposed a broad change to the Energy Labeling Rule back on September 12, 2016. It was at this time that the FTC requested feedback in writing from manufacturers, reatailers and the general public. This feedback was due on November 14, 2016.

You can read the full notice in Vol. 81, No. 176 (PDF) of the Federal Register.

Does it Only Affect Portable AC Units?

No. This specific change to the Energy Labeling Rule was not aimed solely at portable air conditioners. The proposed change to the rule also included different types of ceiling fans and electric water heaters.

What is the Energy Labeling Rule?

In a more general sense, the Energy Labeling Rule applies to a wide variety of appliances found in your home. It requires that a bright yellow “Energy Guide” is adhered to new appliances upon purchase. It is an estimate that specifies how much energy that appliance will use annually, as well as the overall cost of operating it in your home.

On these labels, you’ll find three important ratings:

  • An estimation in how much it would annually cost to use the appliance.
  • The energy efficiency rating and overall consumption of energy (determined by testing methods from the DOE)
  • An energy comparison of similar models, with a range of low to high energy expectations.

This recent change does not affect all appliances, however, only the few mentioned above.


How Does This New Labeling Affect Me?

In theory, the new labels would make it easier for the average consumer to make the best buying decision when they are trying to shop, compare and buy a portable air conditioner. Because they are marketed as an appliance that can cool a single room, they often get compared to other types of room air conditioners, which far exceed portable AC’s in energy efficiency.

BTU vs ASHRAE

The new changes to the Energy Labeling Rule now requires all portable air conditioners to list their cooling capacity based on ASHRAE standards (PDF). This is determined by the new energy efficiency testing procedures by the DOE.

So, now as you shop for a new portable air conditioner, you will should see ASHRAE ratings listed per each unit. If you do not see ASHRAE ratings, then that particular retailer is not in compliance with the FTC.


Room Air Conditioner

Room Air Conditioners: How to Cool a Room Without Central AC

Many homeowners use a central air conditioner to control the temperature in their home, but this often comes with a hefty price tag and the requirement of cooling every room within your home. But, what if you can’t afford a central AC, or you just want to cool down one room? That’s where a room air conditioner can help.

Finding the best room ac unit for your home will depend on a variety of factors, including the size of the space, your budget, and your personal preferences.

Below, we will answer some of the most frequently asked questions people have about room air conditioners, as well as discuss the pros and cons of the different types available for you to choose from.

Let’s get started.

What Is A Room Air Conditioner?

A room air conditioner is any type of appliance that is designed to cool down an individual space, such as a room in a home or office.

Cost-effective and energy-efficient, this genre of air conditioners can be a suitable alternative for homeowners that don’t want to, or are unable to, invest in central air conditioning.


Are They Just For Small Rooms?

No. While they are commonly associated with smaller spaces, room air conditioners are available in a wide variety of sizes.

It’s important to know the size of the square footage of the room you’re looking to cool, and then calculate the amount of BTUs needed for that size space. You will also need to decide the type of AC unit that would work best for your room, which we detail down below.


Types of Room Air Conditioners

Now that we have a better idea of what a room air conditioner is, let’s take a closer look at the pros and cons of the different types you will choose from. Consider these pros and cons as you decide which air conditioner is best for your room.

Window Air Conditioners

Window AC Unit

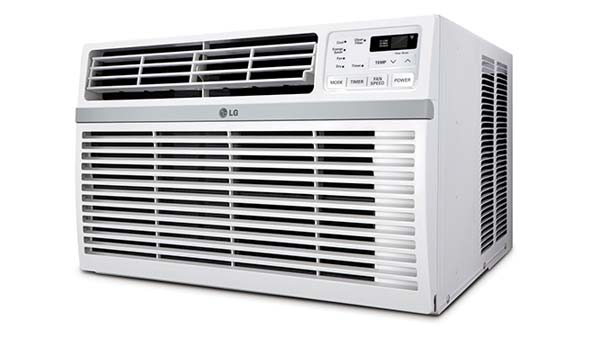
Probably the most familiar type of room air conditioner, window cooling units are a great option for controlling the temperature within single rooms. There are many benefits to this type of AC unit. They are very affordable to purchase, with hundreds of models available from the most reputable brands in the space.

This low price point goes beyond the initial purchase, too. With a reputation of being extremely energy-efficient, you can count on saving even more money on your monthly energy bills. These costs can be further extended if you get an AC unit that has been rated by EnergyStar.

Window AC units come in just about every size, so no matter how large or small your room may be, it’s not hard to find one with the right amount of BTUs for your space.

The main downside of this type of room air conditioner is the installation requirements.

To work properly, window AC units do require permanent installation through a window that is partially open. This will allow the AC unit to vent hot air from the room. Without proper ventilation, the air conditioner would not be able to cool your room to your desired temperature.

While not an overly difficult task, installing a window air conditioner does present a challenge for many homeowners. If you don’t feel confident in your ability to install your AC unit, you will have to hire somebody to complete the task. This is an additional cost that many homeowners don’t consider at the time of purchase.

The Pros:

  • Affordable to buy and use.
  • Very energy-efficient.
  • Lots of options to choose from.

The Cons:

  • Installation may be difficult.
  • May need to hire someone to install AC unit.
  • Fixed location may require multiple units.

Portable Air Conditioners

Portable AC Units

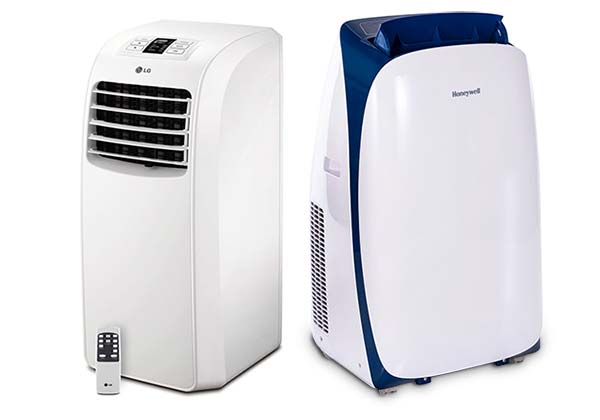
In recent years, portable air conditioners have exploded in popularity. Likely because this type of AC unit is another great option for cooling individual rooms.

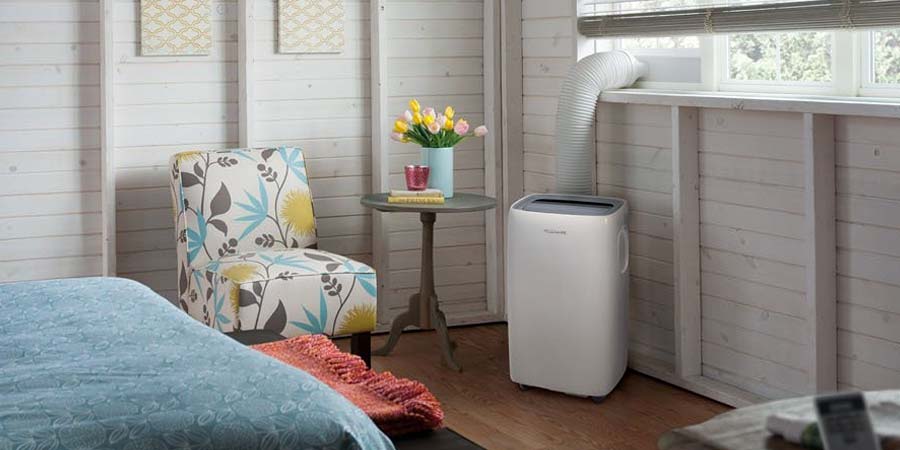
Portable AC units work just as their window counterparts, but offer the convenience of being light enough to move from room-to-room. Because they don’t require permanent installation, you have more flexibility in cooling strategic areas within your home.

Portable Air Conditioning

Portable Air Conditioner FAQs

Popular for cooling single rooms, here is a list of the most frequently asked questions about portable air conditioners.

Learn More

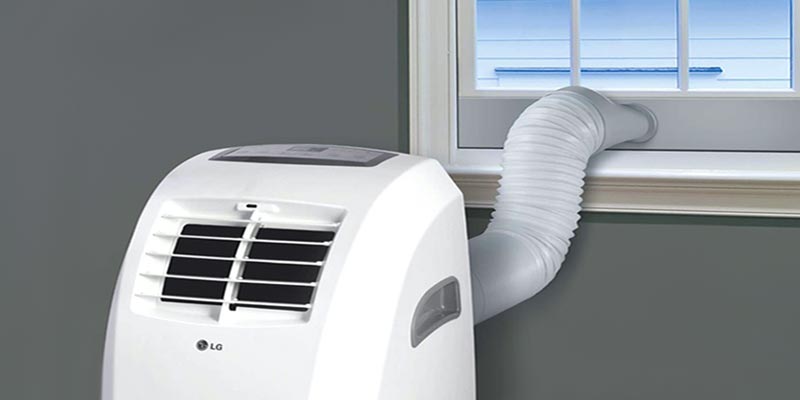
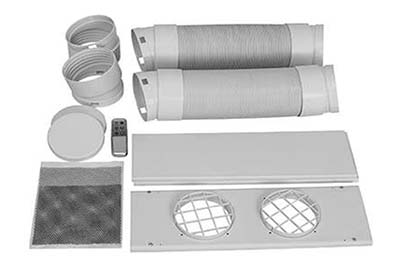
Installing a portable air conditioner is a very simple task that should pose minimal issues for homeowners. Simply click the window vent kit in place, and attach the hose(s) that come out of the back of the AC unit. This is how it vents hot air from the room.

Depending on the brand and model you buy, portable AC units are an affordable option with a large number of units to cool rooms of all sizes. However, the purchase price of a portable AC unit will be slightly higher than window units. But, because they are portable, you may only need to purchase one unit to cool various rooms.

The main downside of using a portable unit is that it will not be as energy-efficient as other types of room air conditioners on this list. At this time, you will not be able to find any portable air conditioners that have earned an EnergyStar rating.

The Pros

  • Affordable to buy.
  • Very simple installation.
  • Portable and easy to roll from room-to-room.

The Cons

  • Not as energy efficient as other room AC units.
  • Some units will be louder than others.

Ductless Air Conditioners (Mini-Split)

Ductless AC Unit

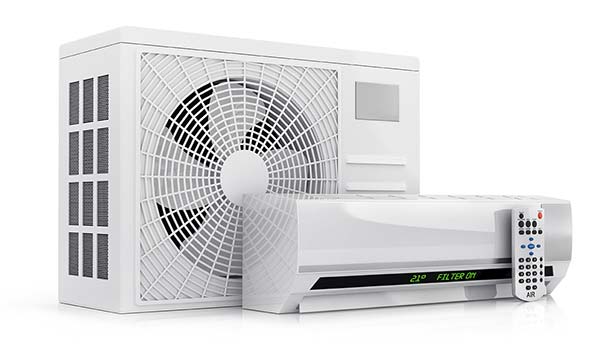
Ductless air conditioners, also known as a mini-split, are great at cooling large, open spaces. While they are not cheap to purchase, this type of room air conditioner is designed to work much like a central AC unit, qualifying it as one of the best alternatives for homeowners.

Consisting of a condenser outside that connects to the unit indoors, ductless AC units are mounted high up on your wall in an area that allows you to maximize the circulation of cool air across the entirety of your room. They take up zero floor space and are extremely quiet, allowing it to largely blend into the room.

Out of all the room air conditioners on this list, ductless AC units are going to be the most efficient. They use very little energy to operate, allowing you to cut your monthly energy costs by a significant amount. You can also find lots of ductless systems that are designed to cool multiple rooms, giving you maximum temperature control across your home.

Similar to buying a central AC unit for your home, the main downsides of ductless air conditioners are the overall cost of purchasing and installing it.

Unfortunately, the price tag for a ductless mini-split system is going to be much steeper than other room AC units. And once you get over the initial sticker shock, you also have to consider the cost of finding and hiring a qualified technician that can install it for you.

The Pros:

  • Surprisingly quiet.
  • Very efficient with minimal costs to use.
  • Doesn’t take up any floor space.
  • One unit can cool multiple rooms.

The Cons:

  • Expensive to purchase.
  • Need to hire a qualified technician to install.

Through-the-Wall Air Conditioners

Wall AC Unit

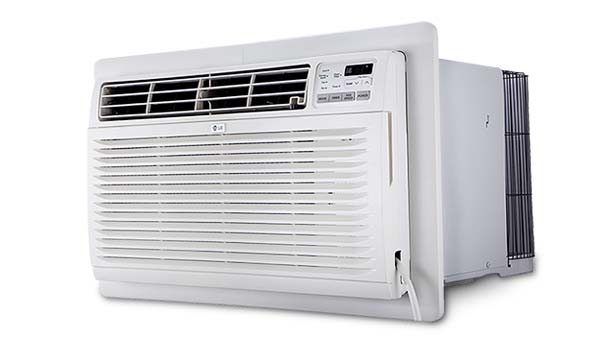
With a similar design as window units, this type of air conditioner is installed directly into your wall of the room you want to cool.

Wall air conditioners are the least popular type of unit on this list, and for good reasons. Most homeowners don’t want to spend the time and money to cut a hole into the side of their home, just to cool one room.

If you’re going to spend that amount of money, it would probably be wiser to invest into a ductless AC that doesn’t require a large hole in your home. It’s also going to be much easier to install and use a portable or window unit.

Despite these downsides, through-the-wall air conditioners are engineered to be slightly different than window units. This allows them to be slightly more efficient at cooling large, open rooms.

Wall AC units are also a great fit for cooling small sheds, workshops or other areas that don’t have a window and have little downside to cutting a hole in the wall.

It is important to remember that the difference between a window and through wall air conditioner does not lie in where they are positioned but in their structure. Through wall air conditioners vent warm air only through the back of the unit while window air conditioners work from both sides. These room air conditioners are not interchangeable.

The Pros:

  • Efficient and powerful.
  • Doesn’t take up any floor space.
  • Great at cooling large rooms and open spaces.

The Cons:

  • Potentially expensive to install.
  • Requires a hole in the wall.

Finding the Best AC For Your Room

Now that you have a better idea of what types of air conditioners can be used to cool a single room, let’s close this out with a few final considerations to help you find the best AC for your room.

No matter what you decide to buy, or how much it costs, this is a big decision that will affect your comfort level on a daily basis. It’s important to look at all the angles before you buy the first one you come across.


Ask yourself these questions:
  • What is the square footage of your room?
  • How much are you willing to spend?
  • Are you willing and able to do the installation?

Once you have the answer to these questions, you’ll be in a position to make an informed decision and find the best air conditioner for your room.

Window vs. Portable

Most homeowners will find that a window air conditioner is the most affordable and easiest to buy, but they may be hesitant when it comes to the installation process. If this is the scenario you find yourself in, then perhaps a portable air conditioner is the better option for you. Just know, that you’d be sacrificing energy efficiency for convenient installation.

Ductless = The Closest to Central AC

If you want to get closely replicate what you have with central air conditioning, then your best bet would be to buy a ductless air conditioner. But, they are more expensive to buy, and considerably more difficult to install. However, long-term, they are a great way to cool a room.

Any questions or thoughts? Let’s start a conversation in the comments below.


Portable AC Unit

9 Tips to Using a Portable Air Conditioner

How to Get the Most Out of Your Portable AC

Like any new appliance you bring into your home, a portable air conditioner requires a little bit of getting used to, plus the typical cleaning and maintenance to ensure it is operating to its full potential. Regardless of where you install it or how often you use it, getting to know your indoor air conditioner and how it works within each room its placed, will go a long way in helping you get the most out of it.

To help you learn how to use your portable air conditioner, we’ve but together the following tips. These tips are designed to help you increase its efficiency, longevity and overall cooling ability. For more technical info, please refer to our list of FAQs here, or the user manual that came with your portable AC.

1. Strategic Installation

Be mindful of where your portable AC is installed. While not always avoidable, there are certainly some areas of your home that you should try to stay away from when you’re installing your unit.

Portable Air Conditioner

Sunny Spots

If possible, you will want to try to avoid placing the portable AC in an area that gets a lot of afternoon sun. If the heat of the sun is bearing down on your AC, it will likely need to work harder to keep the room at your desired temperature. This extra work may eventually lead to a shorter lifespan.

Humid Spots

It’s also wise to install and use your air conditioning unit in rooms that have low humidity levels. This is because the higher the relative humidity is inside the room, and directly surrounding the AC unit, the more condensation it will create.

Depending on the type of portable air conditioner you are using, this extra condensation may increase the frequency that it needs to be drained and cleaned. Failing to remove this will, ultimately, lead to the unit malfunctioning.

2. The Amount of Space Between Walls

One of the main benefits of this type of air conditioner is the fact that it’s portable. This gives you quite a bit of flexibility in the location of your home that it can be installed.


However, it’s still important to pay close attention to where you place it.

No matter where you decide to install the appliance, it is very important that you leave adequate space between the walls and the unit itself. Failing to leave enough space will limit the airflow. When your unit is unable to draw in enough air while it is in use, its output is reduced. As a result, this reduced output makes it harder for your portable air conditioner to cool the room to your desired temperature.

Refer to the user manual to know how much space the manufacturer recommends for your specific model.

3. Ventilation

No matter what type of room air conditioner you are using in your home, ventilation is always going to be one of the most important factors for ensuring optimal operation and a long life of the appliance.

Window Vent Kit for Portable AC

The importance of ventilation cannot be overstated, but it’s especially important when it comes to portable air conditioners.

Proper ventilation will direct the hot air from the compressor and out of the room. This will help prevent your AC unit from overheating, as well as keep the temperature inside your room from going up.

Use the Right Vent Kit For Your Window

Most portable AC units come with a window ventilation kit that’s designed to fit the majority of “standard-sized windows” in homes. However, depending on when your home was built, as well as the region you live or the style of your home, the definition of a “standard-size window” will vary.

It is unlikely that you should have any issues getting your ventilation kit to fit the windows in your home, but if you do, there are other ventilation options available, including kits for sliding doors and drop ceilings.

4. Keep the Exhaust Hose Straight

Now that we have ensured that the portable AC is properly ventilated, let’s now take a look at the exhaust hose. You will want to limit the amount of twists, kinks or coils in the hose leading from the unit to the window. The exhaust hose should remain straight with minimal contortions.

Portable Air Conditioning

How to Save Money With Portable AC’s

If you’re clever in how you use your portable air conditioner, they can save you a lot of money. Here’s how you can use them to lower your energy bills.

Learn How

It is strongly recommended that you minimize any kinks in the exhaust hose that will limit the airflow or reduce ventilation. This may require a shorter exhaust hose, or just simply being mindful of where/how it is installed.

What Happens If the Exhaust Hose is Twisted?

When you have a long and twisted exhaust hose attached to your portable air conditioner, the unit has a harder time with ventilation.

As a result, the moisture in the air being expelled will start to accumulate inside the hose, and eventually start to trickle back down into the unit itself. If this happens, the cooling efficiency and the lifespan of the air conditioner may be reduced.

5. Clean & Replace Filter Regularly

This is probably pretty obvious to all homeowners, but the filter in your air conditioner should be changed regularly. This is not only important to ensure proper operation and cooling, but is essential for maintaining your indoor air quality.

How Often Should I Change It?

The frequency that you clean or change your filter all depends on how often you use the AC unit. It would be wise to inspect it every 6 to 8 weeks, just to make sure that it is in good condition. If your home is dusty, or if someone in your family is prone to allergies, then you may want to consider cleaning or replacing your filter more often.


What Happens If I Don’t Change the Filter?

If you’re using a clogged or dirty air filter, it may reduce the intake of the unit which may lead to a variety of problems.

These problems include:
  • Diminishes the efficiency, costs more to use.
  • Harder to reach and maintain desired temperature.
  • Forces the AC unit to work harder than it should.
  • May compromise indoor air quality.

Many of these issues will only occur when the filter is neglected for an extended period of time, but nonetheless, this shows why it’s important for all homeowners to regularly check and replace the filters in their air conditioners.

What If My Portable AC Has Multiple Filters?

Depending on the brand and model of the portable AC you’re using in your home, you may have multiple filters inside. All portable AC units come with a pre-filter, and don’t always require the use of other filters.

While these pre-filters are great at reducing large particulates that may be circulating in your air, they do very little for the common allergens that are known to lead to health complications, such as mold spores or pet dander. This is why it’s recommended that you use another type of air filter in your portable air conditioner.

6. Keep it Clean

Keeping your portable air conditioner clean is one of the easiest ways you can keep the device working properly, and it doesn’t take much work to complete.

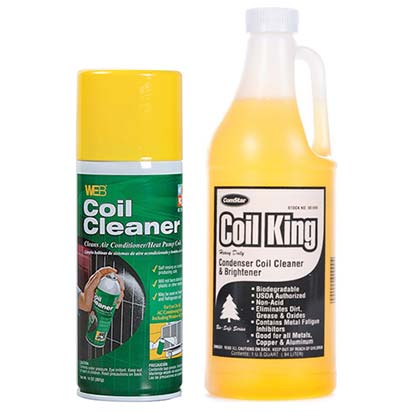
AC Coil Cleaner

The Simple Clean:

Simply wipe down the outside of the unit down with a damp cloth. Avoid using excessively hot water or any sort of cleaning chemicals that may damage the exterior.

How Often? Do this every 4-6 weeks.

The Deep Clean:

Unplug your unit and clean the condenser coils to increase its efficiency. You can either purchase a coil cleaner to use or make your own cleaning solution with water and lemon juice. Spray the solution on the coils and remove after a few minutes.

How Often? Do this once a year.

The Professional Clean:

Sometimes, even when you clean the unit on a regular basis, you may require professional service to improve its functionality. If you experience issues with your unit that you are unable to resolve on your own, don’t hesitate to contact a professional air conditioning service to clean and inspect the appliance.

How Often? As needed.

7. Store it Properly When Not In Use

When you have no plans on using your portable air conditioner, it is recommended that you store it away to keep it safe for the next season. Try to avoid storing your AC unit in an area that has extreme temperatures, such as the garage or patio.

Checklist for Storing Portable Air Conditioners

Before you disassemble your AC unit and put it away into storage, it is strongly recommended that you do the following tasks.

  • All water has been drained from the unit.
  • Turn unit on fan setting to help the inside dry completely.
  • Deep clean all other parts and allow to dry, specifically exhaust hoses and drain pains.
  • Compress the exhaust hose to prevent damage while in storage.
  • Cover the unit with a sheet to prevent dust or other debris from accumulating.
  • Store your portable AC indoors in a climate-controlled area.

8. Electrical Requirements

When it comes to the power source for portable air conditioners, most homeowners shouldn’t have any issues. The vast majority of these AC units are designed to operate on the standard 120v electrical outlets commonly found in homes.


This is a pretty essential feature, as it would be difficult to move the AC unit from room to room if it required a different receptacle.

It may be a good idea to use a surge protector that can add a layer of protection against sudden power failures. It’s also recommended that you are mindful of how many appliances are plugged into the outlet, as to not overwhelm the circuit.

Note: This applies to the majority of portable air conditioners used to cool rooms in your home. If you’re using a commercial-size unit or a high-BTU air conditioner, you may need more electricity. All electrical requirements will be found in the user manual.

9. Pre-Cooling & Better Circulation

To help your portable AC unit cool your down in an efficient manner, it is recommended that you turn it on shortly before the room gets too hot or uncomfortable. If you wait until the sun is shining bright and the temperature is at its peak, the air conditioner will need to work harder, and take longer, to reach your desired temperature.

Another tip that every homeowner should know, is to use a small oscillating fan near the unit. This will help the cool air circulate throughout the room, and make you feel more comfortable.


Final Thoughts

There are many benefits that come from a portable air conditioner, but when you know how to strategically use it, you’ll find that you can improve its efficiency and extend its life.

By following the usage and maintenance tips listed above, you put yourself in the position to get the most from your AC unit, all while staying cool and saving money.