Swamp Cooler

Swamp Cooler FAQs

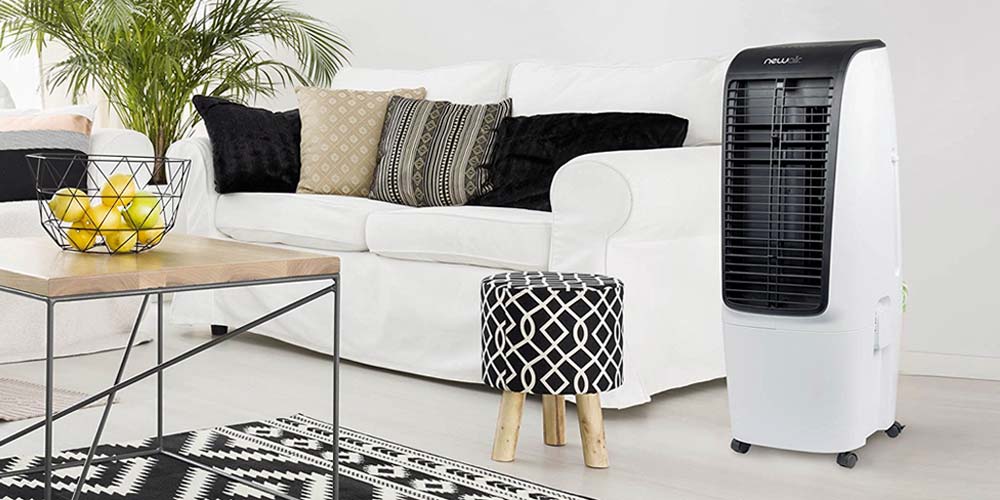
Affordable and energy efficient, swamp coolers are a great way to drop the temperature in your home, without spending the money on a new air conditioner. They don’t use any chemicals or refrigerants, all it needs is water to help you feel cooler.

While this all may sound great, evaporative air coolers are not the right fit for everyone or every home. Only some homeowners will benefit from using a swamp cooler inside their home, and even then, it is hardly ever a suitable alternative to other types of air conditioners.

What Is A Swamp Cooler?

A swamp cooler is an appliance that uses the evaporation of water to help cool the air stream and add humidity back into the air. They are particularly useful for anyone living in arid climates.

Other names for these devices include:

  • Evaporative coolers
  • Wet air coolers
  • Desert coolers

How Does A Swamp Cooler Work?

This type of air cooler utilizes the principles of evaporative cooling.

A swamp cooler is really just a simple contraption that uses a fan to suck in hot air, typically from the outdoors, then pushing the air over a number of wet “cooling” pads.

As the hot air passes over these pads, the liquid water turns into vapor, which is then pushed out of the unit, and into the air inside your home. Once the vapor starts to circulate into the air, the added moisture will extract the heat from the air, helping the ambient temperature feel cooler.

How An Evaporative Cooler Works

The dry air temperature cools during the evaporation process. This is the same method that the human body uses to cool itself down. When we get hot we sweat and the sweat evaporates which lowers our body’s temperature.

Because of this it’s important to use only in hot, dry climates. For optimal performance, only homeowners that have humidity levels below 50% should use a swamp cooler inside their home.


Does It Lower the Ambient Temperature?

A swamp cooler will help make the temperature feel approximately 5°-15° lower in the area within close proximity to where it is located. However, they will not lower the overall ambient temperature in the room.

This is a common misconception and important for homeowners to understand prior to purchasing an evaporative cooler. Unlike an AC unit, you will not feel a significant drop in temperature, nor will you be able to control the temperature with any sort of precision.


What’s the Difference Between a Swamp Cooler & Air Conditioner?

The most notable difference is the method in which they each cool the air that is being circulated within the room.

An air cooler uses water, cooling pads and an internal fan to increase the humidity within the room, whereas an air conditioner uses a compressor and refrigerants that can rapidly cool the air.

While they may have similarities and are both intended to cool a room, it’s very important to understand that they each utilize a distinct cooling method and are not a one-for-one replacement.

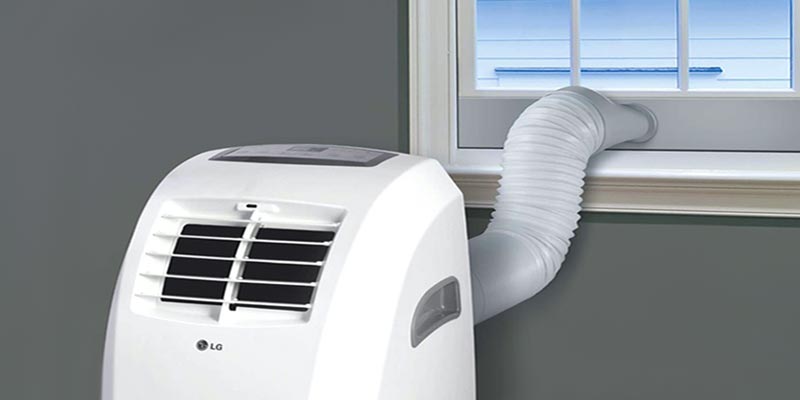
Portable Cooling Confusion

The similarities are noticeably obvious when it comes to portable air conditioners. Because of how similar they are in shape, size and design, not to mention they each have “portable” in their name, it’s very common for homeowners to confuse these units with portable evaporative coolers.

Unfortunately, they operate very differently, and this has left plenty of homeowners both confused and disappointed with their purchase.


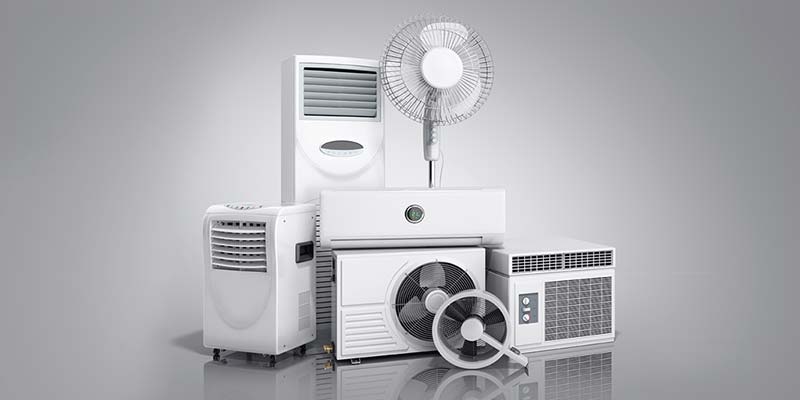
What’s the Difference Between an Evaporative Cooler & Air Fan?

A fan uses rotating blades to create a current of air but has no real effect on the temperature or humidity within the room. All it does is circulate the air around you. It may feel cooler when you first feel the air circulating around you, but this is due to the “wind chill effect” that it creates and will be temporary, at best.

Whereas, an evaporative cooler utilizes an internal fan to help circulate air, but also goes one step further by using a set of wet cooling pads to help recreate the evaporation process by adding a bit of moisture to the air.


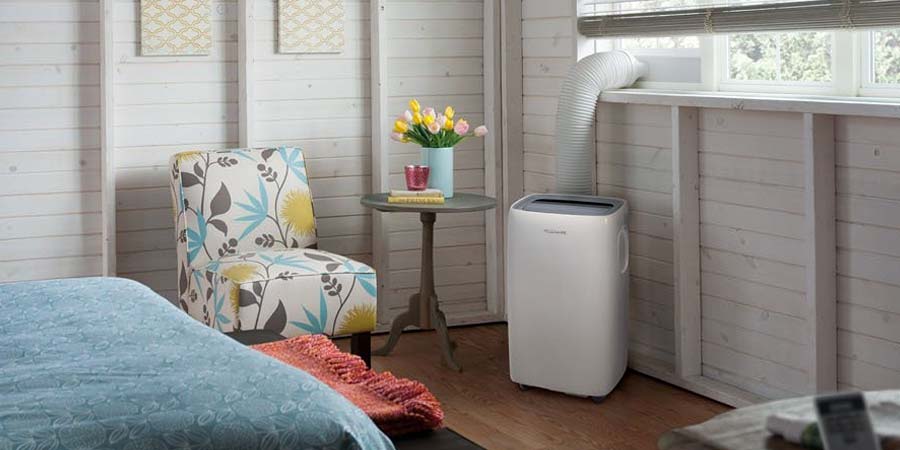
What is the Best Environment to Use a Swamp Cooler?

Due to the evaporative nature of how they operate, swamp coolers are best used in hot, dry climates where the temperature is high, and the humidity levels are low.


Can I Use One If I Live In A Humid Climate?

This is not recommended. If your home is located in an area with a humid climate, then it would be unwise to use a swamp cooler inside your home.

Not only will they be ineffective at cooling, but they will just add unnecessary amounts of moisture to the air. As a result, the excessive humidity levels inside your home will cause more issues and lead to poor indoor air quality.

If you live a humid climate, the better choice would be to use an air conditioner for cooling the interior of your home. However, depending on your location and the fluctuating temperature, there may be certain times in the day that you could use a swamp cooler to help supplement your air conditioner.


Will a Swamp Cooler Help Cool a Garage or Workshop?

Yes. An evaporative air cooler can be a great choice for cooling your garage or workshop. Due to the large doors and poor insulation, you are less-likely to experience the negative effects of too much humidity.

Ironically, it’s because of these same reasons that garages often don’t have an air conditioner. As a result, a swamp cooler could be the ideal choice to provide cooler airflow, especially on those hot summer days.


What Size Swamp Cooler Do I Need?

Once you’ve made the decision to purchase an air cooler, you need to determine the right size unit. Air coolers are measured by cubic feet per minute (CFM). This is the measurement used to determine the amount of air that will be circulated each minute.

How to Calculate CFM:

Figuring out the CFM is pretty easy and shouldn’t take more than a couple of minutes. Here’s the steps you will take.

  1. Determine the square footage of the room.
  2. Multiply the room’s square footage by the height of the ceilings.
  3. Then divide that number by 2.
  4. This is your suggested CFM for that room.

For Example:

To illustrate how this works, we’ll be calculating the amount of CFM needed to cool a room with 150 square feet and 9ft. tall ceilings.

  • Room Sq. Ft — 150 square feet
  • Ceiling Height — 9 ft
  • 150 x 9 = 1350 / 2 = 675 CFM

In the example above, I would need to find a unit that has a minimum of 675 CFM.

If the CFM falls in between units or you have an odd-shaped room with lots of corners, you would want to purchase an air cooler that is slightly larger. If it is too small will have to worker harder to keep the area cool and waste energy doing so.


How Do You Clean A Swamp Cooler?

A swamp cooler will follow a similar cleaning process as a humidifier. Any part of the device that gets wet, needs to be cleaned and sanitized on a regular basis.

To ensure proper cooling and the prevention of mold or mildew, the tank and cooling pads should be cleaned with soap and water at least once every 7-10 days. Allow all parts to dry thoroughly.

This will prevent dust, dirt, and mildew from building up. Cleaning the unit regularly is especially important if you are using the air cooler for long periods of time.

External – Cleaning the outside of the air cooler can be done periodically by simply wiping it down with a damp cloth.


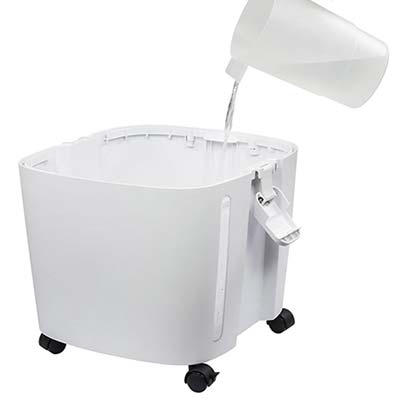
How Often Do You Refill the Tank?

This depends on many factors, ranging from how you are using the device to the brand/model itself. Generally speaking, you should not have to refill the tank for at least 4-6 hours.

Refilling Swamp Cooler Tank

Below, are a few considerations that will play a role in how long your tank will last before it needs to be refilled.

  • How big is the device?
  • How / where often are you using it?
  • What is the temperature of the room / surrounding area?
  • What is the relative humidity of the room / surrounding area?
  • What is the insulation like in the room it is being used in?

Depending on how you answered the above questions, you to help you determine whether or not you can use your swamp cooler in a more efficient manner.


How Often Do You Replace the Cooling Pads?

This depends on how you are using and caring for the device. If you clean your swamp cooler on a regular basis, then your cooling pads will last for quite a while.

As the summer season sets in and you prepare to use the evaporative cooler for the first time, inspect the pads to make sure that they have no damage. If you notice any cracks, then they will need to be replaced.


Do you have a question about evaporative air coolers that you didn’t see listed here? If so, leave it down in the comments below.


Robot Vacuum

Robot Vacuums: Are They Really Worth It?

Robot vacuum cleaners have really taken off in the last few years and it’s fairly easy to understand why. With their ease of use and practical, hands-free action, homeowners are discovering the many advantages of purchasing this type of vacuum cleaner. But, are they really worth the higher cost? Let’s take a look at some of the benefits you can expect from using one.

What Are Robot Vacuum Cleaners?

Robot vacuums are an autonomous device that is designed to clean carpet, tiles and hardwood floors of all dirt and debris, much like other types of vacuum cleaners. The main difference of robotic versions is their ability to minimize the amount of work hat homeowners need to do.

Upon their release in the late ’90s, robotic vacuums initially struggled with homeowners. However, after two decades of innovation and the continual rise in Smart Home devices, robot vacuums have never been more popular.

In recent years, there is no denying their spike of interest from homeowners, partly because they’ve become more affordable, but mostly because they’ve become more efficient at accomplishing their intended purpose — cleaning your floors without requiring you to put in much work.

The Benefits of Owning a Robot Vacuum

If you’re currently looking to buy a vacuum cleaner, you would be doing yourself a disservice by not considering a robotic vacuum. To help you determine if this is the right device for you, let’s take a closer look at some of the benefits you can expect to receive from a robot vacuum.

1. Easy To Use

Perhaps the number one benefit of owning a robot vacuum cleaner is that they are extremely easy to use. Once the machine is programmed for a given space and the timer is set for a predetermined start time, the product virtually runs itself. Simply place the device on the floor in an appropriate starting spot and you’re good to go.

In addition, many models have been refined over the years to be self-regulating and nearly foolproof, meaning mishaps are becoming more and more unlikely as the technology evolves. That means you don’t have to worry about your vacuum malfunctioning or becoming stuck on a surface.

2. Incredibly Efficient

Today’s robot vacuum cleaners provide multiple tasks. They not only clean, they remember the layout of your space, are able to dump the dirt they collect, and then find their way back to the charging station.

Some higher-end models have advanced sensors and are also able to transition between bare floors and carpeted areas without manually switching settings. Other allow you to control them through a smartphone app.

The methodical, back-and-forth or circular motion of the machines also ensures that every inch of a floor or space is covered, which translates to a more thorough cleaning overall.

ECOVACS Robotic Vacuum Cleaner

Photo Credit: ECOVACS Robotics

3. Saves You Time

It is a universal experience that everyone’s lives have become increasingly busier in the 21st century. Indeed, multi-tasking has become paramount to, and part of, modern-day existence. One of the most desirable benefits of robot vacuum cleaners is that you don’t have to be present when the vacuum is operating.

Simply turn it on before you leave the house and it will do all the work for you while you’re out of the house. Therefore, time not spent manually vacuuming can be spent working, relaxing, playing with your kids, or doing whatever your heart desires. Indeed, the old adage that time is money certainly applies to this product as well.

4. Works on Different Surfaces

Another benefit of the robot vacuum cleaner is that it works on multiple types of surfaces, from carpets to wood floors to linoleum to concrete.

As mentioned, higher-end models are able to transition between different types of surfaces during the same cleaning cycle. With other models, you simply change the setting, place the product at a designated starting point, and set the programmer and timer as usual.

5. Detects All Levels of Dirt

Along with working on all types of surfaces, autonomous vacuum cleaners are able to tackle all types of dirt as well. From dust that has barely settled to deeply-embedded debris in your carpet, the vast majority of these vacuums are designed with increasingly powerful suction capabilities, despite their compact size.

Using built-in sensors, the machines also can detect the amount of cleaning required in different situations and will repeatedly go over an area until it is clean. This level of detail when it comes to cleaning is unmatched in other similar products.

6. Sets Boundaries

Another advantage of robot vacuum cleaners is their inherent ability to perform in — and only in — a given space that they are programmed for.

For instance, if you have children playing in another room while the product is operating, you can set virtual walls in the programming function to prevent the machine from going across doorways and other openings. Likewise, if you have pets alone at home while the machine is operating, you can easily limit the scope of the machine so it won’t frighten them.


7. Small, Compact & Easy to Store

A robot vacuum is much smaller than an upright or canister vacuum cleaner and, as such, can easily be stored in just about any space — in a closet, under a bed, or wherever you have room. This makes the product ideal for any homeowner that has limited storage space or is trying to downsize their belongings.

These smaller vacuums can also be easily transported from one location to another because of its size. You don’t need to clear out your trunk or borrow somebodies truck to move it from one place to another. As an added benefit, the small, low-slung nature of the product means it can get under furniture and reach areas that a regular vacuum cleaner cannot.

8. Makes Housecleaning Go Faster

Because a robot vacuum cleaner is self-sufficient and self-operating, it is an ideal product to help you maximize the amount of time spent on housecleaning.

Indeed, while your robotic vacuum is doing its thing on your floors, it frees up your time to work on cleaning other areas of the house. Working in tandem, you’ll be able to significantly cut down on the time it takes to clean your house. And, the result of more efficient cleaning is that you’ll be more likely to clean your house more thoroughly more often.

9. Ideal Solution for the Handicapped & Elderly

People with mobility issues, such as the elderly and handicapped, can truly benefit from owning a robot vacuum cleaner.

With its ease of use and hands-free operation, a robot vacuum cleaner can be a liberating product for this demographic, who would otherwise be forced to hire house-cleaners at a much greater expense. In addition, the money saved that would otherwise be spent on doing so makes this a product worth investing in.

Another alternative to consider that offers similar benefits would be a stick vacuum cleaner.

10. Economical and Cost-Efficient

Because robotic vacuum cleaners have been on the market for a number of years, both the price and features have improved significantly, and continue to improve as the years roll by.

The good news is that you don’t have to spend a fortune to get a decent product that does the job right for your particular needs. Starting at approximately $150, with high-end models running upwards of $1,000 to $1,500, there is something for everyone’s budget when it comes to this type of product.

Takeaways

When considering the reasons why you should buy a robot vacuum cleaner, the previous ten benefits should be at the top of your list. If you can see your life improving with 8, 5, or even 1 of the benefits outlined, then purchasing a robot vacuum cleaner is worth it and then some. For efficient and effective cleaning power, a robot vacuum cleaner is becoming the hands-down choice among many homeowners, businesses, and commercial establishments alike.


Frozen Pipe

How to Prevent Frozen Pipes

If you live in a cold climate, you probably know all too well the dilemma of frozen pipes. If you’re new to cold climates or, perhaps, new to owning a house, it’s wise to learn all you can about what you should do in the event that your pipes freeze during a cold winter chill.

To help you prepare and protect your home, let’s take a look at why pipes freeze, as well as some simple prevention tips that every homeowner should know as the mercury starts to drop.

Why Do Pipes Freeze?

The reason behind why pipes freeze is likely self-explanatory. When the temperature outside your home drops too low, the water inside the pipes will freeze.

This typically starts with any spigots, faucets or pipes that are exposed to the elements. However, it can have an effect on areas in your home this is not heated or just poorly insulated. Upon hitting this frozen state, the water inside your pipes and spigots will expand, which may cause it to burst. This is where things can go really bad for homeowners, possibly leading to a whole host of other problems.


How to Prevent Frozen Pipes

There are many preventative measures that a homeowner can take to protect their home from a frozen pipe. There’s no single “best” way to prevent your pipes from freezing.

Instead, familiarize yourself with the tips below and use them in conjunction with each other. This will go a long way to make sure your pipes don’t freeze and, hopefully, prevent them from bursting and flooding your home.

1. Add Insulation to Exposed Pipes & Fixtures

By far, this is the easiest thing that a homeowner can do to protect their pipes. By adding a layer of insulation to all plumbing fixtures that are exposed, especially pipes and spigots, you can help prevent them from becoming too cold.

Most homeowners will initially think of the pipes and faucets on the exterior of their home. But, don’t forget about any pipes that are exposed in areas of your home that are not heated or well-insulated. This could be your garage or a basement, but also any of the forgotten crawl spaces. All of the pipes in these areas should be insulated, too.

There are lots of types of insulation that can help you here, all of which are available at home improvement stores or online.

Faucet Cover

Faucet Covers

These are a great way to protect outdoor spigots or faucets. Typically, a faucet cover is only a couple of bucks and they’re incredibly easy to install. If possible, opt for the faucet covers that have a hard plastic shell, as these are a bit more durable and will last for many seasons.

Foam Pipe Insulation

Resembling the colorful “noodles” you kids playing with in a swimming pool, these are pieces of foam that are designed to wrap completely around and insulate all exposed pipes. Extremely affordable and easy to install. The best part about this type of insulation, is that it goes far beyond preventing pipes from freezing, it will actually help cut your energy costs and prevent those same pipes from condensation when the temperature goes back up in the summer.

Pipe Wrap Tape

Very similar to the foam insulation above, but instead of a giant noodle of foam, this type of pipe insulation looks more like a roll of duct tape. You’ll apply it much like you would tape, too. Simply wrap it around any exposed areas and it will add a layer of thermal insulation to prevent it from freezing. Unfortunately, pipe wrap tape is going to be one of the more expensive options.

DIY Insulation

Sometimes, a winter storm will creep up on you and leave you with little to no time to get the necessary supplies or insulation. If you find yourself in this situation, don’t worry, there are still some easy and free insulation options that will protect your pipes.

Perhaps, the oldest method of protecting your pipes. Simply take some old rags or towels, and wrap them around any exposed pipes, spigots or other areas that you think is susceptible to freezing.

Make sure it’s wrapped up tight and won’t come loose during a storm. The best option is to wrap duct tape around the towel. Another option is to use another towel, tying it into a knot around the “insulating” layer to ensure it stays in place.

2. Use Heat Tape to Regulate Temperature

The name “heating tape” can be a bit of a misnomer. While there are different types available, some of which do have adhesive properties, most homeowners will think of this as a type of extension cord or cable.

The heating cable is then strategically wrapped around any exposed pipes. Once installed, simply plug in and turn on. The cord will emit a small amount of heat that will help regulate the temperature around the pipe, thus preventing from freezing.

When used properly, this can be a great way to make sure your pipes never freeze. Unfortunately, they are much more expensive then other types of pipe insulation. Additionally, you also need to be mindful of the type of heating cable you use, as well as the material your pipes are made of.

3. Protective Measures Inside Your Home

For pipes and spigots located on the exterior of your, insulation is about the most you can do to protect them from freezing. However, when it comes to the inside of your home, there are many things that a homeowner can do.

Frozen Water Spigot
  • Maintain Temperature:

    The number one thing you should do is regulate and maintain a steady temperature inside your home. Try to keep it above 60°F at all times, even if you’re not home at the time.

  • Heat & Insulate Exposed Areas:

    If you have a basement, garage or crawl space with an exposed water line, then you may want to consider using a small heater in that area to help prevent the temperature from dropping to a level that will cause water inside to freeze. Of course, a heater should only be used if it is deemed safe by the homeowner. Insulating pipes will be the best prevention, but a heater may also help. The very least you can do, at least for a garage, is keep the door closed and insulated.

  • Weather Sealing Doors & Windows:

    This is something that every homeowner should consider, just for the energy savings alone. No matter how extreme the temperature is outside, this is one easy DIY project that will help you regulate the temperature inside. It’ll help prevent pipes from freezing in the cold winter, as well as help your air conditioner keep the room cool in the hot summer.

  • Heat Circulation Within Cabinetry:

    Inside your home, it’s not uncommon for pipes to be exposed inside the cabinetry. They may be hard to spot, but there they are. Look inside your cabinets and if you see pipes, leave those doors open to ensure that the heat in the room can circulate to those areas.

4. Shut-Off Water Supply & Drain

Your pipes won’t burst if there’s no water inside to expand. Therefore, it would be wise to shut-off the water supply for any pipes that lead to an exterior spigot, as well as drain all the water out.

This would include:

If the weather hits extreme temperatures, then you may also want to drain the water out of any appliances that have a water supply, such as your hot water heater or fridge. This is especially true if they are located in a basement or garage.


5. Let Your Faucet Drip

The most popular way to prevent pipes from freezing, is to allow the faucets in your home to slowly drip water. Sure, it’s a gross waste of water, but it works. This is much better than dealing with a burst pipe.

The slow drip works because it helps moderate the water pressure inside your pipes. This allows the water to keep flowing and pressure lowered, all of which makes it more difficult to freeze.

6. Wash Your Dishes & Clothes (While You Sleep)

Most dishwashers and washing machines have an option that allow you to delay the wash-cycle for a few hours. If you have one of these, schedule a load to start in the middle of the night. This is when the temperatures will be at their lowest, and when your pipes have the highest risk of freezing.

This follows the same principles of a dripping faucet, but instead, you’re putting some of the appliances around your home to work (and not completely wasting water).

7. Use Ice Maker to Make Ice

While it sounds counter-intuitive to make ice when the weather is creating ice everywhere else, this little trick works quite well.

Your refrigerator makes ice when it detects that it’s needed. So, empty all the ice out of it. This will cause your fridge to make more ice, thus using more water and helping relieve the pressure that may lead to your pipes freezing.

Keep A Close Eye On Your Pipes

Knowing how to prevent frozen pipes in your home and yard is only part of the battle. If you’re in the home when the cold weather strikes, it’s wise to also keep a close eye on your plumbing.

This includes all faucets inside and outside of your home. Turn them on occasionally, inspecting that the pressure of water is working properly. This should be the first thing you do in the morning, and the last thing you do before you go to sleep.

Visually inspect occasionally to ensure that the preventive measures listed above are working. You want to be able to catch frozen pipes as soon as possible, so you can take the necessary steps to thaw them.


Carbon Monoxide Dectector in Home

Carbon Monoxide: What Every Homeowner Should Know

Nicknamed the “Silent Killer,” carbon monoxide is more common in homes than you may think. In fact, it’s likely in your home right now as you read this.

Should you be concerned by its presence? And, what can you do about it?

Let’s take a look at some of the most common questions homeowners have about carbon monoxide, and why you should have a CO detector in your home.

What is Carbon Monoxide?

A toxic gas that has no visible appearance or noticeable odor, carbon monoxide (CO) can pose serious health risks when it accumulates beyond a certain level.

Because it is completely indiscernible to the human senses, detecting it can pose a bit of a challenge for homeowners. It’s important to note that carbon monoxide is constantly present within your indoor air, but poses little risk until it hits a certain threshold.

Does Carbon Monoxide Smell?

No. You cannot smell carbon monoxide. Nor can you see, taste or otherwise notice its presence unless you have the right equipment.

Carbon Monoxide

It is precisely because of its inconspicuous nature that CO has earned the nickname as being a “Silent Killer” or “Invisible Killer.”

Sadly, unless you have the a carbon monoxide detector installed in your home, you won’t know that levels have reached a toxic level until it is too late.

What Causes Carbon Monoxide in a House?

The short answer is that CO can originate from anything that burns fuel for power. This can include everything from automobiles to gas-powered stove ranges, even water heaters and fireplaces. Carbon monoxide occurs as result of partial oxidation of compounds which contain carbon, forming when insufficient oxygen exists to produce carbon dioxide.

An average home will usually contain up to 5 ppm of CO in the air at any given time, a level that is near to the natural atmospheric concentration and is safe for people and animals to breathe. If you have a gas stove in your home, the level may be slightly higher, but still not high enough to cause significant health concerns.

However, problems with appliances or inadequate ventilation can cause carbon monoxide to collect in parts of a home, eventually elevating to levels where it may be unsafe to remain inside.


How Does a CO Detector Work?

A carbon monoxide detector works much like a typical smoke detector. Equipped with built-in sensors that can identify and measure the concentration of CO in the air.

When unsafe levels of CO are discovered, the device will broadcast an alarm that will alert the occupants inside the home. In theory, this would give anyone within the immediate area an opportunity to respond quickly in order to avoid overexposure to the gas.

Carbon Monoxide Detector

Where Should I Install My CO Detector?

While there are many factors to consider, it is important to pay particularly close attention to what the manufacturer states is best for that specific model. Within the user manual, you will find all the information you need to install it in your home.

Determining the Best Placement:

Aside from the manufacturer’s recommendations, there are a few general guidelines that can help you determine the best placement of a CO detector within your home.

  • Inside Bedrooms — It’s wise to have a carbon monoxide detector in all your bedrooms or any other area of your home where occupants may fall asleep.
  • Central Locations — Spread evenly throughout your home, you should place a CO detector on all levels near any main rooms where residents may be found, including your living room, dining room and near doorways that lead into a garage.
  • Unobstructed Areas — Wherever you install your carbon monoxide detector, make sure that you do not place it anywhere that may be blocked by furniture, drapes or other objects.
Where to Install CO Detector in Home

Just like you would with smoke detectors, it’s wise for homeowners to install these near any potential sources of carbon monoxide output or areas where it may accumulate.


Is Carbon Monoxide Heavier Than Air?

No. Carbon monoxide is lighter than air. Apparently, there is much debate surrounding this question, which has lead to further confusion about where homeowners should install a CO detector.

Hopefully, this 2012 study published in The Journal of Emergency Medicine will settle the debate and give homeowners some reassurance about the location they decide to install their unit. Researchers came to the following conclusions:

CO did not layer on the floor, float at the middle of the chamber, or rise to the top… Mixing would be even faster in the home environment, with drafts due to motion or temperature. It would be reasonable to place a residential CO alarm at any height within the room.


What Are the Symptoms of CO Poisoning?

Any exposure to CO can be potentially dangerous. It is because of this that every homeowner should take any necessary precautions to protect their family and ensure that the air inside their home is safe.

Call for Help!

American Association of Poison Control Centers
1-800-222-1222

For the majority of homeowners, it is unlikely that minimal exposure will cause any issues, however, this is still a toxic gas that has no health benefits associated with it. If you have babies, young children or small pets in your home, you should be especially mindful of how much CO is in your air.

Symptoms may include the following:
  • Respiratory issues.
  • Fatigue and weakness.
  • Headaches, ranging from dull to severe.
  • Dizziness, nausea and vomiting.
  • Impaired judgement and sense of confusion.
  • Faintness and loss of consciousness.
Symptoms, Safe Levels & Duration of Exposure:

While the actual duration and concentration amounts may vary, below is a general guide to help homeowners learn what symptoms they may experience when exposed to different levels of this poisonous gas.

  • Constant exposure to a CO concentration of 35 ppm for 6-8 hours can result in headaches and dizziness.
  • Exposure to 100 ppm can result in headache symptoms in just 2-3 hours.
  • Exposure to 200 ppm may produce headaches and impaired judgment within 2-3 hours.
  • With exposure to 400 ppm, more severe frontal headaches can occur in 1-2 hours.
  • 800 ppm of CO concentration can lead to nausea, dizziness, and convulsions within 45 minutes.
  • 1,600 ppm concentration levels will produce the above symptoms in just 15-20 minutes, and can cause death within 2 hours.
  • Concentration levels greater than 3,200 ppm will cause severe symptoms in 5-10 minutes, and death within a half-hour.
  • As levels increase above 10,000 ppm, unconsciousness will occur after just a few breaths. A full-grown adult will not be able to survive more than a few moments of such exposure before death occurs.

Note: If you believe you or your family is in any sort of danger, get out of the house immediately. Call 911. Call poison control at 1-800-222-1222.


How Can I Protect My Family From CO Poisoning?

No matter how large or small your home may be, there are several ways that a homeowner can prevent and protect their family from this poisonous gas.

Carbon Monoxide in Your Home
  • Install New CO Detector:

    Install a new carbon monoxide detector that meets all current requirements of UL 2034 safety standards. It is suggested that you install at least one detector for each level of a multi-story home, and one unit near each separate sleeping area of a home and/or near locations where gas might collect (such as near a garage).

  • Proper Installation & Maintenance of Fuel-Burning Appliances:

    Ensure that fuel-burning appliances are properly installed and maintained per manufacturer’s instructions, and with respect to local building codes. Professional inspections and servicing of heating systems and chimneys should be performed annually. Never attempt to complete repairs or servicing without qualified knowledge and proper equipment.

  • Never Use Gas-Powered Engines Inside:

    Never operate generators or tools with gas-powered engines indoors, including in garages. Even with doors and windows open, enclosed spaces can trap CO and allow it to quickly accumulate to dangerous levels. Never leave cars running in an attached garage, even with the door fully opened.

  • Never Use Gas-Powered Heaters Inside:

    Do not heat your home using gas-powered appliances such as ovens or ranges, and never operate fuel-burning appliances in unvented rooms where people are asleep.

  • Ensure Chimney is Clear & Unobstructed:

    If performing renovations or repairs on your home, be sure that chimneys and appliance vents remain unobstructed. Verify that all such appliances are in good working condition after work has been completed.


The Best Resources For Homeowners

As your install a CO alarm in your home, take a few minutes to familiarize yourself with the resources listed below. While it is unlikely that you’ll experience an issue, especially now that you have the right equipment to alert you, it is still wise to know what to do if needed.


Bag of Leaves in Yard

13 Tasks Every Homeowner Should Complete Before Winter Rolls In

How to Prepare Your House for Fall & Winter

Fall conjures images of sunset-colored foliage, carved pumpkins and cinnamon in the air. Kids swap boogie boards for backpacks and moms and dads breathe a wistful sigh of relief. But shopping for pencil cases and Halloween candy are not the only important tasks you’ll do this fall.

Below, you’ll find a list of not-so-spooky house care tips that every homeowner should complete during autumn to help keep your home safe and warm all season long.

1. Get Ready for Fall(ing Leaves)

Watching the leaves change from vivid green to amber and gold is one of the highlights of the season. Raking up those leaves once they’ve fallen from the tree is not. Perhaps, composting or mulching all the leaves is your preferred route. But, if you plan on removing them from the yard, you’ll need to have the right tools ready to clear the lawn of debris.

At the very least, you’ll need a good rake to help clear the leaves from your yard. But, if you can get your hands on a leaf blower, you can save a ton of time. And don’t forget to stock up on large bags to help remove the ever-growing pile.

2. Branch Out

Aging trees can pose another threat as the weather gets colder and the winds start to kick up. If the branches of your trees are directly over your home, then you may have a more elevated risk of damage in the event that large branches break off and fall.

If this unfortunate scenario happens to your home, the damage of falling branches could range from minor to quite severe. Common issues may as simple as a few damaged shingles or shattered windows, but when it comes to heavy branches, you may see dented / blocked gutters, or a complete compromise of the integrity of your roof.

This is why it’s important for all homeowners to keep a close eye on the trees surrounding your property. Frequently, inspect them for potential weakness, and strategically trim them as soon as they start to get too close to your home. Use a chainsaw or hire a professional to remove branches that are too close to the house or those that appear to be in danger of falling.

3. Clean Your Gutters

Inspect your roof throughout the season to remove any leaves and branches that have accumulated there. As the leaves fall and pile up in your yard, keep in mind that the same is happening on top of your roof.

If the leaves are not cleared out in a timely manner, the accumulation of leaves or branches may prevent water from draining properly, and sometimes can create a “dam” that prevents water from draining entirely. Dammed up water may damage exterior surfaces and create a leak in your roof, window or walls. As every homeowner knows, a leak in the roof can cause all sort of other damage to items inside your home, possibly even creating an environment that allows mold to grow.

Check your rain-gutters, downspouts and other drainage items frequently to be sure they aren’t blocked by fallen leaves, debris or birds nests.

4. Repair Any Roof Leaks

A minor roof leak can become a major problem as the temperature starts to drop. Frozen water or the weight of snow can exacerbate minor flaws and leave your home vulnerable to major water damage.

This is precisely why every homeowner should make it a habit to climb up on their roof, grab a pair of binoculars or contact a roofing company to do a thorough inspection. Check the shingles and metal flashings for any signs of damage, especially on the ridge and in valleys or around vents and chimneys.

When it comes to roofs, a small amount of preemptive care can save you from an enormous amount of damage down the road.

5. Prepare Your Lawn

When the weather turns colder and the snow is near, some homeowners may breathe a sign of relief knowing that they won’t have to mow their lawn again until spring. For the most part, this is generally true. You will, indeed, have less lawn care responsibilities.

However, before you stash away your lawnmower and turn your grass over to the cold, it’s important to fertilize your lawn one last time. Spread a layer before the ground freezes, and your lawn will wake up in the spring nourished and ready to grow green once again. There’s no better way to start the spring season.

You will also want to winterize your sprinkler system. The last thing you want is to discover that it needs repairs come spring.

6. Walk the Walk. Fill the Crack.

Summer showers and growing roots may have damaged your driveway, or walkway. The wise homeowner will take a few minutes to check if their concrete or pavers have shifted, become loose or are somewhat uneven.

This simple task can prevent a falling hazard throughout all seasons of the year, but are increasingly treacherous in wet or icy weather. No matter how small the crack may seem, if you can spot and fill it before the winter chill, you have a better chance to prevent water from seeping in and freezing when the temperature drops. Once this happens, the cracks may expand and create an even more treacherous hazard as time goes on.

7. Dodge the Draft

Now that you have the windows down and you’re enjoying the cold weather, don’t forget that you need to prepare for the (even) colder temperatures to come.

Cold drafts inside your home can be a real drag. Buy some caulk, and seal cracks and gaps around windows or doors to keep your home energy efficient throughout the year. Check weather stripping for deterioration and replace or repair any sections that look damaged. Window treatments can also reduce energy loss, so consider installing insulating shades, curtains or blinds.

These small improvements are easy DIY projects that can save a ton of money for all homeowners. But this is especially true for those that live in areas that experience extreme temperatures.

8. Get Ready to Heat Things Up

You can also prepare for the cooler, drier winter weather by inspecting and performing routine maintenance on the equipment that heats your home. Perhaps the most important preparation that a homeowner can do to prepare for winter.

If you use a gas heater, hire a professional to inspect it for leaks and ensure it’s ready to warm your home in an efficient and safe manner. A “leaky” heater is not only inefficient but may also fill the air you breathe with dangerous poison. And the wise homeowner knows that they should never compromise their indoor air quality.

9. Change Your Air Filter

The air filter in your home needs to be changed on a frequent basis. While we may sometimes forget or neglect to change the air filter, the dawn of Autumn is a great time to change all the filters in your home.

Not only will this improve your indoor air quality, but it will also increase the overall efficiency of your furnace. If you’ve noticed screeches or whines coming from the belt, or maybe even erratic behavior from your furnace, you may want to have it inspected for blockages or problems with the burners, blower motor or thermostat.

It’s better to do this at the beginning of the Fall season, than to wait until the winter chill sets in.

10. Clear the Chimney (And Fire When Ready)

If you use a wood fireplace in your home, it would be wise to inspect the chimney to ensure there are no blockages or venting problems before you light the first fire of the season. Have your chimney swept, cleaned and cleared before you start any fires inside your home.

For the homeowner looking to save a bit of money, consider adding an energy-efficient fireplace insert or infrared heater to help provide heat to your room while slashing your overall heating bills.

This is also a great time to conduct routine other “home safety” measures, such as replacing the batteries in smoke and carbon monoxide detectors throughout your home.

11. Chill Out. (And Save Money)

After a long, hot summer, the cool weather can be a welcome relief to your body… as well as your budget. You can finally turn down your air conditioner, but may not need heat for a few more months.

Use the colder weather as an opportunity to create a comfortable temperature inside your home. Leave your windows open at night and enjoy the crisp chill of the Fall evening. Strategically tweak your thermostat, enjoy the mild temperatures and think of all the money you’ll save.

12. Add Welcoming Fall Decor

As the Fall season rolls in, there is no better time to change the elements of your interior decor to suit the season and welcome you as you come home.

  • Interior Fall Decor — Whether it’s autumn leaves, orange pumpkins or Fall candles, there are some very easy and cheap improvements that every homeowner can make to add a bit of Fall flair to their home.
  • Exterior Fall Decor — You might add outdoor lanterns along your walkway or fence to welcome visitors as the days become shorter and darkness comes on earlier. Extra light can be great for guiding trick-or-treaters as well. A seasonal doormat, large pumpkins and harvest themed elements create a warm welcome despite the cold.

Embrace the season with these simple upgrades to your decor.

13. Contain Yourself (And Declutter Your Mornings)

While your house may stay cleaner once the kids are back in school, odds are your entryway will not.

Backpacks, jackets and muddy shoes can quickly pile up around your main entrance, creating a mess, as well as a hazard. Now is a good time to add a mudroom bench with hooks to hold all the backpacks and outerwear coming in from the cold day. Extra storage for shoes and other gear will also help cut the clutter and keep your house looking neat. This will all go a long way to getting you ready for the morning rush.


Final Thoughts

Leaves, lawns, furnaces and fires all require attention as the cold weather starts to set in. And while this may be an intimidating task at first glance, getting your home ready for fall doesn’t have to be scary. These simple tips will make fall house care as easy as pumpkin pie.

Downsizing

9 Reasons Why Downsizing Your Home Makes Sense

When we consider the benefits of downsizing, we need to go far beyond the idea that the term “downsizing” simply refers to just moving into smaller living quarters. That’s not a fair definition for homeowners to go by.

What Is Downsizing?

Downsizing can be defined as an intentional reduction in size. This could be as simple as the amount of belongings you own or the size house you live in.

However, we would suggest that it is larger than that. Downsizing is a complete overhaul in your lifestyle. It’s more than just a smaller home, it’s a move towards the simple life.

For the purposes of this article, we will be examining all the reasons why your average homeowner should consider this change in mindset, the benefits of downsizing and how the simple life can bring happiness to your front door.

The Benefits You Should Expect by Downsizing

Once we focus on the totality of downsizing, the benefits increase exponentially. From the testimonials of many who have discovered the wonders of downsizing, here are nine benefits that they smile about.

1. Less Stress, More Happiness

This is a huge benefit that cannot be overestimated. From losing a large mortgage on an oversized house to not running around an urban area trying to have the family involved in so many different activities, downsizing brings less stress, which means more serenity and a much greater chance of actually enjoying life.

You may also will find yourself arriving early for appointments, not always being late. In short, you will be more on top of your weekly schedule, not sweating bullets as you pull up to the dentist 20 minutes late. Another related perk is the ability to find lost items more quickly. With less stuff to clutter your living room, you can locate your keys and purse much faster. Who can put a price tag on that stress-buster?

2. Saving Money on Monthly Expenses

When possessions are jettisoned, one has to spend far less on maintaining them. When the McMansion is left behind, so is the monster mortgage payment.

Downsizing Saves Money

It is almost impossible to downsize and not be in a better position financially. Many people who have downsized have experienced an immediate windfall as they have money left over from the sale of their previous home.

Others see a better balance each month even if they don’t move, as one car needs regular maintenance, not three, as the gasoline bill dips precipitously when the family’s schedule is de-cluttered.

Whether you see this improved picture clearly during Day One of downsizing or after six months, it will be clear at one time or another. Enjoy the view.

3. Better for the Environment

Smaller house equals fewer trees felled. Less driving equals less CO2 that you put into the air. Fewer or smaller appliances equal less electricity consumed. The list can go on and on. You will be the “green” person you’ve always aspired to be without even trying!

4. More Energy to Focus on What Matters

Someone once wrote that the opposite of happiness is boredom. That statement can be debated, but the weariness that comes with routine is well known by many. Downsizing your life could very well push you out of your comfort zone. That change very well may energize you as you re-create your life and become a happier, less stressful person.

As you see the benefits on this list take shape, you will become even more excited about the possibilities of your new minimalistic lifestyle, and rather than sleeping away your precious spare time, you will want to be spending your new free time in constructive ways.


5. More Time to Do What You Want

Do you have any idea how much time you will gain every Saturday when you don’t have to clean so many rooms? You can easily add another hour or two instantly to the weekend!

You will have more time to pursue the passions you’ve always wanted to develop, from painting to reading, from traveling to tennis. Less time cleaning, less time driving, less time shopping — the hours add up rapidly and you will find new joy as you are able to spend more time on pursuits that bring you joy.

6. Fewer Temptations to Buy Stuff

This might not sound like a benefit, but when you really think about it, it does have many upsides.

9 Reasons Why You Should Downsize

Less space means less temptation to buy new items and clutter your living space. Downsizing your living space also means less cleaning.

In another benefit that apartment dwellers have long understood, it can also cause you to spend more time outside, which always equates to better health.

7. Opportunity to Get To Know Your Neighbors

It has been said that when people live on top of each other, they tend to keep to themselves. That necessary social distance in urban areas is true, but it is also true that the opportunities to get to know your neighbors and local shopkeepers multiply when you live in smaller spaces.

Many Americans, in particular, have traditionally sought to live on large lots, separated from other human beings. They have ended up with huge yards to mow, mortgages to pay and a gnawing sense of loneliness.

Of course, not all apartment dwellers revel in community spirit, but don’t be surprised if you see the same people again and again and begin to build a relationship with them. It’s much easier in an apartment or condo building, or in townhouses that adjoin without giant lots in between.

8. More Control On Your Everyday Life

This benefit comes up again and again as veteran downsizers talk about their new way of life.

They offer perspectives such as, “My stuff used to run me. Now, I control my stuff,” or “I was a slave to my possessions. Now, I’m free.” A more open schedule, a less cluttered living space and life, and a realignment that puts you in the driver’s seat–not your things–can surprise you with a far greater sense of control than you’ve previously experienced in life.

9. The Freedom to Live Simple

Whether that freedom comes from you dictating your schedule, not the other way around, or simply feeling liberated by getting rid of junk that has cluttered your mind and life, downsizers all revel in the new freedom that they feel.

Add to this list as you downsize. Fill in the gaps that we may have missed in the list above. Begin the great adventure of living with less and gaining far more in return than you anticipated.

Have you downsized your life? What benefits did you experience? Let’s hear them in the comments below.


Cleaning A Humidifier

How to Clean Your Humidifier

One of the most important factors in determining your indoor air quality is the amount of moisture in the air. The relative humidity inside your home becomes particularly important as winter sets in.

This is because as the temperature starts to drop and you start to crank up the heat, the warm air circulating around your home will dry out the air you breathe. When the air in your home is too dry, you may start to experience a whole bunch of issues, all of which may range from minor annoyances to significant health complications, such as the flu.

Now that the seasons are starting to change and the mercury is starting to drop, we created the below guide to help homeowners learn how to clean their humidifier, and have it ready on those long, chilly nights.

How Often Do I Need to Clean My Humidifier?

Every 24-36 hours. If water has been standing inside your humidifier for longer than that time, you should not use it inside your home. While inconvenient, it is strongly recommended that you clean your humidifier prior to every use.


Why Do I Need to Clean My Humidifier?

Cleaning the humidifier will prevent any sort of bacterial growth or mold from developing inside the device. If you have this sort of contamination inside your humidifier, and you do not clean it before you turn it on, then you may inadvertently disperse harmful particulates into the air.

Not only is this detrimental to your indoor air quality, but it can immediately impact the health of anyone inside your home. This is not only detrimental to your indoor air quality, but it also puts everyone in your home at risk for developing respiratory issues. This is especially true for young children, the elderly and anyone that breathes it in for an extended period of time.

Check the Cleaning Instructions In Manual

Before you try using any of the cleaning methods listed below, it is wise to take a look at what the user manual that came with your humidifier says and follow the care instructions from the manufacturer. These guidelines are the best way to keep your humidifier in good working order, and prevent any unexpected damage that voids the warranty or leads to you having to replace it.


3 Ways to Clean Your Humidifier

Without proper care and regular cleaning, your humidifier puts your indoor air quality at risk. Below, we have highlighted three methods that you can follow to clean your humidifier.

1. Use White Vinegar & Tea Tree Oil

Due to their natural disinfectant properties, the easiest and “all-natural” way to clean your humidifier is to use a mixture of vinegar and tea tree oil.

Vinegar & Tea Tree Oil

Supplies You Need:

  • White vinegar
  • Tea tree oil (optional)
  • Bottle brush if required for your humidifier
  • Water

Cleaning Instructions:

Begin by disassembling your humidifier. Pour any standing water from the tank and lay all pieces out as you take it apart.

Next, add a generous amount of white vinegar to the base of your humidifier, as well as a few drops of tea tree oil. Do the same for the water tank, as well as submerge all other external parts into a similar mixture. Allow it to soak for at least 20-30 minutes.

Before you pour out the vinegar, use a brush or washcloth to scrub all parts of the humidifier. Try to remove any deposit buildup that may be visible.

Once you have scrubbed it thoroughly, rinse all parts of your humidifier with warm water. You may need to do this several times to get rid of the vinegar smell before reassembling your humidifier.

2. Disinfect With Bleach or Hydrogen Peroxide

To give your humidifier a deep clean, try following the cleaning instructions listed above but substitute the tea tree oil with bleach or hydrogen peroxide. By using one of these two chemicals, you ensure that all bacteria and mold spores inside your humidifier is killed off.

Bleach & Hydrogen Peroxide

Supplies You Need:

  • Bleach or Hydrogen Peroxide
  • Clean Towels
  • Safety Goggles & Gloves
  • A Soft-Bristle Brush
  • Water
  • Optional: White Vinegar*

Cleaning Instructions:

For the most part, this process will follow the same instructions recommended for the vinegar and tea tree oil option. However, if you decide to use bleach, you should wear gloves and goggles to protect yourself from the chemicals. *And never mix bleach and vinegar together!*

When using bleach, you can choose to do so at the same time you are cleaning the tank or you can disinfect after the tank is clean. Disinfecting a humidifier with bleach will take an additional 30 minutes, so if you are short on time, it is probably beneficial to do both at once.

Step 1: Begin by disassembling your humidifier. Don’t forget to remove the air filter, if there is one. You can clean the filter by using cool water and letting it air dry.

Step 2: Mix about 1 teaspoon of bleach — or use 3 percent hydrogen peroxide — into a gallon of water and fill the tank with it. Ensure the entire inside is coated by stirring the mixture around.

Step 3: Once you’ve completed both steps, rinse the base, tank and all of its small parts. Shake it well to dislodge any trapped moisture. Remember to do this several times to get rid of any vinegar or bleach odors. Set the pieces on clean towels to air dry.

Once everything is dry, you can reassemble your machine.

Optional Step: After the humidifier has been disassembled, fill the base with vinegar and submerge the smaller parts. Allow it to soak for at least 20-30 minutes, use a brush or washcloth to dislodge any deposits or buildup, and thoroughly rinse out the vinegar. Do not mix vinegar and bleach together.

3. Buy & Use a Humidifier Disinfectant (Bacteriostat)

Humidifier Bacteriostat Treatment

If you don’t want to fool around with any of the cleaning options listed above, you can also buy a ready-made disinfectant or cleanser online. Often labeled as a descaler or bacteriostat, there are plenty of these cleanser available online. (View your options on Amazon.)

All you would do is simply follow the instructions that comes with the product. That’s it, your humidifier is clean and ready.

Effective, but Expensive:

While it is easy and convenient, and no doubt effective at disinfecting your humidifier, this option is not recommended for homeowners as it is grossly more expensive than all the others options listed here.

Vinegar, bleach and peroxide are all very effective at cleaning your humidifier, and they are also all incredibly cheap. You can buy all of them at every grocery store or corner store, and you’ll get a larger supply at a fraction of the cost.


Humidifier Maintenance & Care Tips

Now that you know how to clean your humidifier, it’s recommended that you also learn some simple maintenance tips to prolong its life and overall effectiveness.

How to Clean Humidifier

Empty Basin / Limit Standing Water

Besides weekly deep cleaning of your humidifier, you should be sure to rinse the water basin before every use. Doing so helps to keep bacteria from growing, keeps your unit working properly, and ensures your family is breathing the best air possible.

If possible, disinfect the humidifier any time that water has been standing for more than four hours.

Use Distilled Water

When you do fill your humidifier, only use distilled water. Tap water usually has added minerals. These minerals could be released into the air and create a thin layer of white dust on the surfaces in the room. Additionally, added minerals can build up as deposits in the machine and harbor the bacteria and mold you’re trying to prevent.

Drain & Dry Before Storing

Finally, be sure to drain and clean your humidifier and allow it to dry completely before storing it for the season. Storing a damp unit in a dark place, such as a closet or garage, only creates an optimal breeding ground that encourages bacteria and mold to grow. This will lead to a very gross discovery when it comes time to pull the unit out of storage.


The Homeowner Payoff

Knowing how to clean your humidifier ensures the air you and your family breathes is as pure as possible and leaves you comfortable and healthy. Even better, proper cleaning helps your machine to work for as many seasons as possible so you will be able to save money instead of purchasing a new unit each winter.


Portable AC Unit

Portable Air Conditioners Get New Energy Guide Labels

On October 1, 2017, the Federal Trade Commission (FTC) officially rolled out changes to the Energy Guide labels for portable AC units. This change largely flew below the radar. To help provide some clarity for both consumers and manufacturers, we’ve outlined some of the most common questions that this change may present.

What Changed?

The Federal Trade Commission introduced new Energy Guide labels for portable air conditioners that more accurately reflect the energy efficiency of each unit. This specific change to the labeling is intended to have two immediate changes:

  1. The Energy Guide Labels are more accurate.
  2. Retailers and manufacturers have to update their marketing materials to help consumers.

However, the recent change to the Energy Labeling Rule was more of a reaction to another change made by the Department of Energy (DOE).

How New Energy Testing Forced a Change in Labeling

This proposal from the FTC actually stemmed from new energy testing guidelines that the Department of Energy implemented for both single-hose and dual-hose portable AC Units. The new energy test was initially proposed on February 25, 2015. After a few changes to the initial proposal, the new testing procedure went into effect on June 1, 2016.

New Testing Methods for Portable AC Units

While the new testing methods from the DOE were largely considered to be a step in the right direction for consumers, there were numerous unintended consequences that had a direct effect on the Energy Guide labels. The main concern was the inconsistent testing results that had the potential to mislead consumers comparing portable AC units to other types of room air conditioners.

Portable Air Conditioner

The energy efficiency testing made a few significant changes.

  • Introduced the concept of Seasonally Adjusted Cooling Capacity (SACC).
  • Made revisions to how the DOE calculates and determines Combined Energy Efficiency Ratio (CEER).

Despite rigorous debate from numerous manufacturers, the FTC concluded that the new DOE efficiency model painted portable air conditioners in a favorable light. Due to variables within the new testing procedure, the Energy Guide labels portrayed portable AC units to be more efficient than they actually were.

To mitigate this, the FTC proposed a new rule change with the intention to create more accurate Energy Guide Labels that will help guide consumers as they shop, and help them make an educated buying decision.


When Did the Changes Start?

Officially, the changes to how portable AC units are labeled and marketed by retailers went into effect on October 1, 2017. However, while this may seem out-of-the-blue for consumers, these changes actually been long in the making. With even more changes possibly coming in the years ahead.

The Federal Trade Commission initially proposed a broad change to the Energy Labeling Rule back on September 12, 2016. It was at this time that the FTC requested feedback in writing from manufacturers, reatailers and the general public. This feedback was due on November 14, 2016.

You can read the full notice in Vol. 81, No. 176 (PDF) of the Federal Register.

Does it Only Affect Portable AC Units?

No. This specific change to the Energy Labeling Rule was not aimed solely at portable air conditioners. The proposed change to the rule also included different types of ceiling fans and electric water heaters.

What is the Energy Labeling Rule?

In a more general sense, the Energy Labeling Rule applies to a wide variety of appliances found in your home. It requires that a bright yellow “Energy Guide” is adhered to new appliances upon purchase. It is an estimate that specifies how much energy that appliance will use annually, as well as the overall cost of operating it in your home.

On these labels, you’ll find three important ratings:

  • An estimation in how much it would annually cost to use the appliance.
  • The energy efficiency rating and overall consumption of energy (determined by testing methods from the DOE)
  • An energy comparison of similar models, with a range of low to high energy expectations.

This recent change does not affect all appliances, however, only the few mentioned above.


How Does This New Labeling Affect Me?

In theory, the new labels would make it easier for the average consumer to make the best buying decision when they are trying to shop, compare and buy a portable air conditioner. Because they are marketed as an appliance that can cool a single room, they often get compared to other types of room air conditioners, which far exceed portable AC’s in energy efficiency.

BTU vs ASHRAE

The new changes to the Energy Labeling Rule now requires all portable air conditioners to list their cooling capacity based on ASHRAE standards (PDF). This is determined by the new energy efficiency testing procedures by the DOE.

So, now as you shop for a new portable air conditioner, you will should see ASHRAE ratings listed per each unit. If you do not see ASHRAE ratings, then that particular retailer is not in compliance with the FTC.


Room Air Conditioner

Room Air Conditioners: How to Cool a Room Without Central AC

Many homeowners use a central air conditioner to control the temperature in their home, but this often comes with a hefty price tag and the requirement of cooling every room within your home. But, what if you can’t afford a central AC, or you just want to cool down one room? That’s where a room air conditioner can help.

Finding the best room ac unit for your home will depend on a variety of factors, including the size of the space, your budget, and your personal preferences.

Below, we will answer some of the most frequently asked questions people have about room air conditioners, as well as discuss the pros and cons of the different types available for you to choose from.

Let’s get started.

What Is A Room Air Conditioner?

A room air conditioner is any type of appliance that is designed to cool down an individual space, such as a room in a home or office.

Cost-effective and energy-efficient, this genre of air conditioners can be a suitable alternative for homeowners that don’t want to, or are unable to, invest in central air conditioning.


Are They Just For Small Rooms?

No. While they are commonly associated with smaller spaces, room air conditioners are available in a wide variety of sizes.

It’s important to know the size of the square footage of the room you’re looking to cool, and then calculate the amount of BTUs needed for that size space. You will also need to decide the type of AC unit that would work best for your room, which we detail down below.


Types of Room Air Conditioners

Now that we have a better idea of what a room air conditioner is, let’s take a closer look at the pros and cons of the different types you will choose from. Consider these pros and cons as you decide which air conditioner is best for your room.

Window Air Conditioners

Window AC Unit

Probably the most familiar type of room air conditioner, window cooling units are a great option for controlling the temperature within single rooms. There are many benefits to this type of AC unit. They are very affordable to purchase, with hundreds of models available from the most reputable brands in the space.

This low price point goes beyond the initial purchase, too. With a reputation of being extremely energy-efficient, you can count on saving even more money on your monthly energy bills. These costs can be further extended if you get an AC unit that has been rated by EnergyStar.

Window AC units come in just about every size, so no matter how large or small your room may be, it’s not hard to find one with the right amount of BTUs for your space.

The main downside of this type of room air conditioner is the installation requirements.

To work properly, window AC units do require permanent installation through a window that is partially open. This will allow the AC unit to vent hot air from the room. Without proper ventilation, the air conditioner would not be able to cool your room to your desired temperature.

While not an overly difficult task, installing a window air conditioner does present a challenge for many homeowners. If you don’t feel confident in your ability to install your AC unit, you will have to hire somebody to complete the task. This is an additional cost that many homeowners don’t consider at the time of purchase.

The Pros:

  • Affordable to buy and use.
  • Very energy-efficient.
  • Lots of options to choose from.

The Cons:

  • Installation may be difficult.
  • May need to hire someone to install AC unit.
  • Fixed location may require multiple units.

Portable Air Conditioners

Portable AC Units

In recent years, portable air conditioners have exploded in popularity. Likely because this type of AC unit is another great option for cooling individual rooms.

Portable AC units work just as their window counterparts, but offer the convenience of being light enough to move from room-to-room. Because they don’t require permanent installation, you have more flexibility in cooling strategic areas within your home.

Portable Air Conditioning

Portable Air Conditioner FAQs

Popular for cooling single rooms, here is a list of the most frequently asked questions about portable air conditioners.

Learn More

Installing a portable air conditioner is a very simple task that should pose minimal issues for homeowners. Simply click the window vent kit in place, and attach the hose(s) that come out of the back of the AC unit. This is how it vents hot air from the room.

Depending on the brand and model you buy, portable AC units are an affordable option with a large number of units to cool rooms of all sizes. However, the purchase price of a portable AC unit will be slightly higher than window units. But, because they are portable, you may only need to purchase one unit to cool various rooms.

The main downside of using a portable unit is that it will not be as energy-efficient as other types of room air conditioners on this list. At this time, you will not be able to find any portable air conditioners that have earned an EnergyStar rating.

The Pros

  • Affordable to buy.
  • Very simple installation.
  • Portable and easy to roll from room-to-room.

The Cons

  • Not as energy efficient as other room AC units.
  • Some units will be louder than others.

Ductless Air Conditioners (Mini-Split)

Ductless AC Unit

Ductless air conditioners, also known as a mini-split, are great at cooling large, open spaces. While they are not cheap to purchase, this type of room air conditioner is designed to work much like a central AC unit, qualifying it as one of the best alternatives for homeowners.

Consisting of a condenser outside that connects to the unit indoors, ductless AC units are mounted high up on your wall in an area that allows you to maximize the circulation of cool air across the entirety of your room. They take up zero floor space and are extremely quiet, allowing it to largely blend into the room.

Out of all the room air conditioners on this list, ductless AC units are going to be the most efficient. They use very little energy to operate, allowing you to cut your monthly energy costs by a significant amount. You can also find lots of ductless systems that are designed to cool multiple rooms, giving you maximum temperature control across your home.

Similar to buying a central AC unit for your home, the main downsides of ductless air conditioners are the overall cost of purchasing and installing it.

Unfortunately, the price tag for a ductless mini-split system is going to be much steeper than other room AC units. And once you get over the initial sticker shock, you also have to consider the cost of finding and hiring a qualified technician that can install it for you.

The Pros:

  • Surprisingly quiet.
  • Very efficient with minimal costs to use.
  • Doesn’t take up any floor space.
  • One unit can cool multiple rooms.

The Cons:

  • Expensive to purchase.
  • Need to hire a qualified technician to install.

Through-the-Wall Air Conditioners

Wall AC Unit

With a similar design as window units, this type of air conditioner is installed directly into your wall of the room you want to cool.

Wall air conditioners are the least popular type of unit on this list, and for good reasons. Most homeowners don’t want to spend the time and money to cut a hole into the side of their home, just to cool one room.

If you’re going to spend that amount of money, it would probably be wiser to invest into a ductless AC that doesn’t require a large hole in your home. It’s also going to be much easier to install and use a portable or window unit.

Despite these downsides, through-the-wall air conditioners are engineered to be slightly different than window units. This allows them to be slightly more efficient at cooling large, open rooms.

Wall AC units are also a great fit for cooling small sheds, workshops or other areas that don’t have a window and have little downside to cutting a hole in the wall.

It is important to remember that the difference between a window and through wall air conditioner does not lie in where they are positioned but in their structure. Through wall air conditioners vent warm air only through the back of the unit while window air conditioners work from both sides. These room air conditioners are not interchangeable.

The Pros:

  • Efficient and powerful.
  • Doesn’t take up any floor space.
  • Great at cooling large rooms and open spaces.

The Cons:

  • Potentially expensive to install.
  • Requires a hole in the wall.

Finding the Best AC For Your Room

Now that you have a better idea of what types of air conditioners can be used to cool a single room, let’s close this out with a few final considerations to help you find the best AC for your room.

No matter what you decide to buy, or how much it costs, this is a big decision that will affect your comfort level on a daily basis. It’s important to look at all the angles before you buy the first one you come across.


Ask yourself these questions:
  • What is the square footage of your room?
  • How much are you willing to spend?
  • Are you willing and able to do the installation?

Once you have the answer to these questions, you’ll be in a position to make an informed decision and find the best air conditioner for your room.

Window vs. Portable

Most homeowners will find that a window air conditioner is the most affordable and easiest to buy, but they may be hesitant when it comes to the installation process. If this is the scenario you find yourself in, then perhaps a portable air conditioner is the better option for you. Just know, that you’d be sacrificing energy efficiency for convenient installation.

Ductless = The Closest to Central AC

If you want to get closely replicate what you have with central air conditioning, then your best bet would be to buy a ductless air conditioner. But, they are more expensive to buy, and considerably more difficult to install. However, long-term, they are a great way to cool a room.

Any questions or thoughts? Let’s start a conversation in the comments below.


Portable AC Unit

9 Tips to Using a Portable Air Conditioner

How to Get the Most Out of Your Portable AC

Like any new appliance you bring into your home, a portable air conditioner requires a little bit of getting used to, plus the typical cleaning and maintenance to ensure it is operating to its full potential. Regardless of where you install it or how often you use it, getting to know your indoor air conditioner and how it works within each room its placed, will go a long way in helping you get the most out of it.

To help you learn how to use your portable air conditioner, we’ve but together the following tips. These tips are designed to help you increase its efficiency, longevity and overall cooling ability. For more technical info, please refer to our list of FAQs here, or the user manual that came with your portable AC.

1. Strategic Installation

Be mindful of where your portable AC is installed. While not always avoidable, there are certainly some areas of your home that you should try to stay away from when you’re installing your unit.

Portable Air Conditioner

Sunny Spots

If possible, you will want to try to avoid placing the portable AC in an area that gets a lot of afternoon sun. If the heat of the sun is bearing down on your AC, it will likely need to work harder to keep the room at your desired temperature. This extra work may eventually lead to a shorter lifespan.

Humid Spots

It’s also wise to install and use your air conditioning unit in rooms that have low humidity levels. This is because the higher the relative humidity is inside the room, and directly surrounding the AC unit, the more condensation it will create.

Depending on the type of portable air conditioner you are using, this extra condensation may increase the frequency that it needs to be drained and cleaned. Failing to remove this will, ultimately, lead to the unit malfunctioning.

2. The Amount of Space Between Walls

One of the main benefits of this type of air conditioner is the fact that it’s portable. This gives you quite a bit of flexibility in the location of your home that it can be installed.


However, it’s still important to pay close attention to where you place it.

No matter where you decide to install the appliance, it is very important that you leave adequate space between the walls and the unit itself. Failing to leave enough space will limit the airflow. When your unit is unable to draw in enough air while it is in use, its output is reduced. As a result, this reduced output makes it harder for your portable air conditioner to cool the room to your desired temperature.

Refer to the user manual to know how much space the manufacturer recommends for your specific model.

3. Ventilation

No matter what type of room air conditioner you are using in your home, ventilation is always going to be one of the most important factors for ensuring optimal operation and a long life of the appliance.

Window Vent Kit for Portable AC

The importance of ventilation cannot be overstated, but it’s especially important when it comes to portable air conditioners.

Proper ventilation will direct the hot air from the compressor and out of the room. This will help prevent your AC unit from overheating, as well as keep the temperature inside your room from going up.

Use the Right Vent Kit For Your Window

Most portable AC units come with a window ventilation kit that’s designed to fit the majority of “standard-sized windows” in homes. However, depending on when your home was built, as well as the region you live or the style of your home, the definition of a “standard-size window” will vary.

It is unlikely that you should have any issues getting your ventilation kit to fit the windows in your home, but if you do, there are other ventilation options available, including kits for sliding doors and drop ceilings.

4. Keep the Exhaust Hose Straight

Now that we have ensured that the portable AC is properly ventilated, let’s now take a look at the exhaust hose. You will want to limit the amount of twists, kinks or coils in the hose leading from the unit to the window. The exhaust hose should remain straight with minimal contortions.

Portable Air Conditioning

How to Save Money With Portable AC’s

If you’re clever in how you use your portable air conditioner, they can save you a lot of money. Here’s how you can use them to lower your energy bills.

Learn How

It is strongly recommended that you minimize any kinks in the exhaust hose that will limit the airflow or reduce ventilation. This may require a shorter exhaust hose, or just simply being mindful of where/how it is installed.

What Happens If the Exhaust Hose is Twisted?

When you have a long and twisted exhaust hose attached to your portable air conditioner, the unit has a harder time with ventilation.

As a result, the moisture in the air being expelled will start to accumulate inside the hose, and eventually start to trickle back down into the unit itself. If this happens, the cooling efficiency and the lifespan of the air conditioner may be reduced.

5. Clean & Replace Filter Regularly

This is probably pretty obvious to all homeowners, but the filter in your air conditioner should be changed regularly. This is not only important to ensure proper operation and cooling, but is essential for maintaining your indoor air quality.

How Often Should I Change It?

The frequency that you clean or change your filter all depends on how often you use the AC unit. It would be wise to inspect it every 6 to 8 weeks, just to make sure that it is in good condition. If your home is dusty, or if someone in your family is prone to allergies, then you may want to consider cleaning or replacing your filter more often.


What Happens If I Don’t Change the Filter?

If you’re using a clogged or dirty air filter, it may reduce the intake of the unit which may lead to a variety of problems.

These problems include:
  • Diminishes the efficiency, costs more to use.
  • Harder to reach and maintain desired temperature.
  • Forces the AC unit to work harder than it should.
  • May compromise indoor air quality.

Many of these issues will only occur when the filter is neglected for an extended period of time, but nonetheless, this shows why it’s important for all homeowners to regularly check and replace the filters in their air conditioners.

What If My Portable AC Has Multiple Filters?

Depending on the brand and model of the portable AC you’re using in your home, you may have multiple filters inside. All portable AC units come with a pre-filter, and don’t always require the use of other filters.

While these pre-filters are great at reducing large particulates that may be circulating in your air, they do very little for the common allergens that are known to lead to health complications, such as mold spores or pet dander. This is why it’s recommended that you use another type of air filter in your portable air conditioner.

6. Keep it Clean

Keeping your portable air conditioner clean is one of the easiest ways you can keep the device working properly, and it doesn’t take much work to complete.

AC Coil Cleaner

The Simple Clean:

Simply wipe down the outside of the unit down with a damp cloth. Avoid using excessively hot water or any sort of cleaning chemicals that may damage the exterior.

How Often? Do this every 4-6 weeks.

The Deep Clean:

Unplug your unit and clean the condenser coils to increase its efficiency. You can either purchase a coil cleaner to use or make your own cleaning solution with water and lemon juice. Spray the solution on the coils and remove after a few minutes.

How Often? Do this once a year.

The Professional Clean:

Sometimes, even when you clean the unit on a regular basis, you may require professional service to improve its functionality. If you experience issues with your unit that you are unable to resolve on your own, don’t hesitate to contact a professional air conditioning service to clean and inspect the appliance.

How Often? As needed.

7. Store it Properly When Not In Use

When you have no plans on using your portable air conditioner, it is recommended that you store it away to keep it safe for the next season. Try to avoid storing your AC unit in an area that has extreme temperatures, such as the garage or patio.

Checklist for Storing Portable Air Conditioners

Before you disassemble your AC unit and put it away into storage, it is strongly recommended that you do the following tasks.

  • All water has been drained from the unit.
  • Turn unit on fan setting to help the inside dry completely.
  • Deep clean all other parts and allow to dry, specifically exhaust hoses and drain pains.
  • Compress the exhaust hose to prevent damage while in storage.
  • Cover the unit with a sheet to prevent dust or other debris from accumulating.
  • Store your portable AC indoors in a climate-controlled area.

8. Electrical Requirements

When it comes to the power source for portable air conditioners, most homeowners shouldn’t have any issues. The vast majority of these AC units are designed to operate on the standard 120v electrical outlets commonly found in homes.


This is a pretty essential feature, as it would be difficult to move the AC unit from room to room if it required a different receptacle.

It may be a good idea to use a surge protector that can add a layer of protection against sudden power failures. It’s also recommended that you are mindful of how many appliances are plugged into the outlet, as to not overwhelm the circuit.

Note: This applies to the majority of portable air conditioners used to cool rooms in your home. If you’re using a commercial-size unit or a high-BTU air conditioner, you may need more electricity. All electrical requirements will be found in the user manual.

9. Pre-Cooling & Better Circulation

To help your portable AC unit cool your down in an efficient manner, it is recommended that you turn it on shortly before the room gets too hot or uncomfortable. If you wait until the sun is shining bright and the temperature is at its peak, the air conditioner will need to work harder, and take longer, to reach your desired temperature.

Another tip that every homeowner should know, is to use a small oscillating fan near the unit. This will help the cool air circulate throughout the room, and make you feel more comfortable.


Final Thoughts

There are many benefits that come from a portable air conditioner, but when you know how to strategically use it, you’ll find that you can improve its efficiency and extend its life.

By following the usage and maintenance tips listed above, you put yourself in the position to get the most from your AC unit, all while staying cool and saving money.